Atik Infinity Colour Camera - First Observation Sessions
Introduction | Visited Sky Objects | First Observation Sessions | First Conclusions | Links
Archive
On this page, I describe my first eight observation sessions (or attempts...) with my Atik Infinity Colour* camera to demonstrate my learning process with the camera (received used on November 25, 2017). Possibly, these are useful for others who would like to acquire this camera as well...
Note: After that, routine should creep slowly in so that, apart from my photos, there will not be much to report. I will, however, maintain a brief protocol of all of my observations and present my best photos in the Atik Infinity photo gallery. This first report of this kind can be found on page Deep Sky Observations with Atik Infinity End of 2017 - 2018.
See also pages (Archive):
- Atik Infinity Colour Camera - Information
- Atik Infinity Colour Camera - First Experiences
- Atik Infinity Colour Camera - First Observation Sessions
- Atik Infinity Colour Camera - Further Experiences (Dry Runs) - Further Experiences (Nightly Tests)
- Atik Infinity Colour Camera - Software
- Atik Infinity Colour Camera - Field of View
- Atik Infinity Colour Camera - Photo Gallery
*) Usually, I would write "Color", because I try to use American English, but Atik is a company located in the UK, and therefore it's "Colour"...
Note: Over Christmas 2022, I sold my Atik Infinity camera (transferred on January 5, 2023). I therefore cannot report any further experiences with it here. |
Introduction
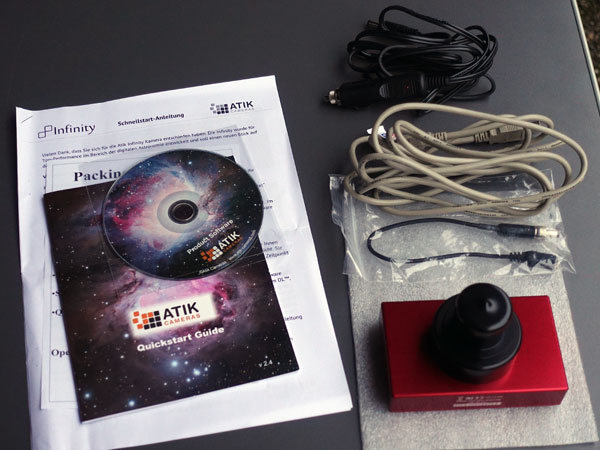
I bought the Atik Infinity Colour camera used at Teleskop-Leasing, instead of leasing it at first (received on November 25, 2017). They also supplied an adapter cable for the power supply that can be screwed into the camera und thus prevents the power cable from being removed inadvertently.
 |
 |
 |
 |
 |
 |
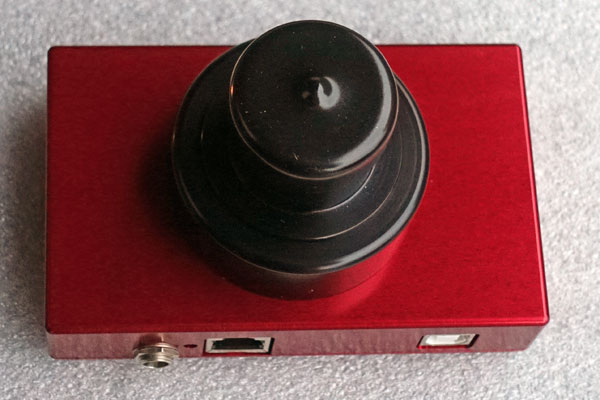
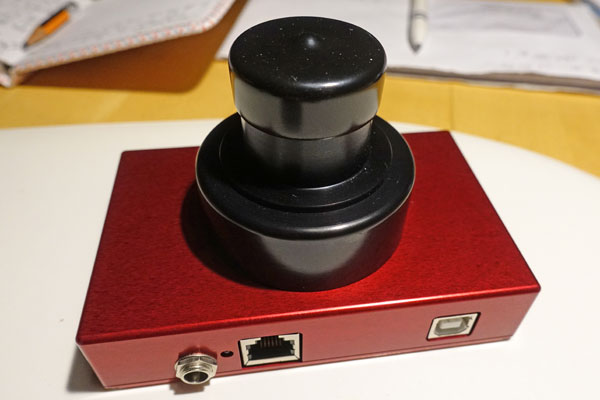
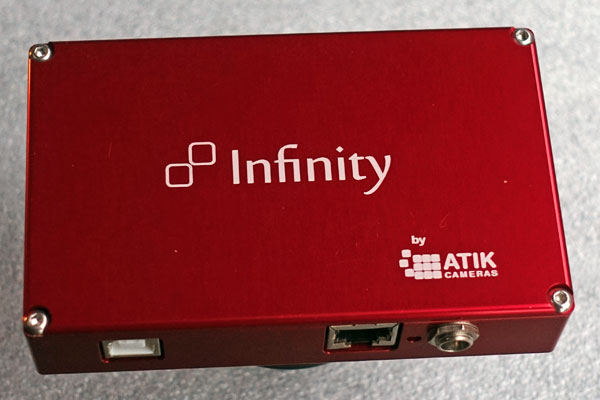
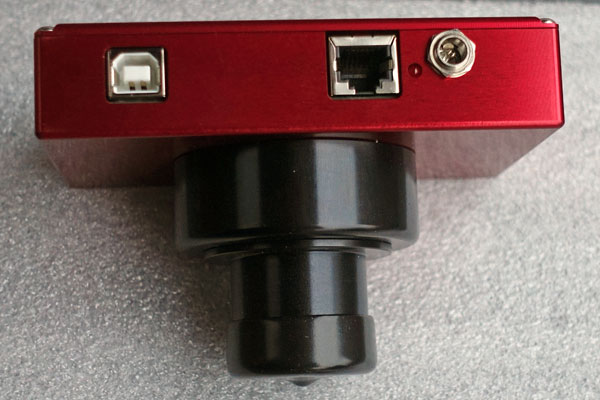
Just as a reminder how the Atik Infinity camera looks like...
Visited Sky Objects
During my first observation sessions, I visited (and documented...) the following sky objects with the Atik Infinity:
- M 15, M 57 (with Heritage 100P)
- M 15, M 27, M 56, M 57 (with Heritage 100P and 2 x Barlow lens / 2 x focal extender)
- M 15, M 27, M 35, M 36, M 37, M 38, M 42/43, M 45, M 56, M 57, M 71, Moon (Half Moon) (with Explorer 150PDS)
- M 31/32, M 45 (with Skymax-127 and 2 x focal reducer plus extension tube, that is, about 3 x reduction)
First Observation Sessions
Note: Here I describe my first eight attempts with the camera to demonstrate my learning process with the camera. After that, routine should creep slowly in so that, apart from my photos, there will not be much to report. I therefore close this page after my eighth attempt. However, I will keep a brief protocol of all of my observations. This log can be found on page Deep Sky Observations with Atik Infinity End of 2017 - 2018.
I do not describe my experiments with the Atik Infinity camera because I am particularly proud of my results, the opposite would be more appropriate, but because my road to first results was rocky - unlike the many "first light" reports that I found on YouTube! and elsewhere on the Internet. Maybe there are other Infinity owners who also did not have an entry as smooth as presented in these videos or reports. These may be consoled by my attempts - and maybe these can give them some advice.
My attempts were also tedious because I was struggling with fast-rising clouds and because I had made up my mind to start my photo attempts with the small Heritage 100P tube. Unfortunately, this tube is not immediately "photo-friendly", and so I had to learn that Barlow lenses or focal extenders can help here, albeit at the expense of longer exposure times. My results were not convincing when I used them, though. This was only the case when I connected the camera to my 6" Newtonian tube. Of course, there is still a lot of room for improvement, but I am satisfied with the results so far...
On the Internet, I found that many amateur astronomers use Schmidt-Cassegrain or Maksutov-Cassegrain telescopes in conjunction with the Atik Infinity camera. Since the latter harmonizes best with focal lengths of 400/500 mm to 1000 mm, focal length reducers are required here, which at the same time increase the light sensitivity of these telescopes, which typically have low aperture ratios. I bought a simpe 2 x focal length reducer (which can be converted with an extension sleeve in a 3 x reducer) to be able to use my (then two) Maksutovs, and I made a first test with the Skymax-127 (sixth attempt).
In the following, I describe my first attempts with the Atik Infinity camera.
Very First Attempt
One or two days after having received the camera, I tried it out for the first time and used it with the Sky-Watcher Heritage 100P on the Sky-Watcher Star Discovery AZ GoTo mount. However, the sky was partly cloudy, so that I was not able to align the mount, because one important star that I needed for the alignment was always hidden. My attempts to direct the telescope anywhere at the sky and to play a little bit around with the application only led to gray noise images on the computer screen... Finally, I tried to point the telescope at the moon and somehow I saw a glimmer on the screen. But very soon, the moon disappeared in the clouds, and I had to shut down my activities...
Why do I write this at all? Well, I did so in order to warn others not to test the camera under inappropriate conditions. That might, as happened to me, only lead to frustration and disappointment...
Second Attempt
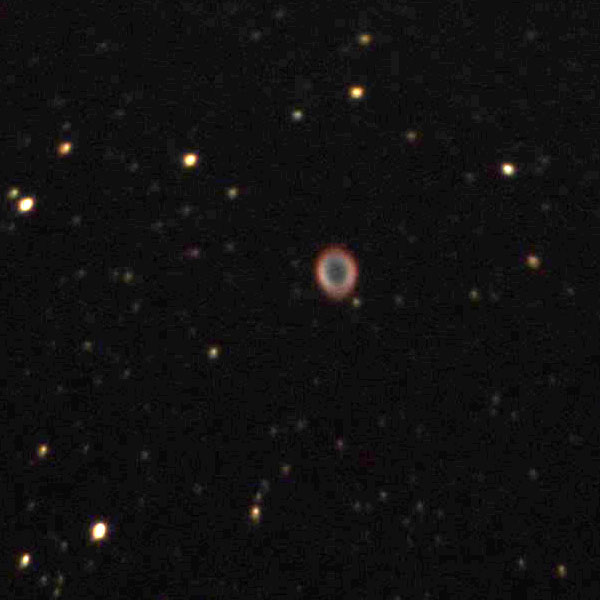
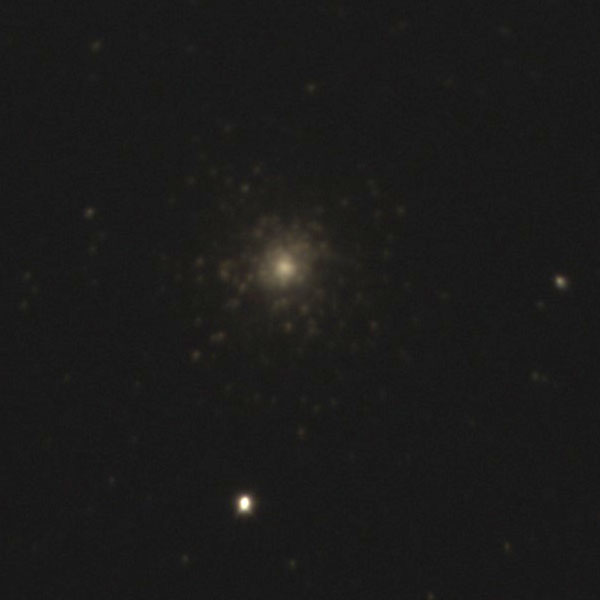
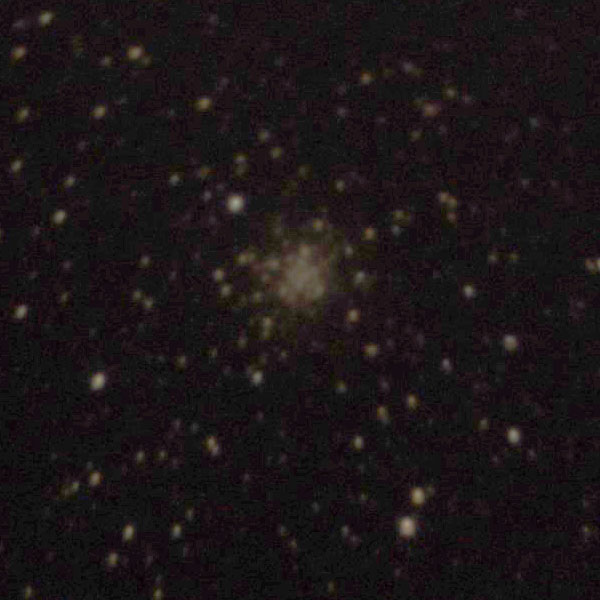
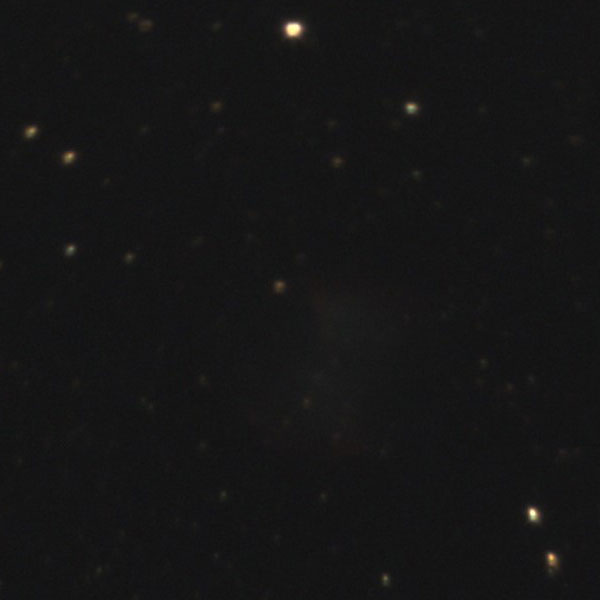
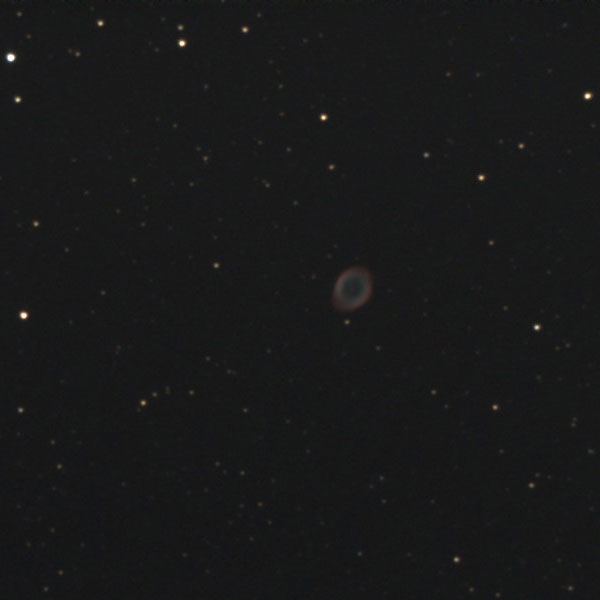
On November 29, 2017, I started my second attempt with the camera. This time the sky was pretty clear (which, however, did not last too long...). The equipment used was the same, and this time I was able to align the mount fairly exactly using the stars Vega and Altair (with a long focal length eyepiece...). The handling of the Infinity application was still not so clear to me, though especially when and where something is stored. In the end, the session and four JPG images were saved, which was sufficient for my purposes (images: two objects, two almost identical images for each). When adjusting to a medium bright star, whichever it was, it turned out that I was not able to get into focus with the Heritage 100P. The focuser was already at the bottom stop, but the image was still not sharp. That was good enough for tests, but, of course, you definitely want to get sharp images. I then tried M 57 (Ring Nebula), which I am rarely able to find with the Heritage 100P. And to my surprise there was something round in rainbow colors on the screen - that had to be the Ring Nebula! I then moved it a little further to the center of the frame and moved the histogram controls to optimize the image. But blurred remains blurred... An attempt with the NGC 7000 (North American Nebula) failed, but the globular star cluster M 15 in Pegasus was visible beyond any doubts. But then the clouds came in and put an end to all this...
Thus, the second attempt was, in principle, OK and even revealed two deep-sky objects, but unfortunately it also showed that my hope to be able to operate the Atik Infinity on the Heritage 100P cannot be fulfilled directly. I cannot come into focus with the camera attached to this telescope. Soon after, I came, however, across the suggestion in a book that Barlow lenses shift the focus to the outside, and also found this statement confirmed on the Internet. More on this when I discuss the third attempt below!
 |
 |
|
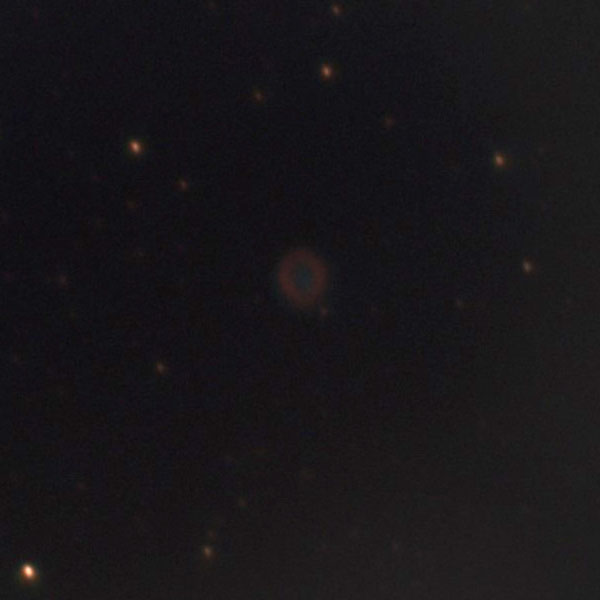
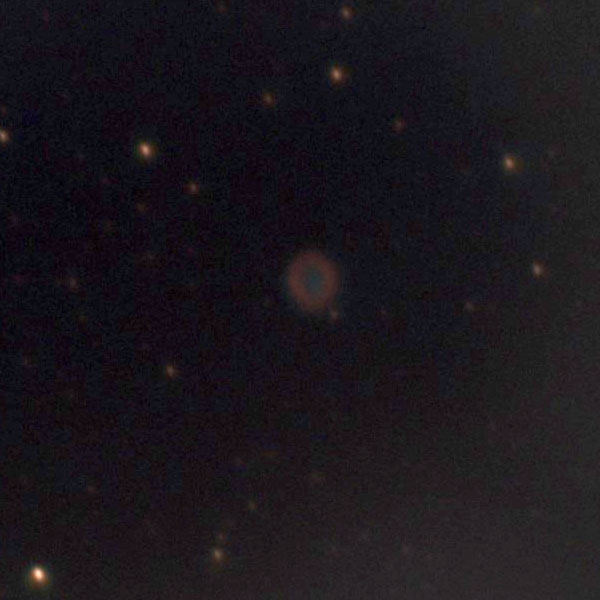
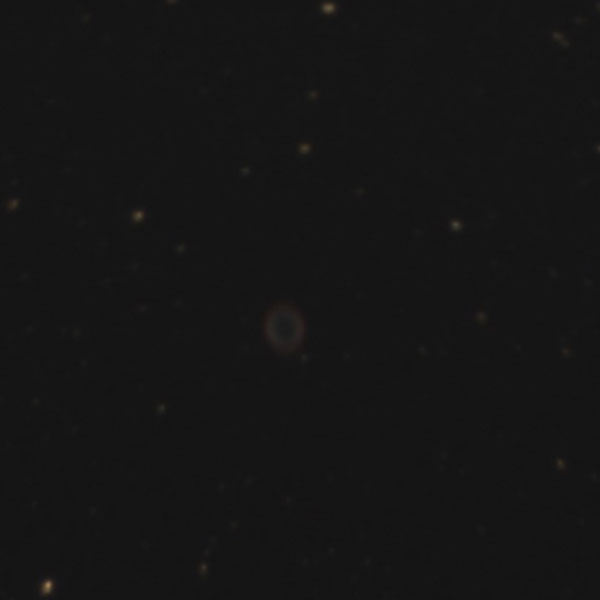
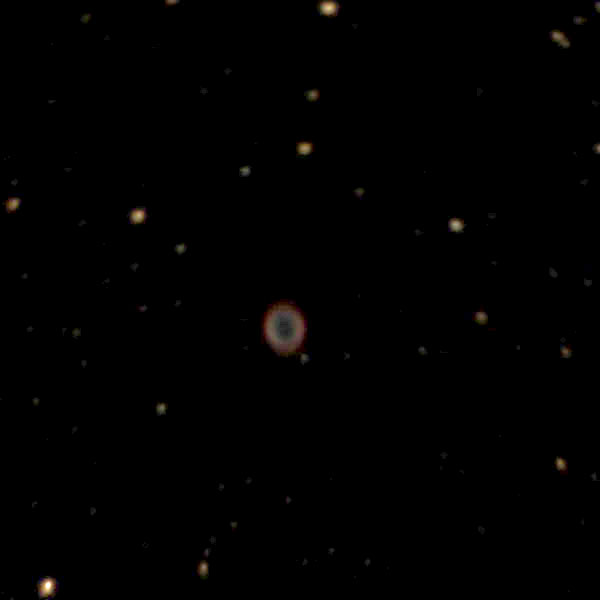
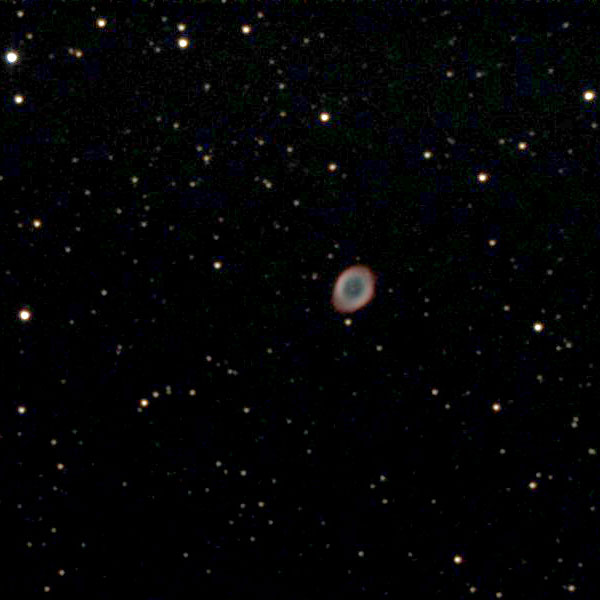
M 57 (Ring Nebula in Lyra), unprocessed |
M 57 (Ring Nebula in Lyra), post-processed |
|
 |
 |
|
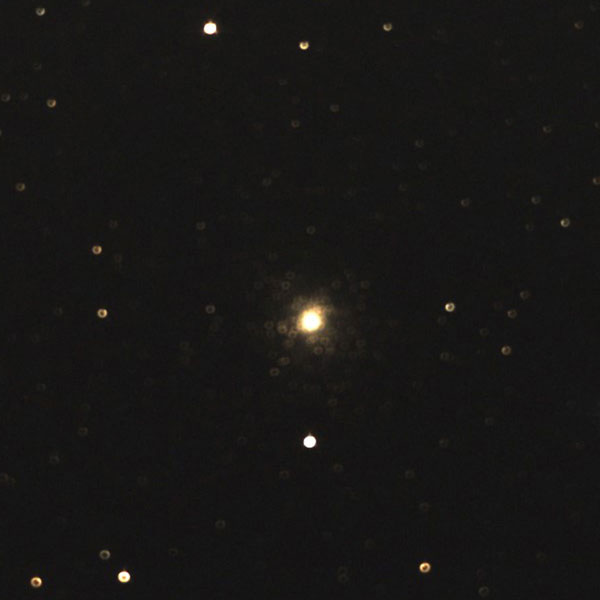
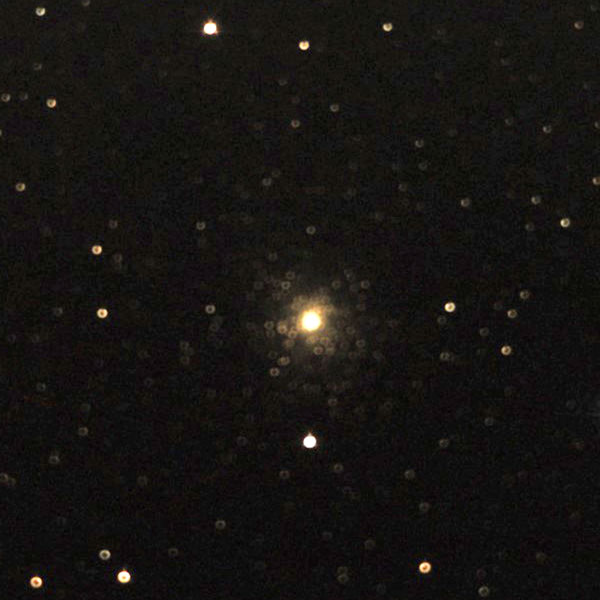
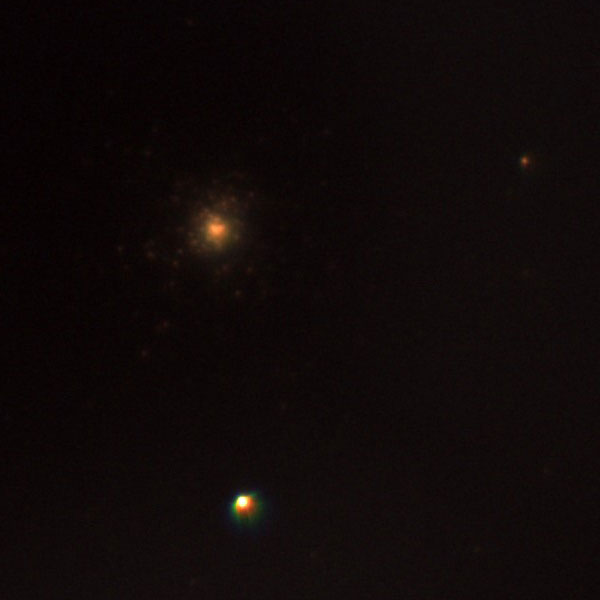
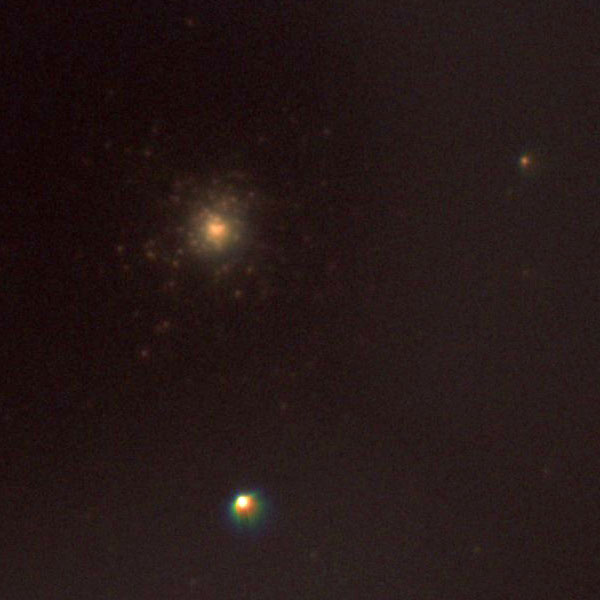
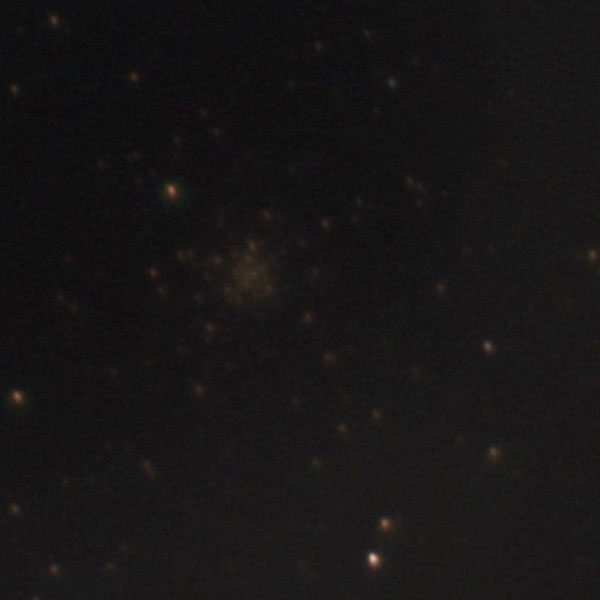
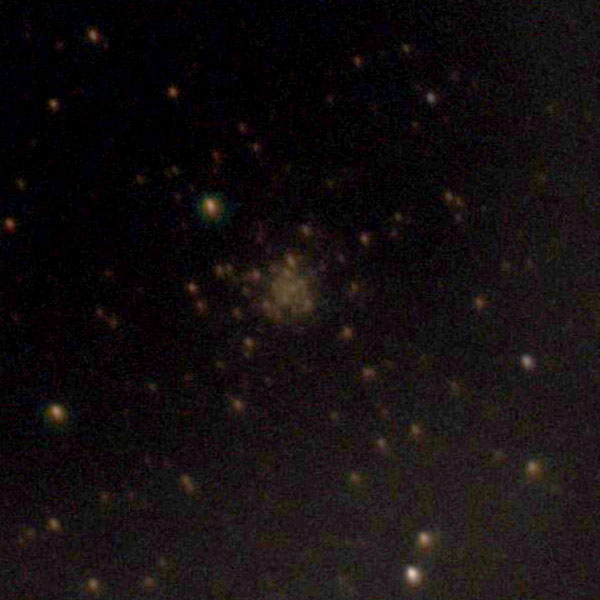
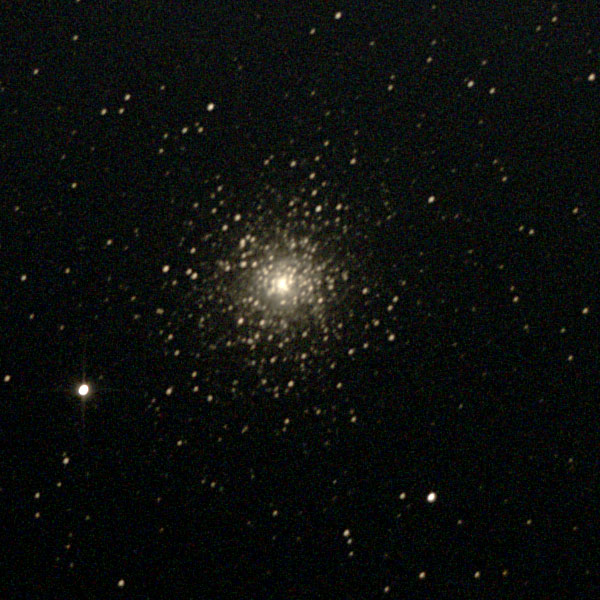
M 15 (Pegasus), unprocessed |
M 15 (Pegasus), post-processed |
Third Attempt
With my third attempt on December 7, 2017, I firstly wanted to clarify whether I would be able to come into focus with the camera on the Heritage 100P and, if not, whether this would, as described, be possible using a Barlow lens or a focal extender. In the case of Barlow lenses / extenders, a magnification factor of two would result in doubling the focal length, but the light intensity would also drop by two f-stops. The first effect would be welcome, at least for small objects such as the Ring Nebula or globular clusters, but the second would be less welcome, as exposure times would quadruple.
At first, the new test showed that the camera indeed cannot get into focus on the Heritage 100P, because the focus point is too far inside. Secondly, both a 2 x Barlow lens (Sky-Watcher) and a 2 x focal extender (Explore Scientific) moved the focus outward far enough so that the camera comes into focus on the Heritage 100P. My first experiments were done with a cheap Sky-Watcher Barlow lens, but then I also tried my Explore Scientific focal extender (although I originally thought that it was too heavy for the Heritage 100P), because when I was using the Barlow lens on the Dumbbell Nebula M 27, I was not able to achieve acceptable results. After all, with the focal extender they were not significantly better ...
Basically, one has to say that with a Barlow Lens / focal extender, objects appear distinctly "fainter" than without one. Here, in addition to the loss of light caused by the Barlow lens / focal extender, the surface brightness may also play a role, because the area is four times as large due to the magnification.
Overall, it can be said that the Atik Infinity camera can be used on the Heritage 100P with a Barlow lens / focal extender. The magnification is even slightly above that of my Explorer 150PDS (800 mm vs. 750 mm focal length), but the loss of light is immense. Therefore, I do not know yet, whether I will go with this solution. I would use the tele extender, which I expected to perform better than the cheap Sky-Watcher Barlow lens, but the differences between the two are not as big as I had expected, based on the low quality of the Barlow lens. A test with the Explorer 150PDS is still on my waiting list...
In the following, I present a few examples of the results achieved on December 7, 2017 (although they are actually very modest ...), which I saved as JPG images from the Infinity program and post-processed a little bit. Overall, these shots are fainter than the first ones, although I exposed much longer, but they are, at least, a little bit sharper. Nevertheless, focusing still remains a problem for me... The shots with the focal extender seem to get, at least, a little more out of the fainter objects, and the sharpness seems to be a bit better overall. But this was not a serious comparison test for the two "extenders"...
With Barlow Lens
 |
 |
 |
||
M 57 (Ring Nebula in Lyra), unprocessed |
Ditto, post-processed |
Ditto, more "aggressively" post-processed |
||
 |
 |
 |
||
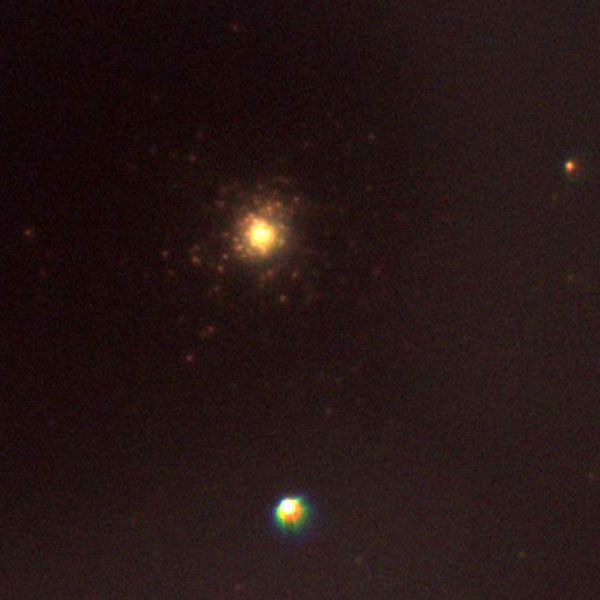
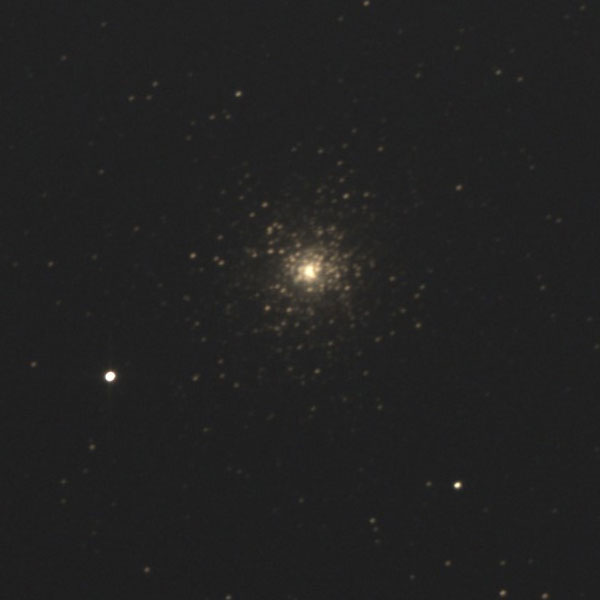
M 15 (Pegasus), unprocessed |
Ditto, post-processed |
Ditto, more "aggressively" post-processed |
||
 |
 |
 |
||
M 56 (Lyra), unprocessed |
Ditto, post-processed |
Ditto, more "aggressively" post-processed |
||
 |
 |
 |
||
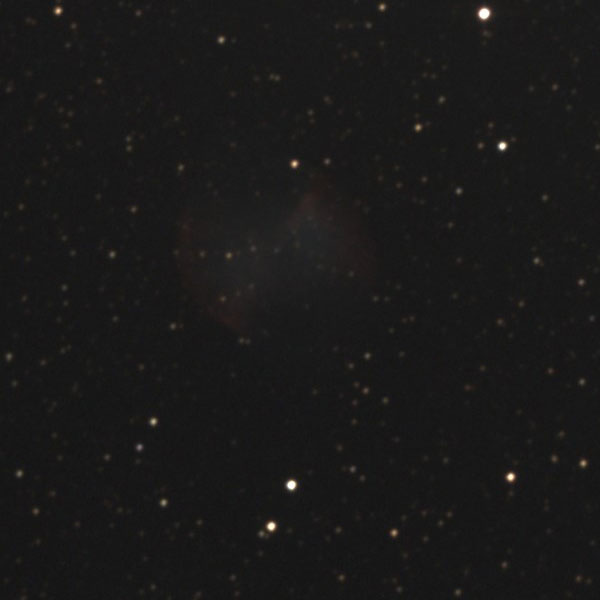
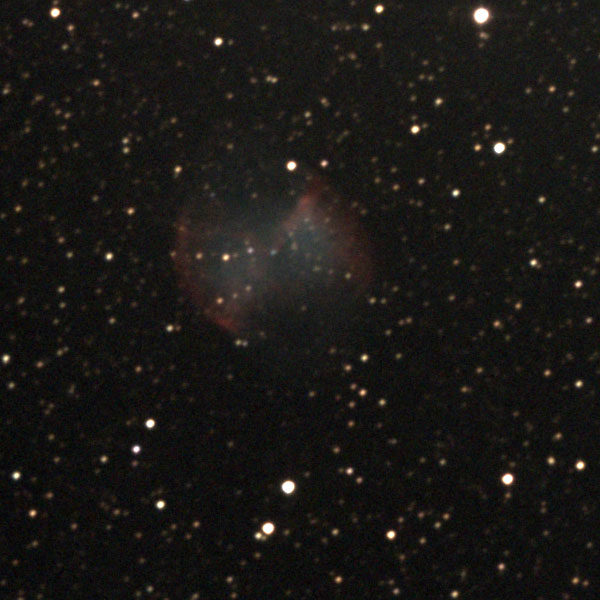
M 27 (Dumbbell Nebula in Vulpecula), unprocessed |
Ditto, post-processed |
Ditto, more "aggressively" post-processed |
I created the "more aggressive" versions later, therefore the sections are different. The Barlow lens versions show vignetting in the original files.
With Focal Extender
 |
 |
 |
||
M 57 (Ring Nebula in Lyra), unprocessed |
Ditto, post-processed |
Ditto, more "aggressively" post-processed |
||
 |
 |
 |
||
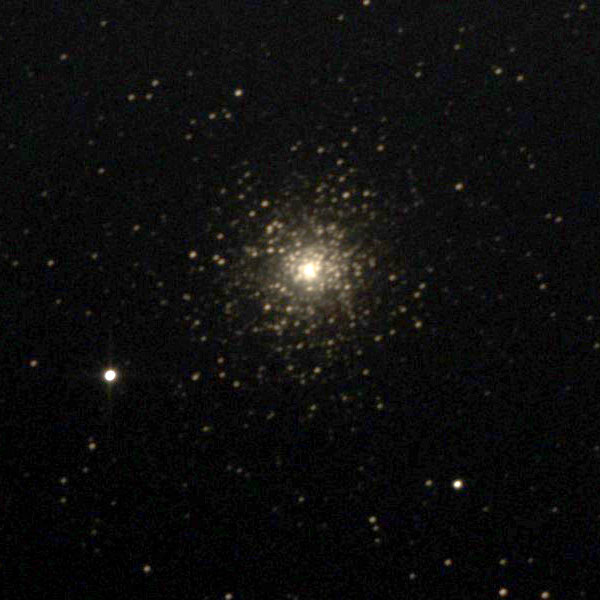
M 15 (Pegasus), unprocessed |
Ditto, post-processed |
Ditto, more "aggressively" post-processed |
||
 |
 |
 |
||
M 56 (Lyra), unprocessed |
Ditto, post-processed |
Ditto, more "aggressively" post-processed |
||
 |
 |
 |
||
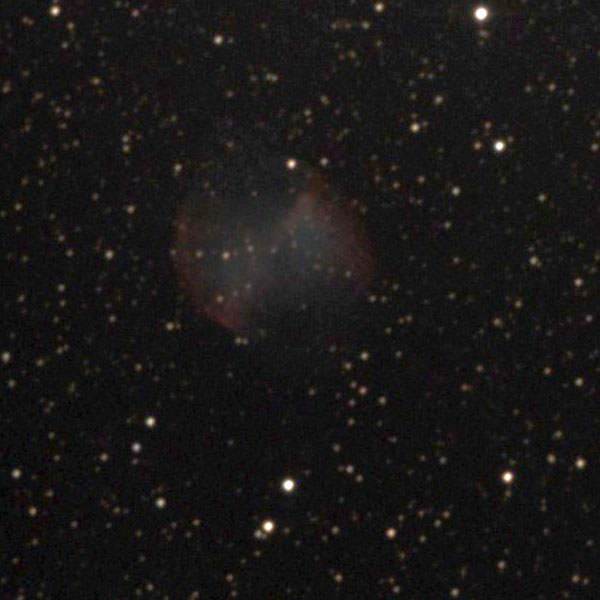
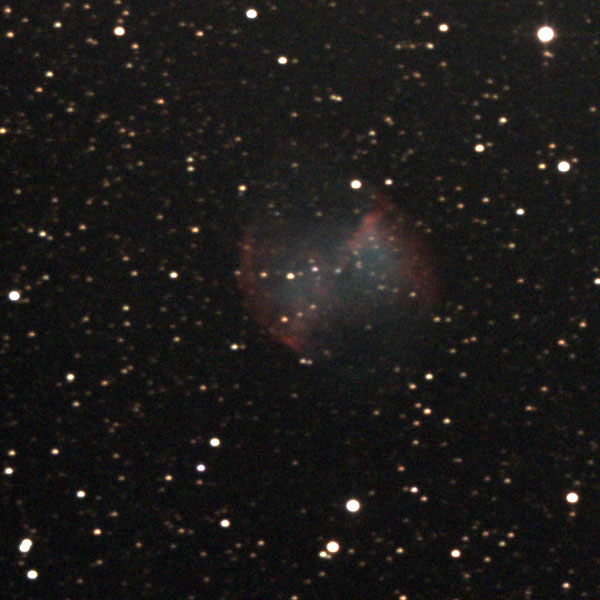
M 27 (Dumbbell Nebula in Vulpecula), unprocessed |
Ditto, post-processed |
Ditto, more "aggressively" post-processed |
I created the "more aggressive" versions later, therefore the sections are different.
Fourth Attempt
On December 12, 2017, the sky seemed to be clear again. This time, I wanted to try out the Atik Infinity camera on my Explorer 150PDS telescope tube (on the Star Discovery AZ GoTo mount as the attempts before). At the beginning, I was able to set everything up, although I had some problems with finding a suitable second alignment star. As a test, I pointed the telescope to M15 in Pegasus and was able to see the globular cluster in the eyepicece - small, but I had found it. I then connected the Atik Infinity camera to the telescope and my laptop computer, started the Infinity application and wanted to start focusing. But now the sky was already cloudy and only gray in the area of M 15. I managed to capture a lower star and was, at least, able to find that the camera comes into focus with this telescope (and without a Barlow lens). But soon the sky was overcast there as well, and the clouds did not release the view of the stars for hours. At first, I moved everything inside the house, except for the telescope on the mount - just in case that the sky might become clear again... But then a short hail came, which luckily did no harm and did not wet the telescope, and I also brought the telescope and mount inside.
Fifth Attempt
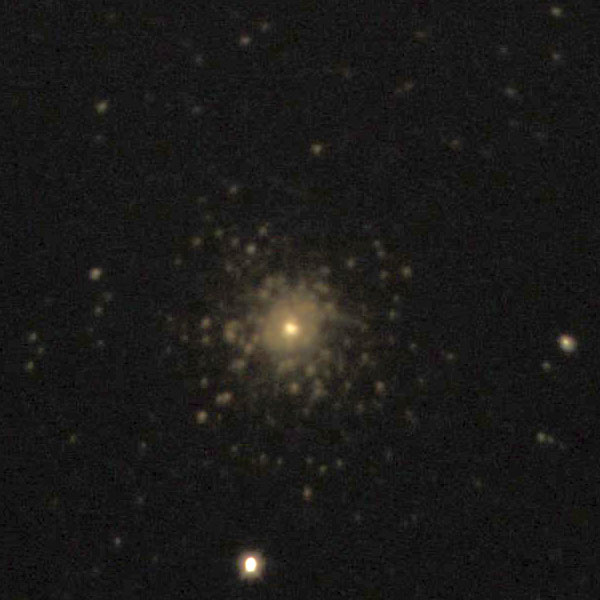
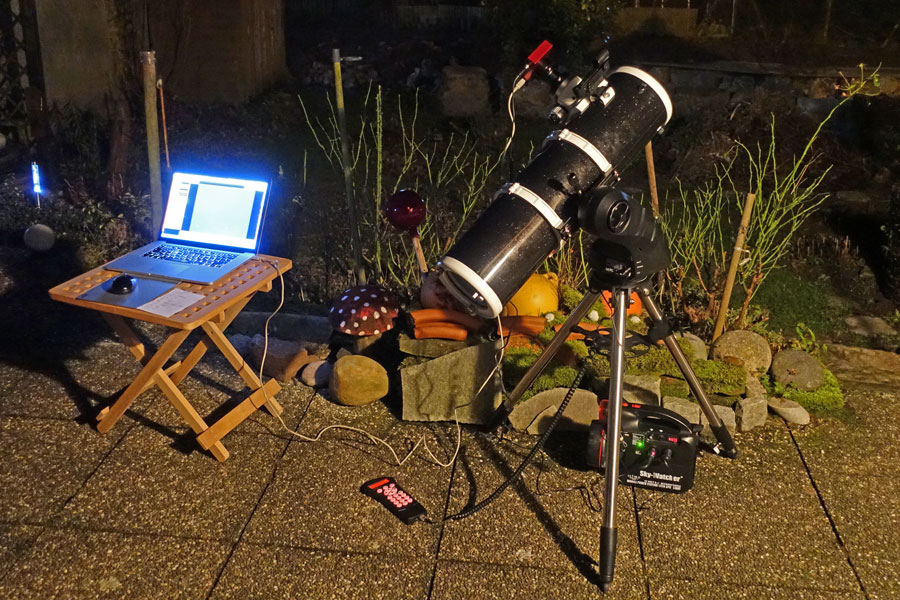
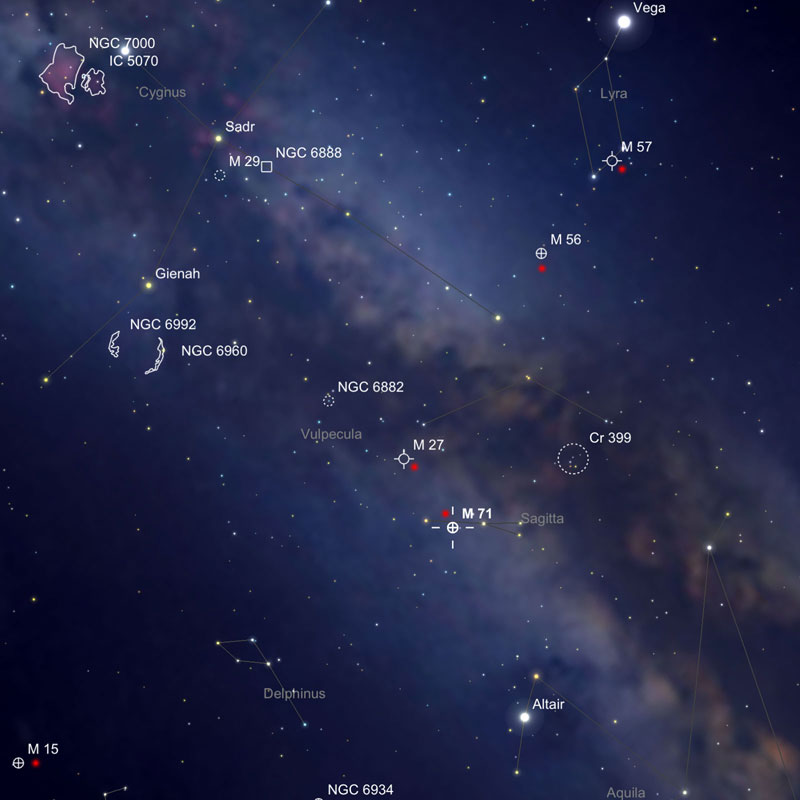
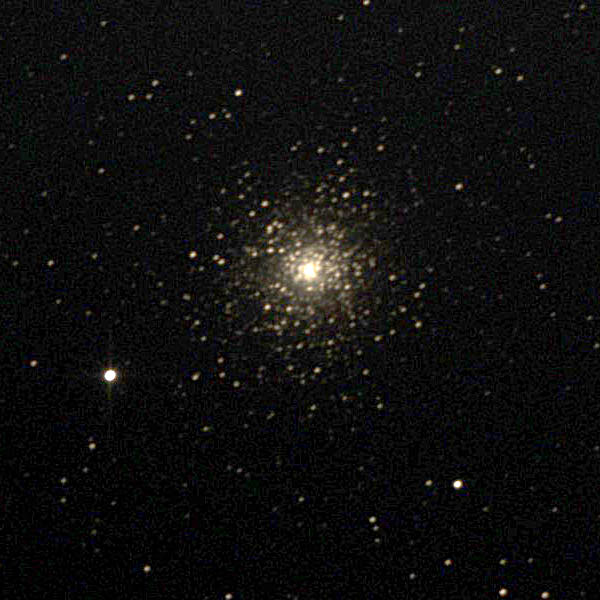
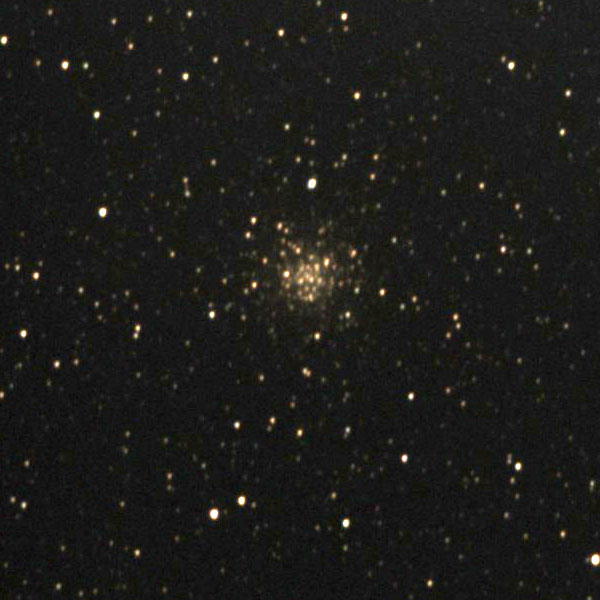
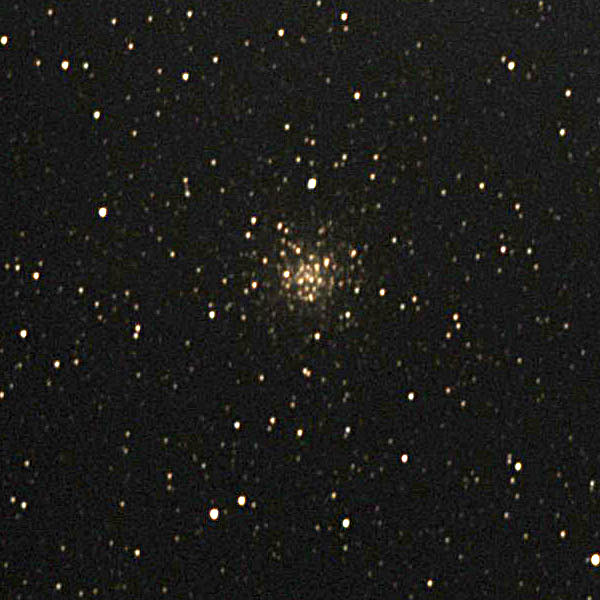
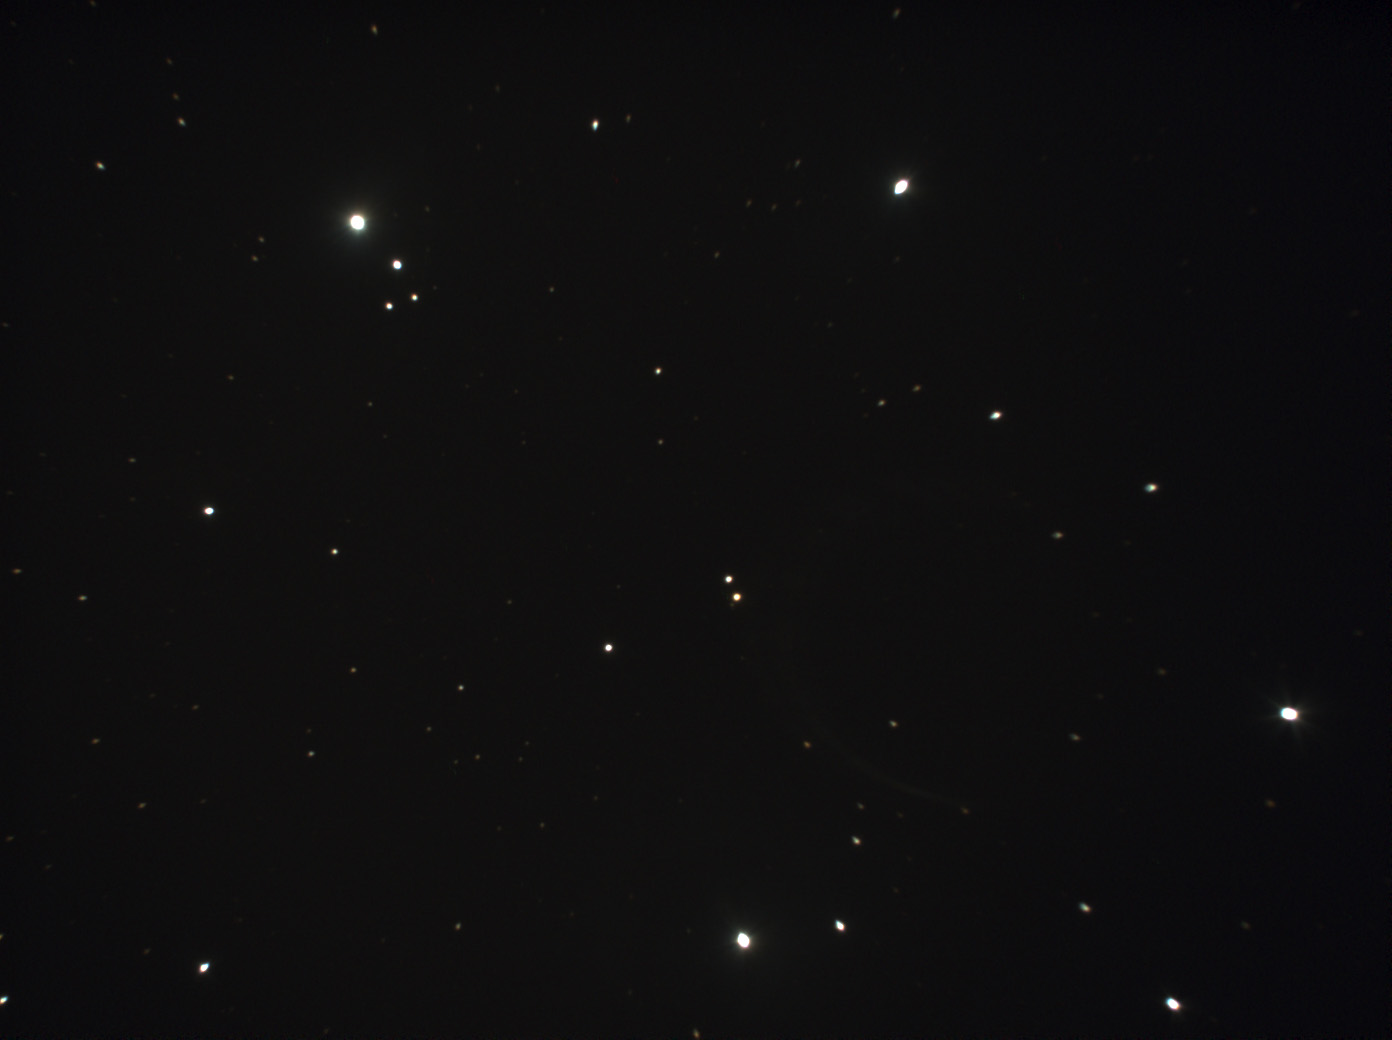
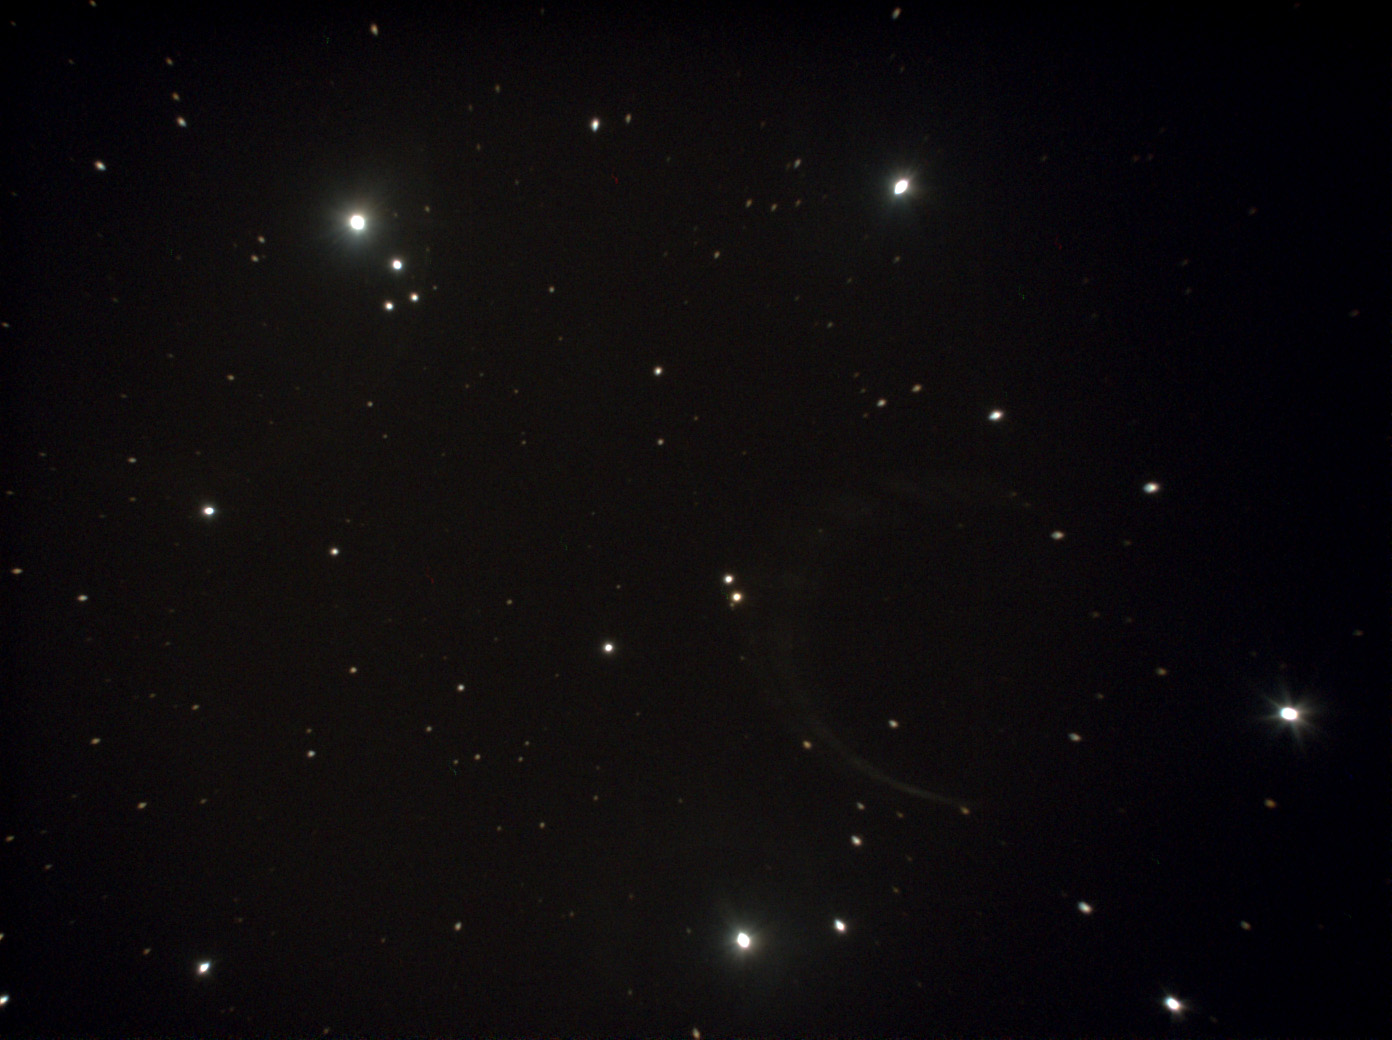
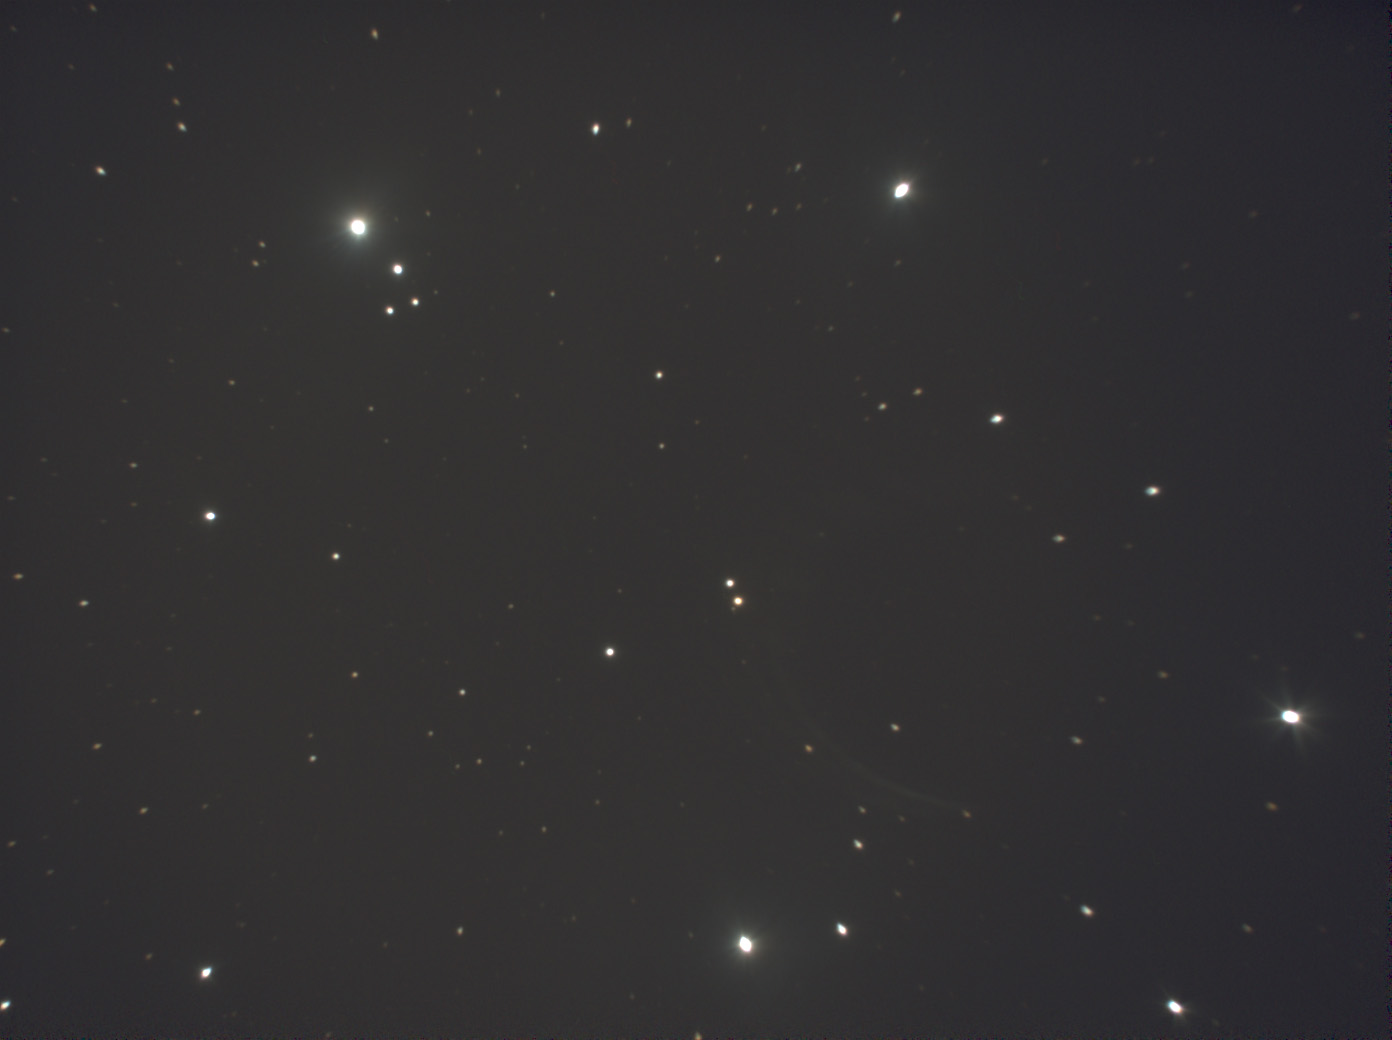
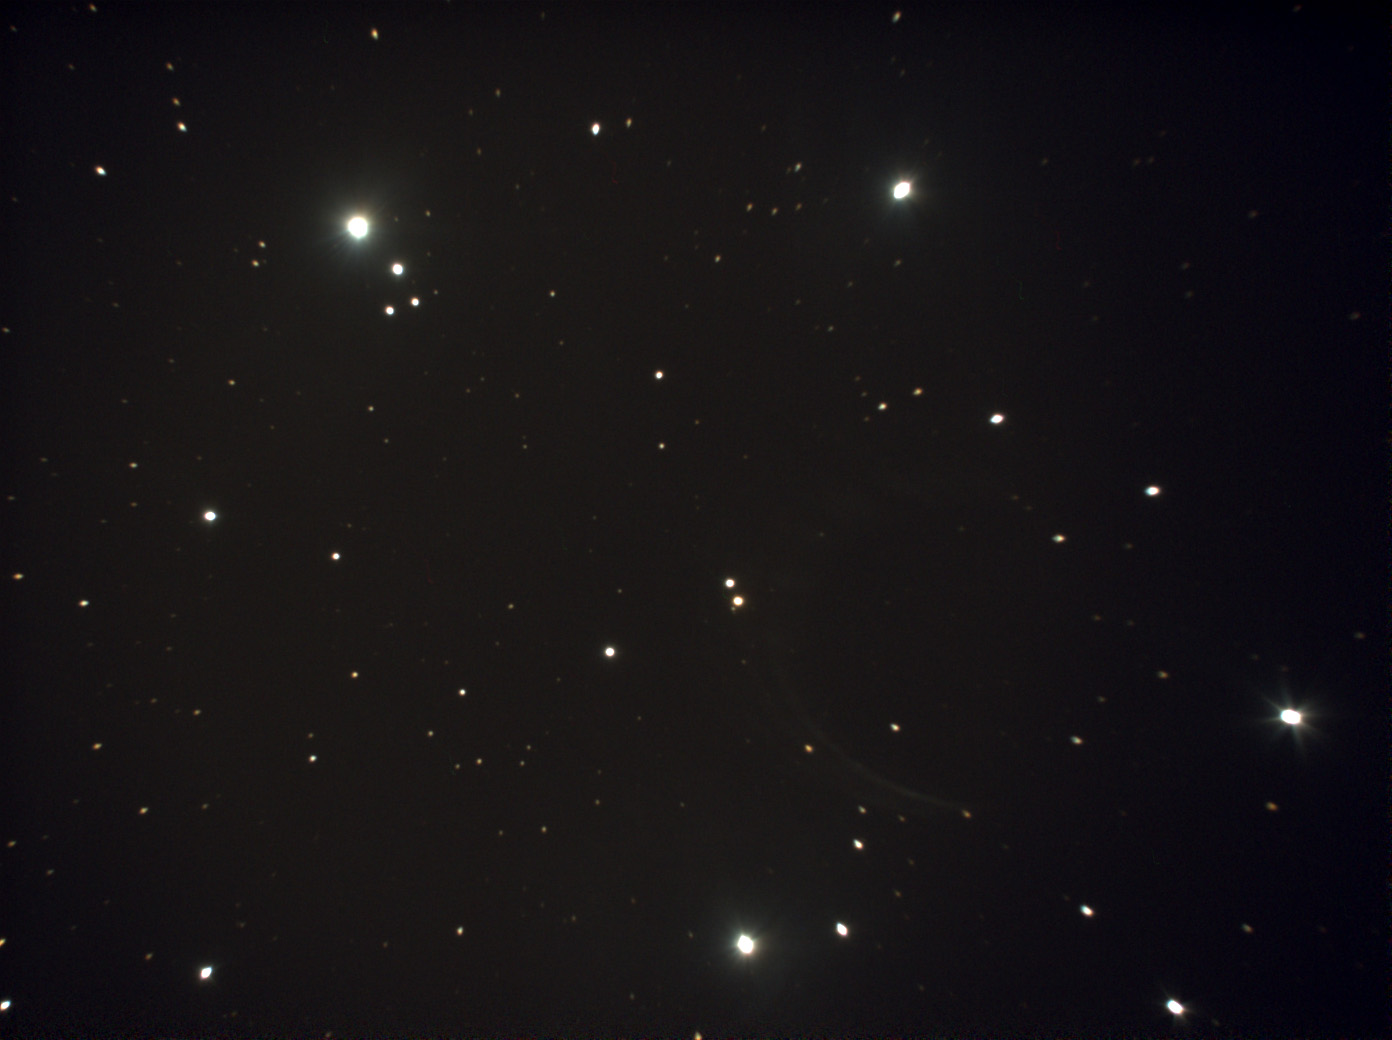
For December 31, 2017, rain was predicted for the evening, but the sky was nearly clear at sunset. I therefore took the opportunity to finally try out the Atik Infinity camera at my Explorer 150PDS on the Star Discovery AZ GoTo mount. Again, I visited my "proven" test objects M 15, M 56, M 57 and M 27 (in this order), and at the end M 71, to try something new. Attempts at NGC 7000 and 7006 failed.
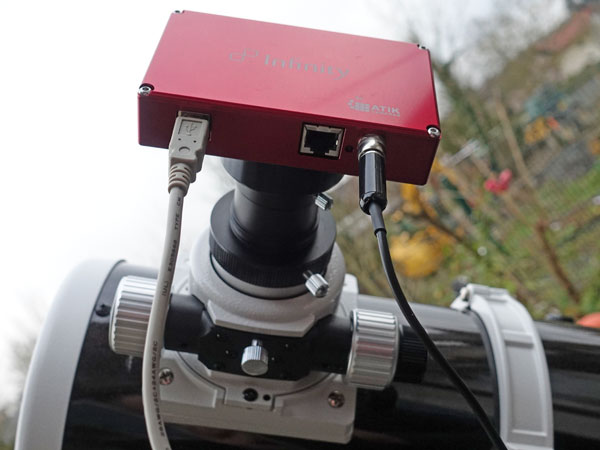
Here are a photo of my equipment and a chart showing the locations of the sky objects that I tested:
 |
 |
|
Photo: My test equipment |
Chart: Locations of the sky objects M 15, M 27, M 56, M 57, and M 71 (larger chart) |
I can state that the results turned out much better than those of previous tests. Only focusing is somethings that I have not yet "maxed out"... Again, this test showed that post-processing can improve the results. However, I found out that when I observed the objects on the screen, they were clearly more colorful than they appear afterwards on the saved images, whatever the reason for this may be... Probably, this is due to the size of the objects: in smaller size, the objects apperar fainter.
I would like to mention another issue, which became clear to me only after I had dealt in more detail with the Atik Infinity software. I saved the images in JPEG format during the observation, and with the 8-bit checkbox unchecked. Therefore, I assumed that the images were in 16-bit format, although I should have known better: images have only 8-bit color in JPEG format, and accordingly, my image editing applications displayed them as "8-bit." At some point in time, I understood this, and will store images in TIFF format (or PNG format) only in the future. I also noted the misleading checkbox in my review of the software.
And here are the photos:
 |
 |
 |
||
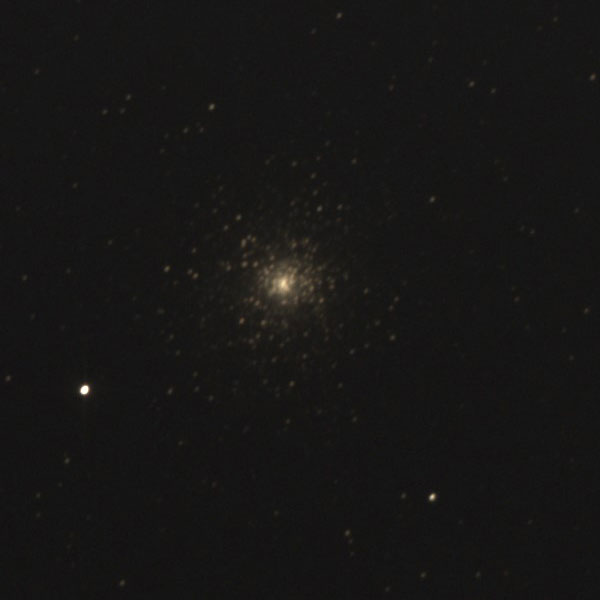
M 15 (Pegasus), unprocessed |
Ditto, post-processed |
Ditto, post-processed and sharpened |
||
 |
 |
 |
||
M 15 (Pegasus), unprocessed |
Ditto, post-processed |
Ditto, post-processed and sharpened |
||
 |
 |
 |
||
M 56 (Lyra), unprocessed |
Ditto, post-processed |
Ditto, post-processed and sharpened |
||
 |
 |
 |
||
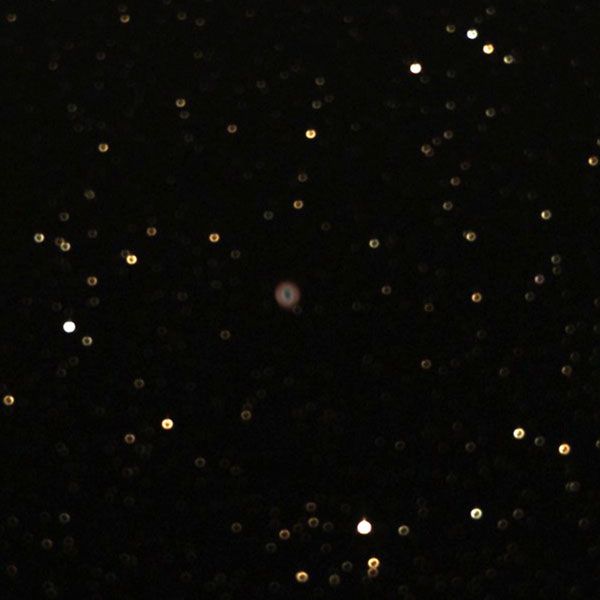
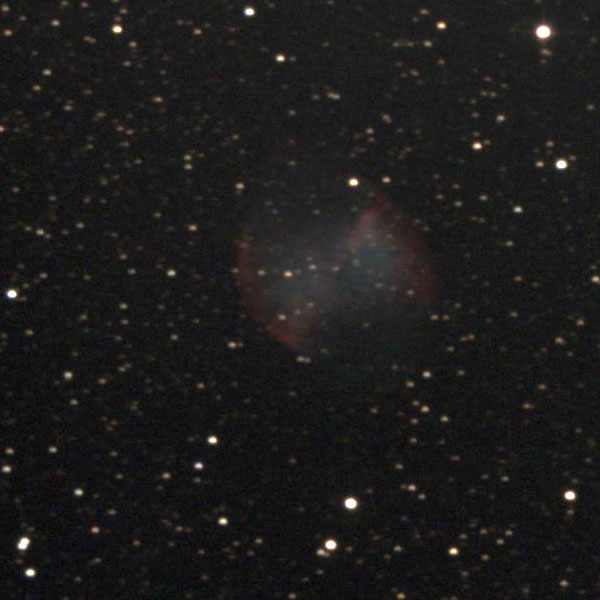
M 57 (Ring Nebula in Lyra), unprocessed |
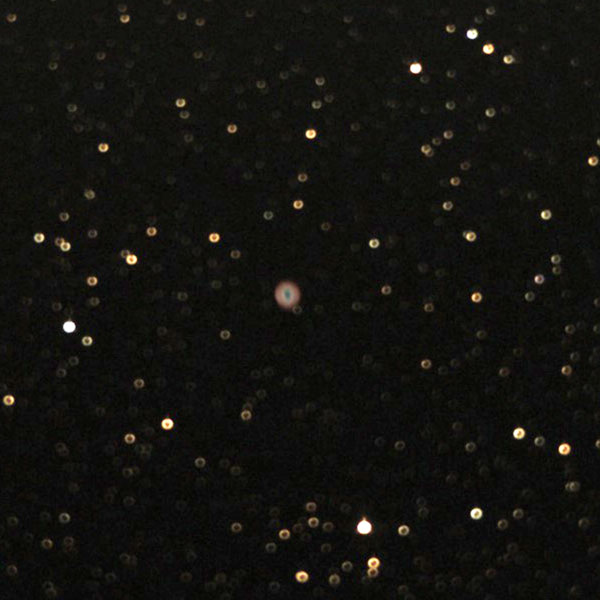
Ditto, post-processed |
Ditto, differently post-processed |
||
 |
 |
 |
||
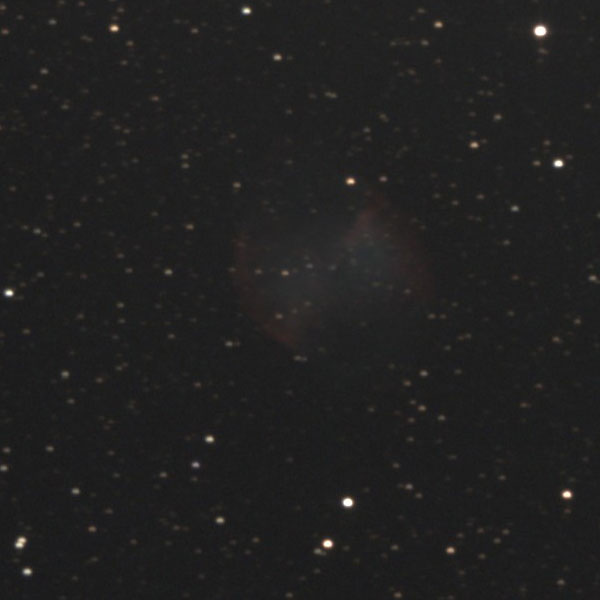
M 27 (Dumbbell Nebula in Vulpecula), unprocessed |
Ditto, post-processed |
Ditto, differently post-processed |
||
 |
 |
 |
||
M 27 (Dumbbell Nebula in Vulpecula), unprocessed |
Ditto, post-processed |
Ditto, differently post-processed |
||
 |
 |
 |
||
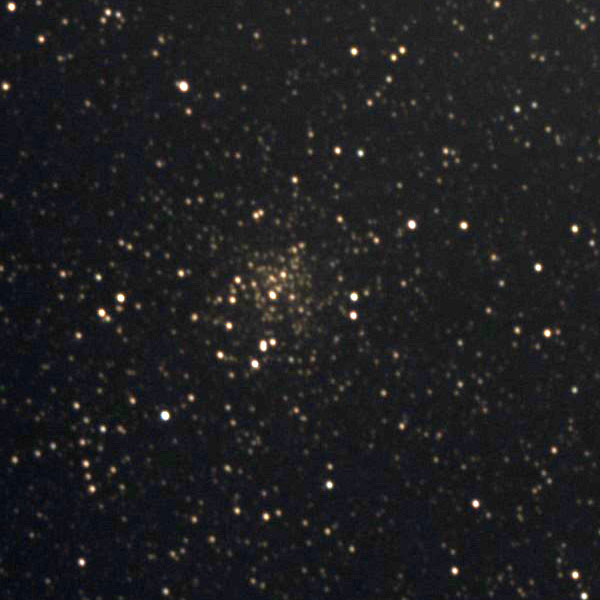
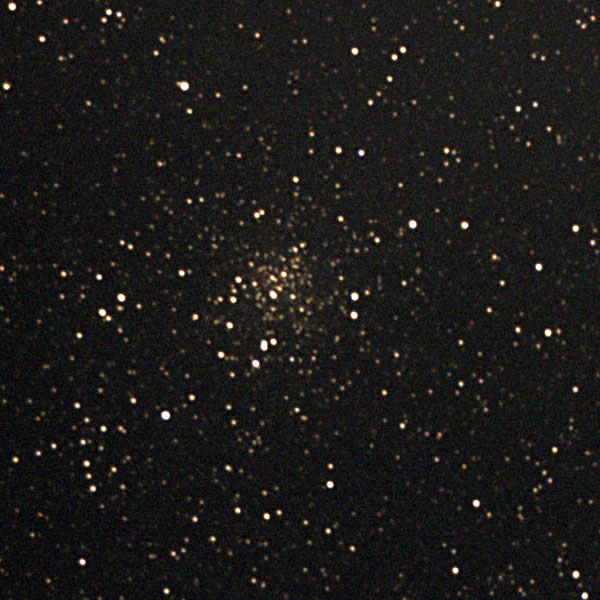
M 71 (Sagitta), unprocessed |
Ditto, post-processed |
Ditto, post-processed and sharpened |
All in all, I am quite satisfied with the results of this test and thus - almost - finish my "First Attempts" section. Getting some experience with the Maksutov-Cassegrain tubes (using a focal reducer) is still on my to-do list, though...
Aftermath: Comparison with Images that Were Created from Replay Mode Stacks
Usually, I save images directly during the observation, particularly, for the case that I forget to start the recording... This time, I had started recording, and this allowed me to compare my directly saved and post-processed images with images that I created from Stacks that I built in "Replay" mode. This allowed me to sometimes reject images that were not optimal, but admittedly I did not do this systematically. In the meantime, I had also learned that JPEG images cannot be saved in 16-bit format, although the "Save" dialog suggests this (see my review of the Atik Infinity software). Here I saved images from "Replay" stacks in the 16-bits-TIFF format. And in the future, I will do so also during observations.
In the following, I present my "best" results (so far) that I created using both methods, that is save JPEG images during observations and TIFF images from stacks that I created in "Replay" mode (in the future I will also save TIFF files during observations).
8-bits Original |
|
8-bits Post-Processed |
|
16-bits Post-Processed ("Replay") |
|
|
 |
||
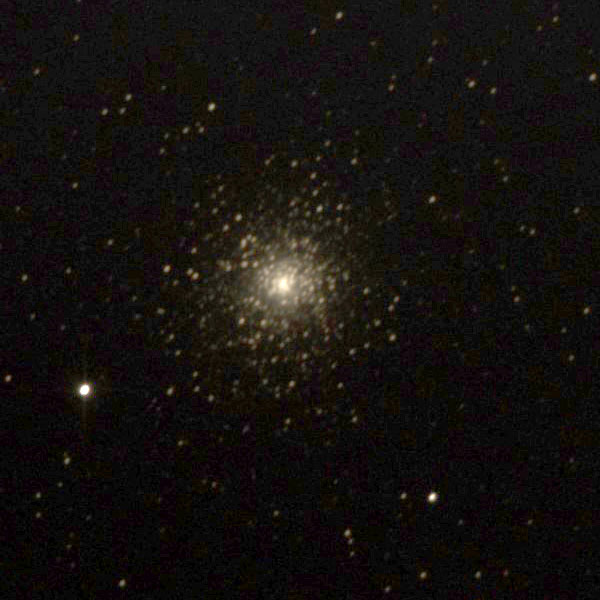
M 15 (Pegasus), unprocessed |
Ditto, post-processed and sharpened |
Ditto, post-processed and sharpened |
||
|
|
 |
||
M 56 (Lyra), unprocessed |
Ditto, post-processed and sharpened |
Ditto, post-processed and sharpened |
||
|
|
 |
||
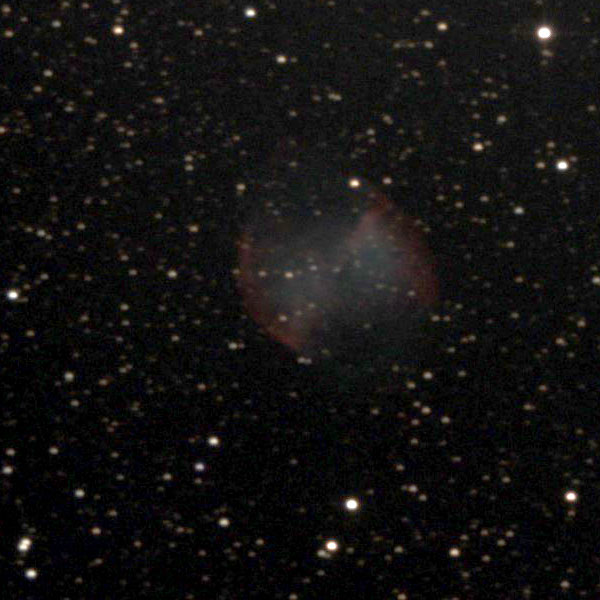
M 57 (Ring Nebula in Lyra), unprocessed |
Ditto, post-processed |
Ditto, post-processed |
||
|
|
 |
||
M 27 (Dumbbell Nebula in Vulpecula), unprocessed |
Ditto, post-processed |
Ditto, post-processed |
||
|
|
 |
||
M 27 (Dumbbell Nebula in Vulpecula), unprocessed |
Ditto, post-processed |
Ditto, post-processed |
||
|
|
 |
||
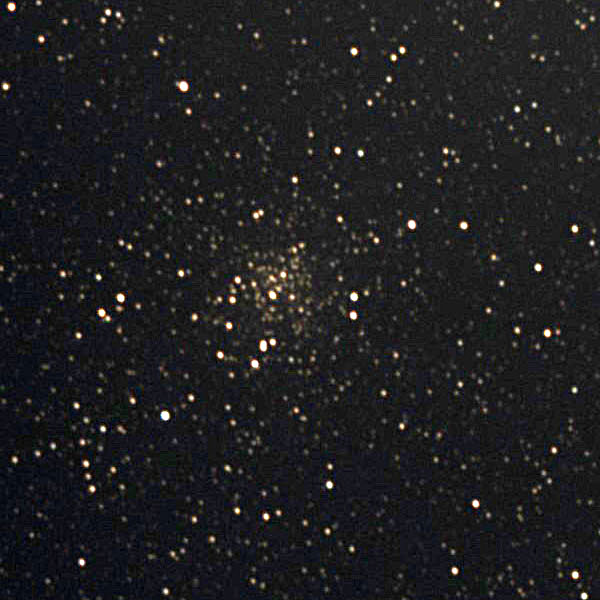
M 71 (Sagitta), unprocessed |
Ditto, post-processed and sharpened |
Ditto, post-processed and sharpened |
The comparison reveals that differences are fairly minor in my different post-processing attempts. At a closer look, the stars often look sharper and rounder in the 16-bits versions, perhaps because I removed some images from the stack. The nebulae seem to be better in 16-bit mode. On the other hand, I managed to get two of the three 8-bits versions of the globular star clusters a little bit brighter than their 16-bits counterparts. Overall, I conclude that it does make sense to undergo the additional work and create optimized stacks in "Replay" mode for potentially better results.
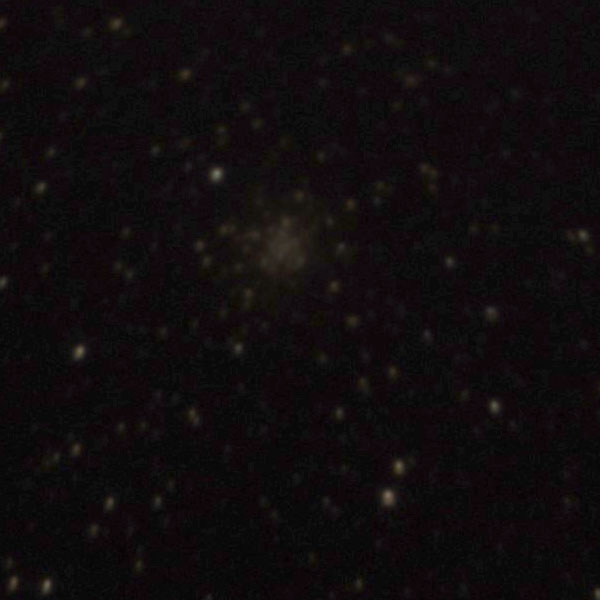
Sixth Attempt
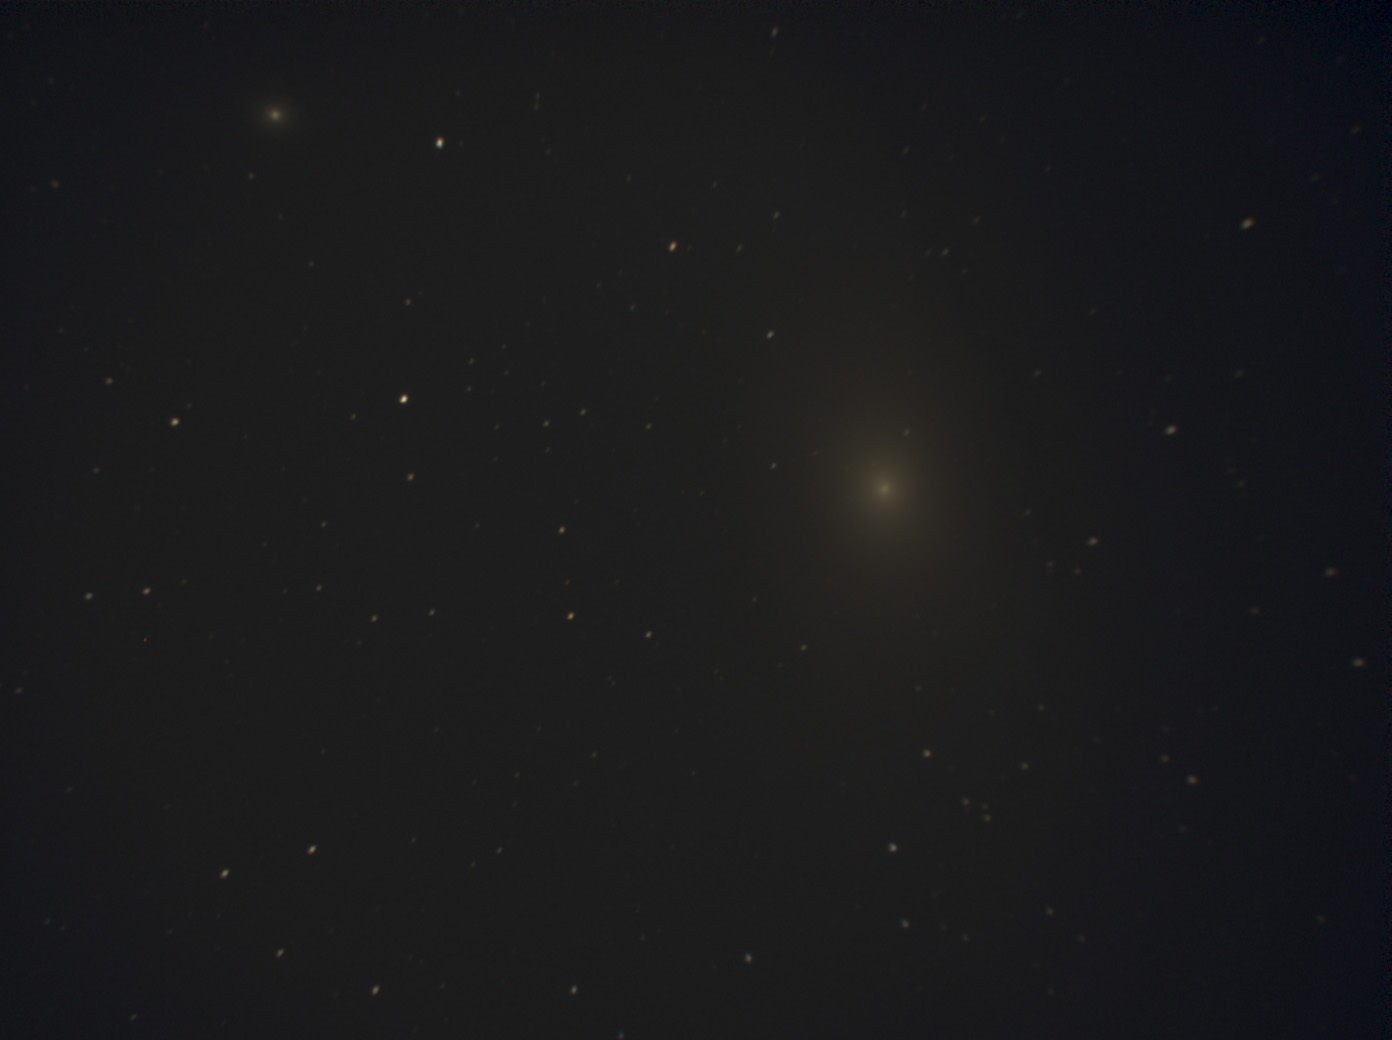
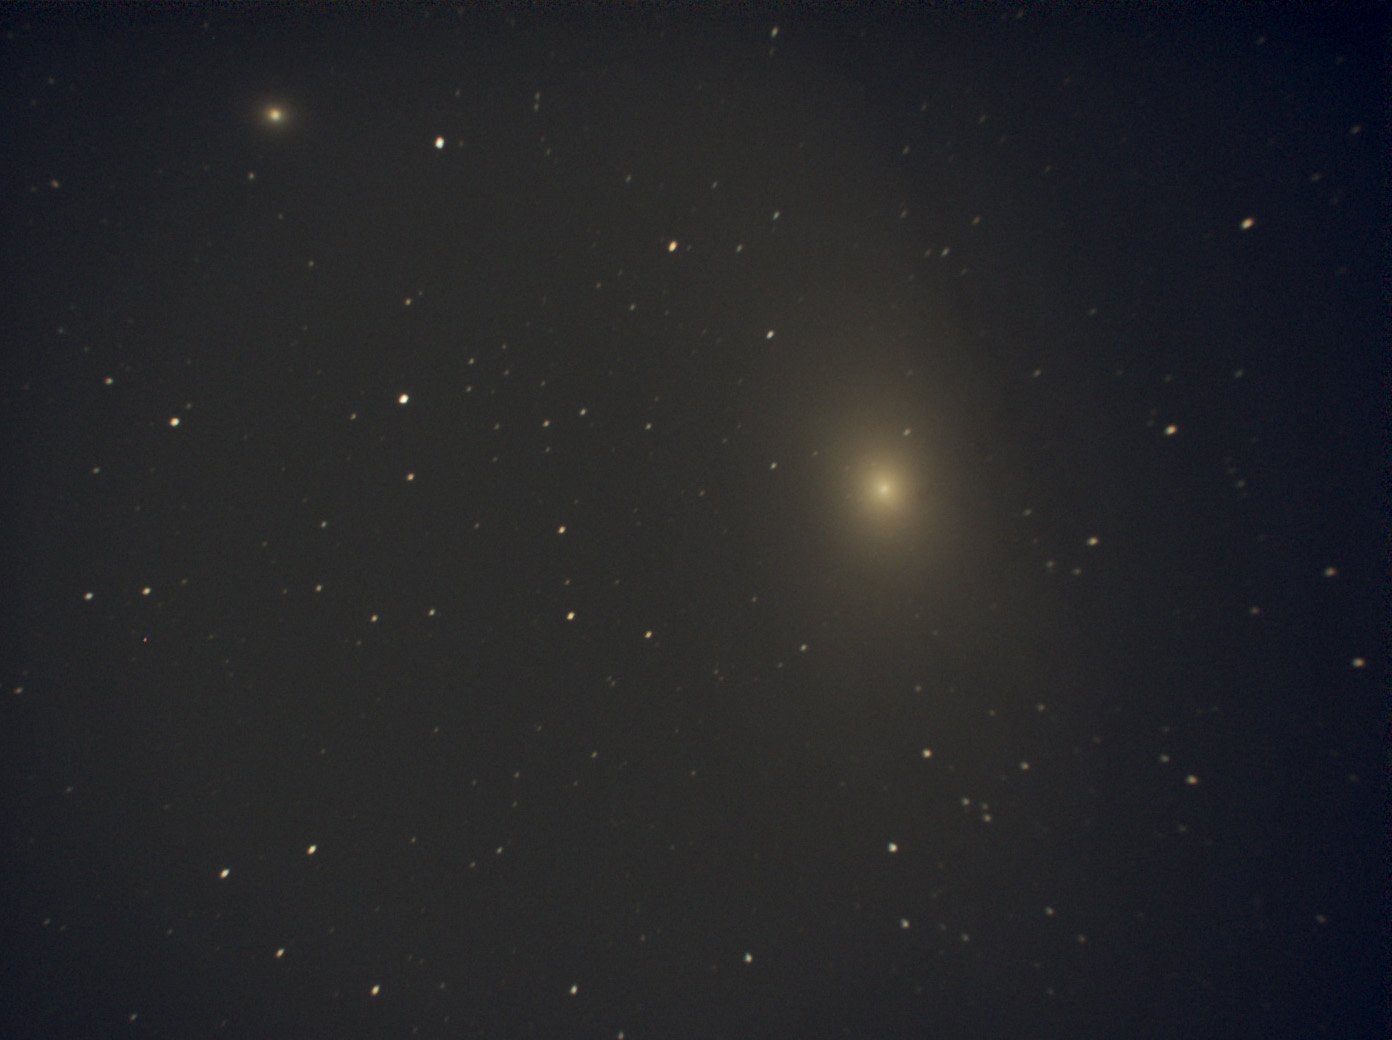
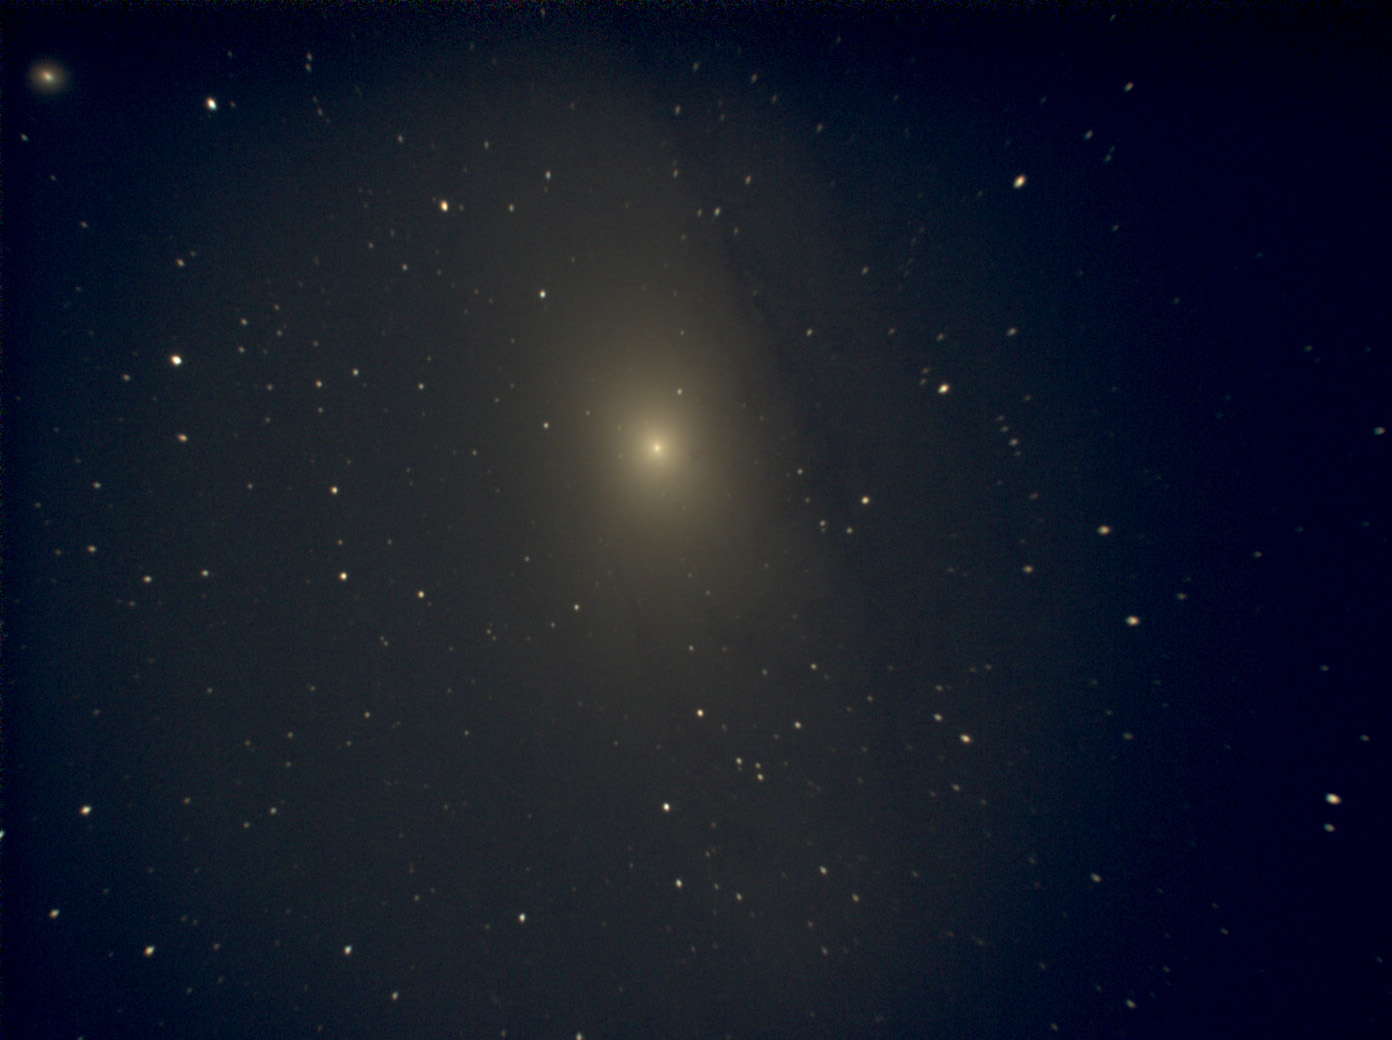
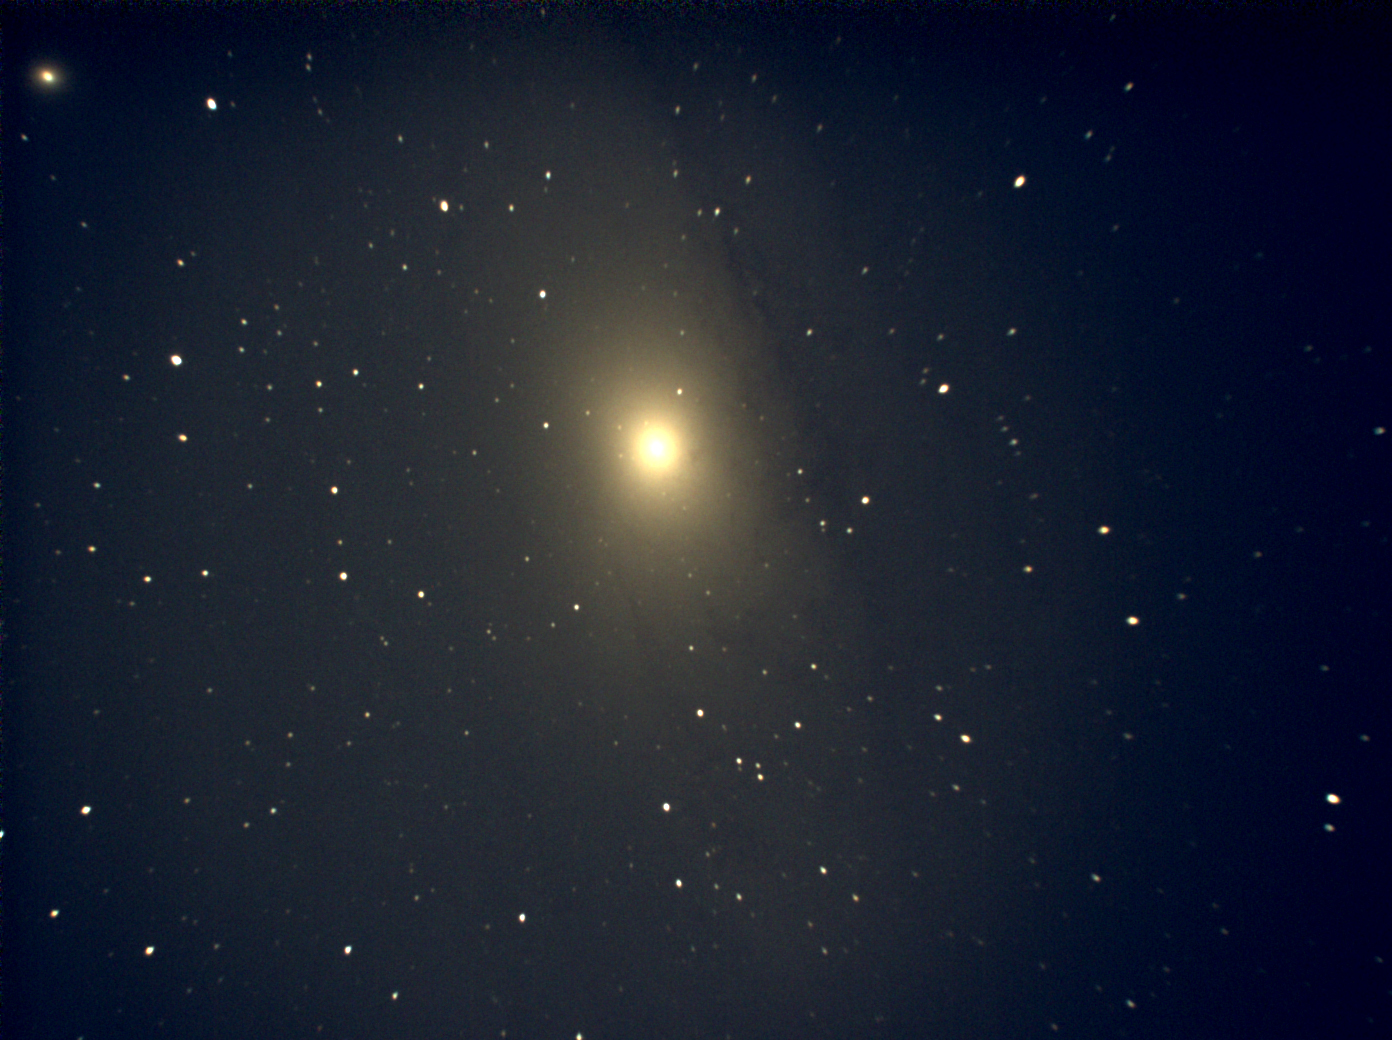
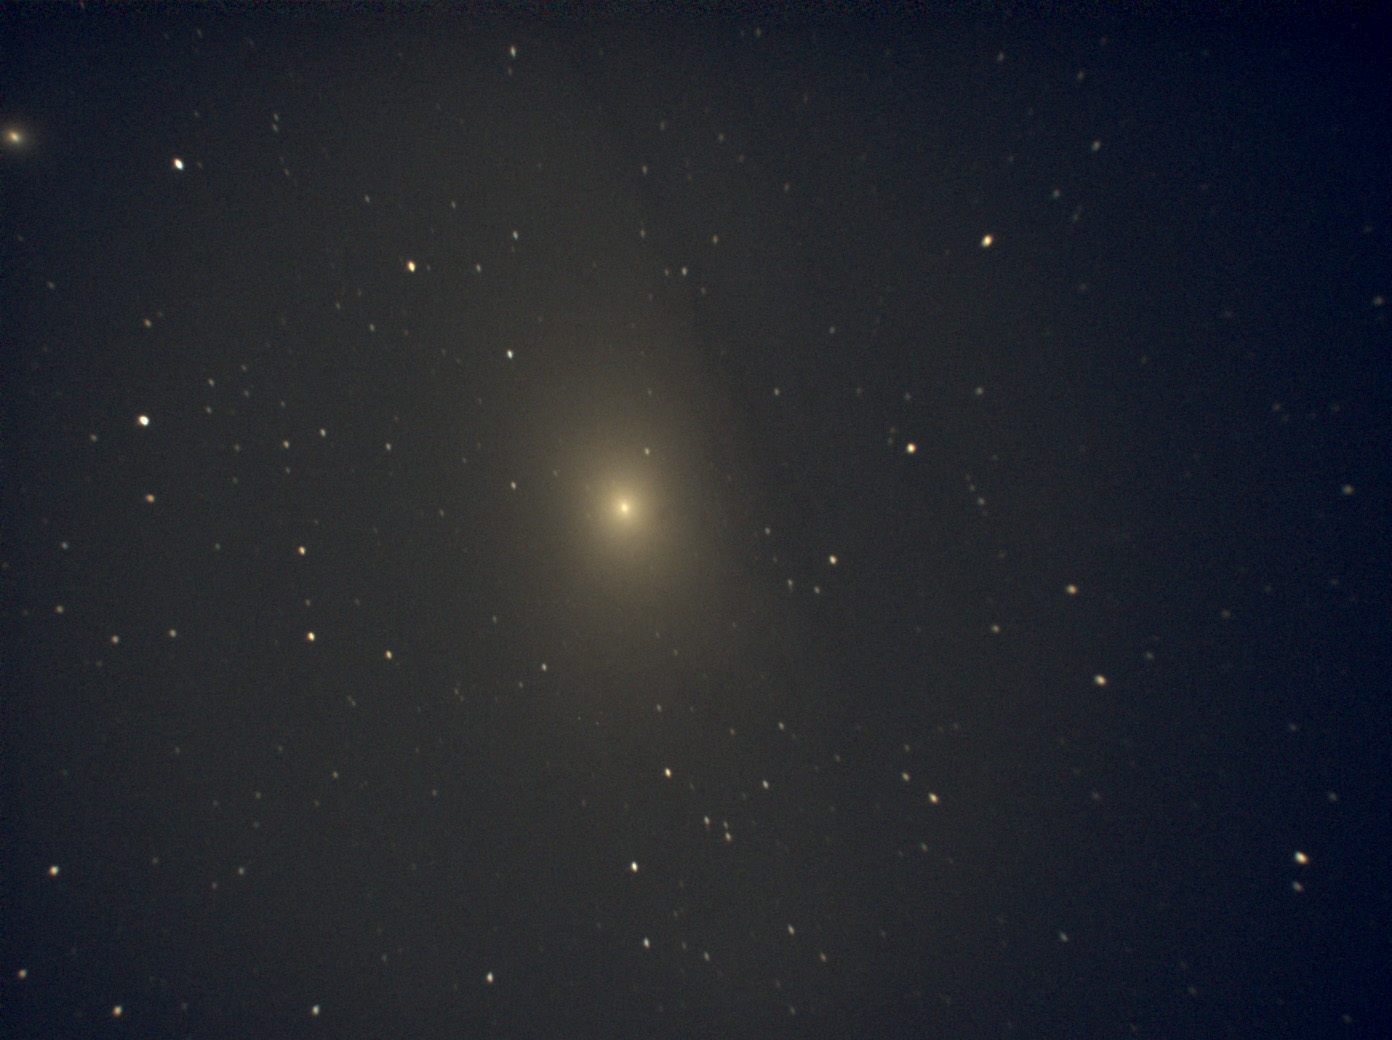
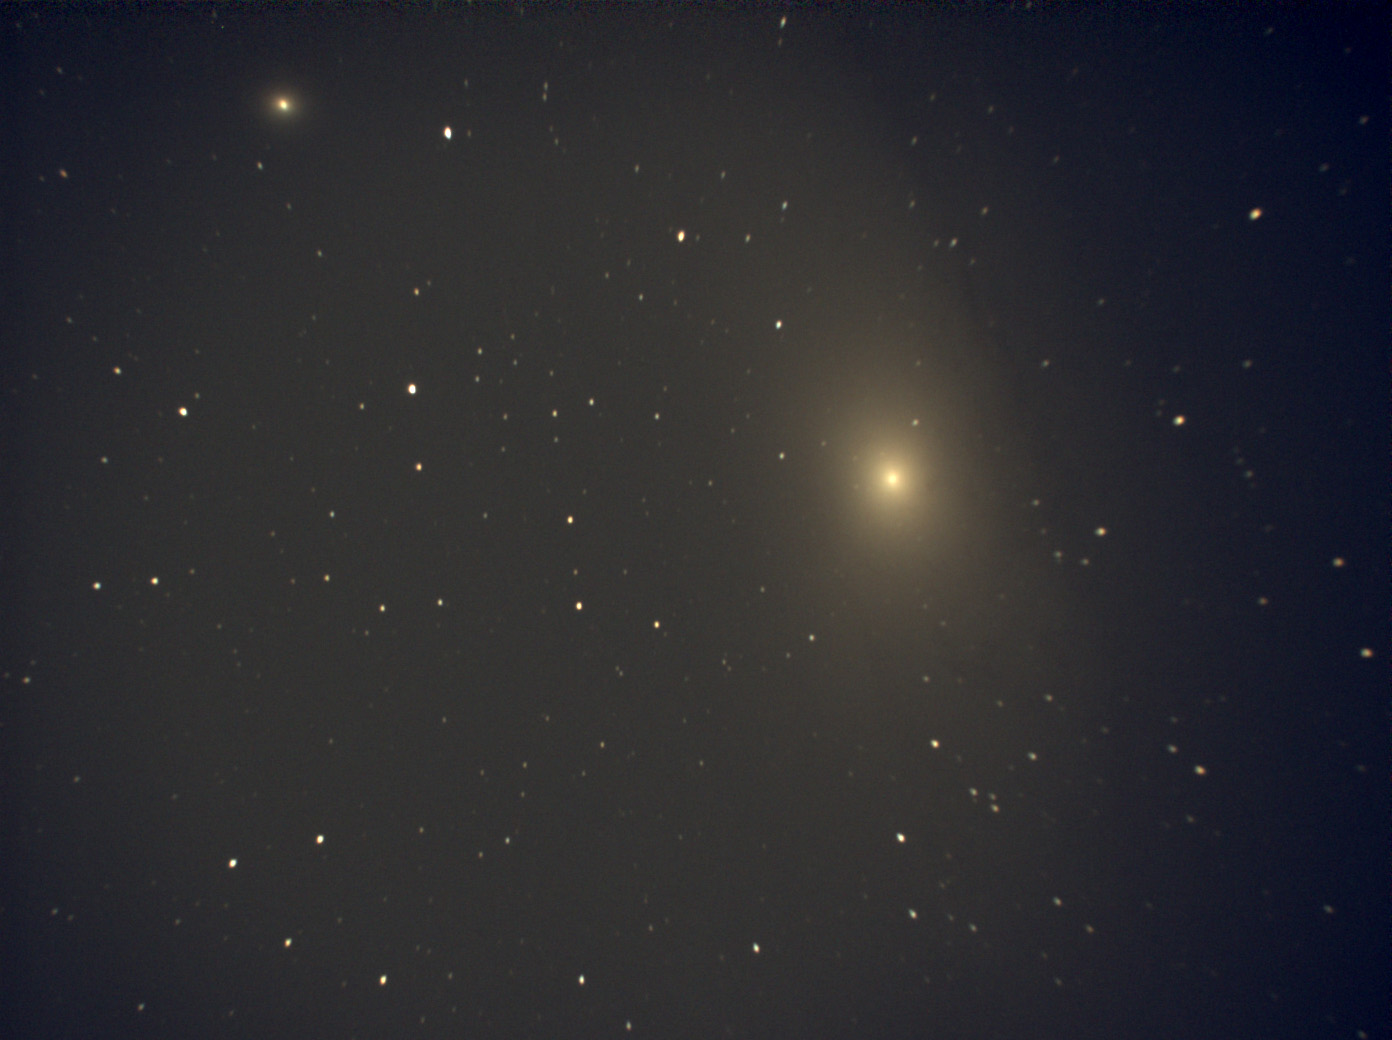
On January 14.1, 2018 there was finally another clear night, and so I finally managed to try out the Atik Infinity on my Skymax-127. I did, however, not succeed in aligning the mount properly, and so the GoTo control did not find the asked-for targets. Frustrated, I finally gave up and decided to try two objects that are relatively easy to find manually (although I would have had to restart the control and align the tube horizontally, which I forgot to do...). The Pleiades M 45 were my first observation target, and I found it after slight corrections. The Andromeda Nebula M 31, was my second target, and it did not work at the beginning. But with a bit of "poking around" and luck I found it at last. These objects proved to be so extended that I had to use my recently purchased focal reducer and extension tube (I still have to measure the exact degree of reduction...). The focus of the photos was not optimal by the way. To my pleasure, I was later able to prove that I had indeed found the objects that I was looking for by comparing my photos with drawings in Stoyan's book Deep Sky Reiseführer. Unfortunately, photos were not very helpful in these cases (maybe, photos on the Internet are more useful...).
Here is an example of each object that I took with the Skymax-127 and 2 x TS focal reducer plus 25 mm extension tube (results theoretically in about 3 x reduction, practically in about 2.31 x reduction) on the Star Discovery AZ GoTo mount:
 |
 |
|
M 45 (Taurus), center, unprocessed |
M 45 (Taurus), center, post-processed |
|
 |
 |
|
M 31 and M 32 (top left, Andromeda), unprocessed |
M 31 and M 32 (top left, Andromeda), post-processed |
The following photos were created later from recordings:
 |
 |
|
M 45 (Taurus), center, from recording, unprocessed |
M 45 (Taurus), center, from recording, processed |
|
 |
 |
|
M 31 and M 32 (top left, Andromeda), from recording, processed |
M 31 and M 32 (top left, Andromeda), from recording, processed, darker variant |
|
 |
This more "aggressive" variant was started with auto-contrast and then changed slightly in the darks to make the background darker. As a result, the core is more washed out, but the fine structures are better to recognize, if one looks at the large version. I found a similar version on astrojedi's blog, so I tried again and processed more "aggresively" to get closer to its result. |
|
M 31 and M 32 (top left, Andromeda), from recording, processed, more "aggressive" variant |
||
 |
 |
|
M 31 and M 32 (top left, Andromeda), from further recording, processed |
M 31 and M 32 (top left, Andromeda), from yet another recording, processed |
|
These photos show the complete field of view, and the large versions are in original size. This is due to the fact that the sky objects are extended - even beyond the field of view.
Seventh Attempt
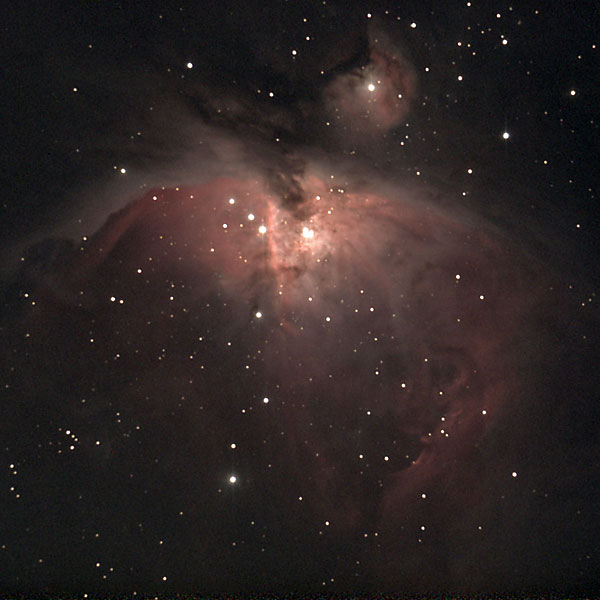
On February 12, 2018, the sky was finally clear again, so that I built up my Explorer 150PDS telescope with GoTo mount, but actually in order to get my new Celestron StarSense module up and running in the second attempt - in the first one, I had failed. I succeeded and then was tempted to connect the Atik Infinity camera to the telescope and look for some "Winter" DSOs: M 35-38 and M 42. The results were quite satisfactory and, of course, the Orion Nebula impressed me.
The following photos were taken with the Explorer 150PDS on the Star Discovery AZ GoTo mount (with StarSense module) and saved as 16-bit TIFF files:
 |
 |
 |
||
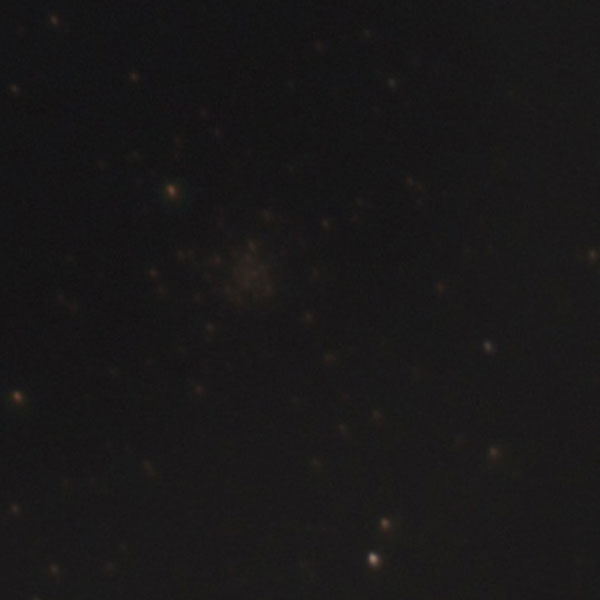
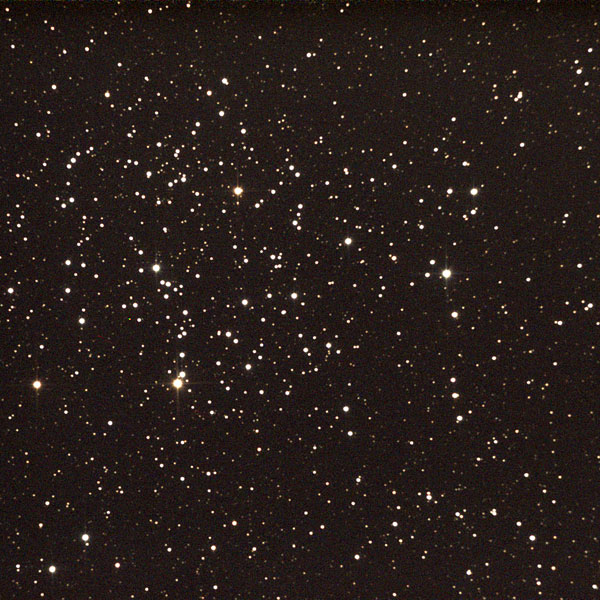
M 35 (Gemini), unprocessed |
Ditto, post-processed and sharpened |
Ditto, post-processed more aggressively and sharpened |
||
 |
 |
 |
||
M 36 (Auriga), unprocessed |
Ditto, post-processed and sharpened |
Ditto, post-processed more aggressively and sharpened |
||
 |
 |
 |
||
M 37 (Auriga), unprocessed |
Ditto, post-processed and sharpened |
Ditto, post-processed more aggressively and sharpened |
||
 |
 |
 |
||
M 38 (Auriga), unprocessed |
Ditto, post-processed and sharpened |
Ditto, post-processed more aggressively and sharpened |
||
 |
 |
 |
||
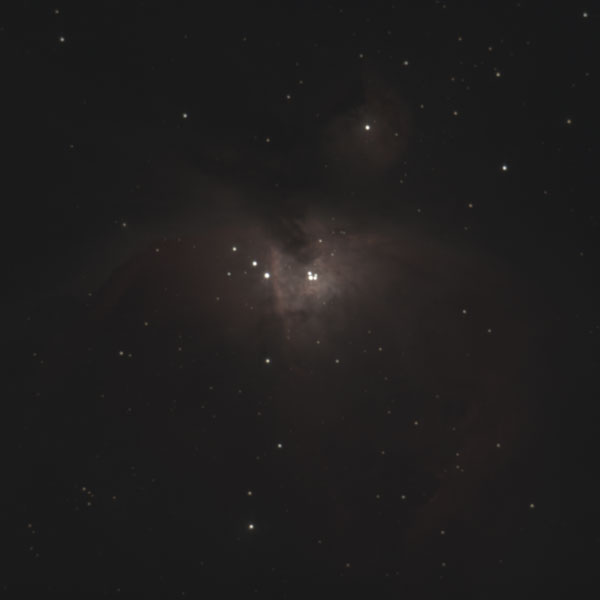
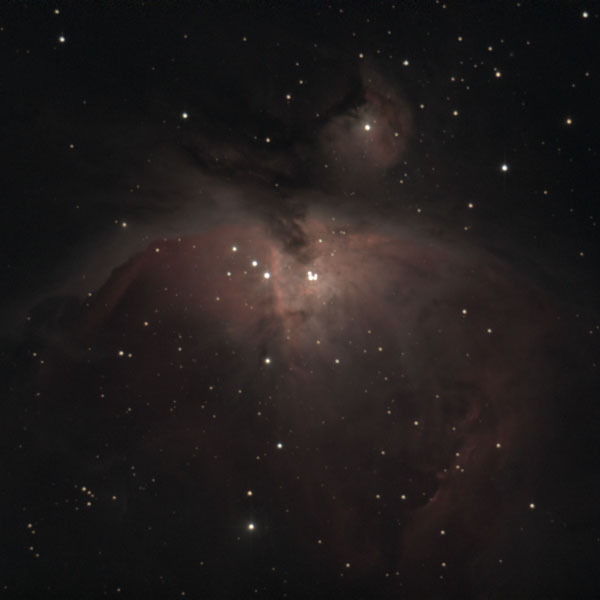
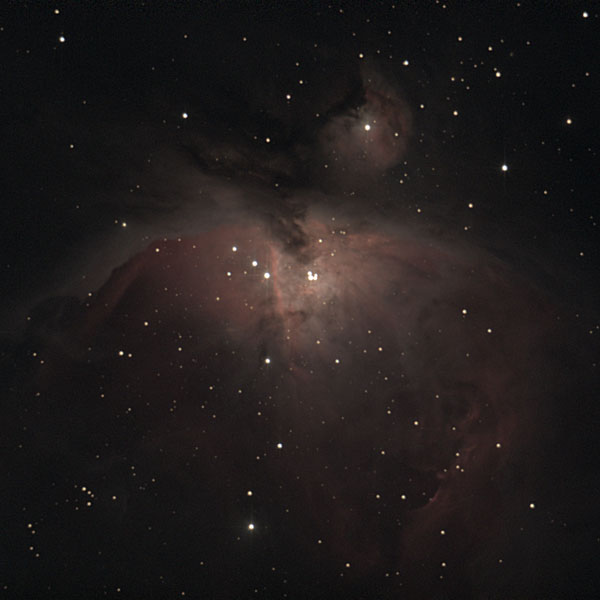
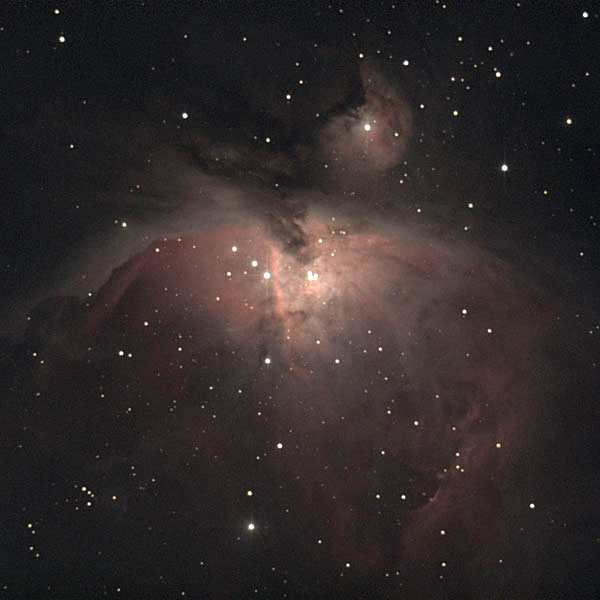
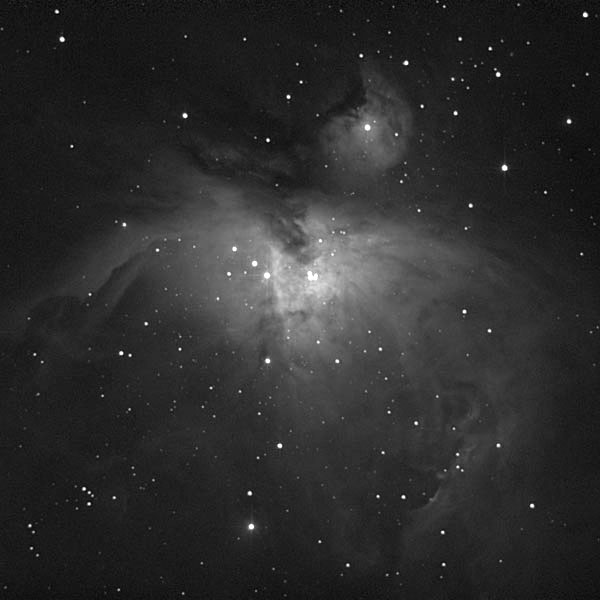
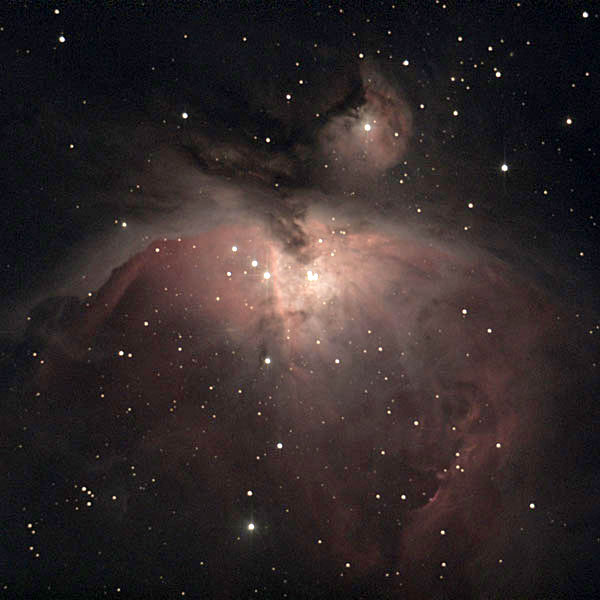
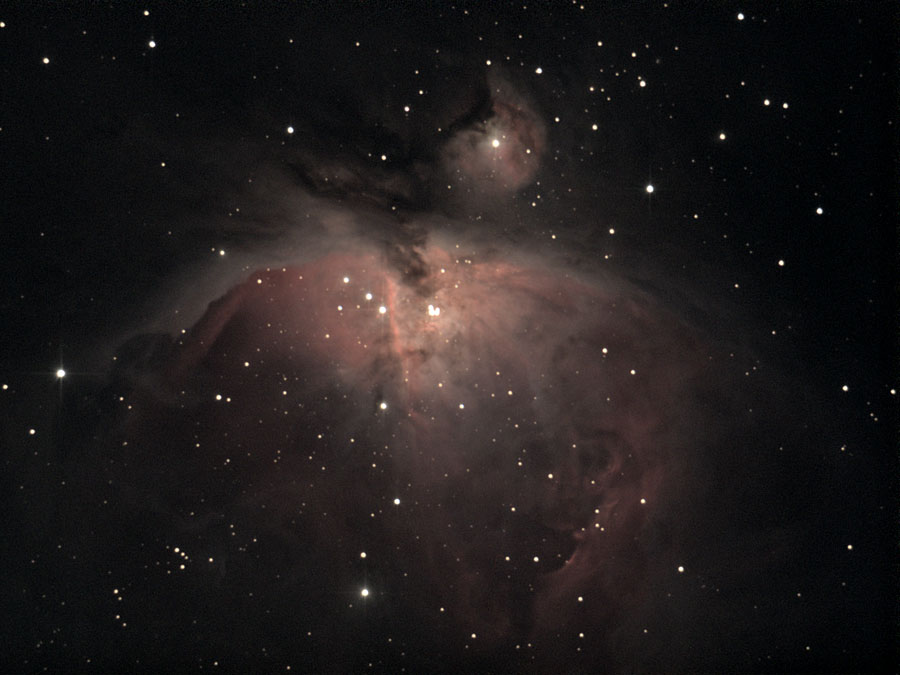
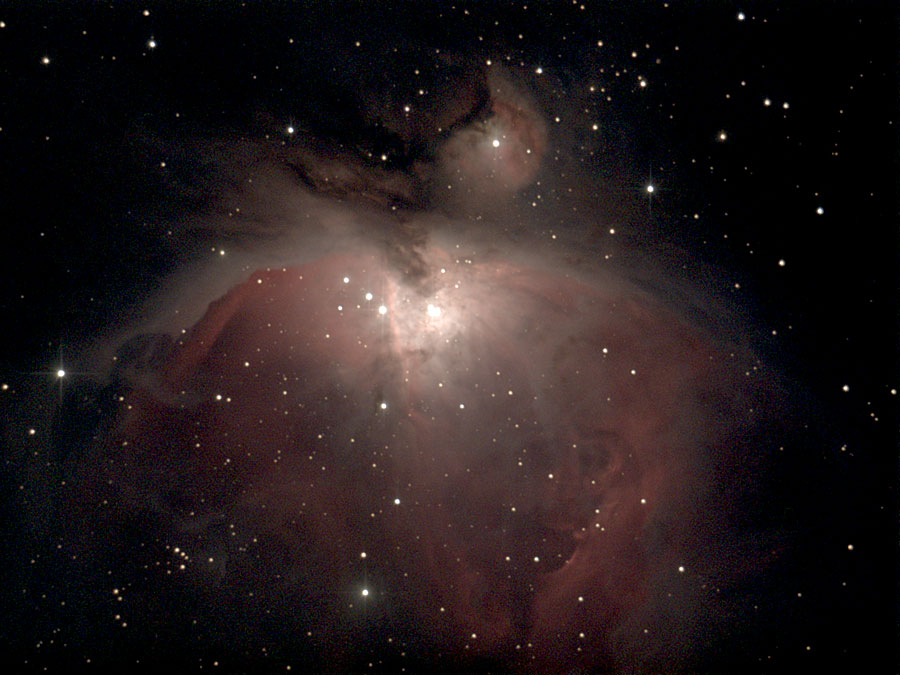
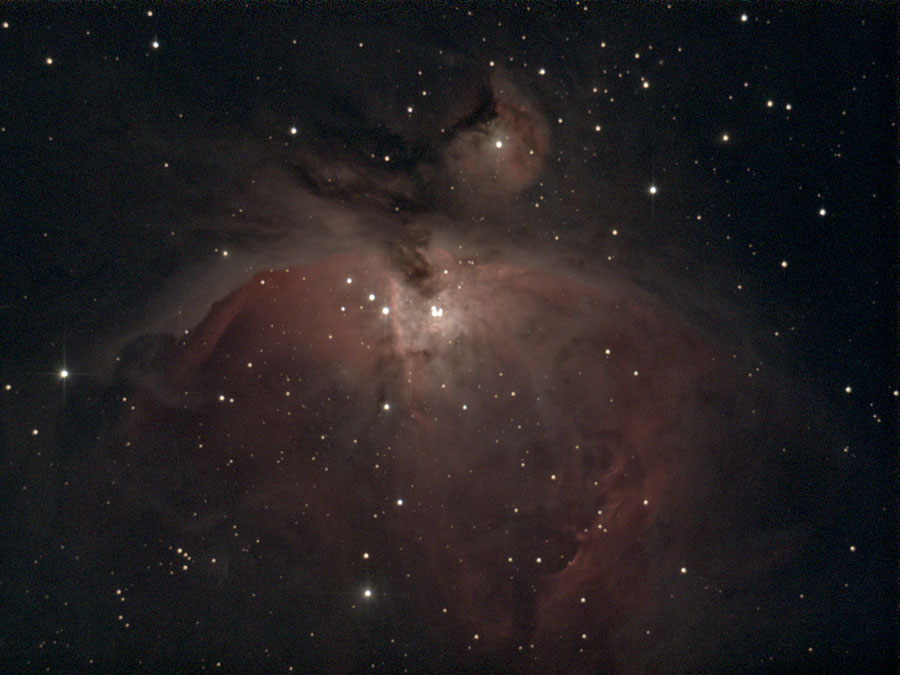
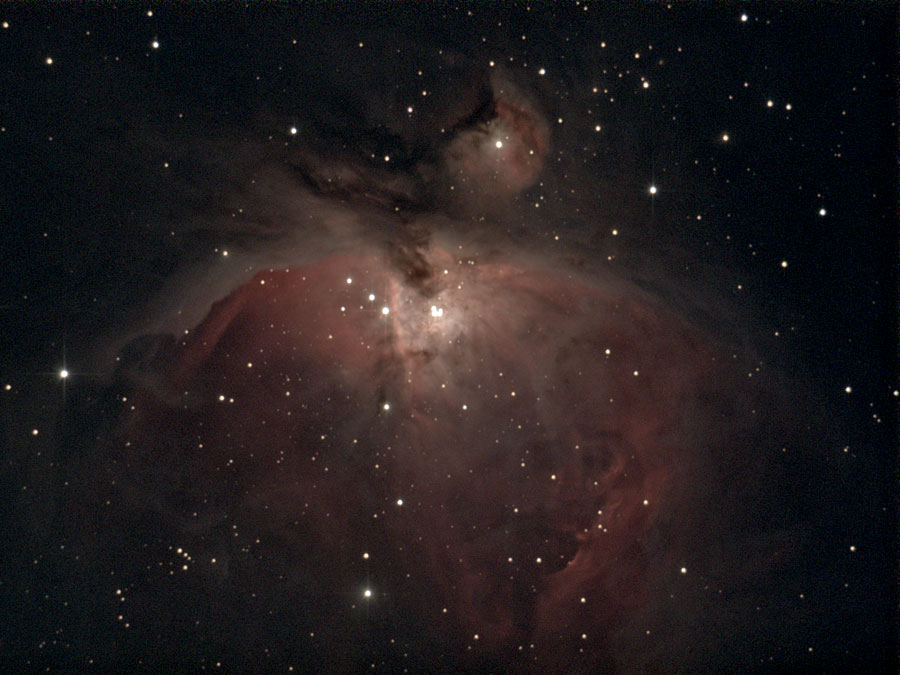
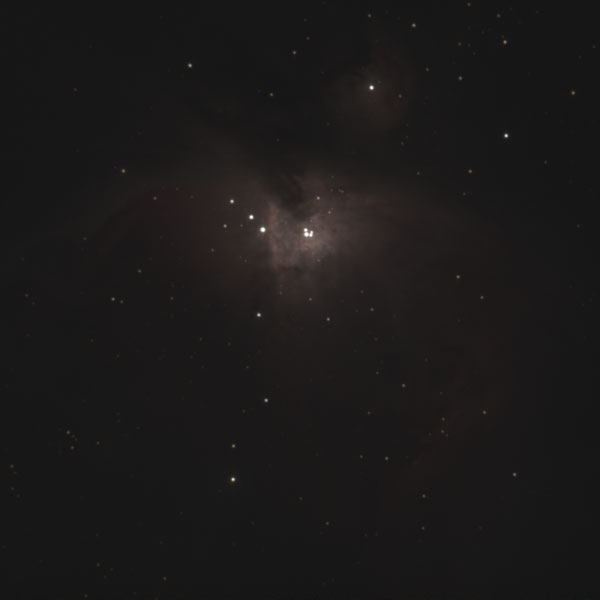
M 42 (Orion), unprocessed |
Ditto, post-processed |
Ditto, post-processed and sharpened |
||
 |
 |
 |
||
Ditto, brighter in second step* |
Ditto, b&w version |
Dito, even brighter (3 steps)* |
*) The quality suffered by doing these steps afterwards...
 |
 |
|
Ditto, once again created from the unprocessed original in one step |
Ditto, processed to be brighter |
|
 |
 |
|
Ditto, created from "replay stack" in one step |
Ditto, same as left, more saturated |
Eighth Attempt
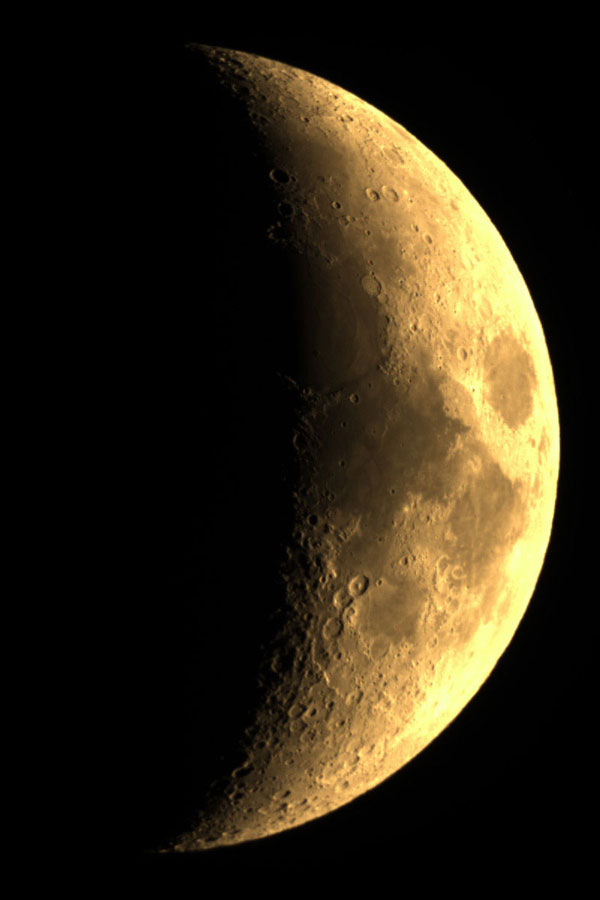
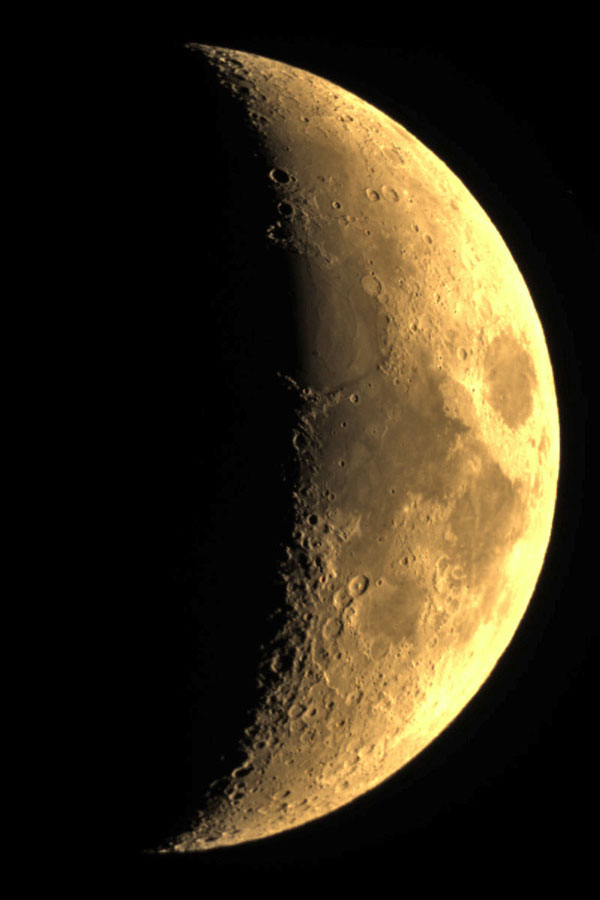
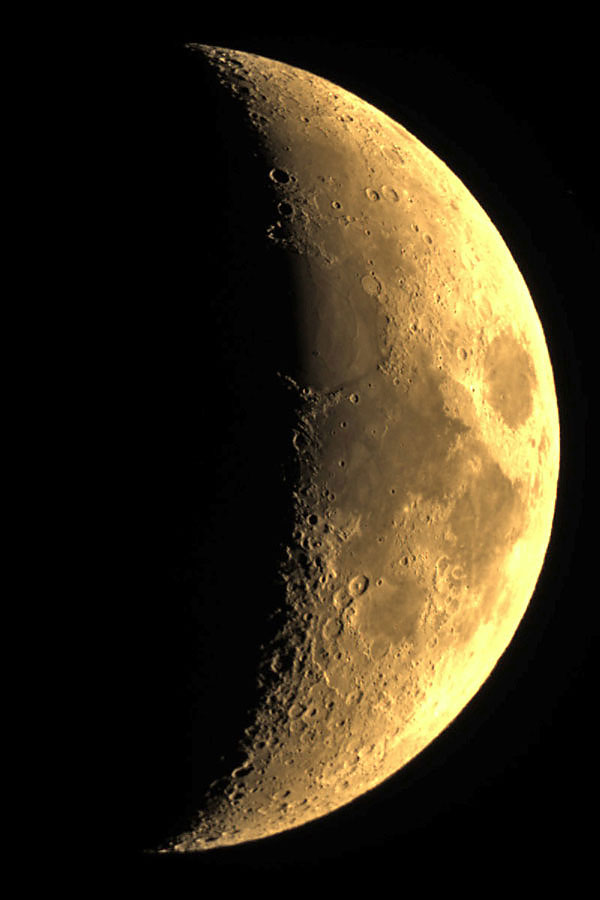
On February 21, 2018, the sky was clear again, so that I built up my Explorer 150PDS with GoTo mount once more. Aligning the mount with the StarSense module was successful, and I looked at a few deep sky objects (M 35, M 42, M 37). Then I attached the Atik Infinity camera to the telescope and looked at two "Winter" DSOs (M 35 and M 42), as well as at the Half Moon. All in all, the moon was already too bright for extensive photo attempts... The results were satisfying, but the moon photos were not as sharp as I had hoped for.
The following photos were taken with the Explorer 150PDS on the Star Discovery AZ GoTo mount (with StarSense module) and saved as 16-bit TIFF files:
 |
 |
 |
||
M 35 (Gemini), unprocessed |
Ditto, processed |
Ditto, processed and sharpened |
||
 |
 |
 |
||
M 42 (Orion), unprocessed |
Ditto, processed and sharpened |
Ditto, processed alternatively and sharpened |
||
 |
 |
 |
||
Half Moon, unprocessed |
Ditto, processed |
Ditto, processed and sharpened |
First Conclusions
Only Poor Results at First, but Now I Can See Light at the End of the Tunnel...
The results I initially achieved with the Atik Infinity camera are certainly way inferior to what can be achieved with it. Nevertheless, I already "saw" more with it than I was able to find so far when observing purely visually. And I was also able to clearly "identify" sky objects using these photos, globular clusters, for example, using companion stars. I was therefore satisfied with the camera for a start.
On my 6" Explorer 150PDS Newton tube, it was already my fifth attempt, I was then able to achieve results that were at least presentable. Now I am even more satisfied with the camera! Of course, there is still a lot of room for improvement, but room for improvement is also nice, because this way I still have goals for the future...
At my sixth attempt, I used the Skymax-127 with a 2 x TS focal reducer and a 25 mm extension tube (about 2,31 x total) because the objects, M 45 and M 31 were so extended. The results seem to be OK but leave room for improvement...
My seventh attempt was with the Explorer 150PDS again and included the StarSence module for automatic alignment of the GoTo mount. This worked more or less well, and the photos were also OK, particularly the ones of the Orion Nebula M 42/43. In my eighth attempt, again with StarSense module, I visited only a few objects (M35, M 42) and the moon. All in all, it was already too bright for longer observations due to the moonlight. The moon photos were unfortunately not very sharp...
I will now report further observation sessions, similar to other telescopes, only in short form and present the best photos in the Atik Infinity photo gallery. Here is the first page: Deep Sky Observations with Atik Infinity End of 2017 - 2018.
Note: Over Christmas 2022, I sold my Atik Infinity camera (transferred on January 5, 2023). I therefore cannot report any further experiences with it here. |
Links
- Atik company Website, UK: www.atik-cameras.com
- Product page: www.atik-cameras.com/product/atik-infinity/
- Pages from German distributors for the Atik Infinity camera:
- Teleskop-Leasing (bought the camera here): www.teleskop-leasing.de/produkte/kameras/atik-infinity-farb-ccd-kamera- (in German)
- Teleskop-Spezialisten: www.teleskop-spezialisten.de/shop/Astrofotografie/Atik-Infinity-FARB-CCD-Kamera-11mm-Sensor-automatische-Aufnahmen::2166.html (in German) - www.teleskop-spezialisten.de/shop/Astrophotography/::2166.html (in English)
- Teleskop-Service/Express: www.teleskop-express.de/shop/product_info.php/info/p8213_Atik-Infinity-FARB-CCD-Kamera---Sensor-D-11-mm--vollautomatisch.html (in German) - www.teleskop-express.de/shop/product_info.php/info/p8212_Atik-Infinity-B-W-CCD-Camera---Sensor-D-11-mm--fully-automatic.html (in English)
- Astroshop: www.astroshop.de/kameras/atik-kamera-infinity-color/p,4831 (in German) - www.astroshop.eu/cameras/atik-camera-infinity-color/p,48316 (in English)
- Testing the 16 bit Atik Infinity camera with small telescopes (x-bit-astro-imaging, S.J. Wainwright): x-bit-astro-imaging.blogspot.de/2016/02/testing-16-bit-atik-infinity-camera.html
- ICX825 Based Astro-Video Camera Comparison (Jim Thompson): http://karmalimbo.com/aro/reports/Test%20Report%20-%20825%20Sensor%20Camera%20Comparison_07Oct2016.pdf
- Bis zur Unendlichkeit…. (Peter Oden, Peters Astroblog): videoastronomie.net/bis-zur-unendlichkeit
- Peter Oden: Videoastronomie: Der Himmel live und in Farbe. Sterne und Weltraum, Juni 2017. (in German)
- Electronically Assisted Astronomy with Atik Infinity (Fallenangel/Franz Müller): fallenangels2ndlife.dyndns.org/2017/03/01/electronically-assisted-astronomy-wit-atik-infinity/
- Einfach und schnell fotografieren mit der Atik Infinity (Sample photos, Peter Weigel, Teleskope Weigel): www.zudensternen.de/Atik_Infinity.html
- Review of the Atik Infinity Color Video Astronomy Camera (astrojedi, Live Astronomy blog): videoastronomy.blogspot.de/2016/02/review-of-atik-infinity-color-video.html
- Sky-Watcher Heritage 100P Information (4" Dobson)
- Sky-Watcher Explorer 150PDS Information (6" Newton)
- Sky-Watcher Skymax-127 OTA Information (5" Maksutov-Cassegrain)
- Sky-Watcher Star Discovery AZ GoTo Mount Information
- Ronald Stoyan (2014). Deep Sky Reiseführer, Oculum Verlag: www.oculum-verlag.de/detailview?no=2015 (in German)
- See also my page offering Astronomy Links.
|
made by |
| 27.03.2023 |