Ikarus StellarMate Plus - Information
Introduction | Look | Look with Telescope | First Remarks | Preliminary Conclusions | Links | Appendix: Data
Archive
On this page, I provide some information about my new astrophotography computer Ikarus StellarMate Plus (ordered on October 21, from Astroshop, arrived on October 26, 2021).
Note: For simplicity reasons, I will often call the device just "StellarMate"...
See the appendix for the technical data.
See also:
- Ikarus StellarMate Plus - Information Archive
- Ikarus StellarMate Plus - First Experiences (Part 1: with Wi-Fi only) Archive
- Ikarus StellarMate Plus - First Experiences (Part 2: with USB Dongle) Archive
- Ikarus StellarMate Plus - Further Experiences Archive
- Ikarus StellarMate Plus - Web Discussions Archive
- Ikarus StellarMate Plus - Instructions Archive
- Ikarus StellarMate Plus - Tips and Tricks Archive
Note: At the beginning of June 2024, I gave my astrophotography computer Ikarus StellarMate Plus away. I therefore cannot report any further experiences with it here. |
Introduction
In the following I would like to briefly introduce what the StellarMate Plus from Ikarus Technologies is, and why and for what purpose I purchased it.
What is the StellarMate Plus?
First of all, here is the product description (taken from astroshop.de/Ikarus), under which you may not imagine too much:
StellarMate PLUS is the Next Generation Internet-Of-Things (IoT) astrophotography gadget! The principle behind StellarMate is simple:
- Connect your equipment (Mount, DSLR/CCD, Focuser, Filter Wheel..etc) to StellarMate via USB/Bluetooth or Network.
- Connect to StellarMate from either your Mobile, Tablet, or Laptop/Desktop Computer.
- Start controlling your observatory and imaging from any major platform.
StellarMate is powered by Open Astronomy Instrumentation protocols (INDI), and Ekos, a cross-platform astrophotography suite for Windows, MacOS, and Linux. It supports highly accurate GOTOs, autofocus and autoguide capabilities, in addition to powerful image aquisition features and support for numerous mounts, CCDs, DSLRs, focusers, and much more. From controlling a lone mount in the field, to orchestration of state of the art observatory, StellarMate is the solution you have been waiting for.
Simply put, the StellarMate (Plus) is an astronomy computer that allows you to control your astronomy equipment and perform automated astrophotography. The hardware is based on the Raspberry Pi computer (or rather, it just is one...), the software on the StellarMate OS, which comes with a set of open source programs (Ekos, KStars, INDI protocol) that allow you to do this on Linux, Windows, and the Mac OS. Primarily, however, the StellarMate is not to be controlled from a laptop or desktop computer, but from a tablet computer (recommended) or a smartphone (IOS and Android are supported).
Why Did I Buy the StellarMate?
At my first contact with the StellarMate Plus, probably in the beginning of 2021, I took it for a pure astrophotography computer (which it probably was at the beginning...) and therefore I did not pursue it further, because I am an EAA supporter. The idea that you can also do EAA with the StellarMate was first brought to my attention by a video by "Cuiv the lazy Geek" (mid-October 2021), which was brought to my attention by a star friend. Through this video, I realized that the StellarMate can be used for EAA in a relatively simple way, even if the "Live Stacking" feature is only "experimental" and thus, rudimentary so far. In addition, the GoTo, i.e. the approach of the celestial objects, can be supported with platesolving, so that the accuracy of the approach of the targets no longer suffers from the mechanical inadequacies of the GoTo control.
In other words, the StellarMate Plus seems to fulfill two of my wishes: (1) it offers GoTo with platesolving support, which I have been wanting for some time, and (2) it offers live stacking, on which EAA is based - and I want to do just this. Of course, I cannot expect the StellarMate Plus to be the ideal solution for these two tasks yet, but it seems to bring me closer to my goals/wishes (which would still need to be proven...). And Cuiv even sees this modular solution as a serious, cheaper, and better alternative to commercially available devices like the Unistellar eVscope and the Vaonis Stellina and Vespera (his configuration presented in the video is similar to the Vespera). In my opinion, however, he does not provide the proof for "better" in his video...
- This is the link to Cuive's video: youtu.be/0JdtL950RjQ
- And this is the link to a discussion in Cloudy Nights (CN), which Cuiv started in the "EAA section" of the CN forums, to create attention to his video: www.cloudynights.com/topic/794637-a-beginner-friendly-smart-eaa-setup/?p=11441505
So I bought the StellarMate Plus to try out whether it is possible to put together a solution for EAA equal to or even better than my eVscope or my future Stellina. The GoTo supported by platesolving plays an important role for me, because I am not happy with the GoTo solutions I own (Sky-Watcher Star Discovery and AZ-GTi. as well as Celestron StarSense module). Unfortunately, the StarSense module, which also uses platesolving algorithms, was not able to convince me so far (and I know of starfriends who sold it again because they had no success with it...).
Why did I not buy any of the versions of ZWO's ASIAir? These devices have a similar field of application as the Stellarmate (Plus) and are probably easier to use because of the unified user interface. Unfortunately, they require an EQ mount, whereas I want to start with an AZ mount. The second limitation, that these devices only work with ZWO cameras, would exclude my Atik Infinity, but I feel that this is not tooo serious for me...
So the StellarMate Plus is now an attempt to put together my own "eVscope" - or even several of them, in order to get more flexible photography options* (in the context of EAA, not astrophotography...)! As components are available to me:
- Telescope tubes: Omegon PS 72/432, TS-Optics TLAPO1027, Celestron C5 and C8
- GoTo mount: Sky-Watcher AZ-GTi (with and without Wedge), Sky-Watcher Star Discovery
- Astronomy camera: ZWO ASI224, Atik Infinity
*) The options result from the cameras (pixel size and number) and the telescope tubes (focal length and, to a lesser extent, aperture and focal ratio).
That would be, if I do not consider the Sky-Watcher Wedge and the Celestron reducer/corrector, 16 combinations, which, of course, are not all possible or useful. 8 possibilities seem reasonable to me, but even these I will hardly want to exhaust in practice:
| Camera >> | ASI224 |
Infinity |
||
| Tube / Mount > | AZ-GTi | SD** | AZ-GTi | SD** |
| Omegon PS 72/432 | yes | hm* | yes | hm |
| TS-Optics TLAPO1027 | yes | ja | ||
| Celestron C5 | yes | hm | yes | hm |
| Celestron C8 | yes | ja | ||
*) hm means: It does work, but I will not test this option... **) **) So far (end of February 2022) it looks more like that my Star Discovery mount does not "coperate" with the StellarMate (also not when using the USB dongle).
Platesolving and Issues when Using It
Platesolving uses photos of the nightly sky and compares them with an internal database to determine, which region of the sky the photo shows. There are several ways to use this technique:
- The Celestron StarSense module has a built-in camera that it uses to take pictures in order to orient itself to the sky. This is typically done once at the beginning of a session and must be repeated if the GoTo accuracy degrades over the course of a session. The GoTo approaches themselves are done without platesolving assistance with the means of the mount being used, but there are ways to adapt and improve the sky model.
- Programs such as SharpCap use platesolving to evaluate an image taken by the astrocamera, so this would be "online" platesolving. To what extent the result is also used to improve the GoTo approach is unknown to me.
- The Website Astrometry.net uploads sky images, determines the sky section shown, and marks DSO and stars detected on the photo. So this is a kind of "offline" platesolving. Apparently, Astrometry.net can also be used for "online" platesolving, because the Stellarmate uses this Website for this purpose (details to be determined...).
- Of course, electronic telescopes such as the eVscope and the Stellina/Vespera also use platesolving to orient themselves to the sky. At least, the eVscope also seems to correct GoTo using sky images - and possibly tracking as well. Details on this are, however, hard to come by....
- The StellarMate Plus offers a "Go and Solve" function via the Ekos application, where it appears that any GoTo approach is aided by platesolving. Whether tracking is also supported, I do not know.
I hit on two issues that platesolving suffers from:
- Stars must be visible in the corresponding area of the sky for platesolving to work. A "dumb" GoTo mount, on the other hand, is set up with the help of alignment stars and can then, in principle, approach any region of the sky, even those where no stars are visible.
- The section of sky captured by a camera must have a certain minimum size (typically 0.5°, but less is now sufficient for some systems) and also contain sufficiently enough stars. This requirement can be problematic and impossible to meet for telescope tubes with long focal lengths and cameras with a small field of view (and more so if you combine the two...).
Here for illustration the associated fields of view and further data of my tubes and cameras:
| Camera >> | ASI224 |
Infinity |
ASI294 |
|
| Tube V | Pixel Number; Pixel Size > | 1304 x 976; 3.75 µm | 1392 x 1040; 6.45 µm | 4144 x 2822; 4.63 µm |
| Omegon PS 72/432 | 432 mm, f/6 | 0.65° x 0.48° | 1.19° x 0.89° | 2.54° x 1.73° |
| TS-Optics TLAPO1027 | 714 mm, f/7 | 0.39° x 0.29° | 0.72° x 0.54° | 1.54° x 1.05° |
| Celestron C5 | 1250 mm, f/10 | 0.22° x 0.17° | 0.41° x 0.31° | 0.88° x 0.60° |
| Celestron C8 | 2032 mm, f/10 | 0.14° x 0.10° | 0.25° x 0.19° | 0.54° x 0.37° |
Red: Field of view potentially too small for platesolving
So, as long as the platesolving algorithms need image fields of at least about 0.5°, only a camera with a larger field of view like, for example, the ZWO ASI294MC will help... With a "normal" GoTo control, however, I might take photos (more or less well) with any of these combinations.
What Can be Found on this Page?
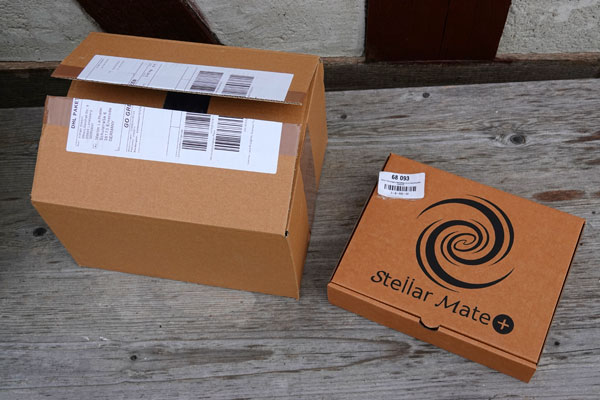
On this page (StellarMate Plus - Information) I present the unpacking of the StellarMate Plus, its look, the look of different equipment combinations, and its technical data. I will present my experiences and attempts to get a working equipment together with the StellarMate Plus on further pages (see at the beginning of this page). In doing so, I am concerned with exactly the functionality that Cuiv presents in his video, that is, mainly live stacking. That means in plain language: to bypass the whole complexity of the system and to develop simple procedures for EAA with StellarMate Plus (or to copy them from Cuiv...).
Look
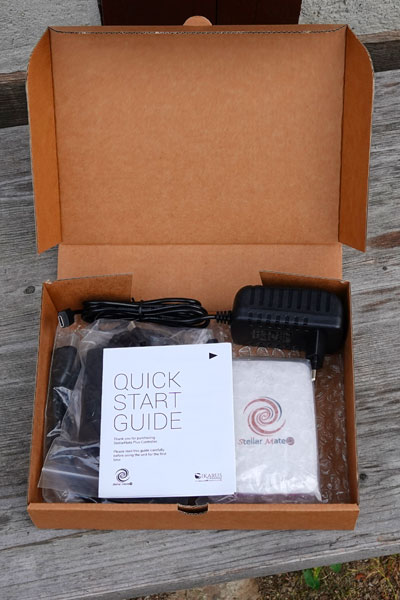
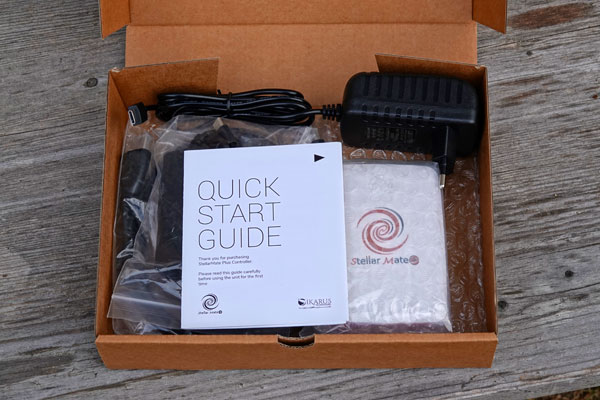
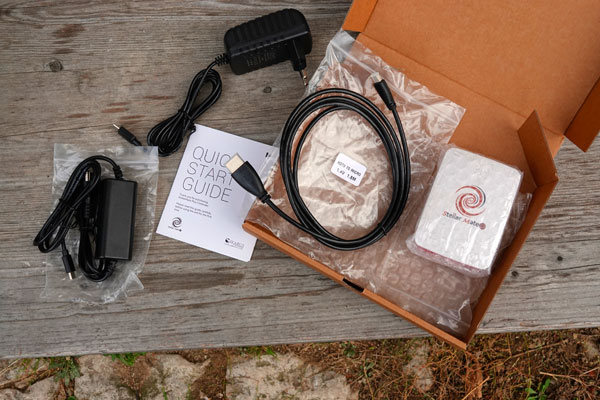
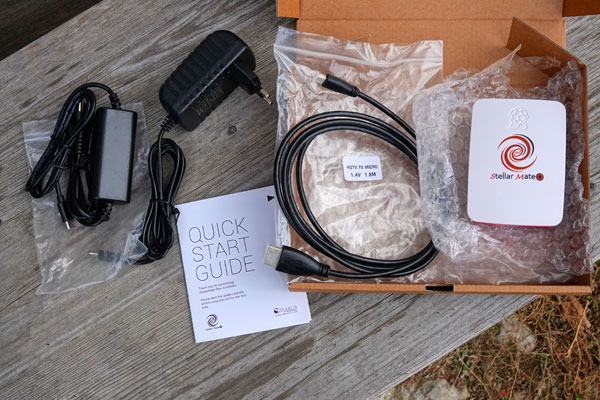
Unboxing
|
|
Center a nd right: Box opened |
|
|
|
|
|
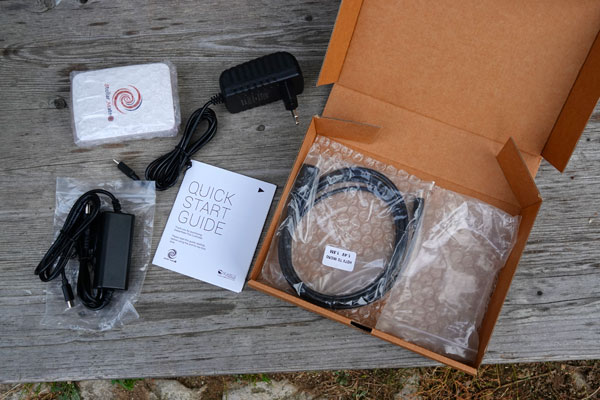
The package content ... |

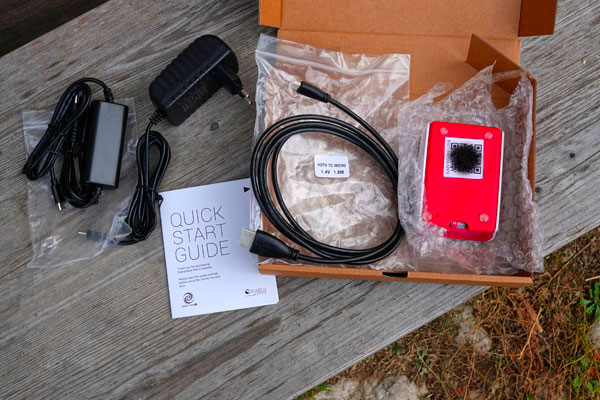
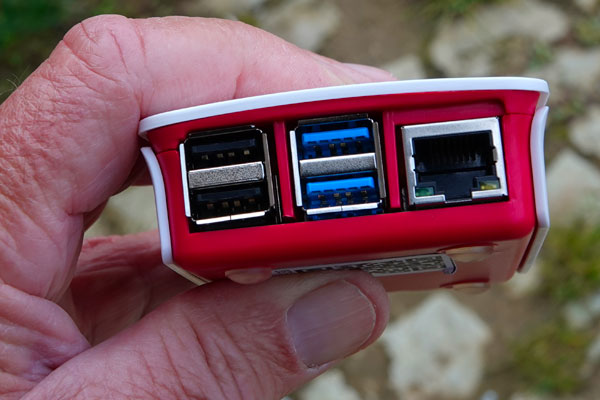
StellarMate Plus
USB connections, Ethernet connection |
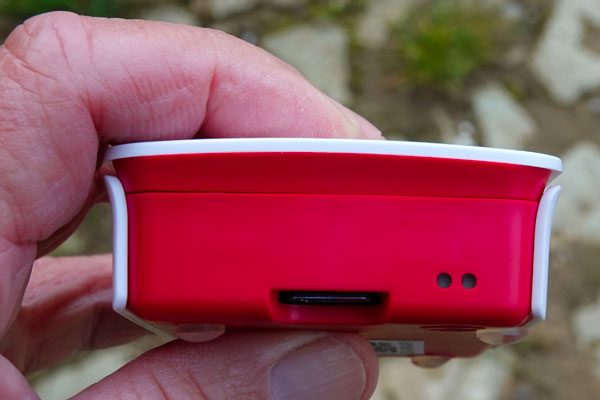
Other side with miniSD plug |
Various connections (long side) |
Top |
Bottom, look at how the feet are fixed... |
Bottom |


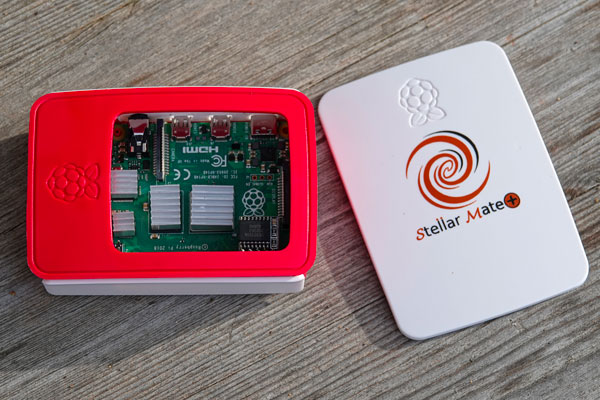
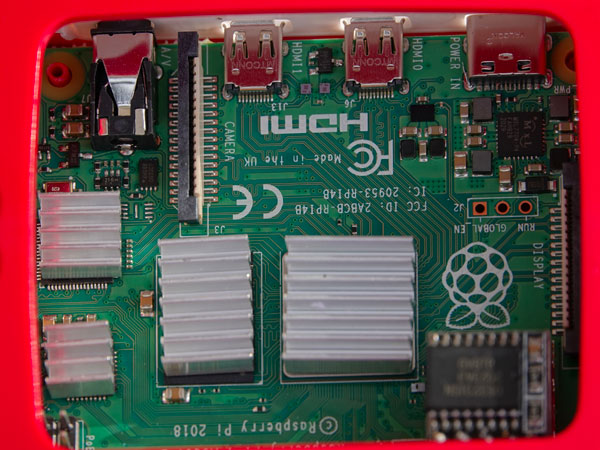
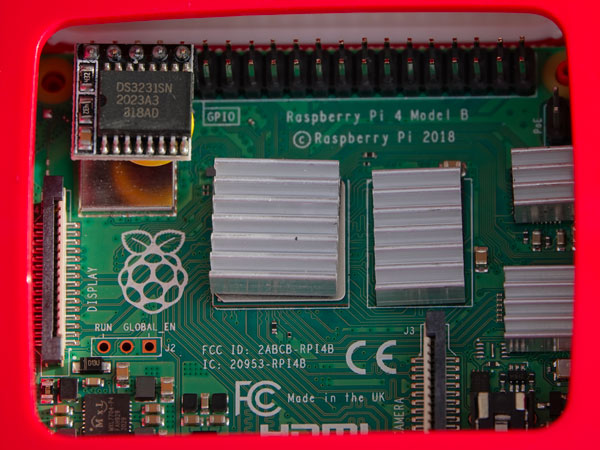
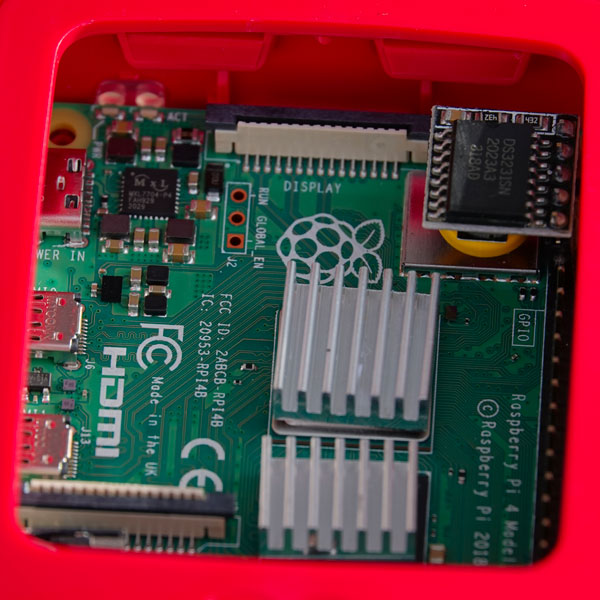
Raspberry Pi Computer
|
|
|
|
|
|

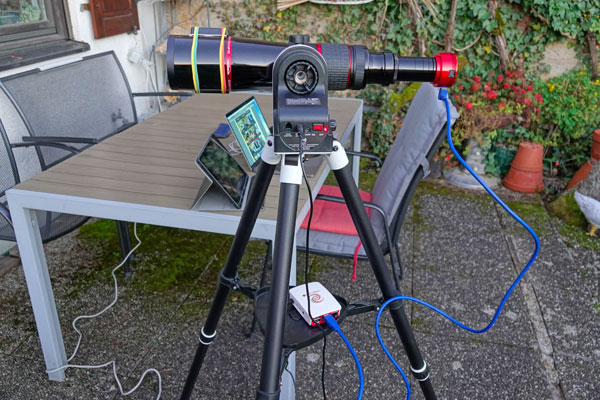
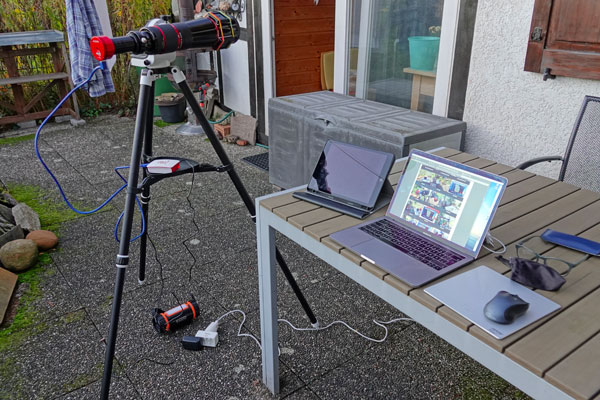
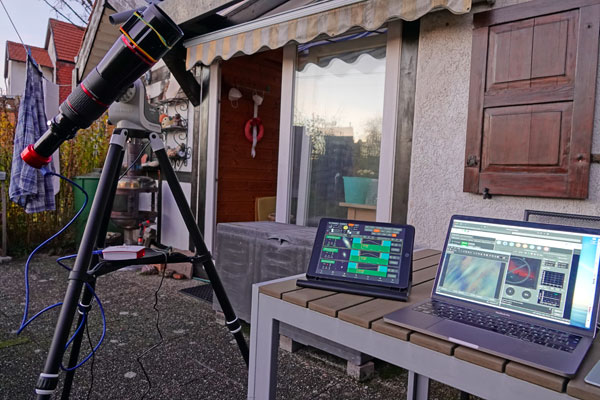
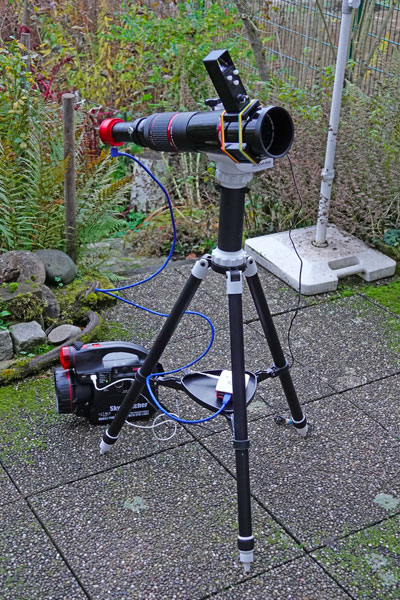
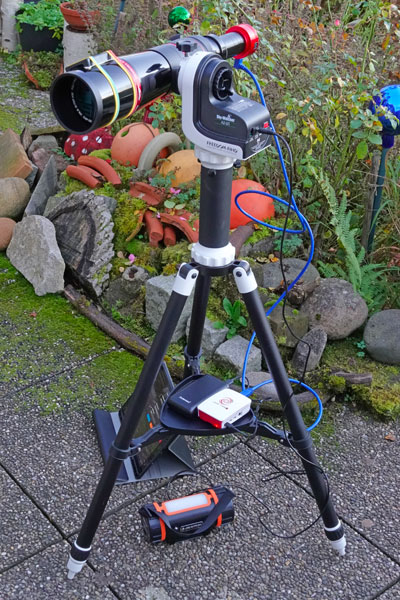
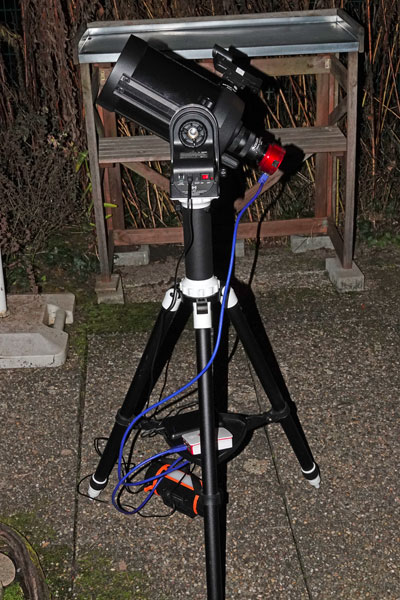
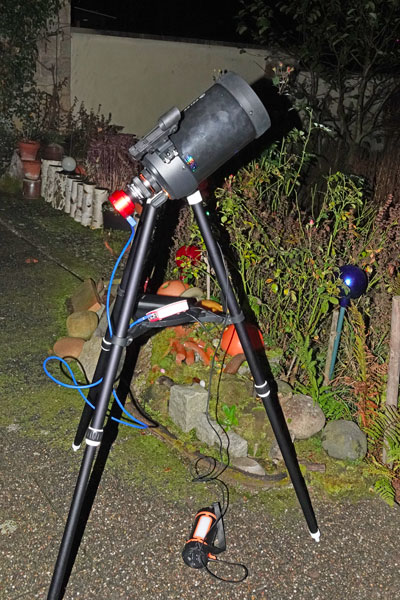
Look with Telescope
Stellarmate Plus with PS 72/432 on AZ-GTi Mount
 |
 |
 |
 |
 |
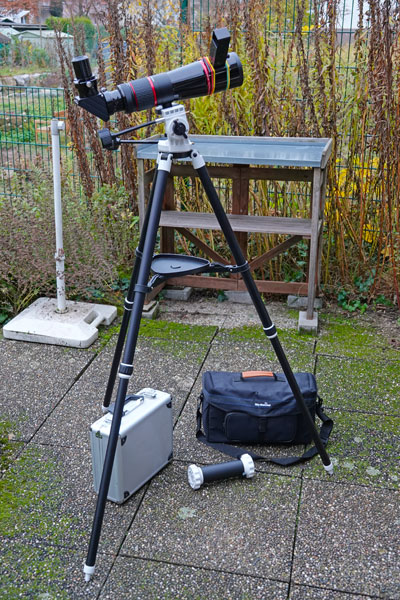
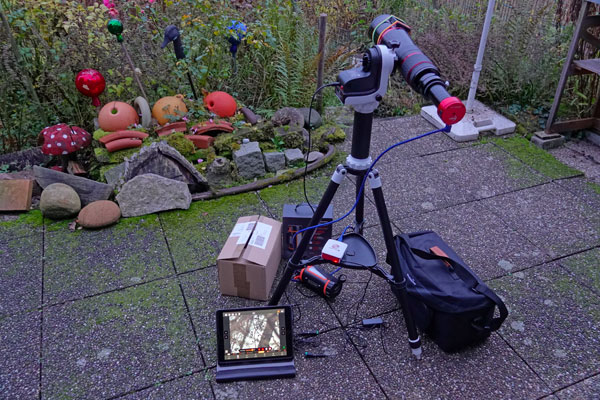
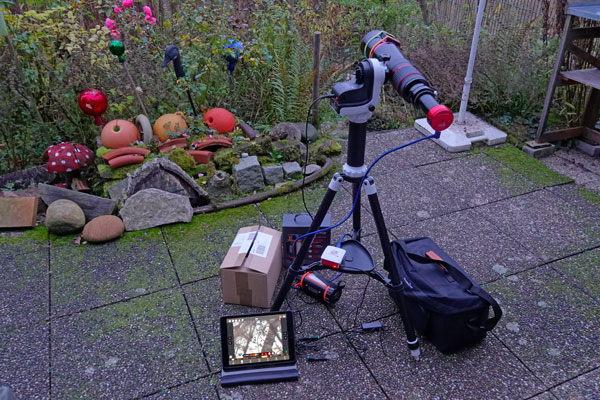
Stellarmate Plus with PS 72/432 on AZ-GTi Mount - Variants and Comparison with visual Equipment (1.25")
StellarMate equipment with cases (in part...) |
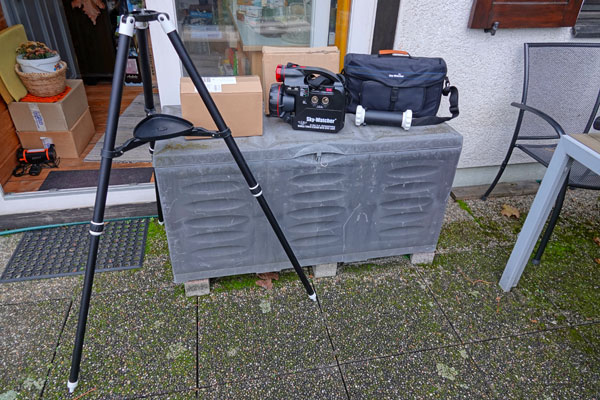
StellarMate equipment ready for travelling |
Visual equipment with cases (in part...) |
StellarMate equipment with extensiontube (and finder) |
Ditto |
Ditto |
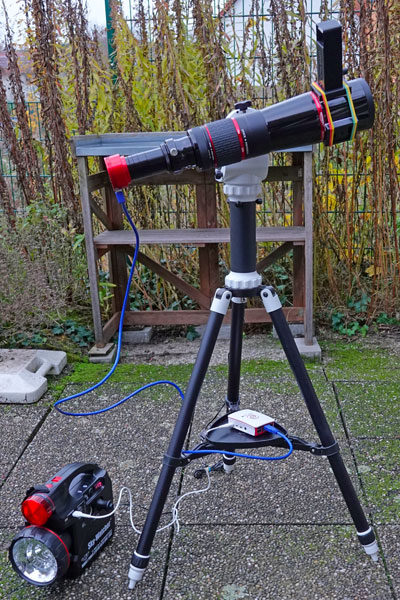
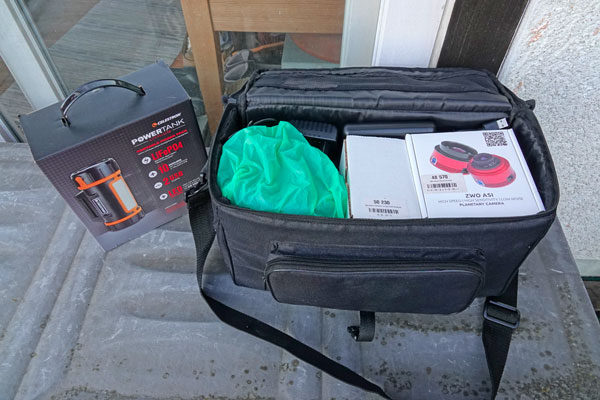
StellarMate-Ausrüstung with extension tube and Celstron PowerTank (minimal equipment) |
Ditto |
I will check whether parts that are in the brown box can be stored in the telescope bag (possibly without their boxes). *) The Celestron PowerTank is considerably smaller and lighter then the one from Sky-Watcher. The is, however more flexible with respect to the connections. |
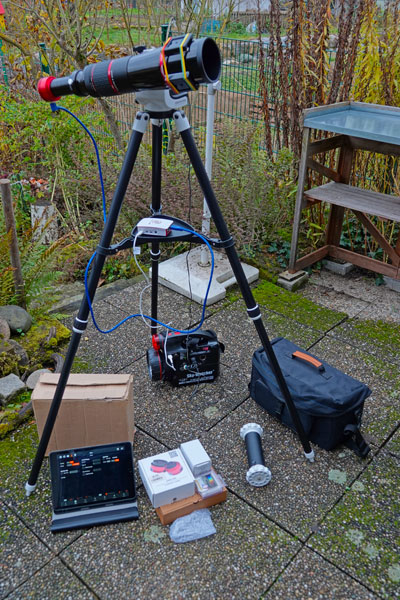

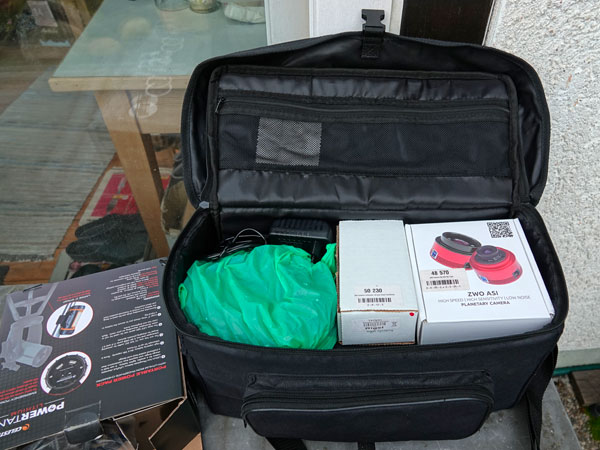
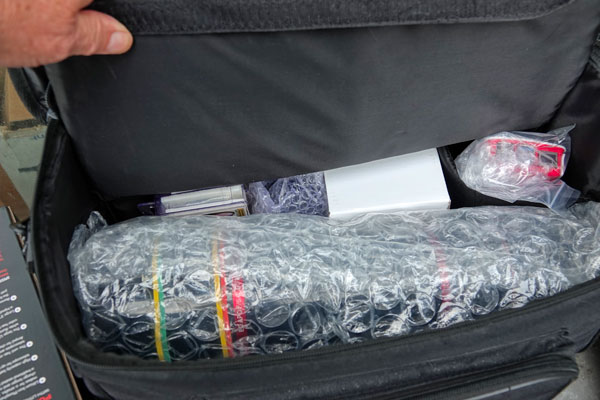
What I did on the photos below! It does work for me:
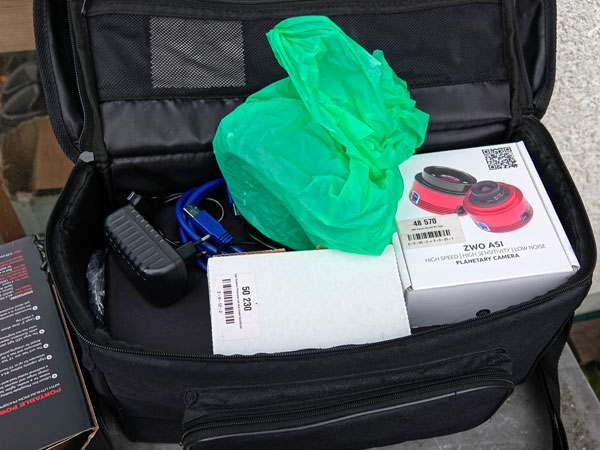
The packed StellarMate eqipment |
View of the telescope bag from above |
Ditto, cables packed more efficiently... |
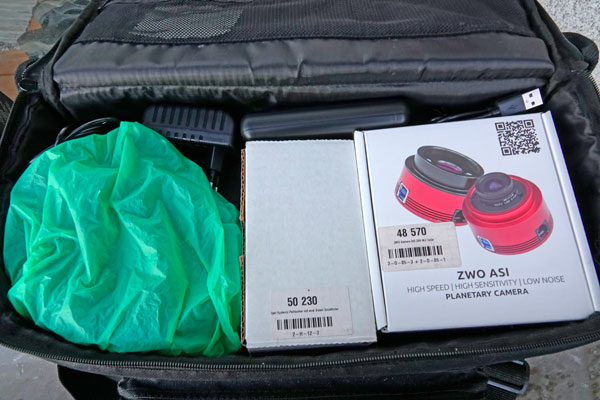
Upper parts removed ; view of the telescope, the StellarMate and further... |
... accessories. In the pouch at the front, I put the Bahtinov mask (not shown). |
In principle, you might pack the mount head, the center column, and the storage board of the mount into another box or bag.... All in all, this is a very compact EAA kit!
|


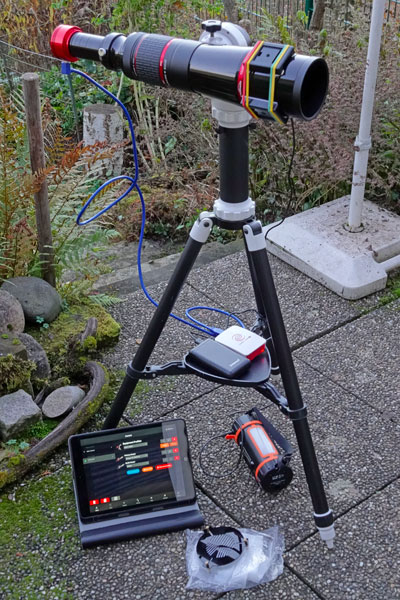
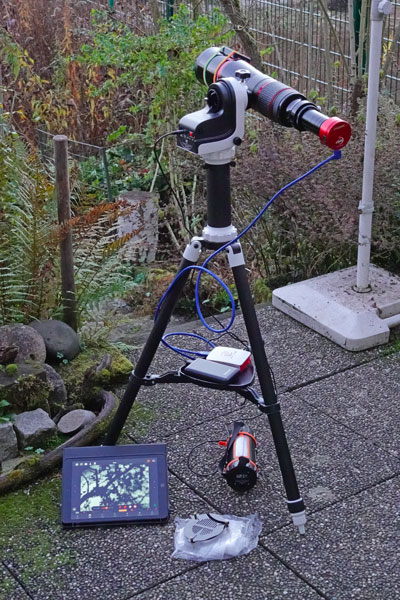
Finally, I added a small PowerBank for powering the StellarMate to the above equipment (instead of a distribution cable and other cables and adapters). The following photos show the StellarMate with a PowerBank as power supply:
Intenso 20.000 mAh PowerBank as power supply for the StellarMate computer |
The connections of the PowerBank; the cable serves for charging the PowerBank via a USB-Netzteil |
|
The packed equipment with PowerBank (hard to see...) |
Ditto withount the mount |
Ditto, closer view; PowerBank at the rear side |
StellarMate equipment with center column, PowerBank, and Celestron PowerTank (minimum equipment) |
Ditto; in the front you can see the Bahtinov mask |
Ditto |
In principle, you might pack
the mount head, the center column, and storage plate into another box
or bag.... |
||


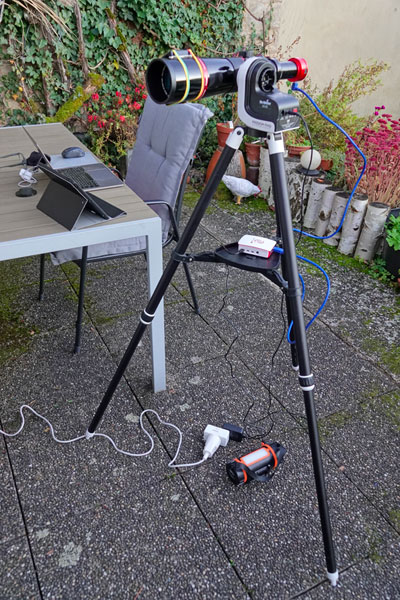
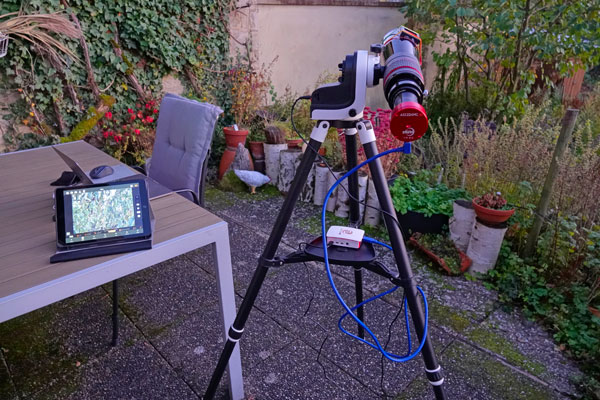
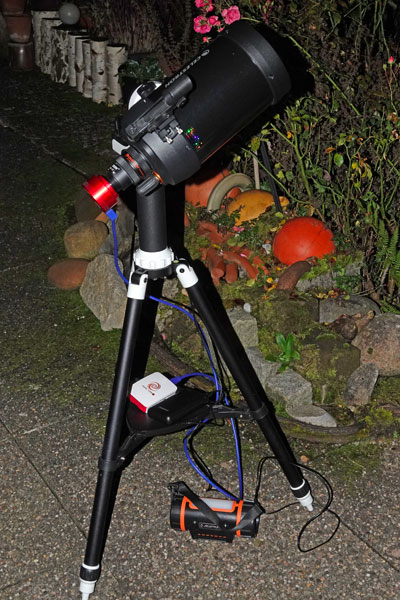
Stellarmate Plus with C5 on AZ-GTi Mount
StellarMate equipment with C5, mount with center column |
Ditto |
Ditto |
StellarMate equipment with C5, mount without center column |
Ditto |
Ditto |
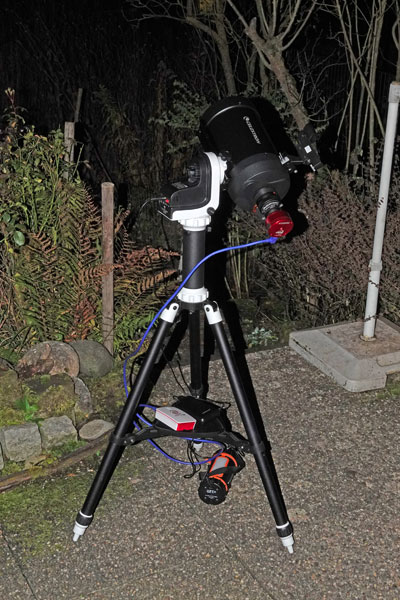
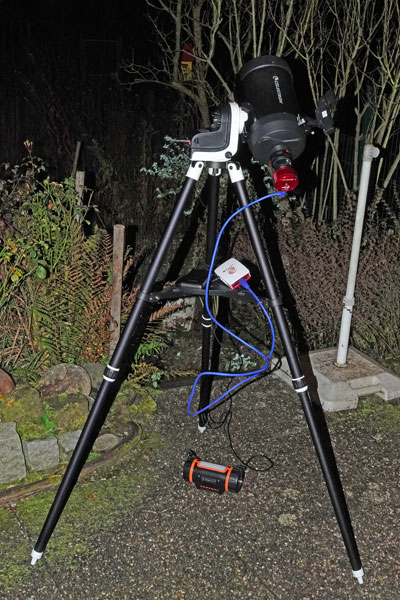
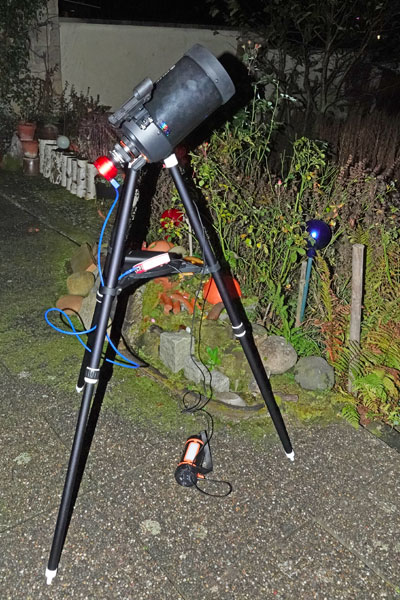
This is also a very compact EAA equipment! Here, the StellarMate uses a powerbank (next to the StellarMate) as its power supply.
First Remarks
I had the StellarMate Plus sent to our vacation home where I have only limited internet access. So I was not able to re-watch Cuiv's video there, nor was I able to update the StellarMate OS or connect the StellarMate Plus to my equipment. So I was left with initial startup attempts (I was able to download the app at relatives'...) and tedious reading of the manual. Well, the manual was written by a programmer, and it shows... I therefore defined my goal in such a way: Despite the manual and with the help of Cuiv's video get the project going and come up with instructions with simple procedures that "circumvent" all the complexity of the system.
I describe my first experiences on page Ikarus StellarMate Plus - First Experiences. The status at the end of February 2022 is that I can operate the StellarMate with the AZ-GTi mount in various network configurations (a misunderstanding had "held me up" at the beginning) and also when using a cable connection via USB dongle, which I prefer because of the better stability of the connection to the Wifi connection.
The "sticking point" right now seems to be, whether I can get the GoTo to work reliably with PlateSolving. One problem might be that my telescope/camera combinations offer a too small FOV.
Meanwhile, I have started with the instructions and a tips and tricks page:
But it is still a long way to go...
Preliminary Conclusions
My preliminary conclusions are: It takes some time... But the project has started! (Actually, it ended before it really started...)
Note: At the beginning of June 2024, I gave my astrophotography computer Ikarus StellarMate Plus away. I therefore cannot report any further experiences with it here. |
Links
- Ikarus Technologies, StellarMate: www.stellarmate.com
- StellarMate Manual: www.stellarmate.com/help
- Ikarus Technologies StellarMate PLUS Astrophotography Controller (astroshop.eu): www.astroshop.eu/controls/ikarus-technologies-stellarmate-plus-astrophotography-controller/p,68093
- HOWTO: Make a POWERFUL smart TELESCOPE! Better than much bigger telescopes! (Cuiv the Lazy Geek): youtu.be/0JdtL950RjQ
- Discussion in Cloudy Nights (CN), which Cuiv started to create attention to his video: www.cloudynights.com/topic/794637-a-beginner-friendly-smart-eaa-setup/?p=11441505
- See also my page offering Astronomy Links.
Appendix: Data of the Ikarus StellarMate Plus
Package Content (From the Manual, adapted)
- StellarMate Plus Unit
- 1.8m mini HDMI Cable
- 3A 5V USB-C Power Supply
- 2-meter 12V DC to 5V DC USB-C cable. This can be plugged to any 12V field battery to power StellarMate.
- Quick Start Guide
- MicroSD Card 32GB (already inserted to StellarMate Plus with SM OS 1.5.9)
Specifications (From the Manual, adapted)
StellarMate Plus is based on Raspberry PI 4B, a proven platform for embedded computers for many years.
- SoC: Broadcom BCM2711 64-bit SoC
- CPU: Quad core Cortex-A72 (ARM v8) @ 1.5GHz
- GPU: Broadcom VideoCore VI
- Memory: 2 GB LPDDR4-3200 SDRAM
- Real Time Clock (DS3231) with battery.
- Storage: 32GB MicroSD card class 10.
- USB: 2 USB 3.0 ports; 2 USB 2.0 ports.
- Network: Gigabit Ethernet, 2.4 GHz and 5.0 GHz IEEE 802.11ac wireless, Bluetooth 5.0, BLE
- Mini HDMI: 1.8m Gold Plated Mini HDMI cable.
- Power: 3A 5V USB-C power supply.
- 12v to 5v USB-C 2-meter cable. Power SM Plus on the field from any 12 V power source.
RTC module: StellarMate Plus ships with a Real-Time Clock with battery to keep StellarMate Plus time accurate even when power is off. A real-time clock is critical for accurate astronomy & astrophotography work.
|
made by |
| 07.10.2024 |