Ikarus StellarMate Plus - Tips and Tricks
Preface | Introduction | Overview | Tips and Tricks | Final Words | Links
Archive
On this page, I report on some tips and tricks for working with my new astrophotography computer Ikarus StellarMate Plus (ordered on October 21, from Astroshop, arrived on October 26, 2021).
Note: For simplicity reasons, I will often call the device just "StellarMate"...
See also:
- Ikarus StellarMate Plus - Information Archive
- Ikarus StellarMate Plus - First Experiences (Part 1: with Wi-Fi only) Archive
- Ikarus StellarMate Plus - First Experiences (Part 2: with USB Dongle) Archive
- Ikarus StellarMate Plus - Further Experiences Archive
- Ikarus StellarMate Plus - Web Discussions Archive
- Ikarus StellarMate Plus - Instructions Archive
- Ikarus StellarMate Plus - Tips and Tricks Archive
Note: At the beginning of June 2024, I gave my astrophotography computer Ikarus StellarMate Plus away. I therefore cannot report any further experiences with it here. |
Preface
What the StellarMate Plus from Ikarus Technologies is, and why and for what purpose I purchased it can be found on page Ikarus StellarMate Plus - Information. On this page, I report on some tips and tricks for working with it.
|
|
 |
Introduction
On this page, I collect simple tips and tricks for working with the StellarMate Plus from version 1.6 on. In older versions, many things are different, other errors occur; so I can not report on it, because my device came with version 1.5.9. and was updated quickly to versions 1.6.0 and 1.6.1. Meanwhile, I updated to version 1.7.0.
Many of these "tricks" are reactions to the current situation, where one thing or another does not work as one would expect it, so that "workarounds" have to be thought out. Other things may be less well known, so I want to "make them known" here. When things have settled, I will move them to an archive in the appendix in case someone needs it after all....
Overview
- Saving Photos (Captures) and Live Stack Photos (Captures) with a Trick
- Saving Live Stack Photos (Captures)
- Transfering Live Stack Photos (Captures) to the Apple Macintosh
- Targets Screen: Understanding the Search for Targets...
- Mount Quick Control: Accessing the Moon and the Sun, as Well as Other Targets
Tips and Tricks
Saving Photos (Captures) and Live Stack Photos (Captures) with a Trick
Note: This tip initially applied to the following configuration: The mount serves as a hotspot, the StellarMate is connected to this network, and the iPad, on which I control the StellarMate using the app, is also connected to this network. Meanwhile, I use the StellarMate as the hotspot - and for this configuration the procedure below works as well.
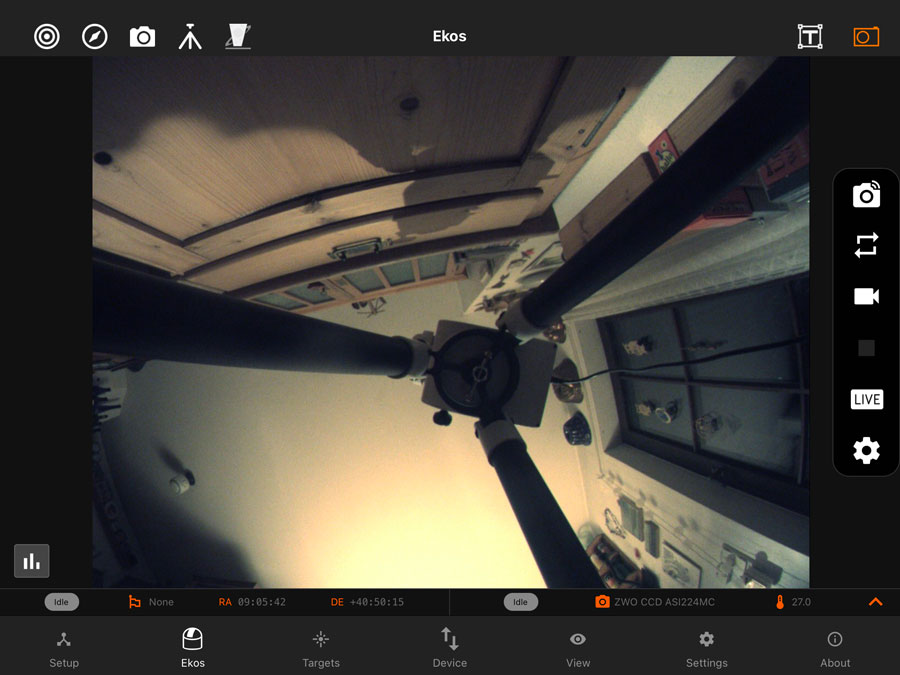
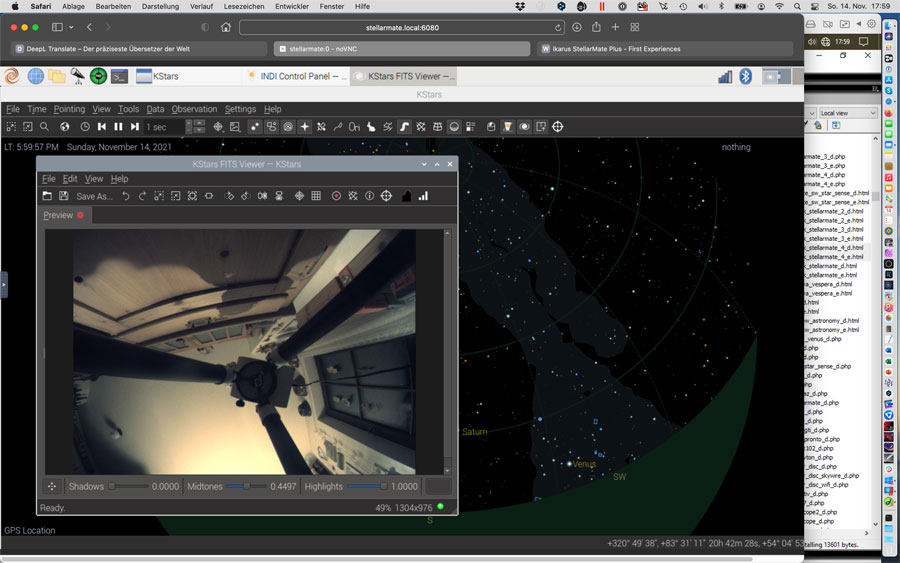
Problem: Initially, I had not found any ways of saving photos (called "captures"), when capturing photos using the camera icon or using the live stacking mode (see the photo below on the left). In the meantime, I was able to solve some of these issues. The "open question" is still, where the photos are stored when I click the camera icon.
 |
 |
|
Photo (or live stack) shown in the app |
The same photo shown in the KStars FITS Viewer |
When I connect my laptop (a MacBook Pro) to the mount's network* and run
KStars on it, the FITS viewer comes up showing the most recent photo, whenever
I take a photo with the camera icon (on the right) or save a live stack.
*) Or the network that is used as the hotspot - currently, I use the StellarMate as the hotspot.
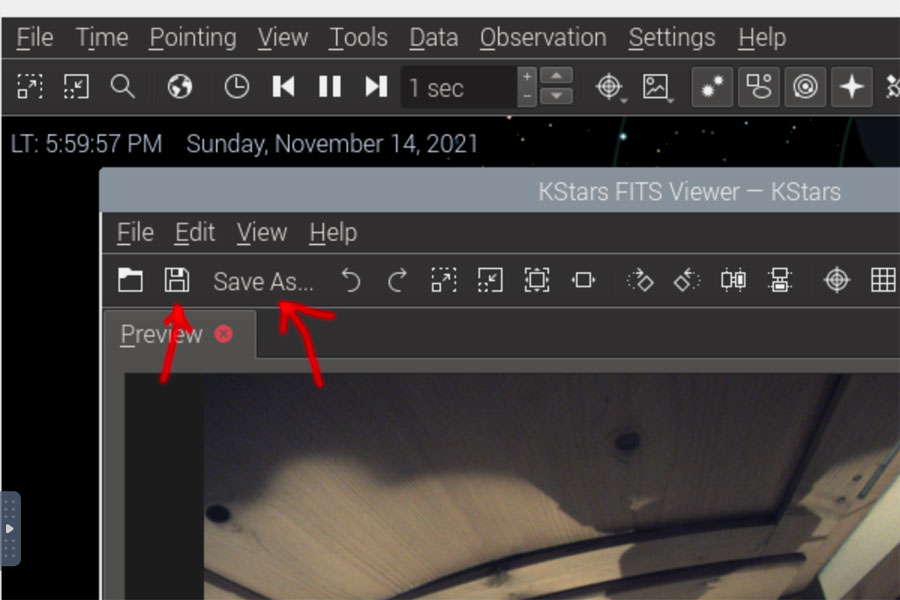
In the
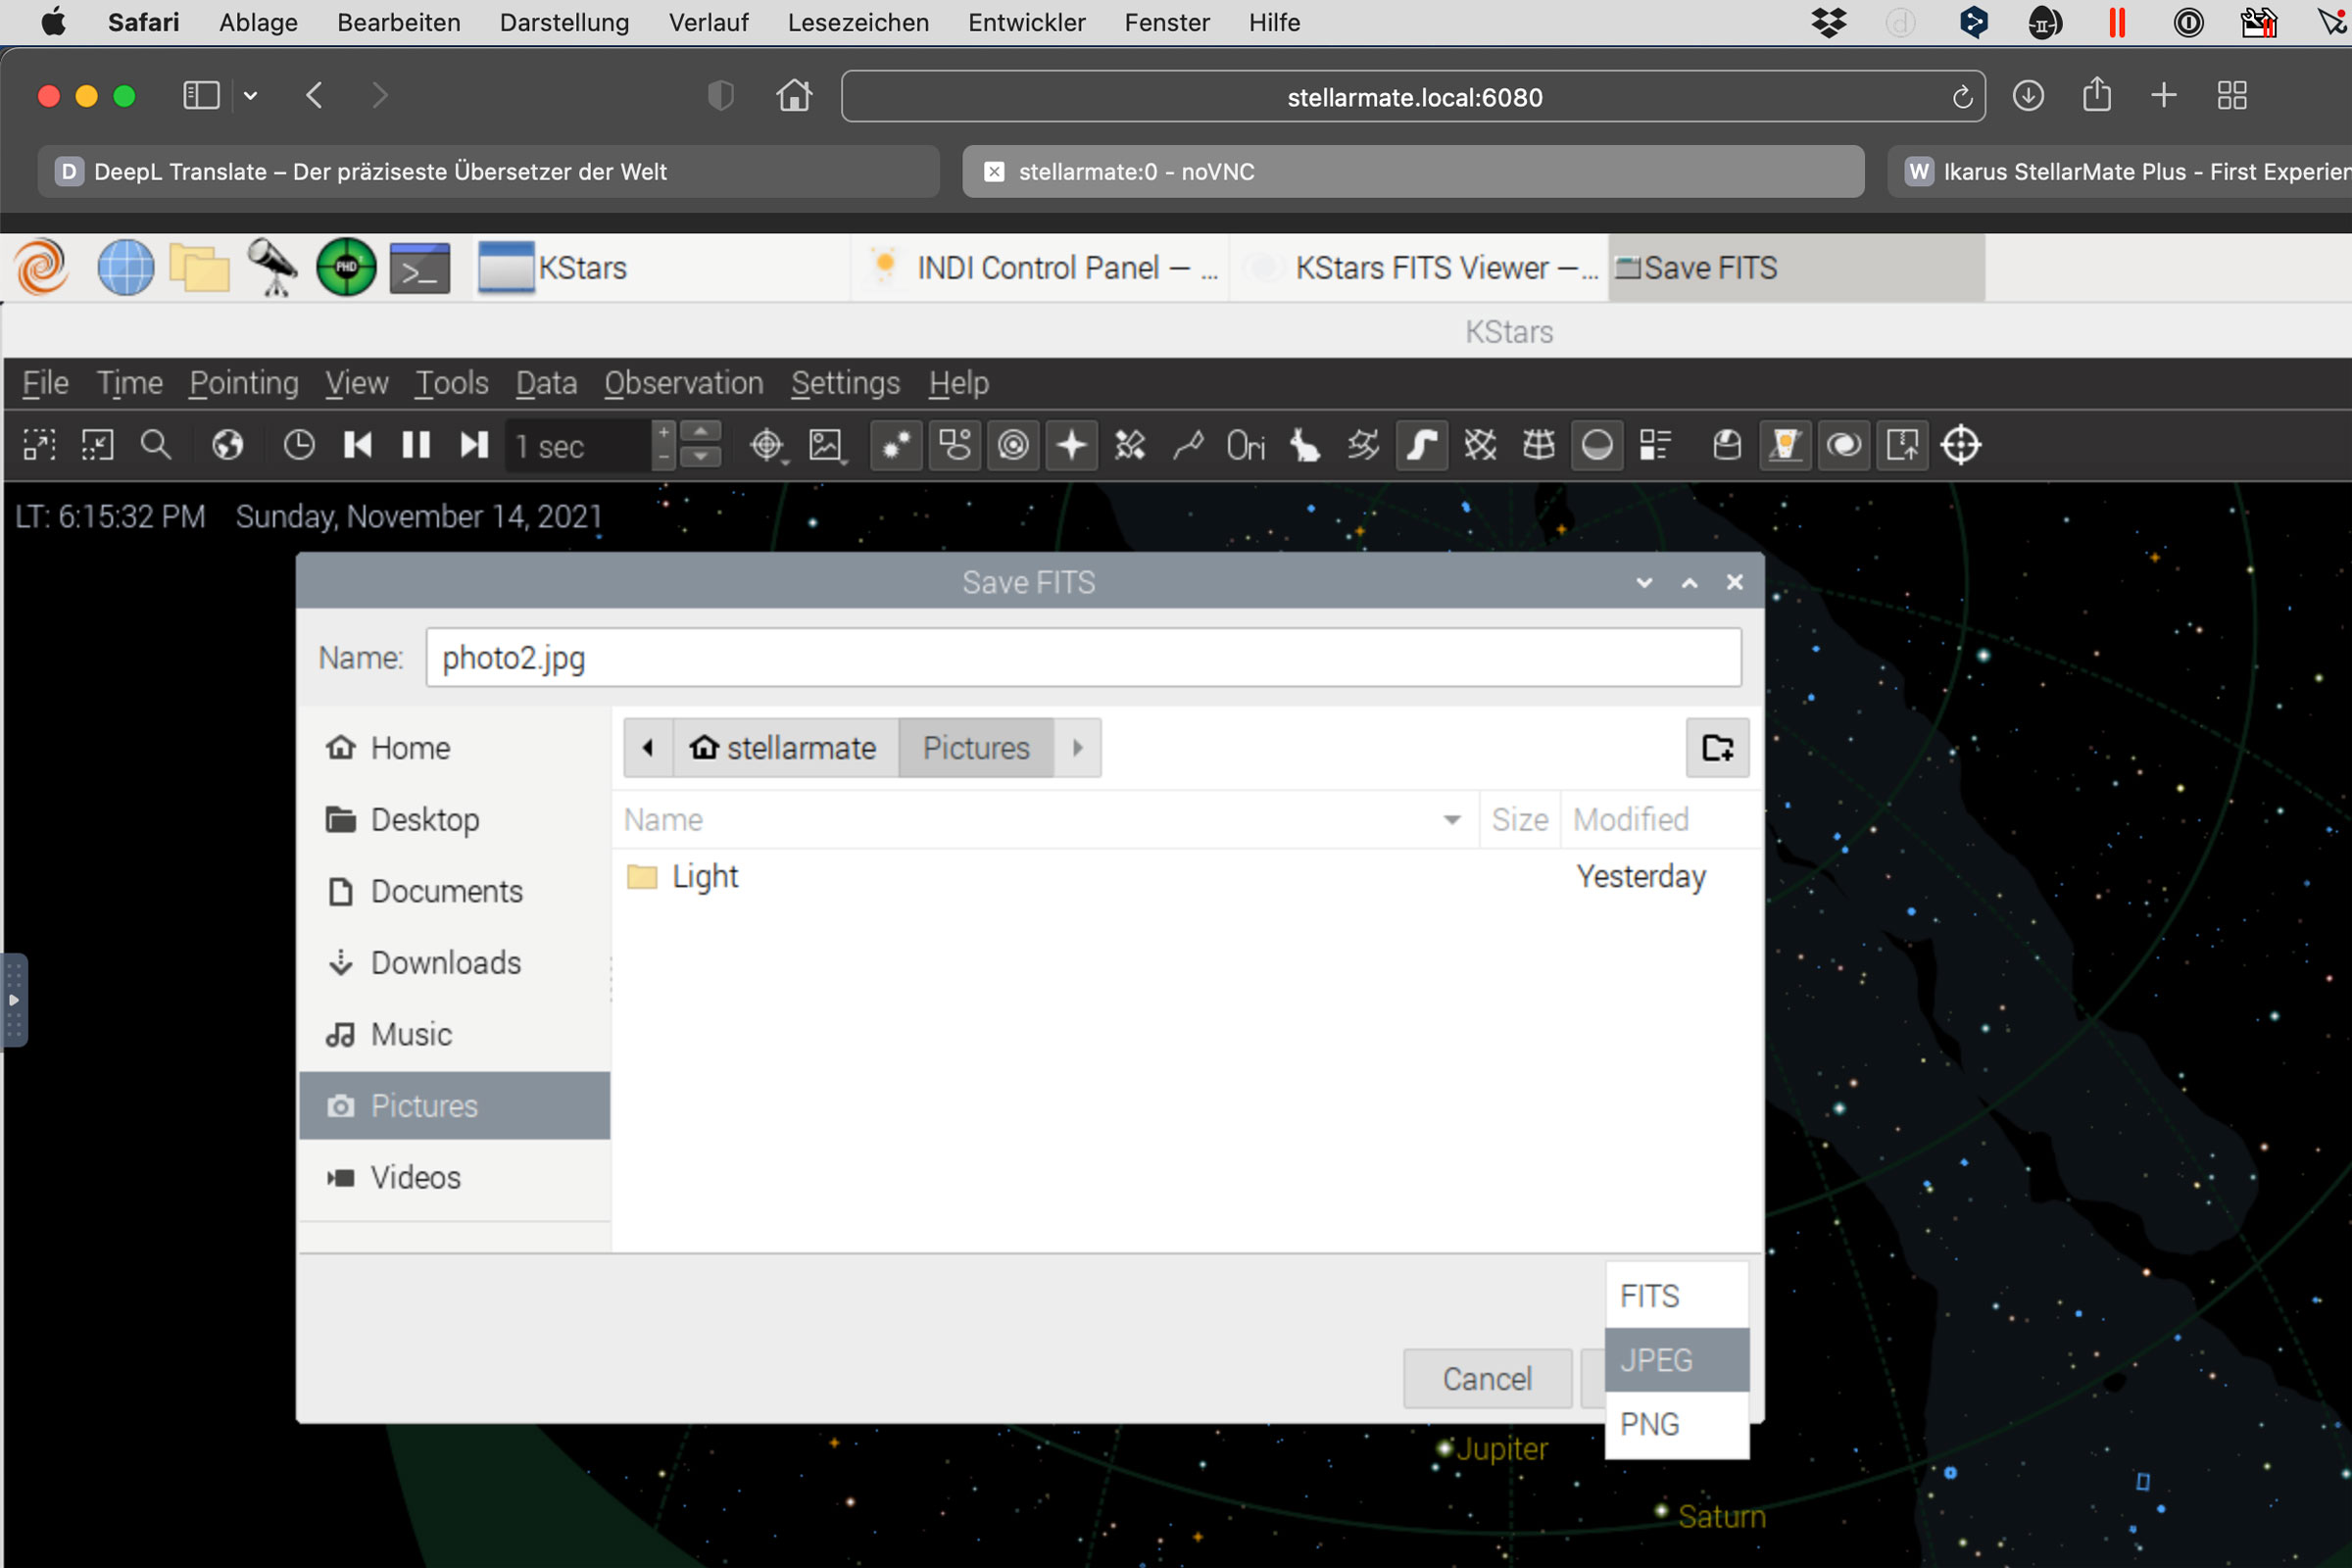
FITS viewer, I can save the photo in three different formats (FITS, JPG, and PNG). But it
only saves in JPG and PNG format, when I manually add the respective extension (.jpg,
.png) - irrespective of what the dropdown list for the file format states.
This is definitely a bug! So, this method has some quirks, but at least, I
found a way to save my "live
views", that is, single photos and live stacks* as well (as I found out
later...). The photos are saved on the StellarMate in folder/home/stellarmate/Pictures/livestacking an can be transferred to the computer from there (the folder can be changed).
*)
But for live stacks it can also be done much simpler, as I found out in the
meantime (after the "live stacking" finally worked...).
See
Saving Live Stack Photos (Captures).
 |
 |
|
The "Save" options in the FITS viewer |
The"Save" dialog in the KStars FITS Viewer |
Saving Live Stack Photos (Captures)
Of course, it would be better if the above trick were not necessary. For saving "Live Stacks" it is indeed not necessary, as long as the live stacking works. Proceed as follows:
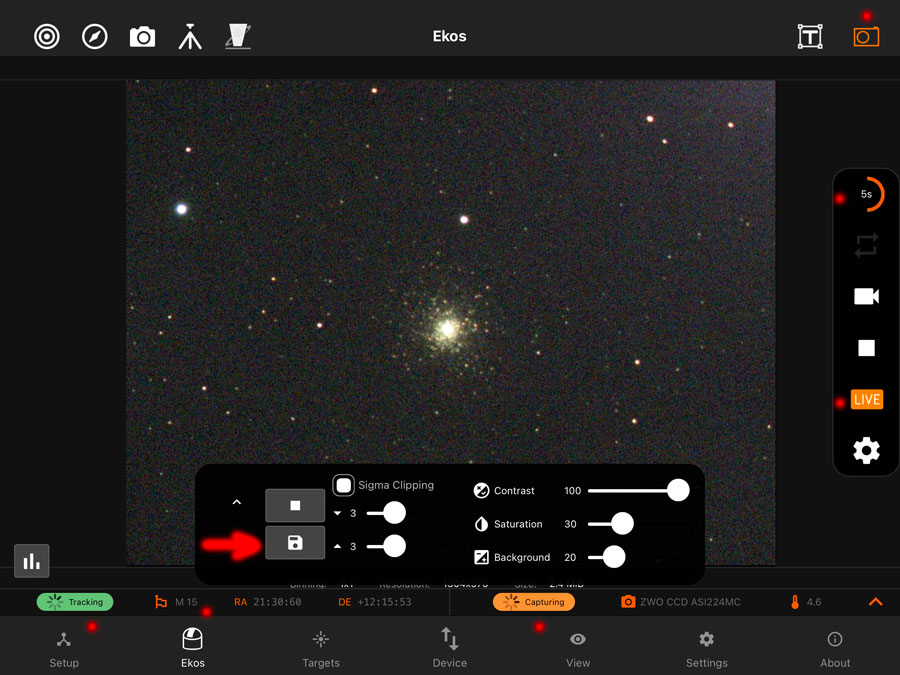
- Start the "Live Stacking" process by first activating the quick control for the camera (top right) and then clicking the "Live Stacking" button (right edge).
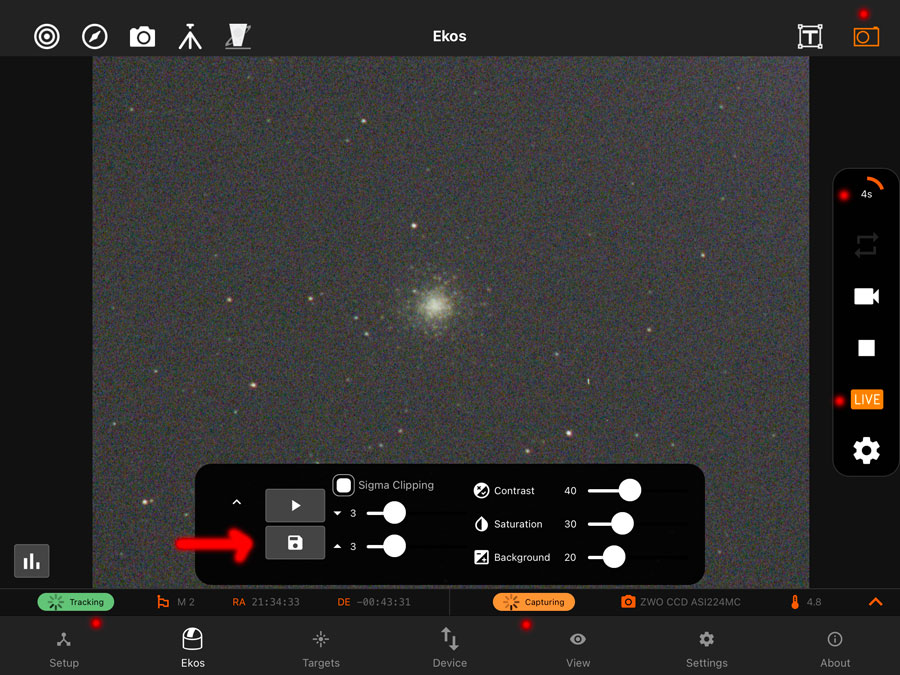
- To save the current state of the "Live Stack"*, click on the floppy disk icon in the "Live Stacking" quick control bar, which is active during stacking (and also afterwards).
*) Since app version 2.5.0, the app saves live stacks automatically (criteria unknown...). So there seems to be no longer a need to save live stacks manually, except for that you want to save a certain state ...
 |
 |
|
Live stacking M 2; the button with the floppy disk symbol is used for saving the state of the live stack |
Live stacking M 15; the button with the floppy disk symbol is used for saving the state of the live stack |
On the iPad, the stack photos are saved in the "Photos" application and can be accessed/forwarded from there. The photos are saved in the JPG format. In addition, the stack photos are saved on the StellarMate in folder /home/stellarmate/Pictures/livestacking an can be transferred to the computer from there (the folder can be changed).
Note: Obviously, only live stacks that are saved manually are transferred to the "Photos" app. For automatically saved stacks see the following tip, which is also valid for manually saved stacks! In the folder livestacking, there is no distinction between stacks that were saved automatically and those that were saved manually.
Transfering Live Stack Photos (Captures) to the Apple Macintosh
Since version 2.5.0 of the StellarMate app, many things work better with the StellarMate, or work at all finally. Live Stacking now automatically saves photos during live stacking (according to criteria unknown to me...) and also shows the running number. These photos are stored on the StellarMate disk and can be viewed using the "View" tab. Now my question was: How can I transfer these photos to my Apple Macintosh? I found the answer to this question in the StellarMate FAQ:
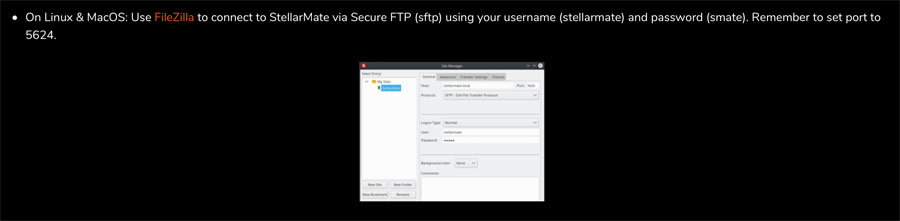
Enlarged, the Site Manager dialog window in the Windows version of FileZilla looks like this (further down, I display the corresponding window on the Apple Macintosh):
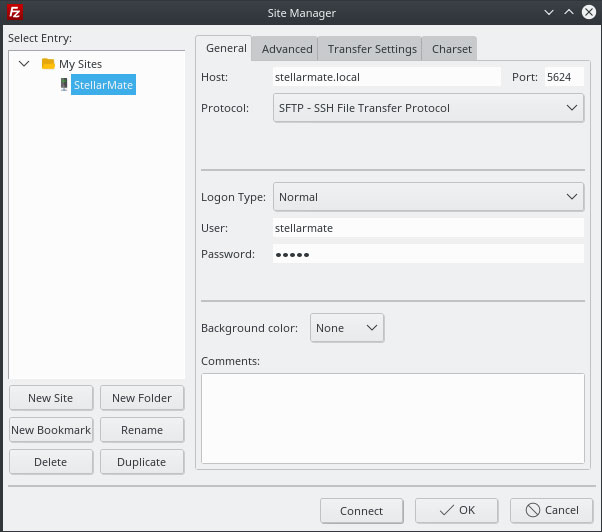
You have to set ther protocol to sftp, the host isstellarmate.local, the port number is 5624, the user is stellarmate and the pass word is smate.
You also need the program FileZilla Pro, which is no longer freely available, but costs a license fee. So I licensed it by necessity...
Enter the following settings into the FileZilla Pro Servermanager (Mac OS; German language version, but should be self- explaining...):
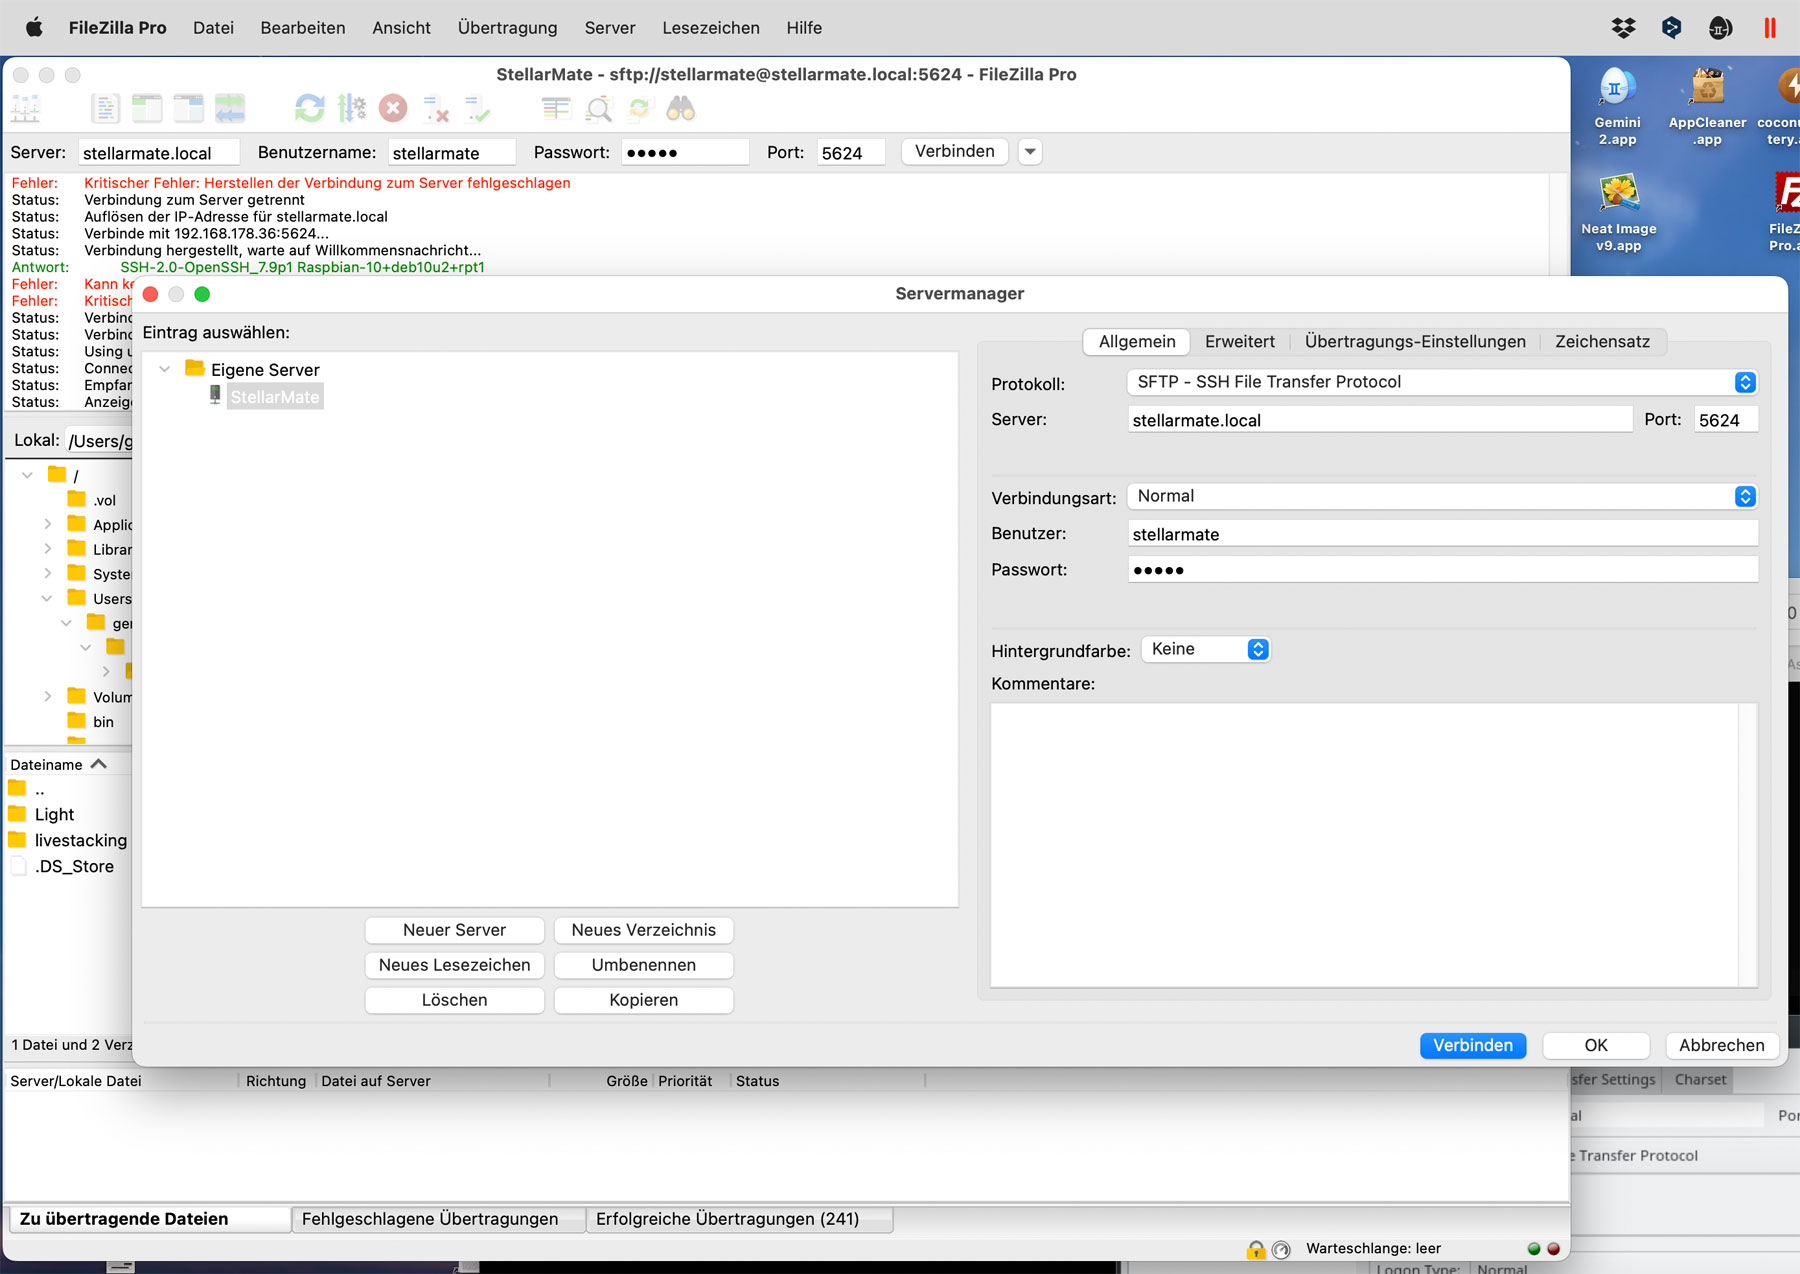
On the StellarMate server, select the directory /home/stellarmate/Pictures, where the data is saved by default (the user can change the location where the photos are stored):
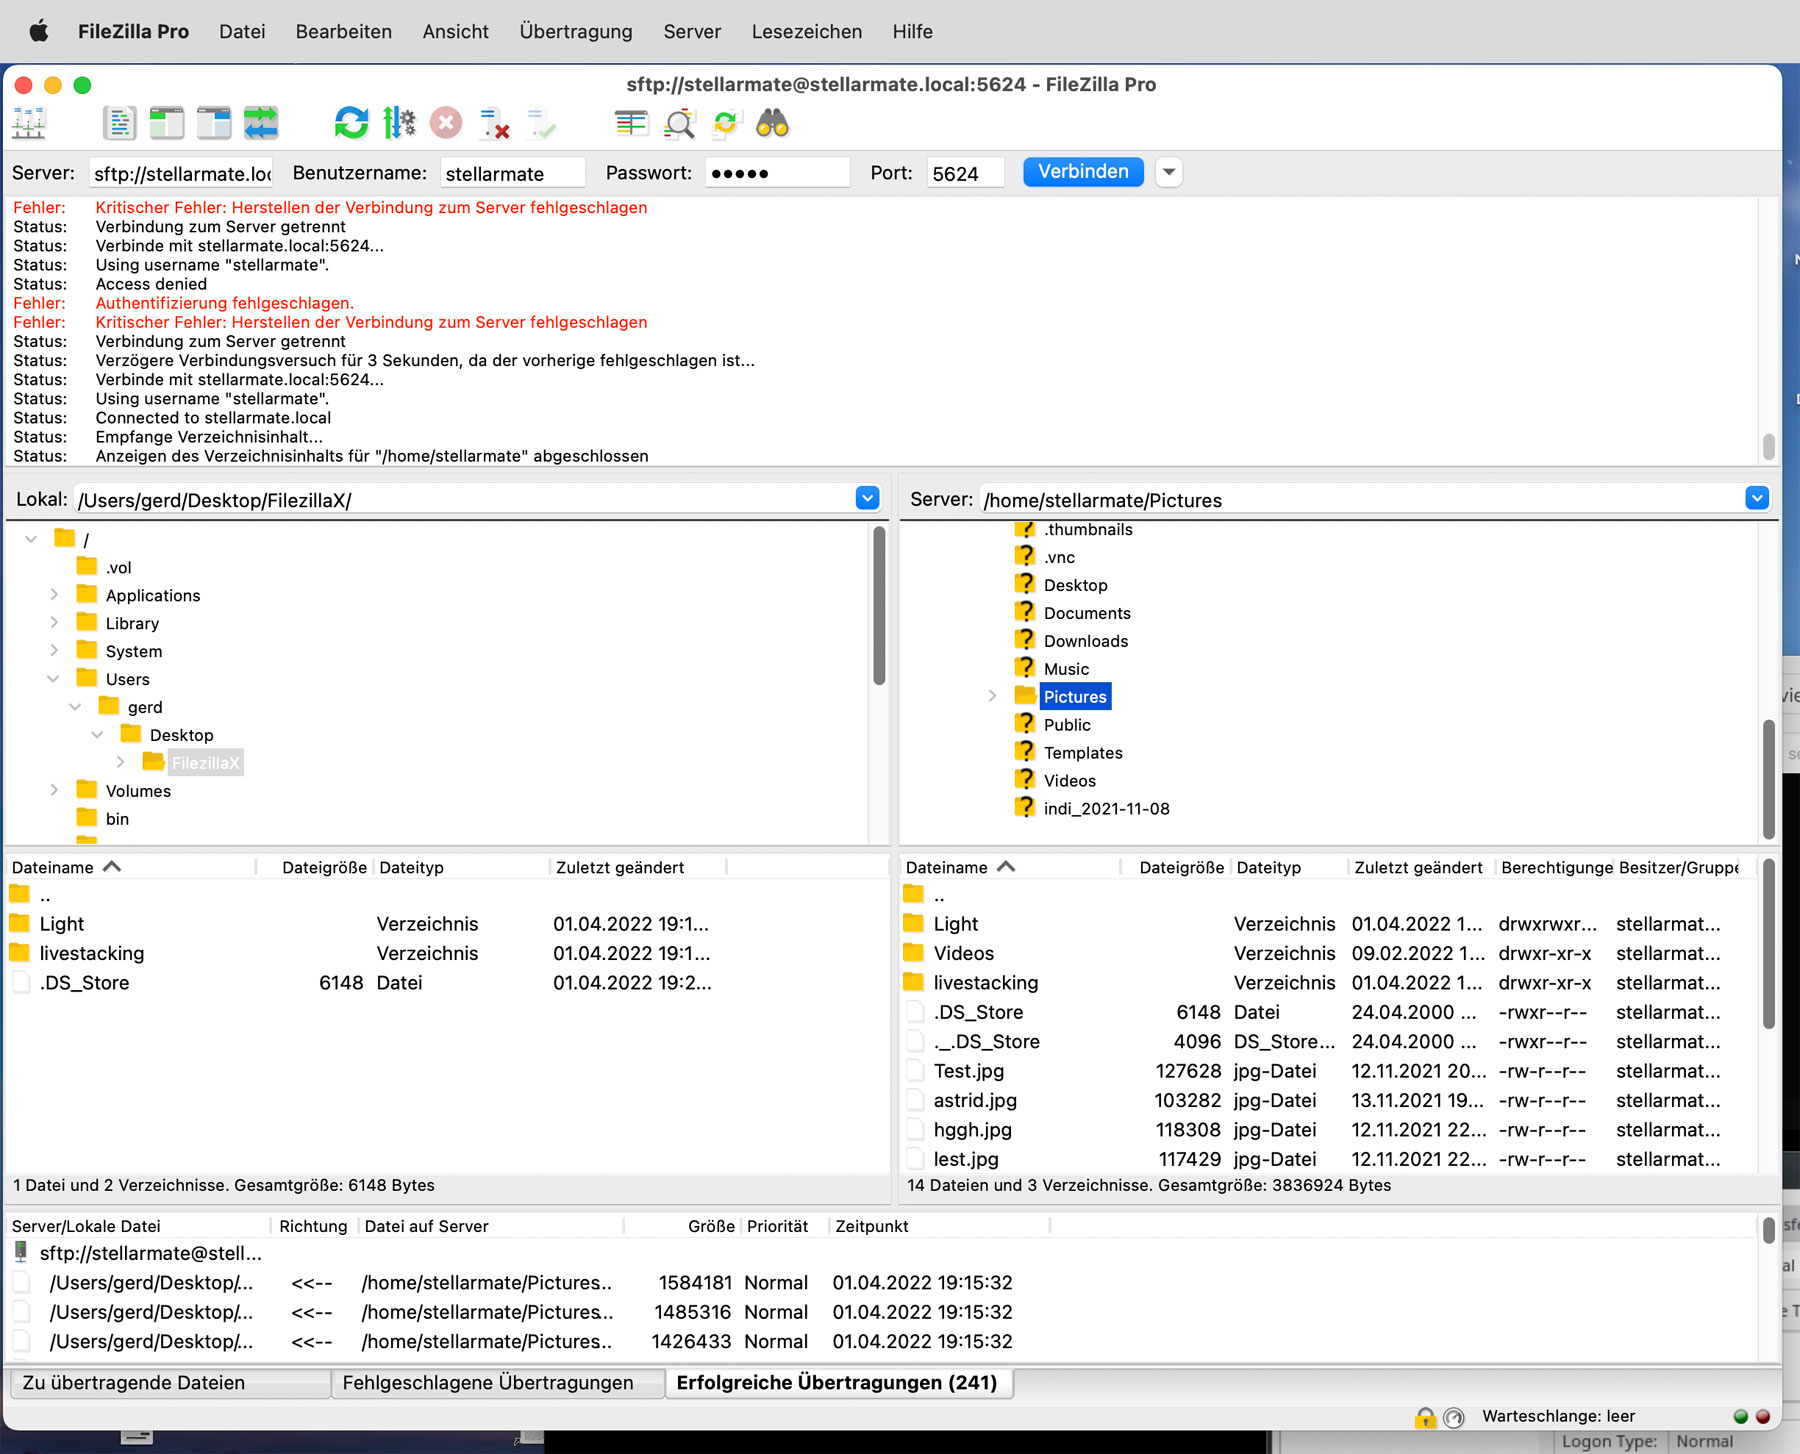
The live stack photos can be found in folder livestacking; they are sorted by date and within the date folders by accessed DSO:
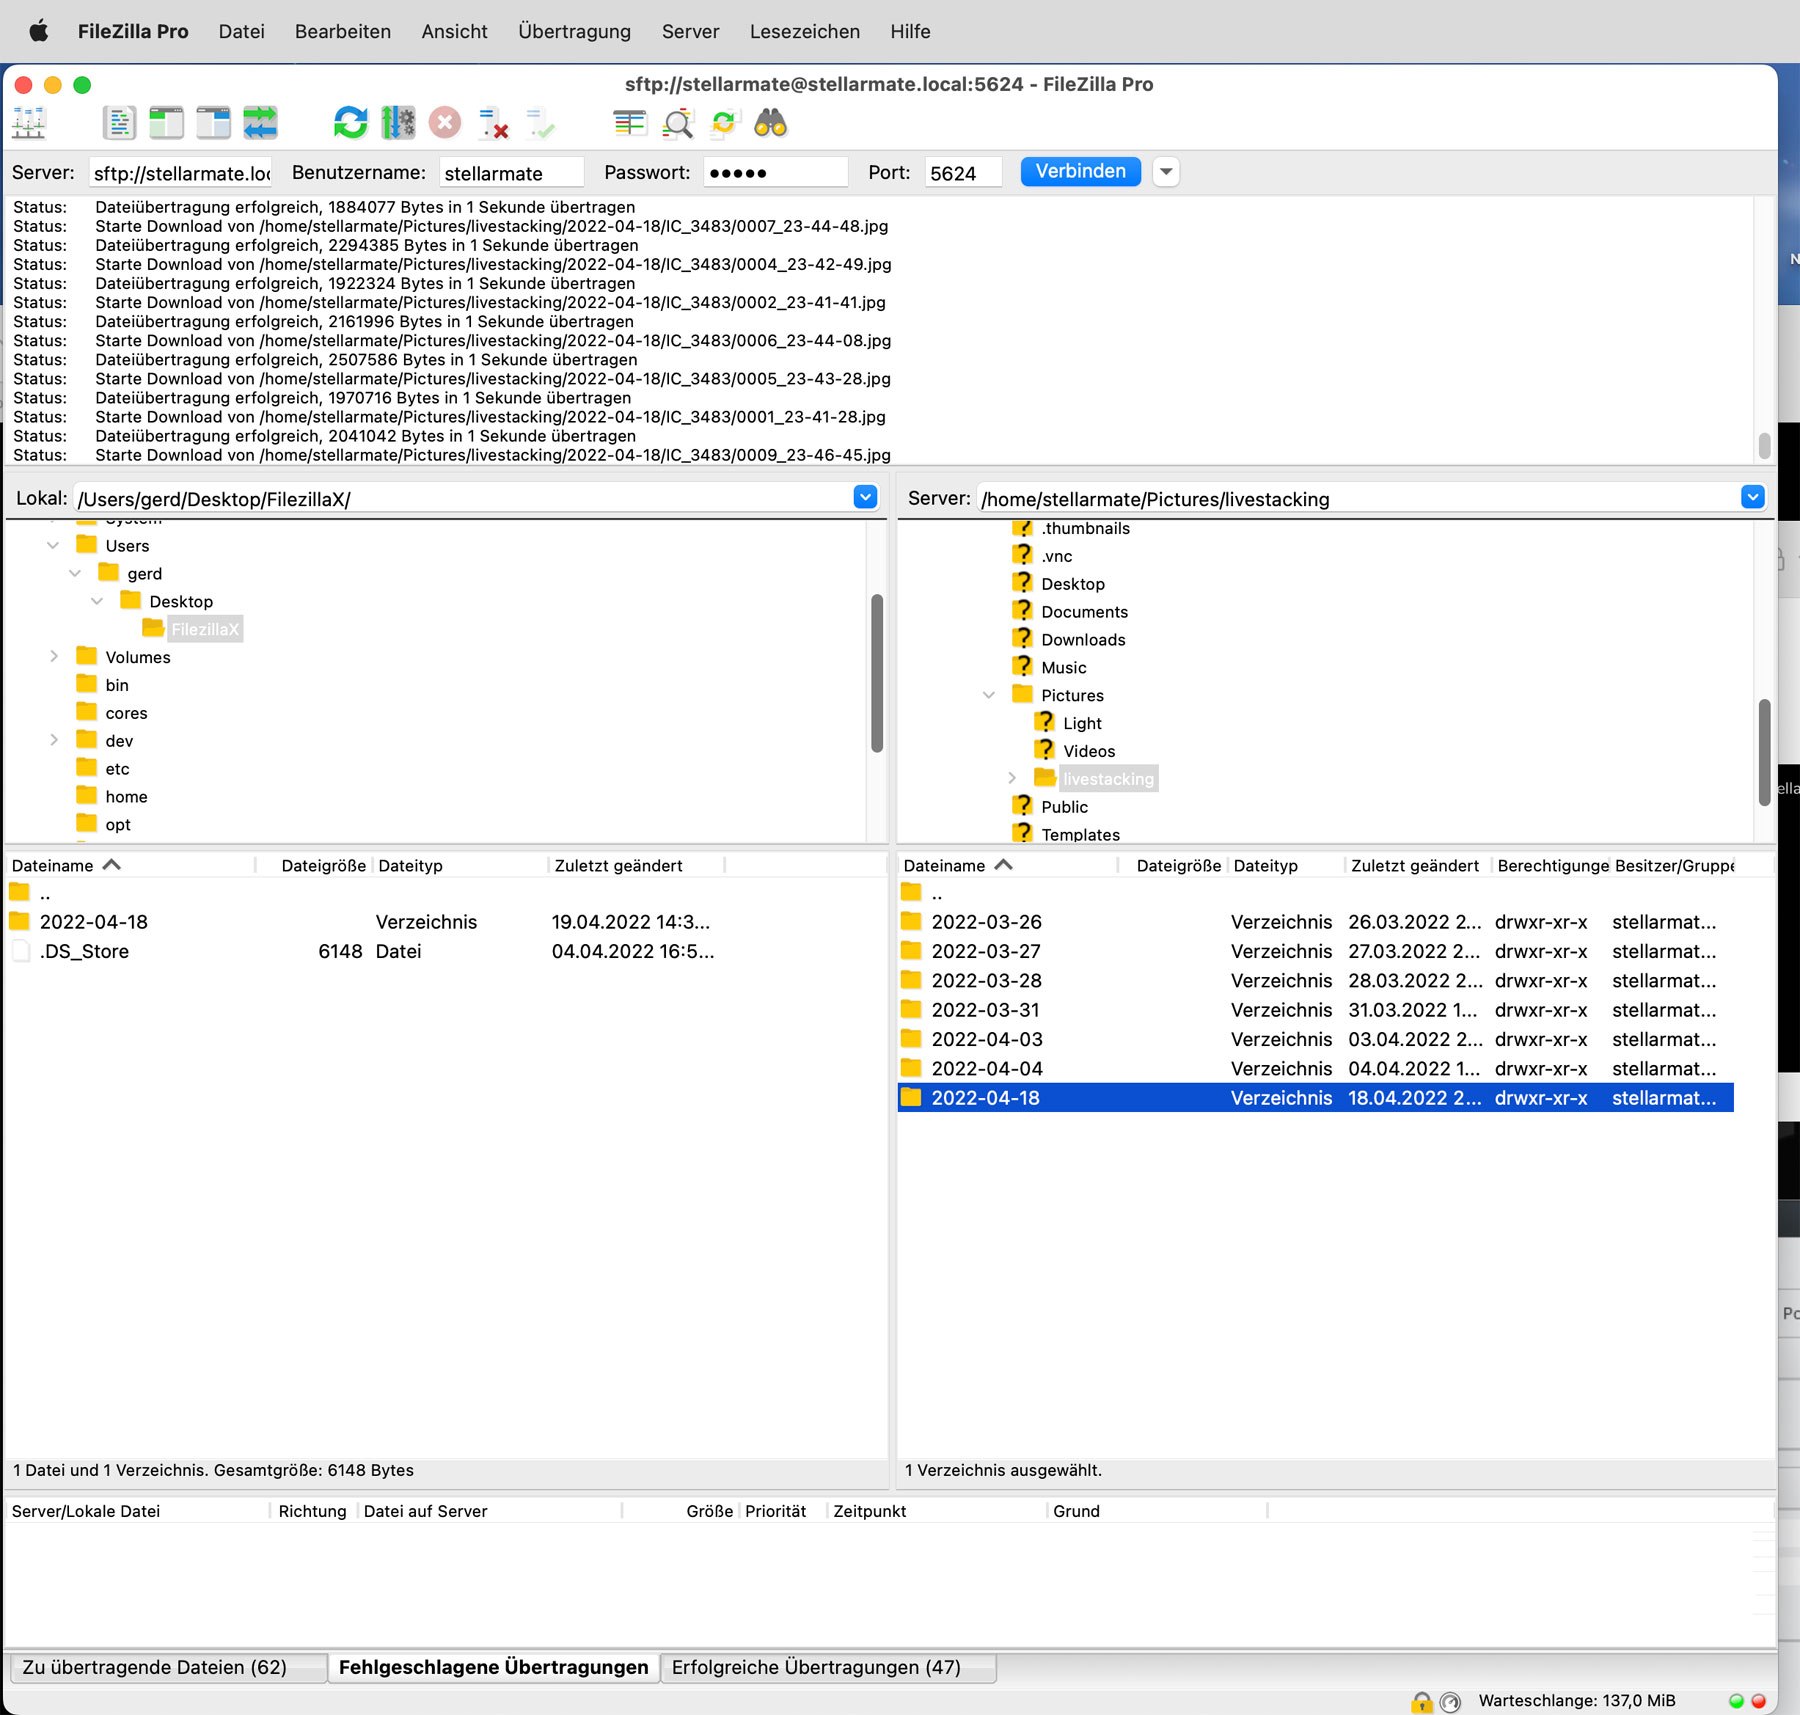
Typically, I transfer the complete folder of an observation setting and store it in the temporary folder FileZillaX (I have freely assigned the name) on the Apple Macintosh, which I have created for this purpose. From there I move the contents to directories of my choice on my Apple Macintosh computer.
Targets Screen: Understanding the Search for Targets...
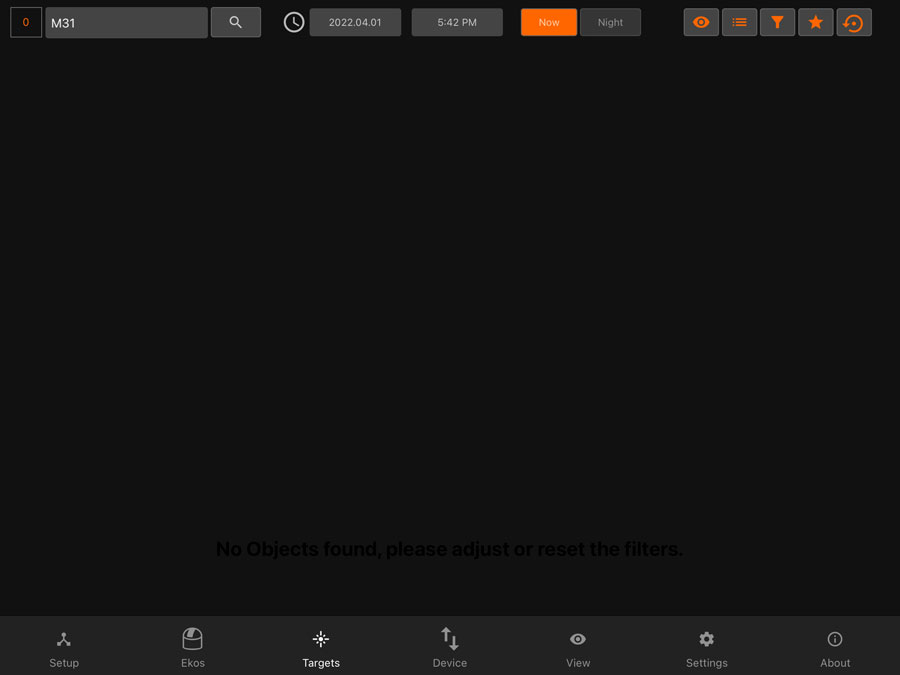
The "Targets" screen of the StellarMate app (here mostly shown from app version 2.5.0 on) is one of several ways to access targets using plate solving. On this screen, the object type has to be selected (star icon), and secondly, the beginning of the name (or number) of the object(s) has to be entered in the search field in order to restrict the search.
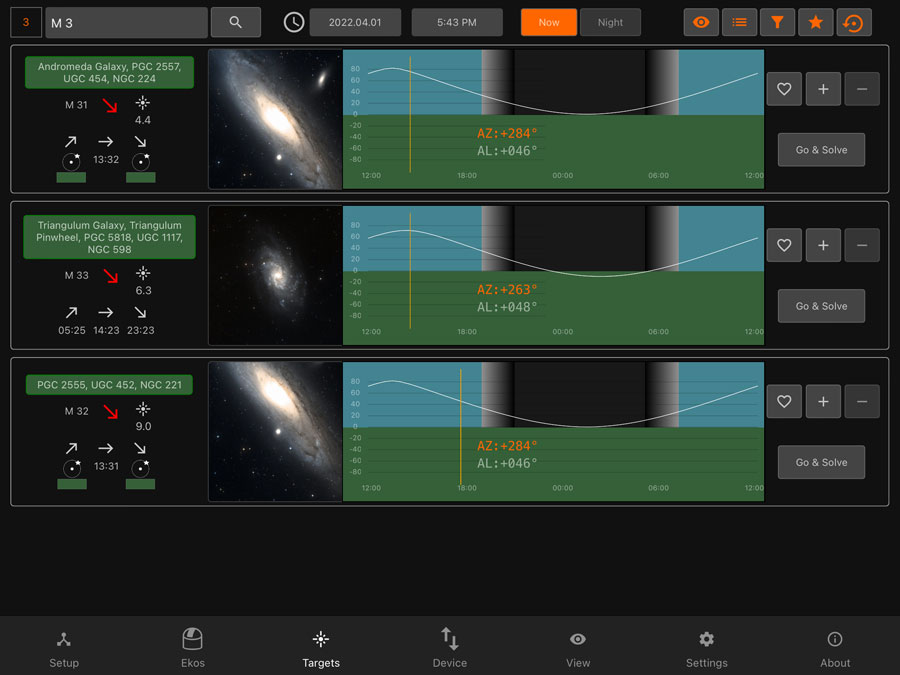
Note: The search is very picky about the correct writing! Like some other posters in the CN forum, I encountered the issue of empty target lists. For example, when I enter "M31", the target list was empty (the search does not care for case). But when I enter "M 31", there it is! With "M 3" you get even more galaxies. Or you get M 3 and M 30 if you switch to globular clusters. There are also several filter optoins available that I have not yet understood.
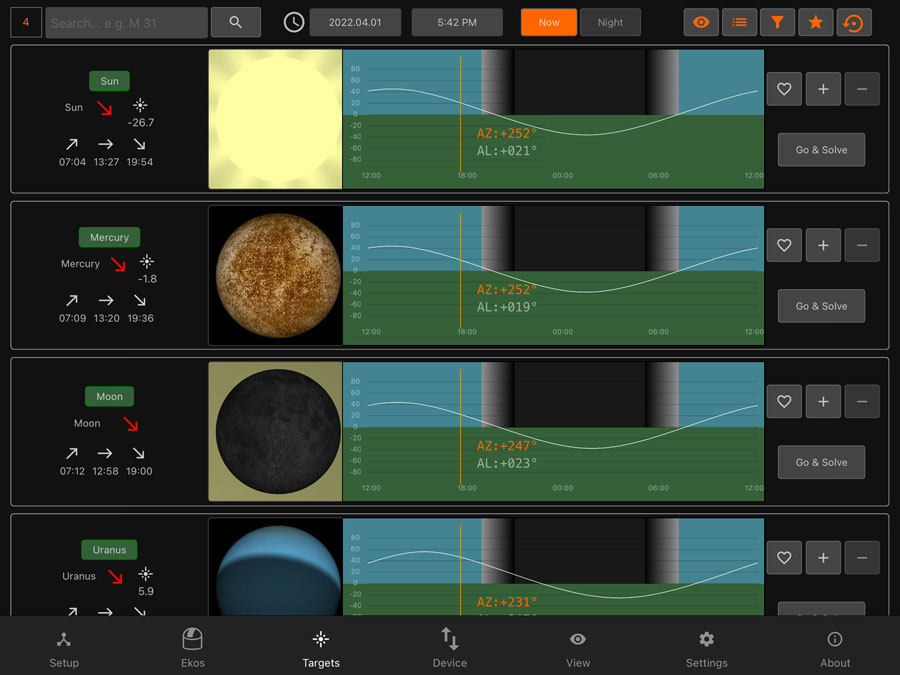
Another question on this screen, how to access the sun and the moon: The answer is, select planets as the object type
 |
 |
|
"M31" leads to an empty target list |
"M 31" leads to just M 31, the Andromeda Galaxy (galaxies selected) |
|
 |
 |
|
"M 3" leads to a couple of galaxies whose number starts with "M 3" (galaxies selected) |
"M 3" leads to two globular clusters whose number starts with "M 3" (note: older app version shown!) |
|
 |
||
The moon and the sun can be found among the planets. |
Note: Alternatively, you can access targets via the "Mount Quick Control". See Mount Quick Control: Accessing the Moon and the Sun, as well as Other Targets for details.
Mount Quick Control: Accessing the Moon and the Sun, as well as Other Targets
Another way to access targets is offered through the "Sync/Goto button in the "Mount Quick Control". In an opcoming dialog window, you simply select a category and a target from a list (or coordinates).
Here I found out first, how to access the moon and the sun (in the meantime, I also found out how to do this in the "Targets" screen):
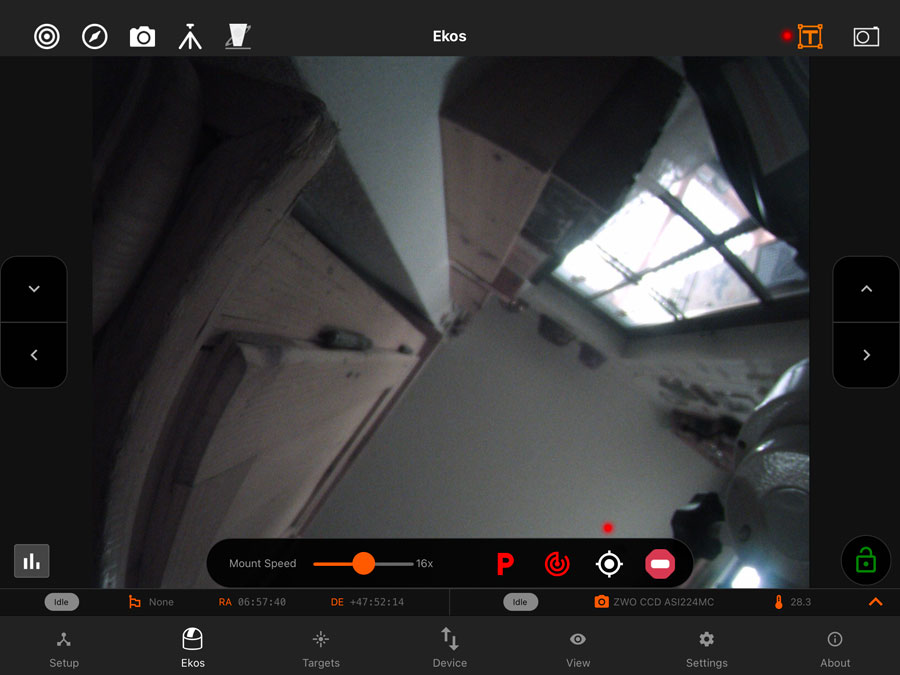
- In Ekos, select the "Mount Quick Control" at the top right (icon with a T = targets) (the direction buttons and the "mount" status bar with some tools will appear)
- Press the "Sync/Goto" button (the second from right) in the "mount" status bar.
- The "Goto or Sync" dialog appears.
- Choose the option "Planets" in "Category"
- Select the moon or the sun (or any planet...) in the field "Target".
- Press the "Sync or Goto" button to proceed with the selected target.
Of course, you can select any other sky object analogeously. The "Target" field remembers previous target choices and displays them (I do not know, how many at maximum...).
Note: The StellarMate manual states (p. 18ff; the following text is
from p. 19):
Goto or Sync
You can goto or sync by clicking on the GOTO button, a dialog will pop-up
where you can goto or sync to your last target, choose one of your last recently
used targets, or select a category and choose a new target.
 |
 |
|
Mount Quick Control: The Sync/Goto button (the second one from right) in the "mount" status bar |
A dialog appears, where you can select targets by category; here the category "Planets" is selected. |
|
 |
|
|
In the "Target" field select the moon or the sun if you search for those. |
Targets screen (alternative): The moon and the sun can be found among the planets. |
Final Words
Some of the "tips and tricks" that I describe here are ultimately "detours" to somehow reach the desired goal. Some of them will no longer be needed, when I understand the StellarMate better...
Note: At the beginning of June 2024, I gave my astrophotography computer Ikarus StellarMate Plus away. I therefore cannot report any further experiences with it here. |
Links
- Ikarus Technologies, StellarMate: www.stellarmate.com
- StellarMate Manual: www.stellarmate.com/help
- Ikarus Technologies StellarMate PLUS Astrophotography Controller (astroshop.eu): www.astroshop.eu/controls/ikarus-technologies-stellarmate-plus-astrophotography-controller/p,68093
- HOWTO: Make a POWERFUL smart TELESCOPE! Better than much bigger telescopes! (Cuiv the Lazy Geek): youtu.be/0JdtL950RjQ
- Discussion in Cloudy Nights (CN), which Cuiv started to create attention to his video: www.cloudynights.com/topic/794637-a-beginner-friendly-smart-eaa-setup/?p=11441505
- See also my page offering Astronomy Links.
|
made by |
| 08.06.2024 |