Astronomy | GXR · GR · RX100 M1 · RX100 M4 · RX10 M3/4 · TZ202 · X Vario · M240 · General | Photos | Conf. Places | Calendars | Art
Leica M (Typ 240): Using Lenses without Lens Codes - Part 3: CornerFix at al.
Introduction | CornerFix | Adobe Flat-Field Plug-in | Results | Conclusions | References
Archive
In this section, currently consisting of three pages, I would like to discuss the situation of owning a Leica M (Typ 240) camera and a number of uncoded of M-mount and M39 lenses (for which I actually bought the camera...), the problems that I am facing in this situation, and the approaches that I tried (and will try) to tackle the problems that I have with my lenses.
With "problems" I mean primarily color shading, and secondarily strong vignetting. I am not interested in fixing issues like distortion, weak vignetting, and chromatic aberration. That is, my main interest is to find easy ways to use the lenses at all (and not having to crop the images to remove the corners and edges because they are colored or too dark).
Note: The lenses covered in this article series comprise my equipment until February 2016 (October 2016 on this page). Additions in November 2016 and later are not covered here.
Overview
On page Part 1: Theory, I give an introduction to the issues that I am facing, lay out the options that I have discovered to solve my problems, and present some first, "theoretical" results as to which Leica lenses are potential candidates for using their lens settings to fix or reduce the issues of my lenses.
On page Part 2: Practice, I present the results of an investigation that I made into this matter, based on what I found out in Part 1. I present test photos without and with manual lens settings applied to my lenses. I use the photos to answer the questions: (1) Which of my lenses do not need a lens setting applied to fix image issues, (2) which lenses might profit from it, and (3) which lenses require that images taken with them are fixed in post-processing because applying lens settings does not help.
On this page Part 3: CornerFix et al., I turn to the lenses requiring that images taken with them are fixed in post-processing. I present some practical results of applying the CornerFix application to images that are affected by color shading (and vignetting).
Introduction
At the end of the previous page, I drew some conclusions from my theoretical and practical investigations for each of my M-mount lenses and put them together in the following table:
| My Lens | "Fitting" Leica Lenses ("Manual" List) (6-bit Coded Lenses with Code) |
"Fitting" Lenses (Adobe Lens List) | Comment |
| Voigtländer Super Wide Heliar 15mm f/4.5* | None* - color shading needs to be corrected in post-processing | Voigtländer Super Wide Heliar 15mm f/4.5 II | Color shading is not improved with any manual lens setting |
| Voigtländer Super Wide Heliar 15mm f/4.5 III | None* | To be done | To be done; according to reviews, color shading is absent or minimal |
| Zeiss Biogon T* 21mm f/4.5 ZM* | None* - color shading needs to be corrected in post-processing | Zeiss C Biogon T* 21mm f/4.5 ZM | Serious color shading, not improved with any manual lens setting |
| Voigtländer Snapshot-Skopar 25mm f/4* | None* - color shading needs to be corrected in post-processing | Voigtländer Color Skopar 25mm f/4 | M39 lens with M-mount adapter Lower degree of color shading, not really improved with manual lens setting, except for the Elmarit-M 28mm f/2.8 ASPH. setting (the "lazy route") |
| Minolta M-Rokkor 28mm f/2.8 | Elmarit-M 28mm f/2.8 (Version 11804 (III); 000011) or Elmarit-M 28mm f/2.8 (Version 11809 (IV); 011011) - currently, I prefer the first one | --- | Minolta CLE lens Fairly low color shading |
| Zeiss Biogon T* 35mm f/2.8/ ZM | Summicron-M 35mm f/2 (Version 11310/11 (IV); 000110) or Summicron-M 35mm f/2 ASPH. (Version 11879/11882; 011110) - currently, I prefer the first one | Zeiss C Biogon T* 35mm f/2.8 ZM | Fairly low color shading |
| Zeiss C Sonnar T* 50mm f/1.5 ZM | None*. Summilux-M 50mm f/1.4 ASPH. (Version 11891/2; 100000) or Summilux-M 50mm f/1.4 (II) (Version 11868/56; 000101) also work (but are not needed) - currently, I prefer the first one | Zeiss C Sonnar T* 50mm f/1.5 ZM | No color shading |
| Voigtländer Color Heliar 75mm f/2.5 | None*. Summilux 75mm f/1.4 (100011) or Summicron M 75mm f/2 ASPH. (Version 11637; 100100) also work (but are not needed) | Voigtländer Color Heliar 75mm f/2.5 | M39 lens with M-mount adapter No color shading |
| Leitz Elmar-C 90mm f/4 (11540) | None*. Leica Macro-Elmar M 90mm f/4 (Version 11633; 100111) improves vignetting slightly | Leica Macro-Elmar M 90mm f/4 (11633) | Leica CL lens Version 11540; S/N 2642706 = 1973**** No color shading |
| Leitz Tele-Elmarit-M 90mm f/2.8 (11800) | None* or Leitz Tele-Elmarit-M 90mm f/2.8 (Version 11800; 000100) - little or no effect | Leitz Tele-Elmarit-M 90mm f/2.8 (11800) | Version 11800; built from 1963/4 to 1986; S/N 2587227 = 1973***** |
| Leitz Tele-Elmar 135mm f/4 (11851) | None* or Leitz Tele-Elmar 135mm f/4 (Version 11851; no code) - little or no effect | --- | Version 11851; built from 1964/5 to 1990; S/N 2046827 = 1964**** No color shading |
*) None means "Lens Detection" set to "Off". *) Sold the lens or going to sell the lens.
My lenses with a focal length of 50 mm and above can all be handled with setting lens detection set to "Off". In some cases, selecting a lens manually (particularly, the same lens...) may lead to improvements regarding the correction of distortions, vignetting, and chromatic aberration, but that is not of primary importance for me. More important for me is "ease of use"...
Two of my lenses are "borderline cases": the Minolta M-Rokkor 28mm f/2.8 and particularly the Zeiss Biogon 35mm f/2.8. Here, a manual setting can improve the image, particularly for the Minolta lens.
For three of my "initial" wide angle lenses, the widest ones, color shading cannot be corrected by selecting a lens from the camera's list manually. Here, only post-processing can improve the images, and the CornerFix application does this quite well (tested with all three lenses).
All in all, my non-Leica wide angle lenses are problematic on the Leica M (Typ 240), particularly the shortest ones. In the following, I therefore turnto the CornerFix application.
Note: Because I am a JPG shooter, I replaced all of my three wide angle lenses, either with a newer version, or with Leica lenses.
CornerFix
Note: This page is mentioned in Sandy McGuffog's blog.
Sandy McGuffog's free application CornerFix enables you to remove color shading and vignetting (color shading is regarded as a "generalized" form of vignetting). It uses calibration images in DNG format to create profiles, which can then be used to correct DNG images. Thus, CornerFix is a DNG-only solution. I described the application and its purpose already in Part 1: Theory and therefore move on to the more practical aspects.
When you search for CornerFix on the Web and follow the found links to camera forums, there seem to be two types of users: (1) One type of users does not have any problems with the application, likes the tool (despite its quirks), and is, of course, grateful that it exists at all. (2) The second type of users miserably fails with this application*, and even assistance from the author often does not help. The problems comprise the interaction with the application (which is easy, as the author believes) as well as the creation of working calibration images. In the following, I will cover both issues.
*) Some examples: "I have to make a profile for the CV 15mm M mount lens..... so far all my efforts have proved terrible." (jacques) "Even such a technically knowledgeable photographer as Steve Huff has informed me that, after having downloaded Cornerfix, he studied it for about 20 minutes without arriving at a workable conclusion about what to do with it." (kcnarf)
Note: If you are interested in the tool, you can find the respective links in the references. The La Vida Leica article Using CornerFix to Correct Images provides a good introduction to the tool.
Using the CornerFix Application
As mentioned above, some users have severe problems with using the CornerFix application. Often, it is unclear, whether it is the application itself or the creation of calibration images that causes the trouble. The latter has its challenges, and I will discuss this topic below. Here, I will briefly look at potential interaction hurdles.
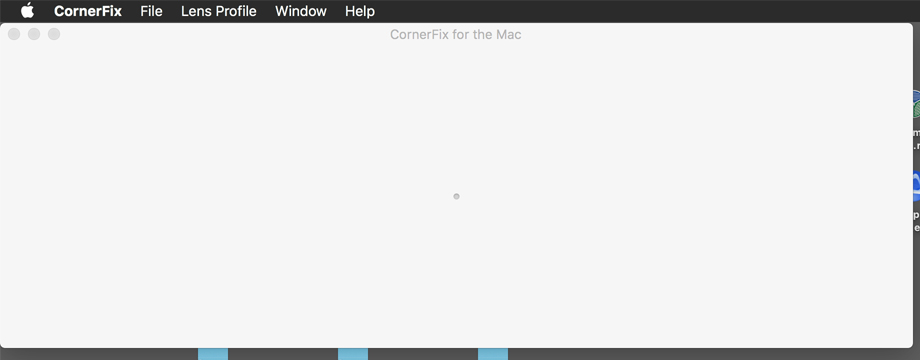
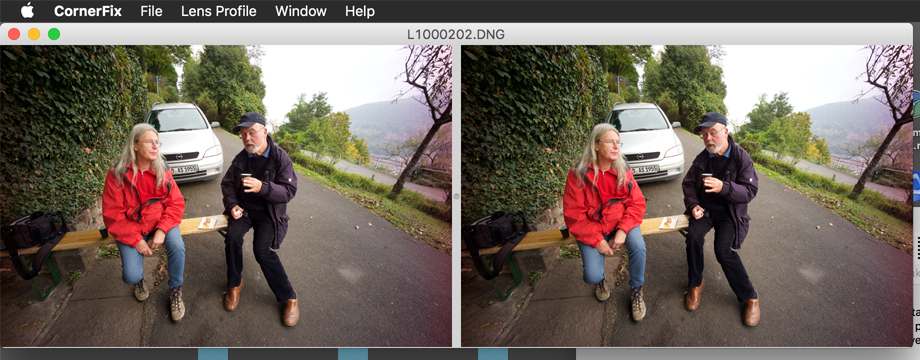
Admittedly, I had severe interaction problems myself when I began using the application. At the beginning, I had no idea, which image was to be processed, which profile was used, and so on. I thought about sending the author an email and propose to list both in the application's title bar. But when I took a closer look at the application window, I found this (click images for larger versions):
 |
 |
|
CornerFix started, nothing loaded |
CornerFix started, profile loaded |
|
 |
 |
|
CornerFix started, photo loaded |
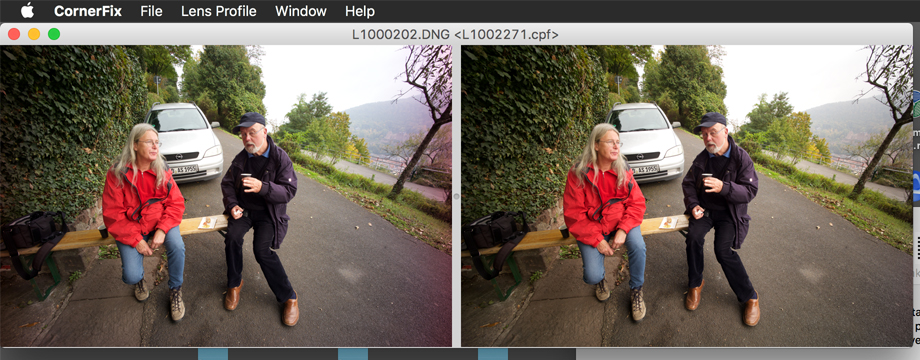
CornerFix started, photo and profile loaded, profile applied |
Well, maybe that the information is a little subtle and cryptic, but it is there! Once you know this, you will probably never forget it... If you want to process several images with the same profile, just load the profile first ("Lens Profile") and then load and process the images one after the after ("File"). Actually, loading the images suffices, because processing starts immediately (it may take some time, though, if you disable thumbnails - see below).
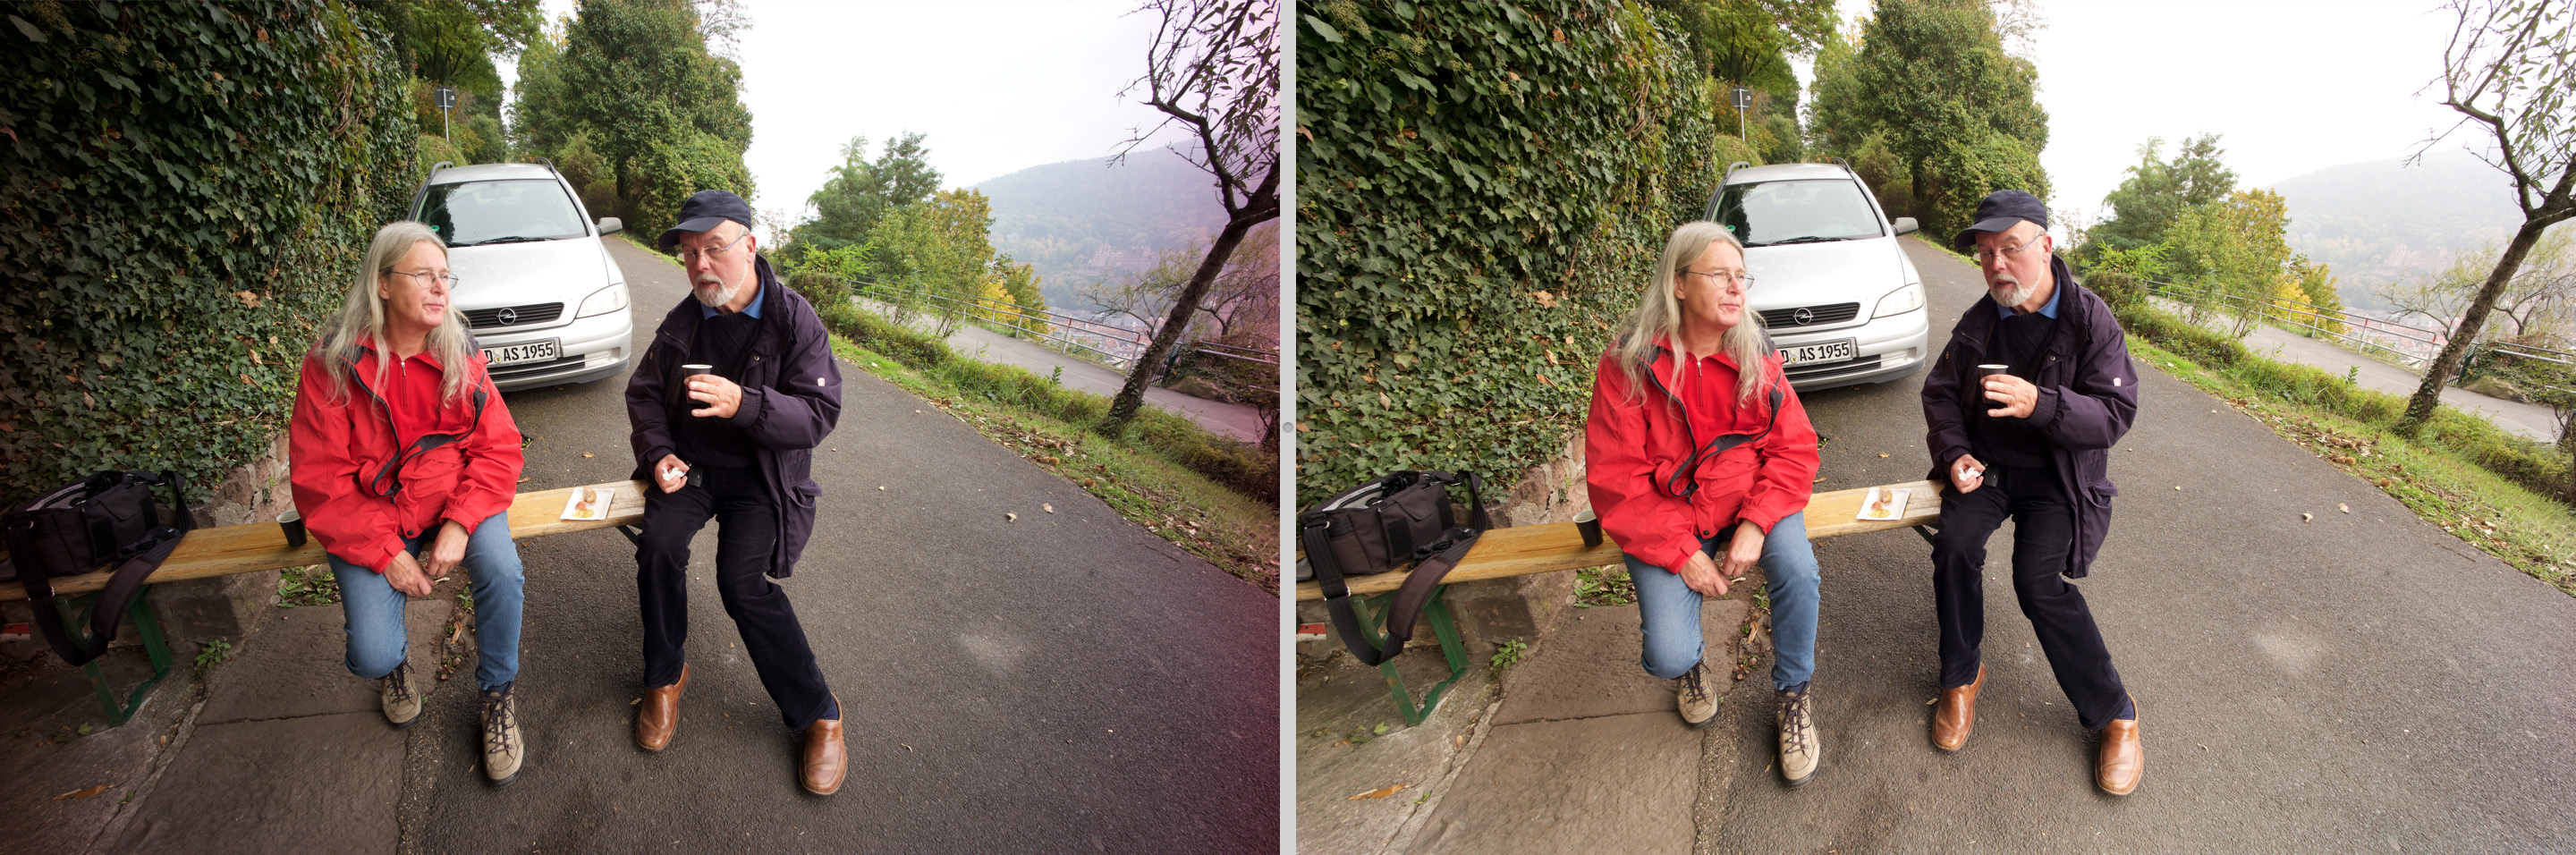
Figure: The result for the above photo and profile as displayed in CornerFix (default settings for luminance and chroma)
But using the batch processing functionality for a collection of files is even simpler. For batch processing, load the profile first ("Lens Profile") and then select the folder where the images are located ("File"). See below for a quick-and-dirty procedure using batch processing. You can even batch create profiles, but I haven't used this feature yet.
All in all, with its cryptic and (sometimes) surprisingly efficient user interface, CornerFix is definitely a "developer's" application and not so much one for "dummy" users...
It is also important to set some preferences optimally and to use the preferences dialog to "fine-tune" your profiles according to your taste (and not to optimal results). I return to this below.
Creating Calibration Images
The biggest issue seems to be the creation of properly working calibration images. Opinions vary in the forums about the strictness of the requirements and how many situations need to be covered with a calibration image of its own. To provide readers with an impression of this, I first cite the author's instructions on this matter, then list opinions from posters in forums, draw some conclusions, and finally, I present what I did in my first and fairly successful attempt at creating a calibration image.
Instructions from the Author
The application's author Sandy McGuffog provides the following instructions for creating proper calibration images (from Website, adapted):
- A flat field reference file is an image of a grey card taken
with the lens, filter and combination of your camera's settings (e.g.,
on the Leica M8 or M9, lens detection on/off, IR filter on/off) that you
want to correct for.
If your camera has automatic lens detection, you should typically, have this off.
You should overexpose by between 1 and 2 stops – enough to get the brightest possible field, without the highlights in any channel blowing out.
It's important that the lighting be as even as possible, and the camera be exactly aligned with the grey card.
Forum Discussions on how to Create a Calibration Image
In the thread "Link - Collection for CornerFix Profiles" started byDoc_P on the l-camera-forum I found a number of statements on this topic:
jacques wrote:
I have to make a profile for the CV 15mm M mount lens..... so far all my efforts
have proved terrible.
Sandy
McGuffog's reply: Generally only one profile for all apertures
will work ok. Usually something like f/8.
jdavidr wrote:
- Just my opinion, but CornerFix rocks. I was able to set it up and create a profile for my CV15mm M-mount in about 15 minutes. The output looks great to my eye.
- To generate the profile image, I set the f-stop to 9.5, ISO160, WB to manual, uncompressed DNG, Lens selection to "off", AE with exposure compensation set to +2, focused somewhere in the middle of the range, pointed it at the light table about 3 inches above, kept the camera moving while tripping the shutter, yielding a 1/15th sec exposure.
- I took two shots, one to set the WB, the other to grab the image. I spent about 45sec spotting out some sensor dust spots visible at 2:1 magnification before my OCD meds kicked in. Then I followed the excellent instructions, and ran a series of shots through the CornerFix grinder in about 30 seconds.
Alnitak wrote:
- In my experience, the difficulty is in getting the right profile. With these super-wide lenses, getting lighting such that the image is evenly illuminated can be a challenge; you also then want to get the WB correct (and very neutral), and clean out any obvious dark dust spots. Once you have a solid reference image and have generated your profile, then the process of using CornerFix is very easy and is very much "set it and forget it."
thrice wrote:
- You don't have to worry about dust bunnies at all, the vignetting gradients are vector calculations to my knowledge. The dust bunnies remain on corrected shots even if they are in the calibration target.
ghealey wrote:
- I am trying to use CornerFix to correct the images but am suffering with creating a good profile. The process for creating the profile is easy enough - the execution is challenging. I use a gray card and shoot from extremely close up to get the card to fill the frame (a couple of inches) as the lens is so wide. This close up makes it difficult to light evenly as either the camera or my head blocks the light. The resulting profile(s) do not work well.
- Today I set up in a studio with an evenly lit mid-grey backdrop and created 6-7 new profiles with various lighting setups. Strangely, they all work about the same and are an improvement on my earlier efforts, but are not great. The red edge has been fixed, but any highlights in the photo are badly blown out.
Response by Sandy McGuffog:
- My suggestion would be to use an evenly lit wall rather than a grey card; CornerFix is relatively tolerant of imperfections that are small relative to the frame size (so e.g., it can be a brick wall), but can't easily tell the difference between vignetting and uneven lighting.
- Some people have also had success by just putting a piece of paper over the lens as a diffuser, but as a technique you're very dependent on the uniformity of the paper, and even then you have to point the camera at something relatively evenly lit.
jdavidr wrote:
- Sandy, a quick question that may have been answered before -- Does the white balance setting matter when creating the profile? I created my CV15 profile using an evenly-lit light table while moving the camera so it's pretty even. Before snapping the profile shot, I manually white balanced the camera using the same technique. I've noticed when I use that profile in daylight, that I'm still getting some red edge. Should I re-do the profile in daylight?
Response by Sandy McGuffog:
- Slightly complicated answer to that one: white balance as set on the camera doesn't matter - CornerFix ignores that. The actual light source however can matter. Specifically, if you have a light source that has a somewhat uneven spectrum, then the actual vignetting characteristics of the lens/camera combination can be different to that under daylight. E.g., if you happen to shoot sports scenes under artificial light, you will find that some high intensity lights used in such situations have odd characteristics. Likewise, some fluorescent lights will give green edges if you use a daylight profile. So, I'd guess that your light table has a spectrum that is different enough to daylight to give a slight red edge.
paolocava wrote:
- I have used a white piece of plastic (from a plastic dish) which I cut to a size in order to fit perfectly on the front filter of my lens, in this way there is non need to take a picture of a wall or a grey card and the white will fill the picture.
- Then I set the white balance of my M9 on manual and take the first shot.
- The following shots are with different exposures up to + 3.
- Cornerfix is fixing both vignetting and red/cyan edges and I use the picture to create the lens profile.
I also found the thread "CV 15 4,5 II und M9 Referenz Datei für Cornerfix??" in the German section of l-camera-forum, in which Marco-HF asks whether someone created or found a CornerFix profile for the CV 15 lens. Here are some suggestions from the thread for replacing the gray card:
- ground glass screen, neutral white or gray wall, white Melitta coffee filter, white sheet of paper (moved for blurring the structure)
Here the original replies in German (which I will not translate):
- Eine Mattscheibe direkt vor das Objektiv halten tut's auch. Auf diese Weise habe ich die Korrekturprofile für mein 21er und das 28er erzeugt. (Karl-Albert)
- Eine einigermaßen neutral graue/weiße Wand anmessen reicht aus. (kgs)
- Am besten man macht sich für verschiedene Lichtsituationen Referenzaufnahmen
mit verschiedenen Blendenstufen (sonnig / bewölkt macht einen Unterschied,
ebenso f:4.5 oder f:8 zB).
Bevor ich meine Phoxle-Scheibe bekommen habe, ging es schon recht gut mit der "Melitta-Technik": Product Comparison: White Balance Filters (Professional Photographer Magazine Web Exclusives)
Wirklich erstaunlich, aber ein Melittafilter schlägt manche Weiß-Scheibe... Und kostet (fast) nichts :-) (C_R) - Ich habe ein weißes Blatt Papier genommen, und damit im diffusen
Dämmerlicht
gegen den Himmel belichtet. Das Blatt habe ich dabei bewegt um keine Struktur
des Papiers in das Korrekturbild zu bekommen. Die Kamera sorgt schon von
selber für das grau.
Das geht Ruckzuck und funktioniert gut. Manchmal bleibt dennoch eine leichte Farbverschiebung am Rand, was man aber bei Bedarf leicht nachbessern kann. Ich habe alle CV 15 Fotos mit dem gleichen Profil behandelt, und nur bei den wenigsten eine störende Farbverschiebung zurück behalten. Aber die Grenzen was noch in Ordnung ist muss jeder für sich selbst stecken. (FrancoC)
Some Conclusions
- White balance does not matter.
- Small imperfections in the card/wall/whatever do not matter.
- The brightness of the card/wall/... does not matter (white or gray is OK).
- The distance setting on the lens does not matter (much) (but the card/wall/... should better not be sharp); the target can even be put directly on the lens as long as the brightness distribution remains even.
- The light source matters if it has
- an uneven brightness distribution
- an uneven spectrum (like certain artificial lights) => it looks as if natural light is to be preferred
- Usually, one calibration image with one f-stop will do (f/8 is a good choice).
- The ISO setting does not seem to be important. However, high ISO values (ISO 3200 and higher) should be avoided in order not to introduce noise artifacts
- The calibration image must be overexposed to some degree; opinions very from +1 to +3... (for details see the instructions above)
- The camera's "Lens Detection" has to be set to "Off" (provided you do not want to select a certain lens for which you want to correct...).
My First Attempt
I created the conclusions above after I did the shots for the calibration images. Therefore, I did not follow all the above recommendations exactly. This is what I did when I created my first calibration images for CornerFix:
- My "gray card" was a large calendar, exactly, its white cardboard at the
back, because it was not glossy like the white backs of the calendar pages.
I used a large calendar so that it filled the whole image even for a focal
length of 15 mm.
>> If you use a smaller sheet of white paper you have to got so close with the camera to the paper that you will cast a shade on the paper, and the lighting will become uneven. - Distance was less than half a meter. On the lenses, distance was set to infinity to smooth out any irregularities in the cardboard.
- The camera's "Lens Detection" function was set to "Off".
- EV was set to +1, that is, I overexposed by 1 f-stop.
- Aperture was set to the maximum value and to f/8. Afterwards, I decided to use the f/8 images only, because these corrected the photos a little less aggressive.
- ISO was set to 400.
- I was simply hoping for an even lighting and exact alignment with the gray card... I was outside on a gray autumn afternoon (natural light, no direct sunlight) and took the photos from above to minimize shading.
I took four photos per lens (two per aperture), but used only one of the f/8 images to create a CornerFix profile. This worked for the CV15 fairly well - and still a little bit too aggressive to my taste. Definitely, my CV15 calibration image has potential for improvement! Earlier tests with non-ideal images or profiles from other sources failed and lead to curious artifacts, but to my great relief this attempt succeeded.
See also a remark on creating calibration images for the Adobe DNG Flat Field plug-in below. It stresses the importance of an even light distribution. I assume that a CornerFix calibration image can be used for the Adobe plug-in as well (see also below).
One More Tip...
I found the thread "Korrektur Profile (Bilder) für das Voigtländer 21mm 1.8 an der a7R" in the systemkamera.de forum, in which Marco-HF asks whether someone would be willing to create a CornerFix profile for his lens. Poster 3d-Kraft has an interesting suggestion for removing/reducing a slight magenta color cast:
- English (translated): In some situations, a slight color cast
is visible towards the edges, ... . In my view, the effort of creating and
using a correction profile is not worthwhile, because retracting
the "purple" color
slider even slightly is sufficient in Adobe Lightroom or Camera Raw. This
removes a possibly occurring color cast very efficiently - usually without
a visible effect on the remainder of the image (if it does not contain
intensely purple colored objects).
German: In manchen Situationen ist ein leichter Farbstich zu den Rändern hin erkennbar, das zeigten auch die Beispiele. Der Aufwand mit einem Korrekturprofil lohnt aus meiner Sicht nicht, da bereits ein leichtes Zurücknehmen am "lila" Farbregler in Lightroom oder Adobe Camera Raw genügt. Damit wird ein ggf. auftretender Farbstich sehr effizient entfernt - i.d.R. ohne dass sich dies sichtbar auf den Rest des Bildes auswirkt (sofern dort nicht zufällig intensiv lilafarbene Sachen zu sehen sind).
Inspecting the Homogeneity of My Calibration Images
Above, the author and several posters point out the importance of even lighting for the calibration images. Below, I present calibration images (EV +1) from three different investigations, and you can judge yourself, whether they are even (before you read my opinion on this below the table):
| EV, Lens Detection Option, Selected Lens | f/4.5 | f/8 |
EV +1 First investigation |
 |
 |
EV +1 First investigation |
 |
 |
EV +1 Additional investigation |
 |
 |
EV +1 Additional investigation |
 |
 |
EV +1 Overexposure investigation |
 |
 |
EV +1 Overexposure investigation |
 |
 |
When you take a closer look at all the images, you can find visible shading caused by the camera or me at the center bottom. In other words, all of these calibration images are not perfect and better ones should be created (although these work already satisfactorily).
Update 2016: In October 2016, I decided to sell my Voigtländer Super Wide Heliar 15mm f/4.5 lens in favor of the newer version Type III lens because of the difficulties I had in creating proper calibration images for this lens. I decided, however, to once again make an attempt at creating calibration images for this lens:
| EV, Lens Detection Option, Selected Lens | f/4.5 | f/8 |
EV +1 Investigation 2016 |
 |
 |
EV +1 Investigation 2016 |
 |
 |
In the end, I would say that these images look fairly similar to the ones that I had already created. Maybe, it is not possible (for me...) to arrive at better ones...
Conclusion
This test confirms for me that it is indeed not easy to create proper calibration images.
Using Cornerfix with My Wide Angle Lenses
In December 2016, I made a larger effort to apply Cornerfix to DNG photos that I had taken with my three wide angle lenses. I did so even after I had sold them, was just selling them, or at least decided to sell them, because I was interested in what can be done. You can find the results, which are indeed good, on the pages for the respective lenses:
- Voigtländer Super Wide Heliar 15mm f/4.5
- Zeiss Biogon T* 21mm f/4.5 ZM
- Voigtländer Snapshot-Skopar 25mm f/4
See below for the quick-and-dirty procedure that I used for this.
So, why did I not just keep the lenses when Cornerfix can do the job? It is mostly to save some effort. Applying Cornerfix requires that you shoot in DNG for the respective lenses. Either you have to set this option each time you use a lens that needs a Cornerfix treatment, or you have to shoot DNG+JPG all the time, although this is not needed. In the first case, I would probably forget to change the file format most of the time (as I do with the lens detection setting)... Moreover, dealing with DNG introduced a lot more work that I do not want to do, hence the use of JPG files, even though I know that DNG leads to better results.
Testing the Effect of Overexposure
Above, I collected instructions from the author and experiences (or opinions...) from forum posters as to how to create an optimal calibration image. The application's documentation states that "you should overexpose by between 1 and 2 stops – enough to get the brightest possible field, without the highlights in any channel blowing out." That is, why I chose an exposure correction of EV +1 for my test shots.
Opinions, however, vary, and some posters used EV +2 and even EV +3 (at least they varied overexposure up to that value). Since I found that my photos were a bit overcompensated in the corners with respect to vignetting, I did another test, in which I varied overexposure between +1 and +3 for the aperture values f/4.5 and f/8 (two photos for each condition). The test photos are shown in the table below:
| EV, Lens Detection Option, Selected Lens | f/4.5 | f/8 |
EV +1 |
|
|
EV +1 |
|
|
EV +2 |
 |
 |
EV +2 |
 |
 |
EV +3 |
 |
 |
EV +3 |
 |
 |
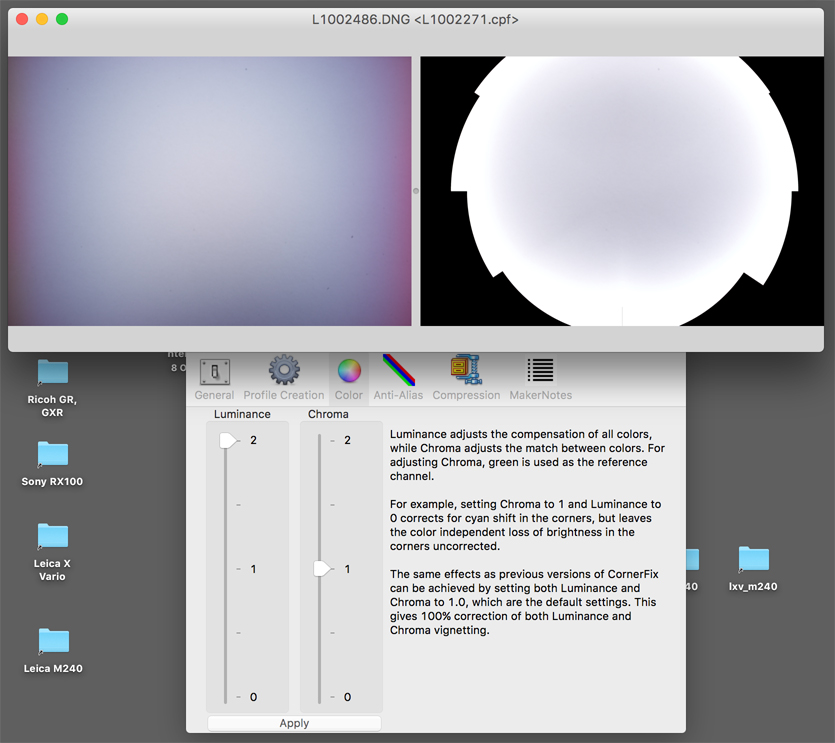
When I used these photos to create calibration images, I got an error message for the EV +3 photos, saying that the photo contains blown highlights, which would lead to incorrect calibration images. This was indeed the case, as the examples below demonstrate. The differences between the EV +1 and EV +2 versions are small, but I found that for EV +2 the corrected photos were even more overcompensated than for EV +1 (or at least, the corners were a little bit lighter...).

The result as displayed in CornerFix for the profile EV +1, f/8 (bottom right of the above samples)

The result as displayed in CornerFix for the profile EV +2, f/8 (bottom right of the above samples)

The result as displayed in CornerFix for the profile EV +3, f/8 (bottom right of the above samples)
Conclusion
Having done this test, I decided that I would rather stay with EV +1 than increase overexposure for the calibration images. However, when looking at the +1 and +2 versions a few months later, I could not find any reasons against the +2 version....
Playing around with Vignetting
After having done the tests described above, I was a little confused, particularly because removing the vignetting somehow destroyed some photo's "atmosphere". I often found that the corners were "overcompensated", that is, too bright. So what could I do? I took a look at the application's preferences - and there I found the solution to this problem.
For example, I played around with the luminance settings in the CornerFix preferences dialog (see below) and found that, particularly for very wide lenses, applying no or only 50% vignetting correction can be OK - depending on the motif, of course.
I then found in different places and for different reasons that I am not alone with this opinion. Sean Reid, for example, points out that leaving some vignetting in the photos leads to less noise in the corners compared with full-strength corrections.
Using the CornerFix Preferences
In the following, I cover the preferences dialog, but only those options that I actually use(d).
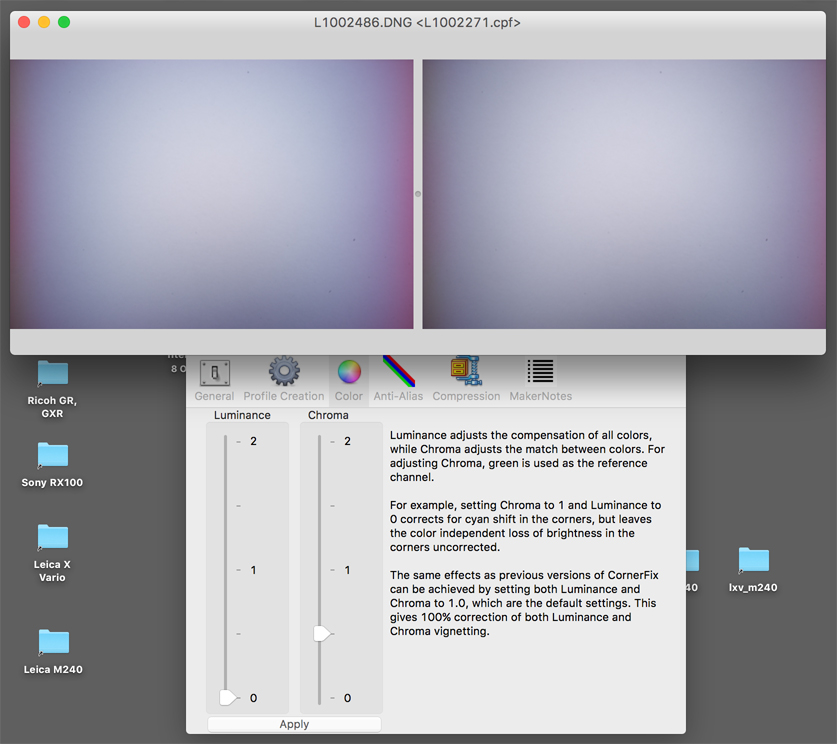
Using the CornerFix Color Preferences to Adjust Vignetting
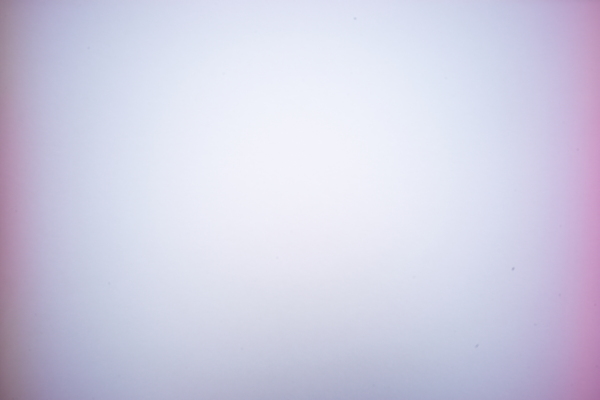
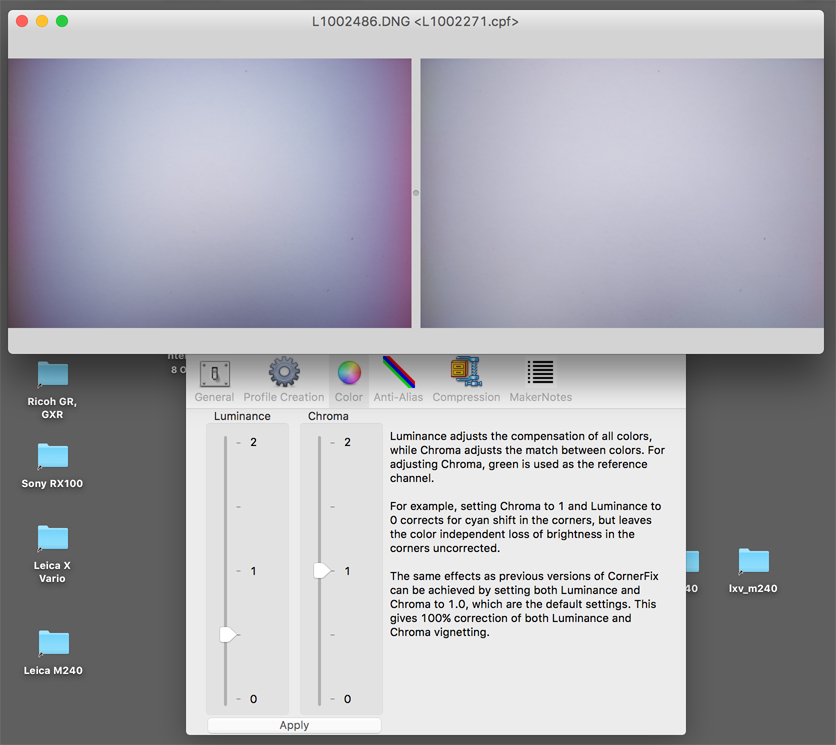
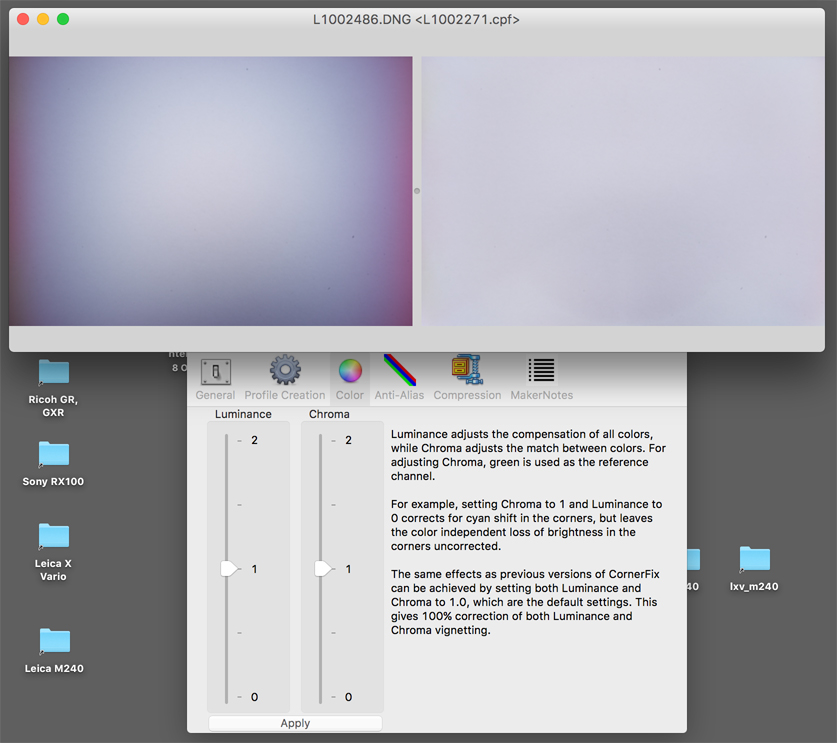
If you click the "Color" tab in the Preferences dialog, you will find two rulers, one for adjusting luminance, one for chroma. The "Luminance" ruler adjusts the strength of the vignetting correction, with values between 0 and 2 and stops at 0.5, 1, and 1.5. The (default) value of 1 means 100% vignetting correction, which often seems to be too much for me, and 0 means no correction. Particularly for very wide lenses, no correction can be OK, depending on the motif, of course. A value of 0.5 can often be a good compromise for wide lenses. The figures below show what happened when I combined two photos that might work as calibration images (color cast corrected, that is chroma set to 1) and changed the "Luminance" setting:
 |
 |
|
Luminance set to 0: no vignetting correction |
Luminance set to 0.5 - vignetting is still visible, but may be acceptable for many motifs (0.75 might even be better) |
|
 |
 |
|
Luminance set to 0.75: vignetting is weak, but still visible; it may be perfect for many motifs (note: a different profile is used here, but this does not make a big difference) |
Luminance set to 1: vignetting is optimally corrected |
|
 |
 |
|
Luminance set to 1.5: vignetting is "over corrected" |
Luminance set to 2: vignetting is even more "over corrected" |
Of course, it is possible to use settings in between to find the optimal vignetting correction.
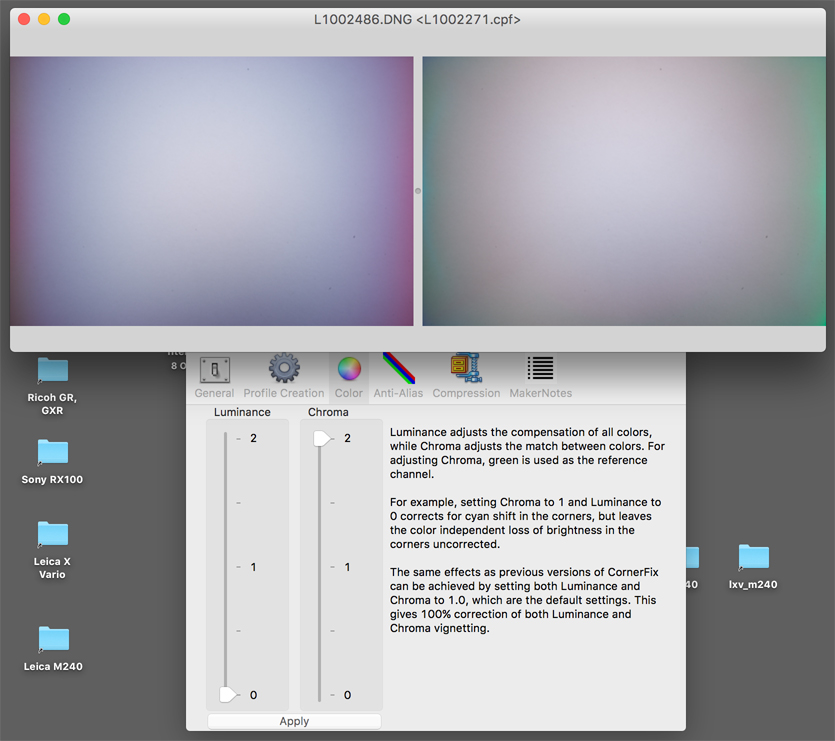
Using the CornerFix Color Preferences to Adjust Color Cast
If you click the "Color" tab in the Preferences dialog, you will find two rulers, one for adjusting luminance, one for chroma. The "Chroma" ruler adjusts the color of the color cast correction, with values between 0 and 2 and stops at 0.5, 1, and 1.5. A value of 1 means 100% color cast correction, which seems OK for me. A value of 0 means no correction of a magenta color cast. A value of 2 causes a cyan color cast. Thus, a value of 1, which is the default value, is typically the best choice here. The figures below show what happened when I combined two photos that might work as calibration images (vignetting not corrected, that is luminance set to 0) and changed the "Chroma" setting:
 |
 |
|
Chroma set to 0: no color shading correction |
Chroma set to 0.5 - a color cast is still visible |
|
 |
||
Chroma set to 1: color cast is optimally corrected |
|
|
 |
 |
|
Chroma set to 1.5: a cyan color cast becomes visible |
Chroma set to 2: strong cyan color cast |
Of course, it is possible to use settings in between to find the optimal color cast correction.
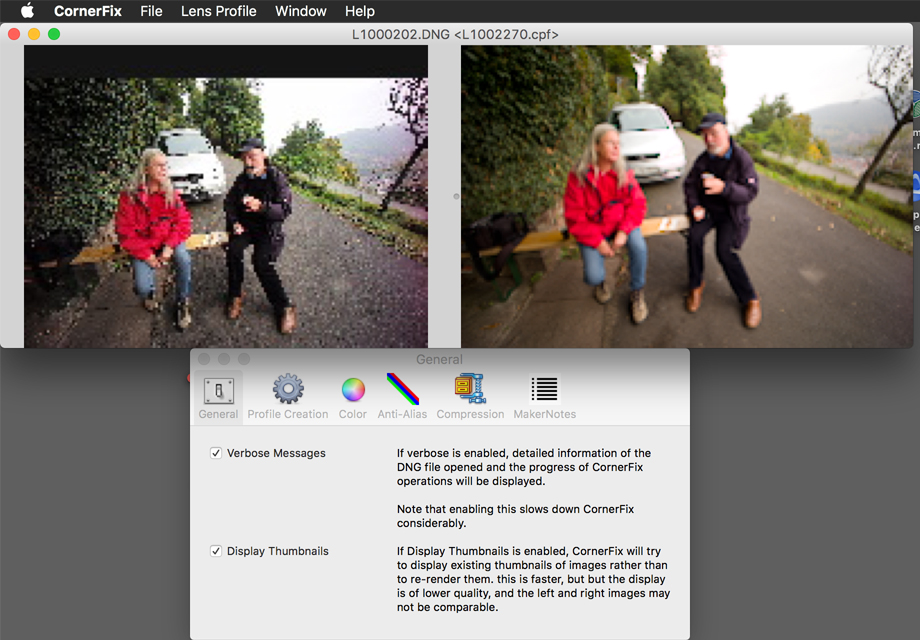
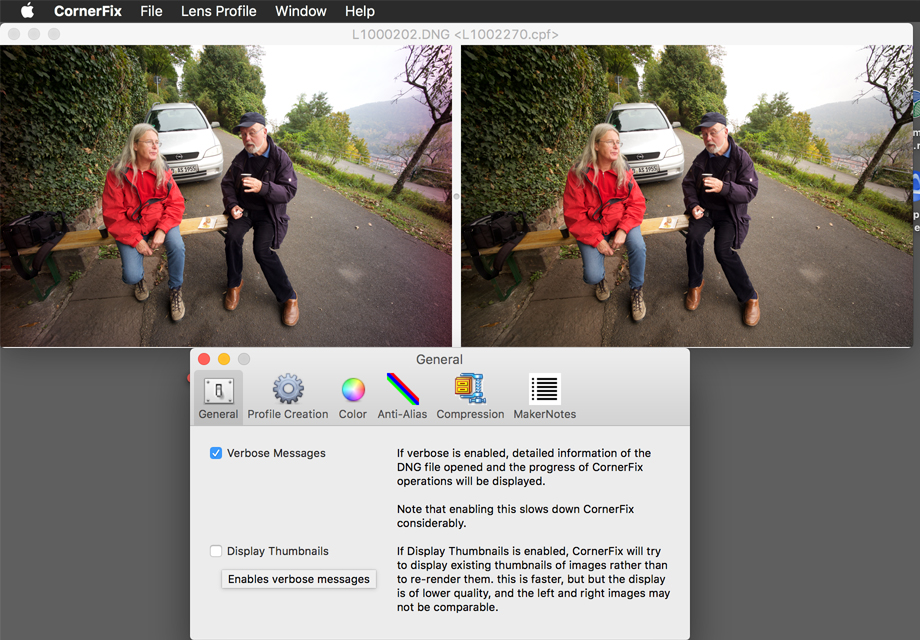
Using the CornerFix Preferences to Get a Better Preview of the Processing Results
If you click the "General" tab in the Preferences dialog, you can check the "Display Thumbnails" checkbox, which is the default, or you can uncheck it. In the "unchecked" case, you get a much better preview of both the original and the processed image, which is often very helpful. The drawback of this setting is, however, that it may take quite a while until the preview(s) apperar (you are warned of this in the preferences dialog). Below is a comparison of what you might get for both options (the embedded previews may vary a lot in their quality; click the images for larger versions):
 |
 |
|
CornerFix with thumbnail display enabled |
CornerFix with thumbnail display disabled |
Using the CornerFix Preferences to Optimize DNG Compression
If you click the "Compression" tab in the Preferences dialog, you can check the "Lossless (Huffman) Compression" checkbox to enable lossless compression of the DNG files that CornerFix creates:
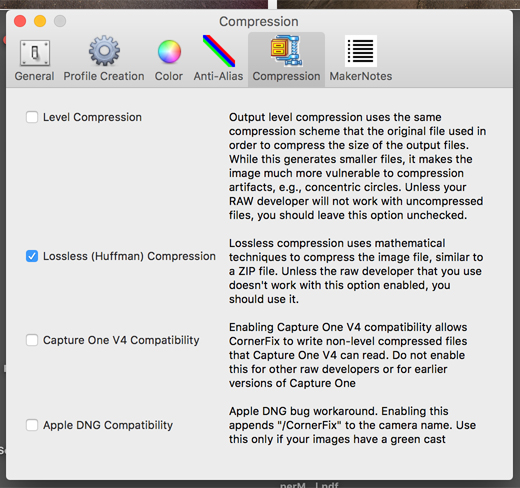
The checkbox is not checked by default, probably for "safety reasons" because some RAW developers may not accept compressed DNG files. I would have preferred it the other way round, though, since I ended up with lots of DNG files having a file size of 48 MB. I took me quite a while to find out that I better check this checkbox. Compressed, many of them get a file size below 30 MB, which make quite a difference (and Adobe Lightroom, the probably most used RAW developer, accepts compressed DNG files).
Finally: A Quick-and-Dirty Procedure for Using Cornerfix (Batch Processing)
The following quick-and-dirty procedure for applying Cornerfix assumes that you already created a Cornerfix profile. Above, I discuss that many people have problems with creating such profiles, including me. But I also learned that you can achieve usable results with "sub-optimal" profiles. In the following, I assume that you want to correct a couple of files and thus, use the batch processing feature of Cornerfix. Correcting only one file should not present a problem...
Step 1: Starting Cornerfix
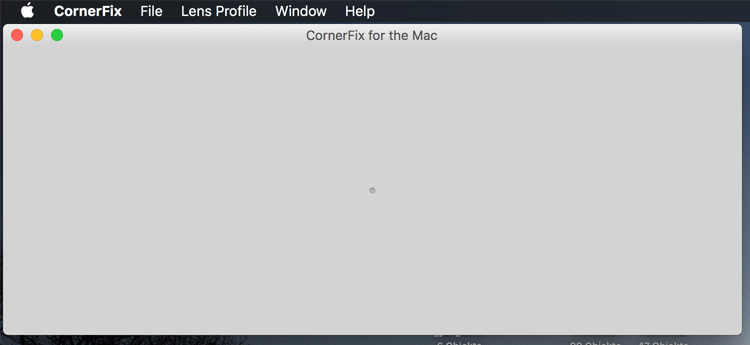
This is the Cornerfix screen after you started the application
Step 2: Loading a profile
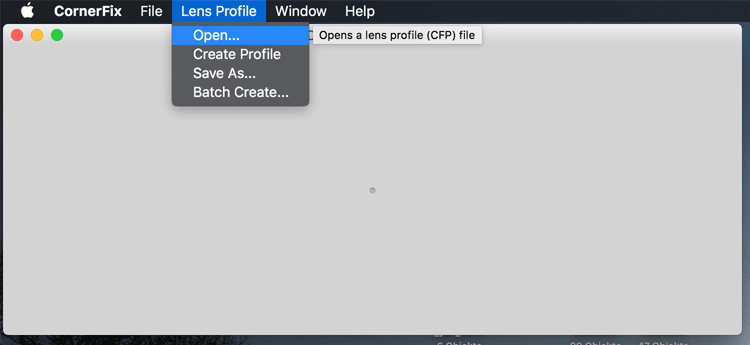
After selecting "Open..." in the menu, select the proper profile in the file selection box (not shown). The profile file will be listed in the title bar in angle brackets (<...>):

Step 3: Starting the Batch Processing
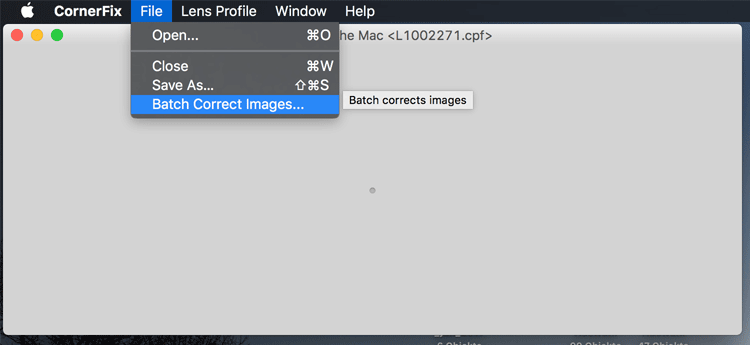
Select "Batch Correct Images..." in the menu (select "Open..." if you want to correct only one file). Then select the folder that contains the to be corrected images. Open it and select the images that you want to correct:
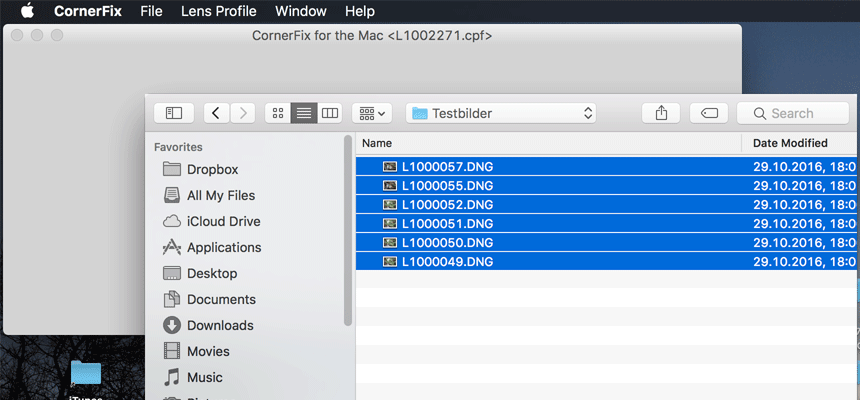
Step 4: Find the corrected Images
The corrected images are saved in the same folder as the original images. They have the suffix "_CF" in their file names:
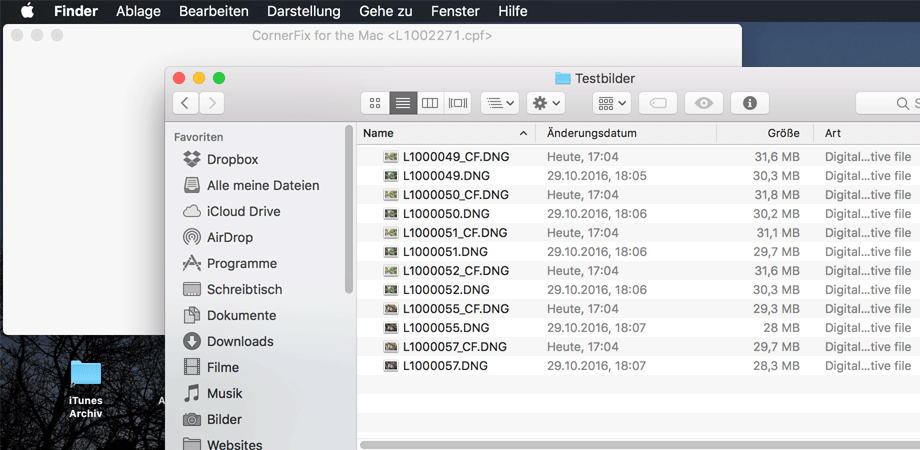
I did not show each single step in the process, but I believe that the missing steps should be evident to people who use a computer regularly.
Adobe Flat-Field Plug-in
The Adobe DNG Flat Field plug-in offers another solution for reducing or even removing color shading. I did not use this tool up to now. Find more information it on the previous page.
For his test of the Voigtländer Super Wide Heliar 15mm f/4.5 at the Leica M and SL in his article "Leica SL And M: Ultra-Wide Rangefinder Lenses", Sean Reid used both CornerFix and the Adobe Flat Field plug-in (after I had pointed him to the latter application). He concludes that the Adobe plug-in handles uneven color drift better than CornerFix and recommends using the first. I still have to try out the plug-in for myself to form my own opinion on this.
Tips and Tricks
I found the thread "Korrektur Profile (Bilder) für das Voigtländer 21mm 1.8 an der a7R" in the systemkamera.de forum, in which Marco-HF asks whether someone would be willing to create a CornerFix profile for his lens. Poster Bezier writes about using the Adobe DNG Flat Field plug-in (in German):
- English (translated): If you limit yourself to color correction(i.
e. fix a possible vignetting otherwise), profiling is uncritical.
Just photograph a sheet of white paper, done. When I tried the tool, I created
six profiles (sun, shade , tungsten , each lens set to " infinity" and "close-up" );
the results were almost undistinguishable. It looks differently, if you
also want to correct the vignetting ; since not only the exposure has
to match exactly, but also the illumination for the profile should be
distributed absolutely evenly. What, as I have learned, is hard to achieve
with home equipment...
So far I removed the color cast always in LR using two gradient filters (one gradient from left, another one from right) by shifting the "Tint" value. And then I save the settings as presets. In most cases, this procedure delivers very decent results.
German: Sofern man sich auf die Farbkorrektur beschränkt (also eine eventuelle Vignettierung anderweitig behebt), ist die Profilerstellung sehr unkritisch. Einfach ein weisses Blatt fotografieren, fertig. Ich hatte zum Ausprobieren sechs Profile erstellt (Sonne, Schatten, Kunstlicht; Objektiv jeweils auf "unendlich" und auf "ganz nah"); die Ergebnisse haben sich praktisch nicht unterschieden. Anders sieht's aus, wenn man auch die Vignettierung damit korrigieren möchte; da muss nicht nur die Belichtung genau passen, sondern auch die Ausleuchtung für das Profil natürlich absolut gleichmässig sein. Was, wie ich feststellen durfte, mit Hausmitteln gar nicht einfach zu erreichen ist...
Bisher habe ich den Farbstich immer in LR mit zwei Verlaufsfiltern (einer von links, einer von rechts) mit Verschiebung des "Tint" korrigiert. Und das dann als Preset abgespeichert. Gibt in den meisten Fällen auch sehr ordentliche Ergebnisse.
Results
The results that I achieved with CornerFix are quite encouraging. CornerFix allows me to keep my wide angles lenses, and the fixing process is fairly straightforward. The biggest problem for me is still to create a good profile image.
I also found it useful to leave a certain degree of vignetting in the images. Often, this makes wide angle photos appear better (or nicer...). Luckily, CornerFix allows you to do this in the preferences dialog (for details see above).
Update 2016: In October 2016, I decided to sell my Voigtländer Super Wide Heliar 15mm f/4.5 lens in favor of the newer version Type III lens because of the difficulties I had in creating proper calibration images for this lens. Later in 2016, I also decided to exchange my 21mm and 25mm lenses for Leica equivalents. Nevertheless, I tested the Cornerfix application with both lenses and got good results. For a RAW user, Cornerfix would only introduce little overhead, particularly if you use the batch processing feature. For a JPG shooter like me, however, more effort is involved because you have to select the DNG format each time you use these lenses. Therefore, I opted for exchanging the lenses to have less work.
Conclusions
At the moment, there is no alternative for me to Sandy McGuffog's great little application CornerFix, when I need to fix color shading in the photos that I take with my wide angle lenses. I am glad that this application is still available - and for free (of course, I made a small donation...).
References
Lens Codes
- La Vida Leica: Leica Lens Codes (lavidaleica.com/content/leica-lens-codes)
- La Vida Leica: Converting to a Coded M Lens Mount (Last updated on March 21, 2013) (lavidaleica.com/content/converting-coded-m-lens-mount)
- Andreas Jürgensen/Carsten Wimster (l-camera-forum): Leica Lens Codes (www.l-camera-forum.com/leica-news/leica-lens-codes/) (Based on the La Vida Leica article "Leica Lens Codes")
- Thread started by Mike Prevette (l-camera-forum): Proof of concept regarding self coding of lenses (www.l-camera-forum.com/topic/10323-proof-of-concept-regarding-self-coding-of-lenses/)
- Michael Zhang (Petapixel): Add a Lens Code to Your Leica Lens with Black and White Paint (Published on March 21, 2013) (petapixel.com/2013/03/21/add-a-lens-code-to-your-leica-lens-with-black-and-white-paint/) (Based on the La Vida Leica article "Converting to a Coded M Lens Mount")
- Bernd Margotte: Objektivkodierung Leica M System (in German, about the Leica M8) (www.berndmargotte.com/technical/objektivcodierung_de.html)
Adobe
- Adobe: Adobe Camera Raw Help / Lens profile support | Camera Raw | Lightroom | Photoshop (helpx.adobe.com/x-productkb/multi/lens-profile-support.html)
- Adobe: Plug-ins for Adobe Photoshop Lightroom (labs.adobe.com/technologies/lightroomplugins/)
- Adobe: Adobe Lens Profile Creator (helpx.adobe.com/photoshop/digital-negative.html#resources)
- Adobe: Adobe Lens Profile Downloader (helpx.adobe.com/photoshop/digital-negative.html#resources)
- Adobe: DNG Profile Editor (camera profiles!!!; helpx.adobe.com/photoshop/digital-negative.html#resources)
CornerFix
- Sandy McGuffog: CornerFix homepage (sites.google.com/site/cornerfix/)
- Sandy McGuffog: CornerFix - still going strong (blog article) (chromasoft.blogspot.de/2015/12/cornerfix-still-going-strong.html)
- sourceforge.net: CornerFix download page (http://sourceforge.net/projects/cornerfix/files/)
- La Vida Leica: Using CornerFix to Correct Images (lavidaleica.com/content/using-cornerfix-correct-images)
- Thread started byDoc_P (l-camera-forum): Link - Collection for CornerFix Profiles (www.l-camera-forum.com/topic/120279-link-collection-for-cornerfix-profiles/)
- Thread started by Marko-HF (systemkamera-forum.de): Korrektur Profile (Bilder) für das Voigtländer 21mm 1.8 an der a7R (www.systemkamera-forum.de/topic/104228-korrektur-profile-bilder-für-das-voigtländer-21mm-18-an-der-a7r/); reply by 3D-Kraft
- Thread started by Marko-HF (l-camera-forum): CV 15 4,5 II und M9 Referenz Datei für Cornerfix?? (www.l-camera-forum.com/topic/169603-cv-15-45-ii-und-m9-referenz-datei-für-cornerfix/)
- Tom Grill (About Photography): Using the Voigtlander 12mm and 15mm lenses on the Leica M (240) (aboutphotography-tomgrill.blogspot.de/2013/06/using-voigtlander-12mm-and-15mm-lenses.html)
- Sean Reid: Leica SL and M: Ultra-Wide Rangefinder Lenses (www.reidreviews.com; subscription Website)
|
made by |
| 04.07.2024 |