DSO Photography for Dummies - Motivation and Introduction
On this page I would like to share the motivation behind my attempts at "DSO photography for dummies and lazy people" and make some introductory remarks. Then I present a few solutions that I regard as "practically usable." Technical details, examples, and experiences (if available ...) can be found on the pages for the respective devices.
Notes:
- I will not add further new telescopes to this page any more! Things are changing too fast...
- Regarding the presented telescopes, this page is already outdated!
- See also pages Atik Infinity Colour Camera, Atik Infinity Colour Camera - Experiences, and Atik Infinity Colour Camera - Software.
- See also page Unistellar eVscope.
- See also page Vaonis Vespera.
Introduction
Astronomy is a great hobby that interests quite a few people. However, many beginners are soon disappointed with what they see in their telescopes (let's assume everything else is OK...). This is because it bears little resemblance to or is only a faint reflection of what can be seen in books and on the Internet on photos that were taken with large or even space telescopes, such as the Hubble telescope: There are no colors, and details are difficult to recognize. Often, you can only see a faint glow, provided you see anything...
The founders of Unistellar, who designed the eVscope (more on this below), describe this "disappointment" as follows:
- I still remember my disappointment when, at age 14, I first saw the Andromeda galaxy, the most prominent deep-sky object in the Northern Hemisphere. After an hour of patiently studying the sky and carefully pointing my telescope, I finally saw a strange misty gray stain appear where I expected to see a vibrantly colored disk of light.
- Many years later my friend Arnaud Malvache ... shared a similar memory with me.
In contrast to photographic emulsions and sensors, our eyes cannot store light and therefore cannot produce a picture impression corresponding to long-exposure photos. In addition, the eye is sensitive to color only at the center (called "yellow spot"). But the cones there are far less sensitive to light than the rods in the outer regions of the retina. Therefore, the light of faint sky objects is not enough to recognize colors. The rods, however, cannot recognize colors, are also distributed more loosely (Stoyan speaks of a 2 to 3 times lower resolution) and are not present at the center of the eye.
Hobby astronomers therefore learn "telescopic" or "indirect" vision to recognize details with the peripheral rods. They do not look directly at the object, but a little past it, as already mentioned, at the expense of color and sharpness. One has to practice this kind of seeing, and one should also observe an object over a longer period of time in order to discover new details. Probably, only a few have the patience that is required for this - I, at least, have it only to a lesser extent (after all, I have found that movements of the eye help to detect details, because the rods are sensitive to movements)...
Many hobby astronomers have therefore turned to astrophotography, especially since it has become digital. Nowadays, many telescopes are already tailored to astrophotography (different focal position, different sizes for the secondary mirror of reflector telescopes, etc.), which in turn annoys purely visual observers (as I read in forums...), which meanwhile feel "abandoned" by telescope manufacturers. Anyway, the possible compromises (a telescope for both uses) seem to be unacceptable for those who always strive for the optimum...
In the simplest case, you can hold a camera (or mobile phone) to the eyepiece to get photos of celestial objects, but that works only for bright objects, such as the moon and the planets. If you really want to take beautiful photos of deep sky objects, you have to use a DSLR or system camera, a suitable tube, a (heavy!) equatorial/parallactic mount, and extensive accessories. In addition, a lot of patience and time for the recording and post-processing of the photos are needed. This scares me, and certainly many others as well, from pursuing this route. And since I do not have any experience of my own in this area, I do not want to go into more detail here. After all, a hobby astronomer, from whom I acquired my used Skymax-127, showed me that already with a 6" Newton tube similar to mine and a standard DSLR (and other equipment of course ...) beautiful photos of deep sky objects are possible.
My Motivation
All in all, my situation was as follows:
- The purely visual observation did not disappoint me, because I knew what to expect. But it has again and again led to frustration and short-term disappointment, because I saw objects very faintly, did not see them at all, or did not know whether what I saw faintly was the desired object. This was not only true when accessing the objects "manually," but partly also when accessing objects with the GoTo control. For example, I was not able to find M 78 in Orion, and I was also not able to find the Ring nebula M 57 in Lyra "manually", even under a dark sky. And there are many more objects to which this applies. In addition, there are always days when frustration is massive - that is probably due to the objects that I want to observe that day...
- Photography with the camera held to the eyepiece, is only applicable to photos of the moon and of planets. With more sensitive sensors, this might change one day...
- I would also like to have a colorful picture of deep-sky objects in the eyepiece or a photo of them. I might also show such a photo to other people and boast of it (that's the main reason for all this, isn't it?)...
- But it would be enough for me to see sky objects in the eyepiece (or anywhere else), which I was not able to find so far - ideally even under not so dark skies, as we find here in Mühlhausen/Kraichgau. After all, I have learned that deep sky photography is possible even under less than ideal skies...
- "Real" astrophotography done with a parallactic mount (and other accessories, guiding, etc.) is out of question for me (also because of my back...). In addition, I own a simple AZ GoTo mount, which I would like to use, but regrettably is unsuitable for this type of photography.
So my problem was that I would like to do "deep sky photography and observation for dummies and lazy people", albeit with little effort and using mostly what I already own (of course, a camera is needed...). But the question was: Is that possible at all, and, if so, how?
Five Solutions - One Approach
In the following, I present five solutions as possible answers to my question, "Is that possible at all?" Four of them, however, require completely new gear... All solutions can be labeled "electronically augmented astronomy" (EAA), sometimes also called "video astronomy" (but there seem to be subtle differences that I do not want to go into here - the solutions described here do not create a video image anyway).
With these solutions, one regrettably, has to abandon the idea of purely visual observing. These solutions are based on the fact that the incoming light is no longer received by the eye, but by a high-sensitivity CCD or CMOS sensor, further processed by software, and displayed on a screen, be it a computer screen or an electronic viewfinder. Exposure times are typically in the range of seconds, and incoming images are overlaid one after the other, called "image stacking", to reduce image noise and show more detail.
Unlike traditional astrophotography, these solutions offer a kind of "live" viewing experience and you do not have to wait until the end of the observations to see the results. The processing is already "live" and not done afterwards, even though that is also possible. The differences to astrophotography are due to the sensors used: DSLRs have large high-resolution sensors (16 MP and more, APS-C or full frame), two of these solutions use small, low-resolution sensors (about 1 MP) with relatively large pixels for increased sensitivity, on solution already a sensor with 6 MP. These sensors are also different from the small sensors of digital point-and-shot cameras, which have exorbitant resolutions (10-20 MP) and tiny pixels.
The solutions that I will introduce here differ in many details, ultimately in how "dummy-friendly" they are, but in my view they have enough in common to be able to speak of "one approach."
Addendum: I assume that more such telescopes will appear in the near future...
Unistellar eVscope
In November 2017, I came across the Unistellar eVscope via the Abenteuer Astronomie Newsletter. For quite a bit of money, a solution to my problem actually seemed to take shape, even though it would not be available before November 2018 at the earliest. I supported the respective Kickstarter project (it's over now), unfortunately already at the highest possible price, and received the "wonder telescope", with which EVERYTHING should be very easy, because it aligns automatically, on January 27, 2020. After initial struggles, the telescope now works for me without hassles and can indeed be operated very easily. It is a 4.5" Newtonian telescope that has a sensitive Sony CMOS sensor in place of the secondary mirror, and instead of an optical eyepiece it has an "eyepiece-like" device for viewing an electronic screen (such as an electronic viewfinder for digital cameras). It is mounted on a simple AZ GoTo mount (sic!).
 |
|
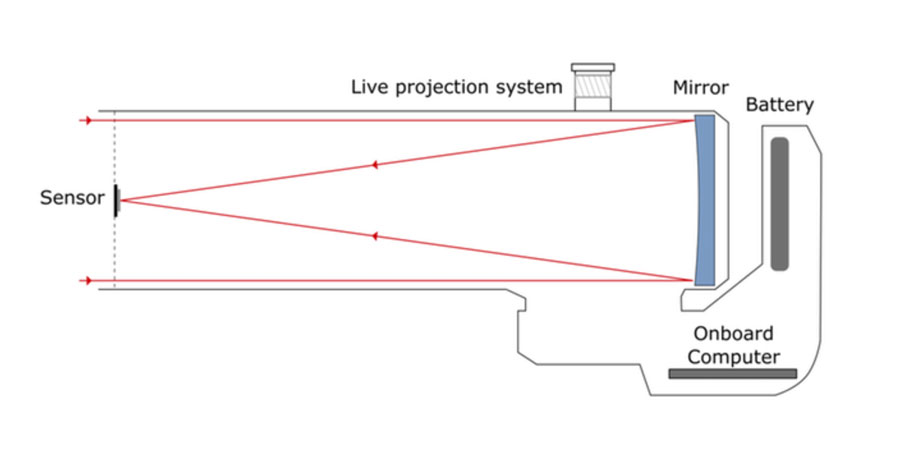 |
The image can be transmitted to smartphones, tablets, and computers, so that you can also show your pictures to other people in parallel to the observation and share them later. The image is in color, but compared with DSLR photos has a much lower resolution. This is simply for people who want to have a very easy solution, but still want to have a "live" impression similar to the one they saw on photos. The telescope is also quite insensitive to light pollution (the software attempts to take care of it).
Here are the technical data for a comparison with the Stellina, Hiuni, and Vespera telescopes (see below):
Hardware |
Electronics |
"Smarts" |
||
*) Calculated with Astronomy.tools |
Sensor Data
*) Diagonal: 6.09 mm (type 1/3, Quad VGA mode) or 5.59 mm (type 1/3.2, HD720p mode) |
|
Delivery was initially scheduled for November 2018, but was postponed several times. I received my sample at the end of January 2020. More about this telescope can be found on page Unistellar eVscope and on page Overview of the eVscope Pages.
Updates: In spring 2021, Unistellar launched the eVscope eQuinox which lacks an electronic eyepiece, and in September 2021 the eVscope 2 with a new, higher resolving sensor and a better eyepiece. Since then, the original eVscope is no longer available. In the beginning of 2023, the eQuinox was replaced by the eQuinox 2, which uses the same sensor as theVscope 2.
Atik Infinity
I asked my telescope dealer about the eVscope and his answer was not really encouraging: He considered it as a toy (but he might buy one when it becomes available...). He also said that an Atik Infinity camera on a 6" Newtonian tube would be a more flexible solution. Thus, he had given me a cue, which I continued to pursue, because it should still take at least a year until the eVscope would be delivered (it became more than two years...) and I did not want to wait that long.
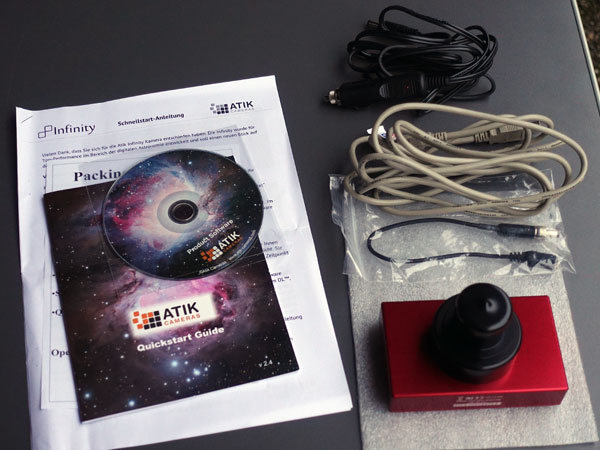
I quickly realized that I had read about this camera before, but without realizing what makes it so attractive for many hobby astronomers (and it seemed too expensive for me at the time ...). My dealer also said that the camera was too expensive and advised me to buy one second hand. That is why I published search ads in two astronomy forums - and received an offer from an obvious fraudster (as I learned on request from a French radio amateur Website, where this guy was already well known...). Then I came across the Website of a hitherto unknown telescope leasing company and was able to use a "Christmas offer" for a good second-hand purchase. Now the camera was mine, but I have to admit that I did not use it often.
This camera, equipped with a CCD sensor from Sony, continuously records images that are superimposed in real time (this is called "image stacking") on a computer running the Atik Infinity software, so that one has more or less the impression of a "live" observation on the computer monitor, whereby the images improve continuously by overlaying old images with newer ones (the eVscope, Stellina, and Hiuni work similarly). The images can be recorded and subsequently edited. And what was also important for me: The camera can be used with a scope on a simple AZ GoTo mount! Unlike the eVscope and Stellina, all this looks much more "technically", also because you have certain options for changing the camera settings. All in all, this solution provided me with an idea of what I could expect from the eVscope and Stellina.
 |
 |
 |
 |
 |
 |
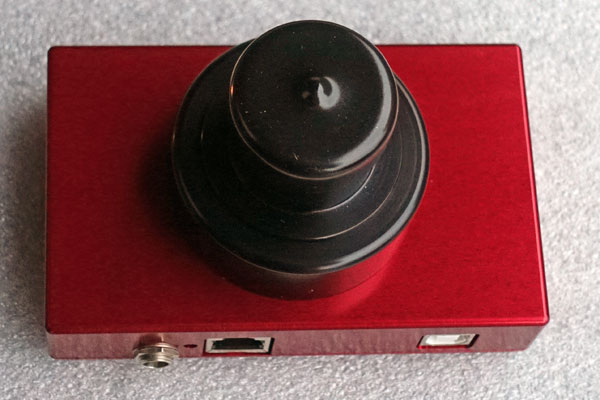
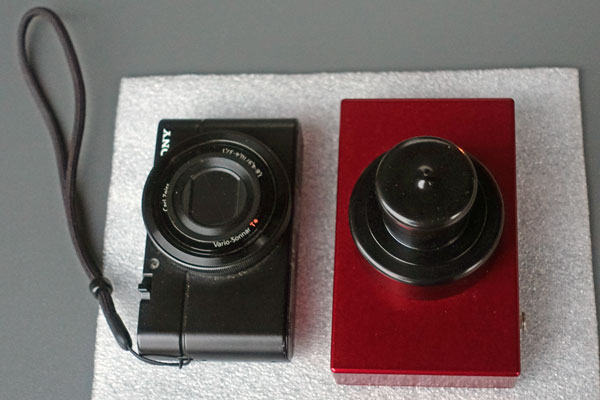
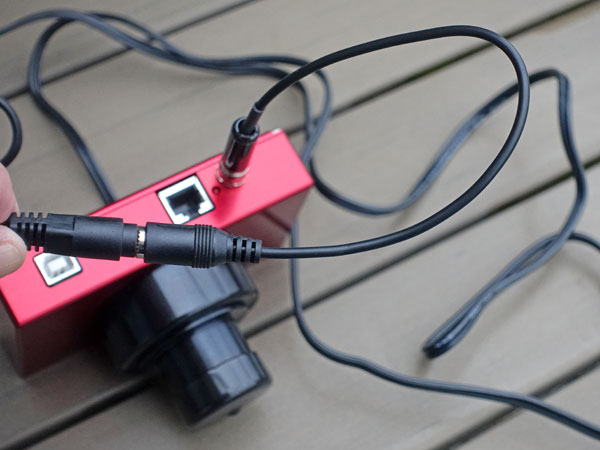
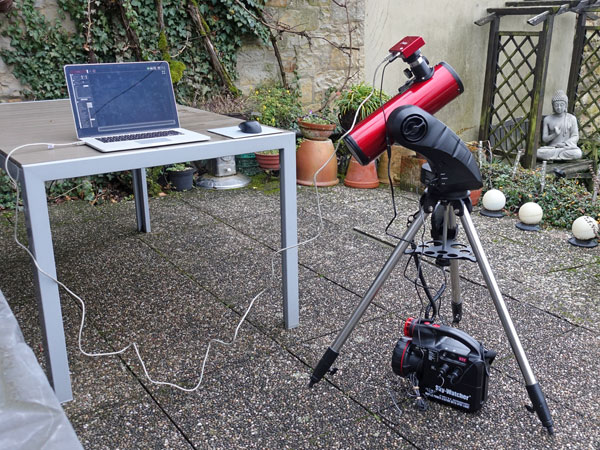
Photos: Atik Infinity Colour camera, ditto with additional screw-in 12 V power adapter (bottom left), complete equipment with Explorer 150 PDS (bottom center and right)
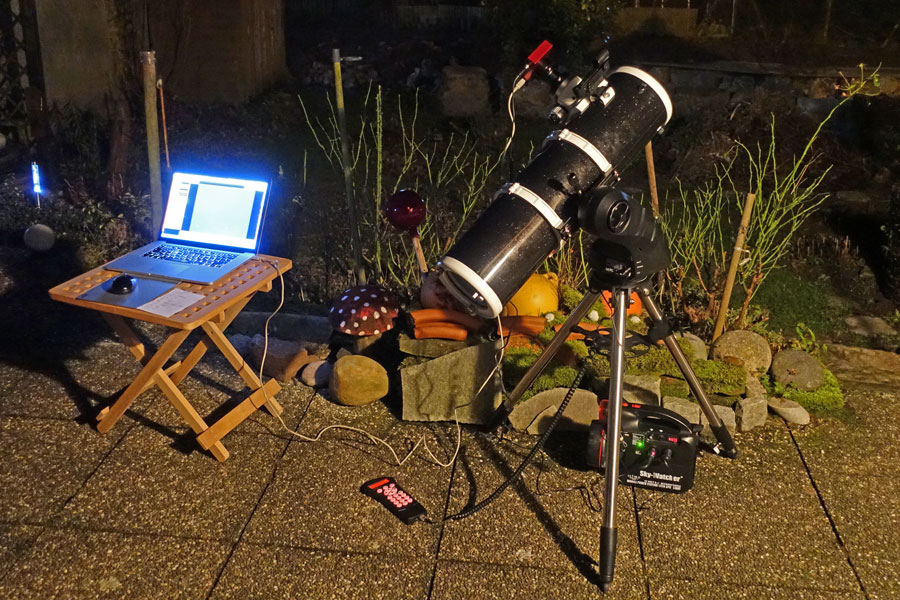
What does this solution look like in practice? In fact, it is not much more complicated than if I work with the Star Discovery AZ GoTo mount alone. Since the beginning of 2018, I have been using the Celestron StarSense module for the alignment of the Star Discovery mount, and with this, I am, with respect to the alignment, "on par" with the eVscope. After telescope and mount are aligned, I put the camera into the eyepiece mount, connect it to the 12V power supply, which has two sockets (one is occupied by the mount), and connect it via USB cable to my laptop computer, on which I run the Atik Infinity software (on the Mac using the Windows emulator Parallels Desktop). On the monitor, I can see more or less "live" what I observe, and the image is iteratively getting better thanks to "image stacking."
Basically, the whole affair is a kind of "kit solution" in comparison with the "ready-to-go" solutions of the eVscope, Stellina, Vespera, and Hiuni. The sensor of the Atik Infinity camera has a slightly higher resolution and larger pixels than the eVscope's sensor. Therefore, the results should be marginally better, especially if I use my 6" Newtonian tube (which I do no longer own; but my TLAPO1027 should offer good results...). Initially, I thought that the effort for using the Atik Infinity camera was absolutely acceptable. And it is also still considered a "beginners' solution"... But the longer I owned the camera, the more I had to overcome myself to use it. And when I got the eVscope (at the end of January 2020), which made everything so much easier, I did not even use it anymore at first. But then I did at least a few attempts with this camera in 2020 and 2021...
I would also like to add that I have learned by now that there are similar cameras like the Atik Infinity, but the Infinity is probably one of the simplest solutions. I have since also purchased the ZWO ASI 224MC camera, which uses the same sensor chip as the originalVscope.
More on the Atik Infinity camera on pages Atik Infinity Colour Camera, Atik Infinity Colour Camera - Experiences, and Atik Infinity Colour Camera - Software. At the end of 2022, I sold my Atik Infinity camera.
Vaonis Stellina
I only came across the Stellina telescope from Vaonis at the beginning of January 2018 because, like the Unistellar eVscope, it was presented at the CES 2018 in Las Vegas and mentioned in a corresponding message alongside the eVscope. Meanwhile, Stellina is being sold and costs 3,999 EUR.
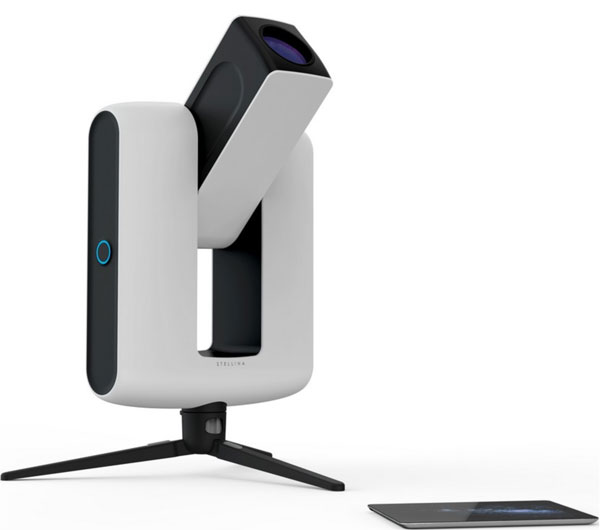
Photo: The Vaonis Stellina telescope (from the Vaonis Website (FR/EN))
Its technical data were somewhat difficult to find for me on the Vaonis products page (FR/EN), but here they are (updated September 2020):
Technique |
Optics |
Mount |
||
|
Sensor
|
Other
|
||
*) Calculated with Astronomy.tools |
||||
Like the eVscope, the Stellina telescope aligns itself automatically (autonomous field detection), can automatically "point" to objects, calculate out the field rotation, and take light pollution into account. It also sits on an Alt-AZ mount, but this one is two-armed and should thus, be more stablee.
But there are also clear differences: The Stellina telescope is a refractor with two aspherical ED glasses (added later), 80 mm aperture, and 400 mm focal length, resulting in an aperture ratio of f/5. The Sony CMOS sensor used has more than twice the resolution as the one used in the eVscope (and as the CCD sensor of the Atik Infinity camera). The telescope is designed for wide-field observations and has a field of view of 1° x 0.7° (that is, two moon or sun diameters). Unistellar, on the other hand, mentions a field of view of ~ 30' for the eVscope (about 0.5°, about the moon or sun diameter). And while the eVscope has an eyepiece to look at a small screen, the Stellina telescope no longer has an eyepiece and you "observe" on your smartphone or tablet only.
With initially 2,000 EUR, the price was approximately the same as the eVscope will cost after the end of the Kickstarter campaign. But in the meantime, the price has risen to 3,999 EUR. In November 2019, I saw Stellina at online dealers for the first time.
In September 2020, Vaonis published a great project, initiated by Gilles Krebs, Technical Director at Vaonis: They created a mosaic of the Milky Way with Stellina based on a special, still prototypical software, which will become available to Stellina owners in 2021. The mosaic of 546 million pixels required the capture of 208,000 photos. It took 336 hours of exposure and 168 fields stitched together, to create this giant photo of the Milky Way. Really amazing!
In September 2020, Vaonis also announced a Kickstarter project for a "Mini-Stellina" that started on October 1, 2020. I included the telescope, called "Vespera" on this page.
Hiuni
Note: In September 2021, it looked as if the Hiuni telescope will never be delivered. And in March 2023 this was the same...
I hit on the Hiuni teleskop from ComingSoon Tech, probably from China and the USA, in May 2018, when it was discussed on the Kickstarter page of the Unistellar eVscope because a Kickstarter campaign for this telescope was started in May 2018. The delivery of the Hiuni telescope was originally scheduled for June 2019. The idea for the Hiuni telescope was born already at the beginning of 2015. A first design concept emerged in autumn 2015 (see the timeline on the Hiuni Kickstarter page).
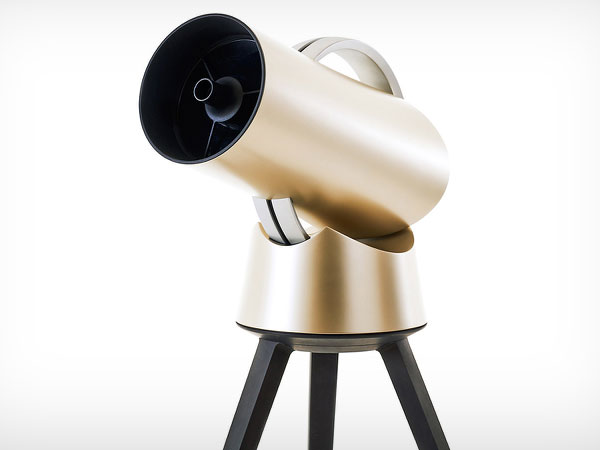
Photo: The Hiuni telescope (from ComingSoon Tech Website)
Here are some technical data for comparison:
Optics |
Elektronics |
Smart Features (some) |
||
*) Calculated using Astronomy.tools |
Sensor Data
|
|
Find more about this telescope on page Hiuni: A Smart, Connected GoTo Telescope (Kickstarter).
Now a few words about this telescope from my point of view. When I found the Kickstarter campaign, the telescope was available for $489 for only two more hours. After that it already was at $539, which was still much cheaper than the planned final price - and much cheaper than the eVscope and Stellina. However, I did not want to make a quick decision, especially since I had some doubts about the telescope. On the one hand, the low price was astonishing, and there were people on the Kickstarter page who doubted that the telescope can even be delivered at this price. I had my doubts about this as well... But more important for me was that I could not fully value the concept of the Hiuni telescope. And besides, it was a little too big and heavy for me.
About the Hiuni concept: As a Cassegrain telescope with a long focal length (1.524 m), a low focal ratio (f/10) and a small field of view (0.27° x 0.20°), the Hiuni is more suited to observing planets and the moon than deep sky objects. Despite the large aperture, the maximum magnitude is correspondingly small (below 13 mag). Although it is also recommended for brighter DSO, its strengths certainly lie elsewhere. But since I am mainly interested in observing DSOs with such a telescope (I have my Maksutovs for moon and planets...), I was less interested in the Hiuni telescope.
Vaonis Vespera
Vespera is the second telescope that the French company Vaonis developed. For this purpose, Vaonis started a Kickstarter campaign on October 1, 2020, in which I participated very early to get an early-bird offer, which was successful. I learned about this campaign because Vaonis contacted me personally.

Foto: Das Vaonis Vespera-Teleskop (von der Vaonis-Website (EN))
Vespera was meant to become a small and affordable version of Stellina. It is also a refractor, but a quadruplet with 50 mm aperture (like binoculars) and 200 mm focal length (aperture ratio f/4). It uses a Sony IMX462 Starvis sensor with HD resolution (1920 x 1080 pixels). This gives a field of view of 1.6° x 0.9°, which makes the Vespera a small rich field telescope. Its image scale of 2.99 is quite high and leads to undersampling, but according to Astronomy.tools, this is acceptable for rich field telescopes. With a weight of 5 kg and a height of 40 cm, the telescope is light and compact, making it an ideal travel telescope. The battery lasts for 4 hours, which is enough for me at least. I decided to go for the "Adventurer" package with backpack, additional battery, and additional tripod. In the shops, Vespera costs 1500 EUR (July 2023; 2500 EUR beginning of 2023).
Here are some technical data for comparison:
Technique |
Optics |
Mount |
||
|
Sensor
|
Other
|
More about this telescope on page Vaonis Vespera: The new way to observe the universe (Kickstarter) and on page Vaonis Vespera - Information.
Comparison Table
Finally, a comparison table, which also shows how the different sensors, and for the Atik Infinity camera, the different telescopes (or better, their focal lengths), affect the resolution.
| Telescope/Camera > | Hiuni | Vespera | Stellina | eVscope | eVscope 2 | Infinity |
|||
| Manufacturer | Bosma | Vaonis |
Unistellar |
Atik |
|||||
| Telescope (AI) | Custom, Cassegrain | Custom, ED-Refractor (Quadru-plet) | Custom, Refractor (Doublet) | Custom, Newton | Custom, Newton | 6" Newton Explorer 150PDS, StarBlast 6, ... |
5" Newton Heritage P130, Sky Prodigy 130, ... |
4.5" Newton Heritage 114N, StarBlast 114, ... |
4" Refractor TLAPO1027 |
| Manufacturer (AI) | SkyWatcher, Orion | Sky-Watcher, Celestron | Sky-Watcher, Orion | TS-Optics | |||||
| Focal Length | 1524 mm | 200 mm | 400 mm | 450 mm | 450 mm | 750 mm | 650 mm | 500 mm | 714 mm |
| Aperture | 152.4 mm | 50 mm | 80 mm | 114 mm | 114 mm | 150 mm | 130 mm | 114 mm | 102 mm |
| Aperture Ratio | f/10 | f/4 | f/5 | f/4 | f/4 | f/5 | f/5 | f/4.5 | f/7 |
| Resolving Power (Dawes)+ | 0.79"§/0.75"* | 2.32"* | 1.45"* | 1.02"* | 1.02"* | 0.77"* | 0.89"* | 1.02"* | 1.14"* |
Resolving Power (Rayleigh)++ |
0.92"§ | 2.77" | 1.73" | 1.12" | 1.12" | 0.92" | 1.06" | 1.12" | 1.35" |
| Sensor | Aptina MT9M001-C/M | Sony IMX462 | Sony IMX178 | Sony IMX224 | Sony IMX347 | Sony ICX825 |
|||
| Sensor Type | CMOS | CMOS | CMOS | CMOS | CMOS | CCD |
|||
| Pixel Resolution | 1280 x 1024 | 1920 x 1080 | 3096 x 2080 | 1280 x 960+ | 2048 x 1536 (LV) 3200 x 2400 (EV) |
1392 x 1040 |
|||
| Pixel Size | 5.2 µm x 5.2 µm | 2.9 x 2.9 µm | 2.4 µm x 2.4 µm | 3.75 µm x 3.75 µm | 2.9 µm x 2.9 µm | 6.45 µm x 6.45 µm |
|||
| Resolution H | 0.27°/16.2' 10.3° (finder) |
1.6°* | 1° (1.06°/63.6'*) | 0.61°/36.7'* | 0.78°/47'# | 0.69°/41.16'** | 0.79°/47.49'** | 1.03°/61.74'** | 0.72°/43.24'** |
| Resolution V | 0.2°* | 0.9°* | 0.7° (0.71°/42.6'*) | 0.46°/27.6'* | 0.57°/34'# | 0.51°* | 0.59°* | 0.77°* | 0.54°* |
| Resolution per Pixel | 0.7"* | 2.99"* | 1.24"* | 1.72"* | 1.33"* | 1.77"** | 2.05"** | 2.66"** | 1.86"** |
| Resol. per 2 Pixels | 1.4"* | 5.98"* | 2.48"* | 3.44"* | 2.66"* | 3.54"** | 4.1"** | 5.32"** | 3.72"** |
| Resolving Power (Dawes)+ | 0.79"§/0.75"* | 2.32"* | 1.45"* | 1.02"* | 1.02"* | 0.77"* | 0.89"* | 1.02"* | 1.14"* |
| Image Scale* | 0.70 | 2.99* | 1.24 | 1.72 | 1.33 | 1.77 | 2.04 | 2.66 | 1.86 |
*) Calculated with Astronomy.tools; **)
my own calculations, verified with Astronomy.tools
+) also calculated as 116 / aperture; ++) calculated as 138 / aperture; § given
by manufacturer
+) Enlarged from app version 1.3 on
*) Calculated according to the formula: Image Scale = 206 * Pixel Size / Focal
Length; the image scale should ideally be in a range between 1 and 2. Under
1 may lead to bloated stars (oversampled); over 2 may lead to blocky/pixelated
stars (undersampled).
**) In the meantime, I have learned that you have to relate the sensor resolution
not to one but to two pixels, because details extend over 2 x 2 pixels.
#) For the Live View mode, I found a pixel
resolution of 2048 x 1536 pixels, that is, the image is cropped horizontally;
vertically the maximum pixel number is exploited. For the Enhances Vision mode,
I found 3200 x 2400 pixels (= 7.7 Megapixels), which is roughly a scale factor
of 1.6.
eVscope = the original eVscope and the eVscope Equinox
Discussion
Technically, the simplest solution compared with the "ready-made" telescopes would probably be a combination of the Celestron Sky Prodigy 130 with the Atik Infinity camera. In the beginning of March 2018, when I creted this page, this combination would cost in Germany about 900 to 920 EUR + 1090 EUR, that is, with shipping around 2,000 EUR - as much as the eVscope was announced to cost after the Kickstarter campaign; later, it did cost 2,999 EUR plus shipping (the original eVscope is no longer available).
The Vaonis Stellina telescope has a field of view that is almost twice as large as that of the eVscope, making it more suitable for larger DSOs. The 4 times higher sensor resolution, however, is less clearly reflected in the reproduction of details: a 15' large object (e.g. M 13 in Hercules) extends over 523 pixels with the eVscope and over 726 pixels with the Stellina; this is a factor of almost 1.4 and not earth-shattering... In addition to the number of pixels, the "quality" of the pixels (noise behavior etc.) is also important, which I cannot say anything about at the moment, except for that the pixels of the eVscope sensor are significantly larger than those of the Stellina sensor (3.75 µm compared to 2.4 µm).
The Hiuni telescope is, as already written, better suited to observing planets and the moon than DSO. Despite the large aperture and the large pixels the maximum magnitude is only 12.8 mag. The field of view covers only half of the moon! But maybe the Hiuni can play to its strengths with some smaller DSO (e.g. globular clusters, Ring Nebula M 57)... Note that an object of 15' like the Hercules Cluster M 13 nearly covers the complete width of the view of the Huini telescope (and more than its height). Thus, the Hiuni will offer about twice the number of pixels for this object than the eVscope. As of fall 2021 (and March 2023), it looks like that the Hiuni telescope will regrettably never be released and that the Kickstarter backers lost their money...
The Vaonis Vespera telescope has a horizontal field of view three times as large as the eVscope, vertically it is about twice as large. This makes the Vespera more of a "rich-field" telescope (the mosaic mode even moerw so!). The sensor resolution is almost twice as high as that of the eVscope, which means that objects become smaller with the Vespera than with the eVscope. This has consequences especially for globular star clusters, small galaxies, and planetary nebulae. The sensor of Vespera is new and seems to have a good quality.
For the evaluation of the "fit" between sensor and telescope I use (unlike in earlier versions of this page) the formula "image scale = 206 * pixel size / focal length"; the image scale should ideally have a value between 1 and 2. Accordingly, the eVscope and Stellina have sensors with a good "fit", whereas the Hiuni "oversamples". The Vespera undersamples, but according to Astronomy.tools, this is acceptable for rich-field telescopes. The Atik Infinity only fits well at telescopes with a focal length of 650 mm and more (up to 1300 mm).
Summary
If you are willing to spend some money, but only in this case, there are indeed solutions that can be described as "deep-sky photography for dummies and lazy people," including "near live observation." By the way, "real" astrophotography is not cheap either. The presented two solutions by no means deliver results comparable to those achievable with "true" astrophotography, but they provide a "near live experience" that can also be accessed more or less quickly. They do not require you to wait for the results for a long time, or to put a lot of time and effort into post-processing. Of course, you can also post-process the images and share them, but you cannot expect any "miracles" in terms of image quality, especially resolution. On this site, I present some examples for the eVscope (2), Vespera, and three astronomy cameras, and you can also find quite a lot of them for (nearly) all the solutions on the Internet.
The Atik Infinity camera is one of the three solutions that I decided to buy, but I never try it out sufficiently and thus, sold it. Nevertheless, there are some results. For the other solution, I had to wait until the end of January 2020. Read more about this telescope on page Unistellar eVscope and find links to further pages (experiences, observations, photos, etc.) on page Overview of the Unistellar Pages. Furthermore, I took part in the Kickstarter campaign for the Vaonis Vespera, which was forecast to be delivered before Christmas 2021. The delivery was, however postponed to May/June 2022 (I got mine at the end of July 2022). And finally, I ordered an eVscope 2 in October 2021, which was delivered before Christimas 2021, but I got a "final" sample only in July 2022. At the end of 2023, I sold it again...
If You Want to Go Further...
... I recommend reading the following two articles:
- A Beginner's Guide to Choosing Equipment for Deep-Sky Electronically-Assisted Astronomy (EAA) (by Brian Ventrudo): agenaastro.com/articles/guides/miscellaneous/agena-beginners-guide-to-choosing-equipment-for-deep-sky-eaa.html
- Agena Buyer's Guide to ZWO Astronomy Cameras (by Brian Ventrudo and Manish Panjwani): agenaastro.com/articles/guides/cameras/zwo-astronomy-cameras-buyers-guide.html
Links
- Unistellar Website: unistellaroptics.com
- Unistellar product page (eVscope eQuinox and eVscope 2): unistellaroptics.com/products
- Unistellar eVscope eQuinox: unistellaroptics.com/equinox
- eVscope vs eQuinox: help.unistellar.com/hc/en-us/articles/360021445999-eVscope-vs-eQuinox-
- eVscope Kickstarter campaign (eVscope | 100 times more powerful than a classical telescope): www.kickstarter.com/projects/unistellar/evscope-100-times-more-powerful-than-a-classical-t/
- Atik company Website, UK: www.atik-cameras.com
- Product page: www.atik-cameras.com/product/atik-infinity/
- Pages from German distributors for the Atik Infinity camera:
- Teleskop-Leasing (bought the camera here): www.teleskop-leasing.de/produkte/kameras/atik-infinity-farb-ccd-kamera- (in German)
- Teleskop-Spezialisten: www.teleskop-spezialisten.de/shop/Astrofotografie/Atik-Infinity-FARB-CCD-Kamera-11mm-Sensor-automatische-Aufnahmen::2166.html (in German) - www.teleskop-spezialisten.de/shop/Astrophotography/::2166.html (in English)
- Teleskop-Service/Express: www.teleskop-express.de/shop/product_info.php/info/p8213_Atik-Infinity-FARB-CCD-Kamera---Sensor-D-11-mm--vollautomatisch.html (in German) - www.teleskop-express.de/shop/product_info.php/info/p8212_Atik-Infinity-B-W-CCD-Camera---Sensor-D-11-mm--fully-automatic.html (in English)
- Astroshop: www.astroshop.de/kameras/atik-kamera-infinity-color/p,4831 (in German) - www.astroshop.eu/cameras/atik-camera-infinity-color/p,48316 (in English)
- Testing the 16 bit Atik Infinity camera with small telescopes (x-bit-astro-imaging, S.J. Wainwright): x-bit-astro-imaging.blogspot.de/2016/02/testing-16-bit-atik-infinity-camera.html
- Vaonis: vaonis.com/fr/ (FR), vaonis.com (EN)
- Stellina product page: vaonis.com/stellina (EN)
- Vespera product page: vaonis.com/vespera (EN)
- Vespera Kickstarter-Kampagne: www.kickstarter.com/projects/vaonis/vespera-the-new-way-to-observe-the-universe/description
- Hiuni product page: comingsoon-tech.com/projects/hiuni-motorized-telescope
- Hiuni Kickstarter campaign (Hiuni: A Smart, Connected GoTo Telescope): www.kickstarter.com/projects/1324372410/hiuni-a-smart-connected-goto-telescope
- A Beginner's Guide to Choosing Equipment for Deep-Sky Electronically-Assisted Astronomy (EAA) (by Brian Ventrudo): agenaastro.com/articles/guides/miscellaneous/agena-beginners-guide-to-choosing-equipment-for-deep-sky-eaa.html
- Agena Buyer's Guide to ZWO Astronomy Cameras (by Brian Ventrudo and Manish Panjwani): agenaastro.com/articles/guides/cameras/zwo-astronomy-cameras-buyers-guide.html
Selected Pages from this Website
See also my page offering Astronomy Links.
Atik Infinity
Unistellar eVscope
- Overview of the Unistellar Pages Read First!
- Information
- Photo Gallery (Messier Catalog)
- Photo Gallery (NGC)
- Photo Gallery (Other)
- Photo Comparison against Atik Infinity
- Photo Comparison against Vespera
Vaonis Vespera
|
made by |
| 15.02.2024 |