Celestron StarSense AutoAlign for Sky-Watcher - First Experiences
"First Light" or better, "Frustration Day"... | "Second Light" - Now It Worked! | Preliminary Conclusions | Links
Archive
On this page, I collect my first experiences with my Celestron StarSense AutoAlign for Sky-Watcher module*, which I will call "StarSense module" for short in the following.
*) Ordered on February 1, from Teleskop-Spezialisten, arrived on February 7, 2018, sold in mid-November 2022.
Note: If you are only interested in the operation of the StarSense module and less in my first experiences with it, you will find an updated quick start guide for the Celestron StarSense module here.
| Note: In mid-November 2022, I sold my Celestron StarSense AutoAlign for Sky-Watcher module. I therefore can no longer report any experiences with the StarSense module here. |
See also:
- Celestron StarSense AutoAlign for Sky-Watcher Information Archive
- Celestron StarSense AutoAlign for Sky-Watcher - First Experiences Archive
- Celestron StarSense AutoAlign for Sky-Watcher - Further Experiences Archive
- Celestron StarSense AutoAlign for Sky-Watcher - Connecting to a Mac (USB) Archive
- Celestron StarSense AutoAlign for Sky-Watcher - Using it with a Celestron C8 Archive
- Sky-Watcher AZ GoTo Mounts (Star Discovery, AZ-GTi) - Instructions Archive
"First Light" or better, "Frustration Day"...
One day after the arrival of the StarSense module, that is, on February 8,2018, the sky was clear in the afternoon and early evening, so that I took the opportunity to test the module on the Explorer 150PDS for the first time. What followed was a frustrating experience in which three things played their part: my own ignorance, errors and inaccuracies in the manuals, and finally clouds that prevented further testing.
|
|
|
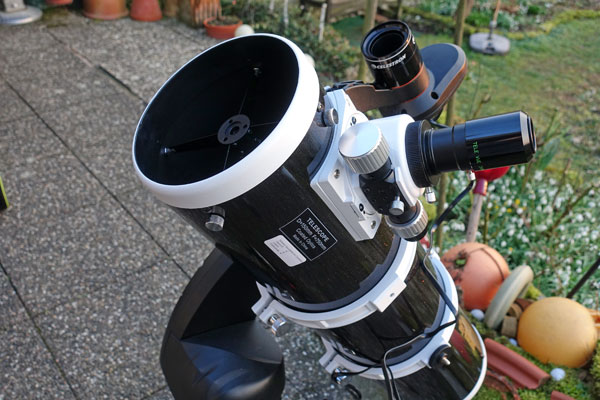
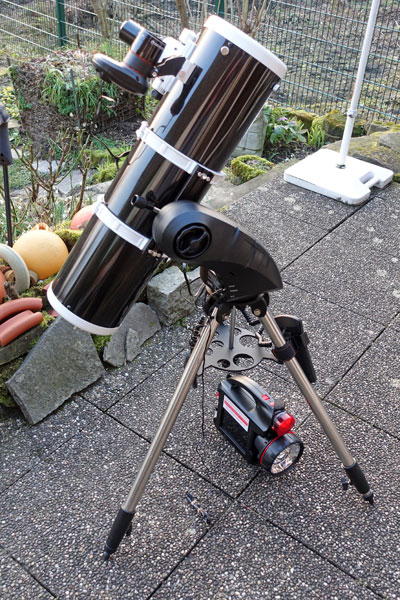
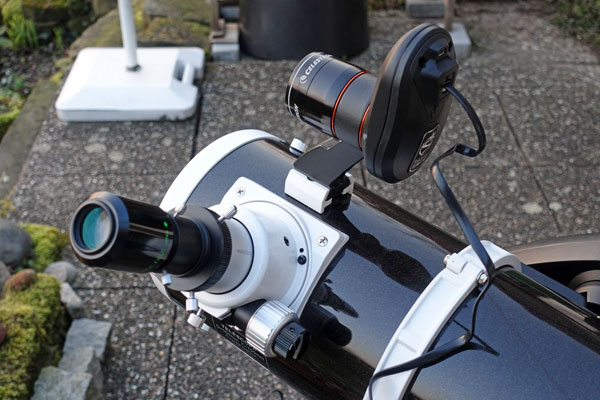
Photos: StarSense on Explorer 150PDS and Star Discovery AZ GoTo mount
First of all, I had already been warned by my astronomy dealer, Mr. Kloß, who wrote:"An older version is described in the operating manual, but this only concerns the indication of the location. So just follow the hand controller's instructions." For me, this meant that I could entrust myself to the guidance of the hand controller. I quickly forgot the topic "enter location"...
After I had built everything up, it was still too bright, so that the automatic alignment failed twice. Then the mount did not want to move the telescope anymore. So I turned it off and on again - after that the telescope moved again. And soon it was dark enough so that the automatic alignment was successful.
Now the next step had to be taken, the calibration, which has to be carried out once during the first use, in order to align the StarSense camera and the telescope with each other. To do so, you have to go to the list of named stars, select one that is bright enough and let the telescope point to it. After that, you have to move the telescope with the direction keys so that the star is visible in the (long focal length) eyepiece. This did not work for the first star, because it was not bright enough to "stand out". That is why I switched to Aldebaran that, as I hoped, would be easier to find. Of course, it was not visible in the eyepiece at first, but after some "moving around" I managed to "catch" it. According to the manual, I should now press "ENTER" to change to a slower search speed for fine-tuning. But every time I pressed "ENTER", the telescope moved back to where it had initially "assumed" Aldebaran would be. After countless unsuccessful attempts, I just pressed the "ALIGN"-button instead. And then I was already in calibration mode, rough mode first, then fine tuning! In the heat of battle, however, I forgot or was not sure whether I had really pressed "ALIGN" or got there in some other way - and clouds prevented me from checking this. But the next day I was able to understand and confirm the whole thing without the need of a starry sky...
Now the telescope was calibrated and needed another auto align before it could ne used. According to the German manual (and as I found out in the meantime, older English manuals) the device has to be switched off and on before the alignment, according to the current English manual not. I think I left this step out, and the alignment was still successful. With great joy, I headed for the Pleiades M 45 - but the telescope was pointing quite off. Meanwhile, the Orion nebula M 42 became visible. So I started another attempt - unfortunately with the same result...
Now the clouds were coming quite fast from the west, a new auto alignment therefore failed, and I just quickly picked out M 42 "manually" to have observed something at all. The Trapezium was still visible, but not much of the nebula. Then I had to go inside to help prepare supper, but the sky was already covered with clouds anyway...
Inside, I had time to think about this matter, while cleaning the Ruccola salad, and I realized that although time information was requested, no location information was asked for. This might, of course, be the reason for the poor alignment. After supper, I took the mount with telescope and module into the kitchen, found the location entry only via the menu system (which is probably the only possibility nowadays), and there I found that Torrance in California, the Celestron headquarters, was set as location. In Germany, only Frankfurt and Munich were offered as the closest locations for me, but when reading the manual I found out what the little "ball" on the right wanted to tell me: I might press the "Celestron" key on the hand control for more input options - and this way, I was able to enter the coordinates of the village where I live.
Meanwhile the clouds had cleared again and I made a second attempt, now with correct location data. However, the clouds came back so quickly that the first auto alignment failed. What was left behind was a mischievous hobby astronomer...
After the Day of Frustration...
The next day I tried to answer my questions and solve my problems by reading manuals, surfing the Internet, watching YouTube videos (which I had already watched some time ago) and trying out the controls "live." Here are my results!
Entering the Location
I found a discussion thread in Cloudy Nights about the topic of entering the location, which an 88-year-old gentleman, who had just bought the StarSense module, had started. Just like me, he had only been offered a time setting dialog by the hand control. Since this thread started in 2014, it looks as if Celestron did not manage to update the online manuals in 4 years time... As so often, the discussion unfortunately went in all sorts of directions, but the real question was rarely dealt with. But in the end, the gentleman himself found the same way through the menu system as I did, and his approach was also generally confirmed (without the original question being answered...). He did not report whether he was successful with the alignment (as so often...) in the end, but at the beginning he probably only had bad weather. He wrote: "Surely you must be aware of the astronomers curse that when you buy something you get several weeks of rain and clouds free of charge that accompany the delivery." A sentence for hanging on the wall...
At YouTube, I first came across a video from Celestron describing the set-up of the StarSense module. In this video, the speaker just enters the time and the starts the Auto Alignment, just as the gentlemen and I experienced it. Maybe, the Celestron people never left Torrance, CA, and thus, it worked for them... Anyway, I also found in another video, that you have to enter the location via the menu only once, that is, when using the module for the first time. Unique, of course, only if you observe in one place only or stay close to it.
I do not know why the necessity to enter the location via the menu once (or several times) has not found its way into the Celestron video or the manual in its different versions. The fact that the feature is described elsewhere in the manual is no excuse for not mentioning it during setup.
Calibration
Update: I updated this section a bit at the end of 2020.
I had already written that (after a first auto alignment) a calibration is necessary for the first use, so that the StarSense module "knows" where the telescope looks. To do this, press the "STARS" key of the hand control, select "Named Stars" and choose a star from the list that is bright enough (the hand control shows the magnitude of the stars offered). I do not know how long the list is, I think it is best you take one from the beginning or the end of the alphabet, otherwise you will have to scroll endlessly... After pointing the telescope to this star, the manual says that you should now use the hand control buttons to move it into the field of view of the (long focal length) eyepiece and then press "ENTER" to enter the fine tuning mode. The manual states:
5. Press ENTER, once the star is in the field of view of your eyepiece.
The hand control is now in fine centering mode, which has a slow slew speed.
My hand control does not at all think of going into this mode, but returns the telescope to the original position, where it believes the star is. This game can be repeated as often as you like, no matter what the manual states... According to the manual, you should continue with "ALIGN" after having finished the fine adjustment (where I never get...). Meanwhile it looks to me as if a piece of text is missing in the manual. Even at the end of 2020 the manuals have not changed in this respect.
I was all the more astonished when I then observed in the already mentioned Celestron video a completely different procedure than described in the manual. The speaker selected, as described above, a star, pointed the telescope to it, and then pressed "BACK" twice to get to the upper menu level. He then pressed the "MENU" key, selected the item "StarSense," which is not mentioned in the manual, and there he selected "Calibrate." And then, after he had pressed the "ENTER" button several times, the procedure went on as described in the manual, that is, first came the rough and then came the fine centering of the star in the eyepiece (but basically this was done in a completely different mode and was documented on the hand control display). And all this seems to be mentioned nowhere...
And now comes, in my opinion, the best! I once again tried to find out what happens when I press the "ALIGN" key after pointing to the star (and maybe already doing a little bit of moving around...). I get exactly at the location for which the Celestron speaker needed several keystrokes, namely to the "Calibrate" function. This is so ingenious that even the Celestron people do not seem to know about it...
At some point in time, I bought the book "The NexStar User's Guide II" by Michael Swanson, and there the calibration is actually described correctly on page 104, albeit in the more cumbersome way as shown in the videos. In both the video and this guide it is said (in the guide only indirectly) that you should not move the star, which was approached before the calibration, with the manual direction buttons. This is done only during calibration.
Switching the StarSense Module off and on After Calibration
After calibration, the German user manual (and older English versions) requires the user to switch the module off and on again, while the new English version does not. What is correct? I have not been able to clarify this "empirically" so far, but I assume that it works without this step (I found similar contradictions between manual versions for the Sky-Watcher Virtuoso Mount...).
And what now?
Now I was waiting for another "clear night" to come, on which I would be able to check all this "live" and maybe could do some first observations with the StarSense module. The wait lasted until February 12, 2018...
"Second Light" - Now It Worked!
On February 12, 2018 there was finally a clear sky that lasted for a long time. That is why I put up my Explorer 150PDS telescope with the GoTo control and also mounted the StarSense module to try out my "ideas." I wanted to apply everything I had learned on the day of "frustration" and the day after, and developed my "personal" procedure for getting the StarSense module to work. It consisted of the following steps (updatetd end of 2020):
- Level the telescope before powering the mount on.
- Enter the menu "Time and Location" for setting location and
time to check and/or set these.
Since I had already set the location and it was still correct, I was quickly finished here.
Date and time had to be updated; this would also be possible later when doing the "Auto Align," but since I was already in the respective settings, I did this here.
In forums, by the way, it was advised to always check these settings first, because sometimes they seem to get lost... - First "Auto Align": Since it was dark enough, this worked out right away!
- Calibration now went as follows:
- Press the "STARS" key, select menu item "Named Stars," then select a star and let the mount point to it.
- Once the GoTo has finished, press the "ALIGN"* key; this will take you to the "Calibrate" menu item (in the undocumented "StarSense" menu).
- After pressing "ENTER" you are in the coarse calibration mode, another "ENTER" press forwards you to the fine calibration mode.
- If the object is well centered in the eyepiece, continue by pressing the "ALIGN"button again. StarSense now takes a picture of the sky and, after some calculations, completes the calibration.
- Finally, you will be prompted for another "Auto Align."
- According to the "latest" manuals, the StarSense module no longer needs to be switched off and on again, and the telescope tube no longer needs to be aligned horizontally before pressing the "ALIGN" button and selecting "Auto Align" for a second time.
- After a successful second "Auto Align," the StarSense module is calibrated and aligned to the telescope so that you can start observing. Alternatively, you may want to increase the pointing accuracy by adding more targets, which I have not tried yet.
*) Alternatively, as shown in some videos (e.g. this one) and written in Michael Swanson's book, you can press "BACK" twice, then press the "MENU" key, where you will find the (undocumented) "StarSense" menu with item "Calibrate" in first place; press "ENTER" again to get to the calibration procedure.
The next time, a simple "Auto Align" should be enough to get started...
After successfully completing this procedure, I checked the alignment accuracy on some targets (M 35, M 36, M 37, M 38, M 38, M 42, M 45, M 31, NGC 884/869). It needed improvement, but I did not want to spend any more time with aligning it, because I wanted to connect the Atik Infinity camera to the telescope. The accuracy proved sufficient for this purpose, because the targets (M 35, M 36, M 37, M 38, M 42) were still visible in a corner of the image so that centering them was not a problem.
If the accuracy is not good enough the next time, I will try to use additional targets to improve the pointing accuracy, or alternatively try the "HELP"function to improve the alignment.
All in all, it worked out for me the second time, but after a lot of effort. In my opinion, Celestron does neither the buyers nor itself a favor, if it delivers the StarSense module with an outdated and misleading (or also wrong...) manual. I probably would never have been able to get the module up and running without a lot of reading, trying, and searching the Internet. What a pity! But obviously, all criticism that can be found on the Internet and elsewhere bounces off Celestron and its German distributor Baader Planetarium, presumably because there is no competitor's product yet...
Note: An updated short instruction for the Celestron StarSense module can be found here.
Preliminary Conclusions
My preliminary conclusion, after my initial failure, is that Celestron does neither the buyers nor itself a favor by delivering the StarSense module with an outdated and misleading (or also wrong...) manual. I probably would never have been able to get the module up and running without a lot of try-and-error and searching the Internet. What a pity! At least, Michael Swanson's book is also a helpful resource (see links).
There are also some other details that get on my nerves. So one almost forgets that the StarSense module seems to do its job well when it finally works properly, and you do not have excessive demands on positioning accuracy. But for being able to judge the latter, I need much more experience with the device anyway (it remained that way...).
Links
- Celestron Website, USA: www.celestron.com
- Product page: www.celestron.com/products/starsense-autoalign (for Celestron only) - www.celestron.com/products/starsense-autoalign-for-sky-watcher-mounts (for Sky-Watcher)
- Celestron, Germany (Baader-Planetarium): www.celestron-deutschland.de
Product page: www.celestron-deutschland.de/product.php?CatID=31&ProdID=1147 (for Celestron only) - www.celestron-deutschland.de/product.php?CatID=31&ProdID=1362 (for Sky-Watcher) - Pages from German distributors for the Celestron StarSense for Sky-Watcher:
- Teleskop-Spezialisten (here the module was bought): www.teleskop-spezialisten.de/shop/Montierung-Zubehoer/Nachfuehrung-und-GoTo/Celestron-StarSense-fuer-GoTo-Montierungen-automatische-Eichung-Alignement::1914.html (for Celestron only, in German) - www.teleskop-spezialisten.de/shop/Mounts-Accessories//::1914.html?language=en (for Celestron only, in English) // www.teleskop-spezialisten.de/shop/Montierung-Zubehoer/Nachfuehrung-und-GoTo/Celestron-StarSense-AutoAlign-fuer-Skywatcher-Montierungen::2096.html?language=de (for Sky-Watcher, in German) - www.teleskop-spezialisten.de/shop/Mounts-Accessories//::2096.html (for Sky-Watcher, in English)
- Teleskop-Service/Express: www.teleskop-express.de/shop/product_info.php/language/en/info/p6040_Celestron-StarSense-fuer-GoTo-Montierungen---vollautomatische-Eichung.html (for Celestron ony, in English) - www.teleskop-express.de/shop/product_info.php/info/p9016_Celestron-StarSense-AutoAlign-for-Skywatcher-mounts.html (for Sky-Watcher, in English)
- Astroshop: www.astroshop.eu/controls-with-goto/celestron-starsense-module-including-hand-controller/p,32954 (for Celestron only, in English) - www.astroshop.eu/controls-with-goto/celestron-starsense-autoalign-for-skywatcher-synscan-mounts/p,51606 (for Sky-Watcher, in English)
- StarSense Start Up Problems (thread in Cloudy Nights, started by hamdul): www.cloudynights.com/topic/485630-starsense-start-up-problems
- How to Set Up StarSense AutoAlign (Celestron video on YouTube): www.youtube.com/watch?v=OqqoFZyxzQg
- Celestron StarSense 'User profiles'? (thread in Stargazers Lounge, started by GrampyG): stargazerslounge.com/topic/246401-celestron-starsense-user-profiles/
- Michael Swanson (2017). The NexStar User's Guide II. Springer. Softcover ISBN: 978-3-319-64932-0 (link)
- Celestron StarSense: Set-Up, Alignment, & Calibration (AstroBlender video on YouTube): www.youtube.com/watch?v=Mc2iEwc-i-s&list=PLE-H5M8vFOdKyRKXWzS90lDHQU_0sZIia&index=14
- See also my page offering Astronomy Links.
|
made by |
| 28.11.2024 |