Sky-Watcher AZ GoTo Mounts - Instructions
Introduction | Instructions for the Alignment When Using the Handbox (AZ Mode) | Instructions for the Alignment When Using the Handbox (EQ Mode) | Instructions for the Alignment When Using Wi-Fi and the SynScan App | Instructions for the Alignment When Using Wi-Fi and the SynScan App (EQ Mode) | Tips from the Manuals and My Experience | Instructions for the Celestron StarSense AutoAlign for Sky-Watcher Module (AZ Mode) | Conclusions | Links
Archive
On this page I compile instructions for the operation of my Sky-Watcher AZ GoTo mounts using the handbox (V4*) and the SynScan Wi-Fi module and also provide some useful tips from the manual. I conclude this page with instructions for using the mount with the Celestron StarSense AutoAlign for Sky-Watcher module.
*) I only own the handbox V4 and and therefore regrettably do not know, whether the instructions on this page are also valid for the handbox V5. All I can state at the moment is that the AZ-GTi works in EQ mode with the V5 handbox as well (according to a star friend).
The instructions should be valid for the following mounts:
- The Sky-Watcher Star Discovery AZ GoTo telescope mount (in my possession since July 2016, sold at the end of November 2024), called Star Discovery mount for short.
- The Sky-Watcher AZ-GTi mount, as long as it is operated in AZ mode (in my possession since late January 2021, sold in October 2024). I probably will not write instructions for the EQ mode, because the procedure is similar after polar alignment.
The instructions provide more detail for the AZ mode; they are only brief for the EQ mode, because the procedures are very similar...
Note: The Star Discovery mount can be controlled wirelessly via Wi-Fi using the SynScan Wi-Fi module (in the meantime, the mount is only sold together with it and without the handbox). The AZ-GTi mount has Wi-Fi already built in, but can also be controlled with the handbox, provided that you own one. The SynScan app, which can be operated on a smartphone or Windows computer, is used for controlling the mount wirelessly.
Introduction
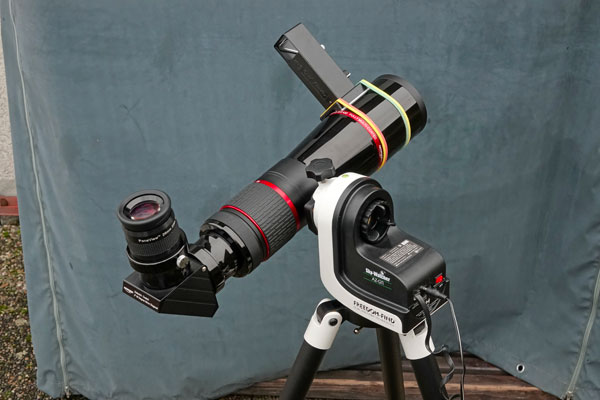
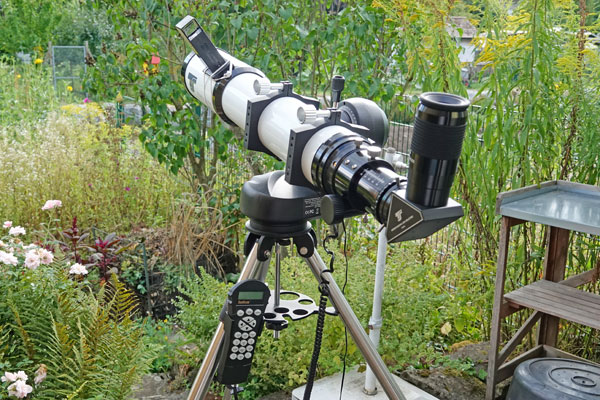
Mount from one side |
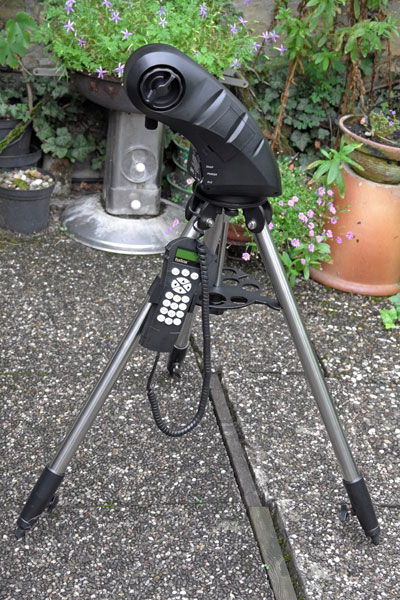
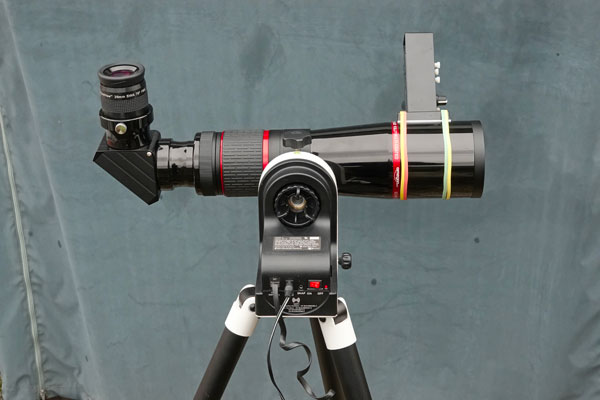
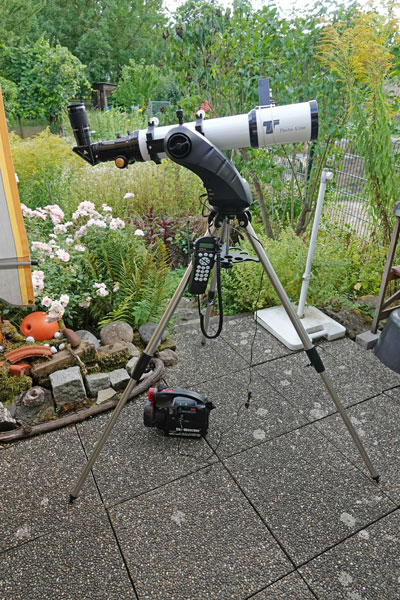
Mount turned around |
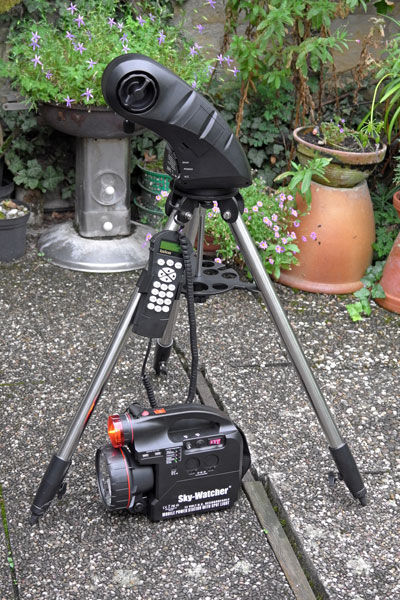
Ditto with external power supply (Sky-Watcher Power Tank 12 V / 7 Ah) |
|
|
|
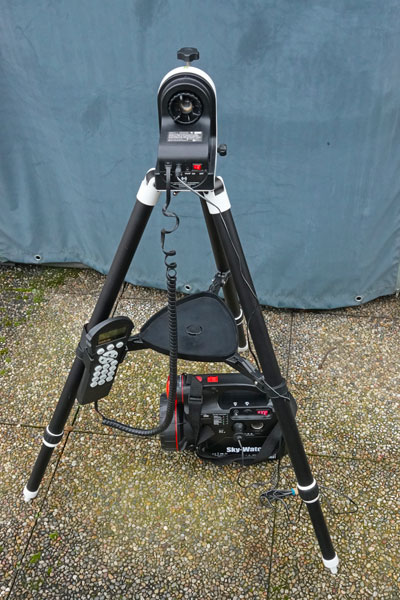
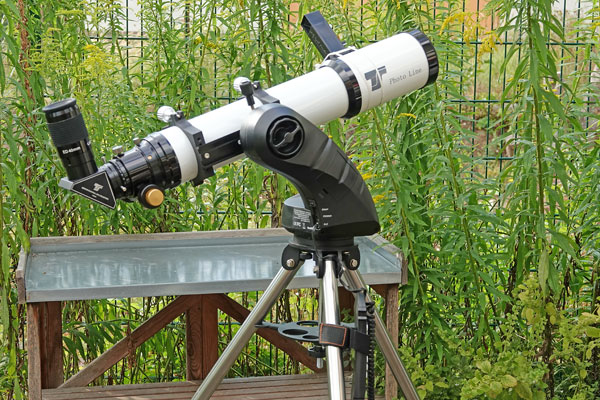
AZ-GTi mount head on AZ Pronto tripod without extension tube |
||
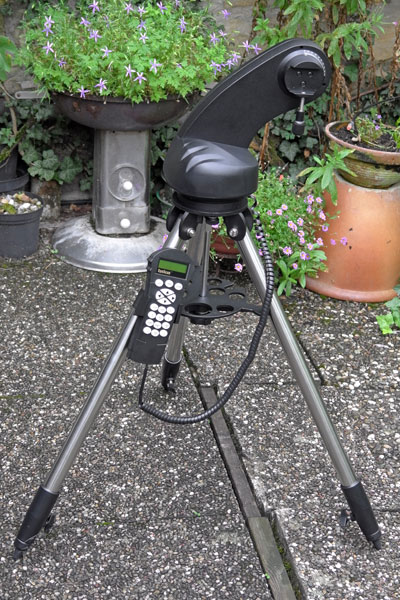


In the following, I attempt to describe in simple words the most important alignment procedures that can be performed when using the Star Discovery or the AZ-GTi mount, either with the handbox, with the SynScan Wi-Fi module and SynScan app, or with the Celestron StarSense module including its own hand control. I hope that reading these instructions will be faster than reading the manual. Some steps are omitted (often further pressing of the ENTER key).
I also pass on some hints from the manuals and from my experience.
The following table is an attempt to provide an overview of the different possibilities for the AZ mode:
| Mode | Name | Mount Position before Power on | Procedure after Power on | Typical Accuracy | # of Alignment Stars | First Action (after Power on) | |
| Handbox V4 | Tracking | Tracking | In home position | Nothing | Tracking OK? | -- | You manually point to sky objects |
| Alignment | Brightest Star Alignment | Home position is not critical, but helpful (I assume) | Perform alignment | GOTO and AZ tracking: Good | 2 | You manually point to first the planet or star | |
| 2-Star Alignment | 2 | Handbox starts rough GOTO to the first star | |||||
| Synscan Wi-Fi | Default Pointing Model | Tracking, rough GoTo | In home position | Nothing | GOTO and AZ tracking: Satisfactory | -- | You manually point to sky objects |
| Non-Default Pointing Model | 1-Star-Alignment | Home position is not critical, but helpful (I assume) | Perform alignment | GOTO and AZ tracking: Good | 1 | App starts rough GOTO to the first star | |
| Brightest Star Alignment | 2 | You manually point to first the star | |||||
| North-Level Alignment | 2 | You manually point the telescope level and to north | |||||
| 3-Star Alignment | 3 | App starts rough GOTO to the first star | |||||
| Celestron StarSense with Hand Control | Tracking | Quick Align | In home position | Nothing | Tracking OK? | -- | You manually point to sky objects |
| Alignment | Plate-Solving | Telescope tube level | Perform automatic alignment (and calibration if needed) | GOTO and AZ tracking: Good | 1 (for calibration) | Nothing |
Home position: Telescope tube level and pointing to true north.
For the EQ mode, I found the following options:
| Mode | Name | Mount Position before Power on | Procedure after Power on | Typical Accuracy | # of Alignment Stars | First Action (after Power on) | |
| Handbox V4 | Tracking | Tracking | In home position | Nothing | Tracking OK? | -- | You manually point to sky objects |
| Alignment | 1-Star Alignment | Home position is not critical, but helpful (I assume) | Perform alignment | GOTO and AZ tracking: Good | 2 | You manually point to first the planet or star | |
| 2-Star Alignment | |||||||
| 3-Star Alignment | 2 | Handbox starts rough GOTO to the first star | |||||
| Synscan Wi-Fi | Default Pointing Model | Tracking, rough GoTo | In home position | Nothing | GOTO and AZ tracking: Satisfactory | -- | You manually point to sky objects |
| Non-Default Pointing Model | 1-Star-Alignment | Home position is not critical, but helpful (I assume) | Perform alignment | GOTO and AZ tracking: Good | 1 | App starts rough GOTO to the star | |
| Brightest Star Alignment | 2 | You manually point to first the star | |||||
| 2-Star Alignment | 2 | App starts rough GOTO to the first star | |||||
| 3-Star Alignment | 3 | App starts rough GOTO to the first star | |||||
| Celestron StarSense with Hand Control (in preparation...) | Tracking | Quick Align | In home position | Nothing | Tracking OK? | -- | You manually point to sky objects |
| Alignment | Plate-Solving | Telescope tube level | Perform automatic alignment (and calibration if needed) | GOTO and AZ tracking: Good | 1 (for calibration) | Nothing |
Home position (from Sky-Watcher):
- Mount tripod is leveled as indicated by its bubble level
- RA axis points towards the northern or southern celestial pole, whichever is visible at your location
- The telescope tube points towards the visible celestial pole
- Counterweight rod point as close to the ground as possible
Instructions for the Alignment When Using the Handbox (AZ Mode)
Note: I do not cover the Brightest Star Alignment method here. It is similar to the 2-star alignment, but you have to align the telescope manually to the first star. If one chooses a planet as start, two further stars have to be be selected, which are approached automatically; in this case, one must align manually to the planet. First of all, however, one must select a sky region from which the first object will be taken and proposed.
|
||||||
|
|
|
|
|||
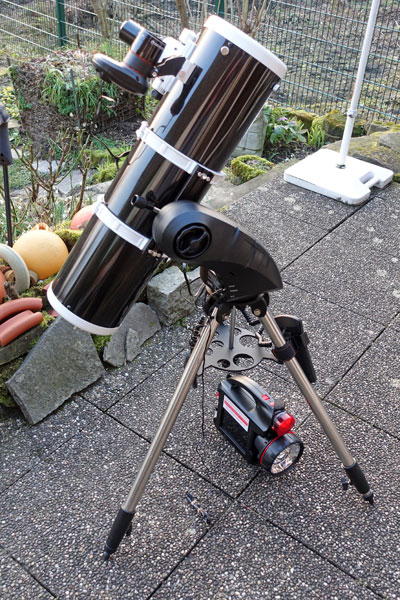
Star Discovery
mount on the steel tripod, TLAPO1027 2 refractor |
||||||
 |
 |
|||||
AZ-GTi mount without extension on the AZ Pronto tripod, PS 72/432 refractor |
||||||


Initialization
Power the mount on
- Level the mount and the telescope tube, then power
the mount on.
(It is not clear to me, whether the horizontal position is only required for tracking or also for the alignment, because in the latter case the first alignment star is accessed manually, which "overrides" the level position).
Set the information of the observing site
- Longitude, Latitude (49° 15′ N , 8° 43′ E for Mühlhausen/Kraichgau)
- Time zone (+1 for Mühlhausen)
- Date, time, daylight saving time
Start mount alignment
- Select 1 or 0 (1 = Alignment, 0 = skip Alignment, tracking only; alignment can be done later),
- Select 2-Star-Alignment (2-Star Align.) using the scroll keys
Note: The alignment can also performed later (key "MENU" > "Setup" > "Alignment" > "2-Star Align.").
2-Star Alignment
First Alignment Star
- "Choose 1st Star": Select the first alignment star using the scroll keys and confirm with ENTER; point the mount to the star using the direction keys (or manually if the mount has encoders) and center it in the FOV of the eyepiece; confirm with ENTER.
- "Ctr. to eyepiece...": Use the direction keys to center the star in the FOV of the eyepiece (the speed of movement is lowered automatically*); confirm with ENTER (this has to go fast if the star moves quickly).
Second Alignment Star
- "Choose 2nd Star": Select the second alignment star using the scroll keys and confirm with ENTER; the mount accesses the star automatically.
- "Ctr. to eyepiece...": The second star should be visible in the FOV of the finder; use the direction keys to center the star in the FOV of the eyepiece (the speed of movement is lowered automatically*); confirm with ENTER (this has to go fast if the star moves quickly).
- "Alignment Successful": Continue with ENTER!
*) The speed can be adjusted manually to one's own needs (Press key "RATE"
and a number key, then further number keys if needed)
**) This procedure should always end with using the UP and RIGHT keys
(to minimize mechanical backlash); if you overshot, use the opposite key to
return and then use the recommended one.
Repeat the Alignment
Press key "MENU", select item "Alignment" in the "Setup" menu using the scroll keys, and then the 2-star-alignment; continue as described for the 2-star-alignment.
You can also switch the mount off and then on again. Level the telescope and point it north before switching it on, particularly if you want to use tracking only.
Instructions for the Alignment When Using the Handbox (EQ Mode)
The following instructions for the EQ mode are only brief, because they are in principle similar to those of the AZ mode. Before they are started, the telescope must be polar-aligned.
1-Star Alignment (EQ Mode)
1-Star Align: The handbox proposes a star* from the data base, and after you selected a star, the mount moves to it, center the star.
*) changeable via scroll keys, but makes suggestions...
2-Star Alignment (EQ Mode)
2-Star Align: The handbox proposes a first star* from the data base, and after you selected a star, the mount moves to it; center the star; ditto for the second star.
*) changeable via scroll keys, but makes suggestions...
3-Star Alignment (EQ Mode)
3-Star Align: The handbox proposes a first star* from the data base, and after you selected a star, the mount moves to it; center the star; ditto for the second and third star.
*) changeable via scroll keys, but makes suggestions...
Instructions for the Alignment When Using Wi-Fi and the SynScan App (AZ Mode)
Note: On this page, I only cover alignment methods for alt-azimuth mounts; therefore, the 2-star alignment is missing here, which is only available for parallactic mounts since an update of the SynScan app.
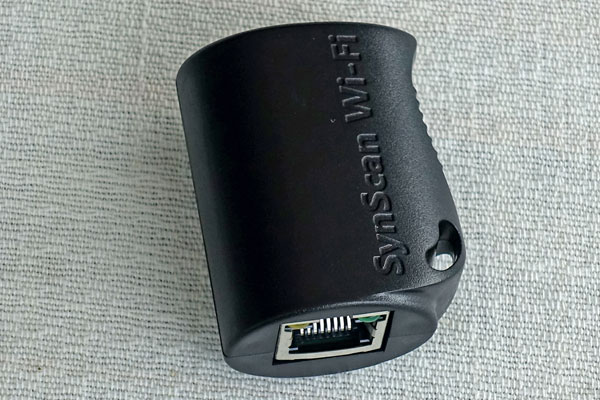
The Star Discovery mount can be controlled wirelessly via Wi-Fi using the SynScan Wi-Fi module (in the meantime, the mount is only sold together with it and without the handbox). The AZ-GTi mount has Wi-Fi already built in, but can also be controlled with the handbox provided you own one. The SynScan app, which can be operated on a smartphone or Windows computer, is used for controlling the mount wirelessly.
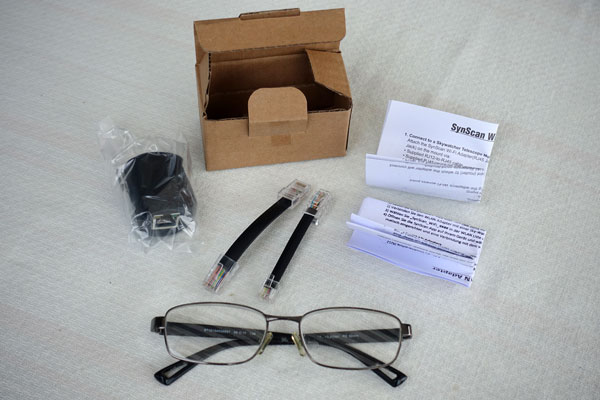
Box content (and glasses...) |
The adapter module |
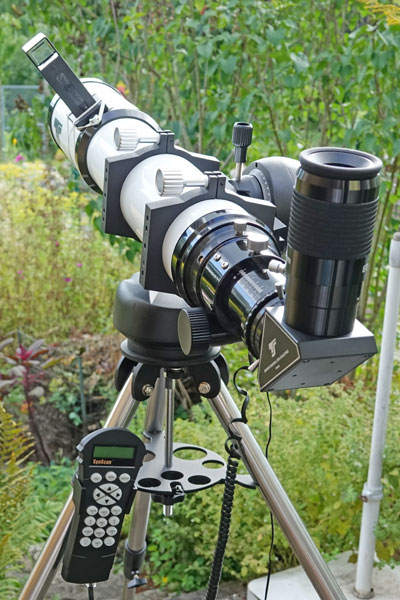
Ditto, connected to the mount |

Initialization
(1) Connect and start the app:
- Connect your smartphone with the SynScan module via Wi-Fi.
- Start the smartphone app SynScan (Pro), press the "Connect" button => "Alt-Az Mode" will appear as soon as a connection was made.
(2) Power the mount on:
- Level the mount tripod (as indicated by its bubble level - the Star Discovery does not have one).
- Level the telescope tube and point it to true north.
- Power the mount on.
That is, the mount is to be set to the "home position" before powering it on. The data for the observation (location, date, time etc.) is taken from the smartphone; if in doubt, check the location data in menu "Settings".
(3) Start the alignment: Go to the "Alignment" overview screen and select one of the alignment methods offered there to start the alignment. In the following, these are described in short form.
Instructions for the 1-Star Alignment When Using the SynScan Module and the SynScan App (AZ Mode)
First action: The app starts a rough GOTO to the first star (from manual)
- Select the "1-Star Alignment" icon on the alignment overview screen.
- Select an alignment star (or planet) from the upcoming list; after selecting the star, it will be listed and the "Begin Alignment" button will appear.
- After pressing the "Begin Alignment" button, the mount will automatically move to the target (message "Go To <star>")*. Then the instruction "Manually Center <Star>" will be displayed; the "Next" button is disabled, the UP button (or RIGHT if necessary) will flash. After using the flashing navigation buttons, the "Next" button is active.
- After pressing the "Next" button, the message "Alignment successful" appears on the alignment overview screen.
*) This only works if the mount was previously in the "home position" (mount and tube horizontal, tube aligned to the north), but you can move the telescope to the correct position (as with Brightest Star Alignment).
Instructions for the 2-Star Alignment (North-Level Alignment) When Using the SynScan Module and the SynScan App (AZ Mode)
First action: Manually point the telescope level and to north (from manual).
- Select the "North-Level Alignment" icon on the alignment overview screen.
- Select two alignment stars (or planets) from the upcoming list; after selecting the second star, the stars will be listed and the "Begin Alignment" button will appear.
- After pressing the button "Begin Alignment", the instruction "Level your telescope and point it to north" and a "Next" button appear. This offers the opportunity to set the telescope to the "home position"!
- After pressing the "Next" button, the mount automatically accesses the first alignment star (message "Go To <star 1>"). Then the instruction "Manually Center <star 1>" will be displayed; the "Next" button is disabled, the UP button (or RIGHT if necessary) will flash. After using the flashing navigation buttons, the "Next" button is active.
- After pressing the "Next" button, the mount automatically accesses the second alignment star (message "Go To <star 2>"). Then the instruction "Manually Center <star 2>" will be displayed; the "Next" button is disabled, the UP button (or RIGHT if necessary) will flash. After using the flashing navigation buttons, the "Next" button is active.
- After pressing the "Next" button, the message "Alignment successful" appears on the alignment overview screen.
Instructions for the 2-Star Alignment (Brightest Star Alignment) When Using the SynScan Module and the SynScan App (AZ Mode)
First action: Manually point to first star (from manual).
- Select the "Brightest Star Alignment" icon on the alignment overview screen.
- Select two alignment stars (or planets) from the upcoming list (the list is much shorter than for the "North-Level Alignment"); after selecting the second star, the stars will be listed and the "Begin Alignment" button will appear.
- After pressing the button "Begin Alignment", the instruction "Manually Center <star 1>" will be displayed; the "Next" button is disabled, the UP button (or RIGHT if necessary) will flash. Here you have to manually center the first alignment star first in the finder and then in the eyepiece using the direction keys. After using the flashing navigation buttons, the "Next" button is active.
- After pressing the "Next" button, the mount automatically accesses the second alignment star (message "Go To <star 2>"). Then the instruction "Manually Center <star 2>" will be displayed; the "Next" button is disabled, the UP button (or RIGHT if necessary) will flash. After using the flashing navigation buttons, the "Next" button is active.
- After pressing the "Next" button, the message "Alignment successful" appears on the alignment overview screen.
Instructions for the 3-Star Alignment When Using the SynScan Module and the SynScan App (AZ Mode)
First action: The app starts a rough GOTO to first star (from manual)
- Select the"3-Star Alignment" icon on the alignment overview screen.
- Select three alignment stars (or planets) from the upcoming list; after selecting the third star, the stars will be listed and the "Begin Alignment" button will appear.
- After pressing the "Begin Alignment " button, the mount automatically accesses the first alignment star (message "Go To <star 1>"). Then the instruction "Manually Center <star 1>" will be displayed; the "Next" button is disabled, the UP button (or RIGHT if necessary) will flash. After using the flashing navigation buttons, the "Next" button is active.
- After pressing the "Next" button, the mount automatically accesses the second alignment star (message "Go To <star 2>"). Then the instruction "Manually Center <star 2>" will be displayed; the "Next" button is disabled, the UP button (or RIGHT if necessary) will flash. After using the flashing navigation buttons, the "Next" button is active.
- After pressing the "Next" button, the mount automatically accesses the third alignment star (message "Go To <star 3>"). Then the instruction "Manually Center <star 3>" will be displayed; the "Next" button is disabled, the UP button (or RIGHT if necessary) will flash. After using the flashing navigation buttons, the "Next" button is active.
- After pressing the "Next" button, the message "Alignment successful" appears on the alignment overview screen.
Instructions for the Alignment When Using Wi-Fi and the SynScan App (EQ Mode)
The following instructions for the EQ mode are only brief, because they are in principle similar to those of the AZ mode. Before they are started, the telescope must be polar-aligned.
Instructions for the 1-Star Alignment When Using the SynScan Module and the SynScan App (EQ Mode)
1-Star Align: Select star from list; the mount accesses the selected star (the first and only one; from list*); center star.
*) Star selectable from list of suggestions (list varies, depending on the previously selected star).
Instructions for the Brightest-Star Alignment When Using the SynScan Module and the SynScan App (EQ Mode)
Brightest-Star Align: Select first ("brightest", small list**) and second star from list; move to first star manually and then center; mount moves to 2nd star, center star.
**) Star selectable from list of suggestions (list varies, depending on the previously selected star; list shorter for first = brightest star).
Instructions for the 2-Star Alignment When Using the SynScan Module and the SynScan App (EQ Mode)
2-Star Align: Select first and second star* from list; the mount accesses the first star; center star; ditto for 2nd star.
*) Star selectable from list of suggestions (list varies, depending on the previously selected star).
Instructions for the 3-Star Alignment When Using the SynScan Module and the SynScan App (EQ Mode)
3-Star Align: Select first, second, and third star* from list; the mount accesses the first star; center star; ditto for 2nd and third star.
*) Star selectable from list of suggestions (list varies, depending on the previously selected star).
Tips from the Manuals and my Experience
Some Things to Observe when Doing the Alignment...
Eyepiece for the Alignment
Sky-Watcher notes that is is important to put the alignment stars at the center (or the same spot) in the field of view of the telescope's eyepiece and thus, recommends to either use
- an eyepiece with a shorter focal length or
- a crosshair eyepiece (also called reticle eyepiece)
Actually, my crosshair eyepiece (see above) also has a shorter focal length (12.5 mm), which makes it difficult for me to come up with a good alignment at telescopes with longer focal lengths, because the alignment stars move so fast. I therefore prefer to use eyepieces with longer focal lengths for the alignment process.
Update: In January 2020, I purchased an additional crosshair eyepiece with a focal length of 23 mm, which is better suited to tubes with a longer focal length, such as my Celestron C5 and C8.
Sky-Watcher also suggest to defocus the telescope, because the larger, defocused star shape (a disk...) is easier to center than a sharp star.
Avoiding Mechanical Backslash
Since all mounts have more or less mechanical backslash on both axes, Sky-Watcher recommends the following:
- When centering an alignment star in the eyepiece, the operation should always end by using the UP or RIGHT direction keys of the handbox to move the axes.
- If you overshoot when centering with these keys, use the LEFT or DOWN keys to pull the star back to the edge of the field of view and then use the RIGHT or UP key again.
Rules for Choosing an Alignment Star
Sky-Watcher recommends:
- The altitude of the two alignment stars should be between 15 and 60 degrees and the difference in altitude between the two should be between 10 and 30 degrees.
- The azimuth difference of the two alignment stars should be between 45 and 135 degrees; it is best to be close to 90 degrees.
- For 3-star alignment (SynScan WLAN), the first two stars should have similar altitude and the 3rd star should have 30 degree or more variant in altitude compared to at least one of the first two stars.
Can I Use Automatic Tracking only (that is, not GoTo)?
With Handbox
The Star Discovery and AG-GTi mounts have an "easy tracking mode" for doing just this. The steps to enable this mode are as follows:
- First, the mount must be set up at a proper "Home" position:
- Level the mount base
- Level the telescope tube and point it towards the true north (not magnetic north).
- Connect the handbox to the mount (if it was not yet connected).
- Turn on the power to the mount and start the initialization process of the SynScan handbox.
- In the last step of the initialization procedure ("Begin Alignment?"), cancel the mount alignment by selecting "2".
Now you can directly point the scope to the desired target using the handbox, and the mount will track the target automatically. If you want to track the moon or the sun, you have to set the respective tracking speed in the "Tracking" menu (otherwise the sidereal rate is being used). For observing terrestrial targets, you can also stop tracking in the "Tracking" menu.
With SynScan WLAN
When no alignment has been done, the SynScan app uses the "default pointing model" (location related), which allows a roughly accurate GoTo and tracking. The accuracy of the "default pointing model" depends on how perfectly the mount was placed in the home position before power on. The following table from the manual describes the differences:
| Mount position before power on | Procedure after power on | Typical accuracy | |
| Default pointing model | In home position* | Nothing | GOTO and AZ tracking: Satisfactory |
| Alignment (non-default pointing model) | Home position not critical, but is helpful | Perform alignment | GOTO and AZ tracking: Good |
*) Home position:
- Mount tripod is leveled (as indicated by its bubble level, if available).
- The telescope tube is leveled and points to true north.
Not all Handboxes are the same!
If you take a look at the Sky-Watcher and Celestron handboxes, they look very similar at first sight (I owned a Celestron StarSense handbox as well):
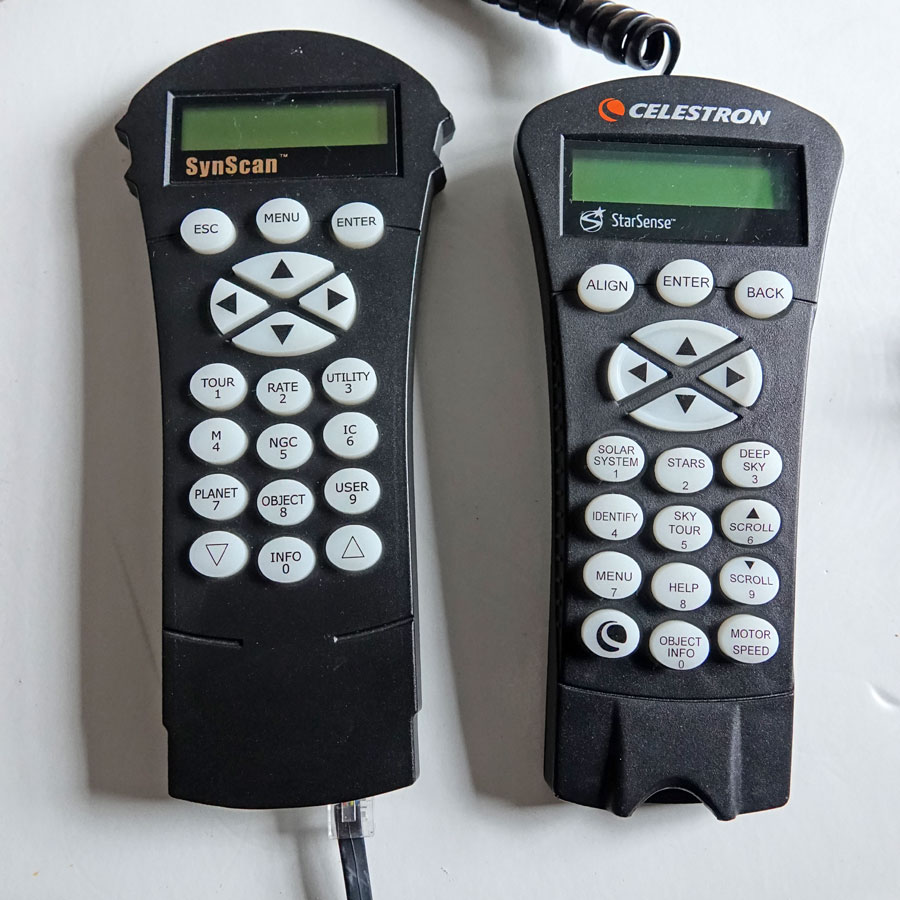
Photo: Sky-Watcher SynScan handbox (left) and Celestron StarSense handbox (right)
At a closer look, however, you will notice striking differences! The same functions are named differently and/or are located in different positions, especially the general "navigation functions", which one can master "blindly" after some practice:
| Functionality | SynScan | StarSense/NexStar | Position | Comment |
| Sub menu /Start an action | ENTER | ENTER | left/center | If you as a Celestron user want to press "ENTER", you end up in the setup menu (key "MENU"), this is "confusing"! |
| Back/Cancel | ESC | BACK | left/right | If one knows the "BACK" function, probably does not understand what "ESC" does (the same)... |
| Setup menu (includes the alignment)/Alignment | MENU | ALIGN | center/left | Similar, but not identical; the text "MENU" suggests to me something quite different from what the key actually does, namely a jump to the top-level menu. |
What do these differences mean in practice? Unfortunately a lot! If, for example, your hand grips come "blindly" for the Celestron handbox, you will keep coming back to the "MENU" key on the SynScan handbox, when you actually wanted to press the "ENTER" key - because it is located in the middle of the Celestron hand box.
So you will end up in the "Setup" menu, actually at the first item date entry. In the opposite case, you will get back instead of forward...
Shortcut Key MENU (Handbox)
The "MENU" key leads to the "Setup" menu despite of its label. In my eyes, this labeling is simply misleading. I had expected that this key would lead to the top level of the menu system. I needed to consult the "thick" manual (needs to be downloaded from the Internet....) and find the page describing the shortcut keys to find out what this key actually is meant to do...
Instructions for the Celestron StarSense AutoAlign for Sky-Watcher Module (AZ Mode)
Note: On this page, I only cover alignment methods for alt-azimuth mounts. In the following, I cover only the Star Discovery mount, but everything should be similar for the AZ-GTi mount (not yet tested).
Introduction
The Celestron StarSense AutoAlign for Sky-Watcher module contains an additional interface box, which is best attached to a tripod leg. For the cabling the cable of the SynScan handbox is required. Below, I describe how to make the connections!
If you want to use the StarSense AutoAlign module for the first time, the module must first "learn" how the StarSense camera and telescope tube are aligned. This requires a calibration. Before the calibration, an AutoAlign has to be be performed, as well as after calibration, before you can begin observing.
StarSense interface box and handbox on mount |
|
|

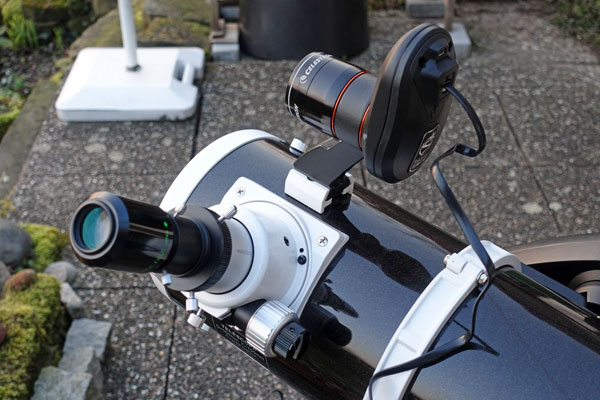
Photos: StarSense on Explorer 150PDS and Star Discovery AZ GoTo mount
Initially, I found a lot of contradictory and wrong information as to the calibration procedure. I have therefore developed a "personal" procedure for my purposes, which consists of the steps described in the following. This has, however, been confirmed by videos and Michael Swanson's book (I also found a "fast lane" to the calibration that nobody seems to know...).
Connecting StarSense to the Star Discovery Mount
- Mount the interface box on a tripod.
- Connect the interface box (unlabelled wide plug) to the mount using the 8-pin SynScan handbox cable.
- Connect the StarSense camera to the interface box using the supplied flat 6-pin cable (any AUX plug).
- Connect the StarSense handbox to the interface box (any AUX plug).
- Turn on the mount as usual and operate the mount with the StarSense Handbox.
First Observation Session
Powering the Mount on
- Level the telescope before powering the mount on.
Check Time and Location
- Enter the menu "Time and Location" for setting location and time to check and/or set these.
(Date and time can also be set later when doing the "Auto Align.)
Press the "Option" key (Celestron symbol) to enter location coordinates.
It is advisable to always check these settings first, because sometimes they seem to get lost...)
First AutoAlign
- Press key "Align", select"StarSense Auto", continue with "ENTER".
Calibration
"My" calibration procedure is different from that in the manuals (but similar to Celestron's video, other videos, and Michael Swanson's book) and as follows:
- Press the "STARS" key, select menu item "Named Stars," then select a star and let the mount point to it.
- Once the GoTo has finished, press the "ALIGN"* key; this will take you to the "Calibrate" menu item (in the undocumented "StarSense" menu).
- After pressing "ENTER" you are in the coarse calibration mode: Use the arrow keys (fast slew rate;can be changed manually), until the star appears in the field of view of the eyepiece.
- Another "ENTER" press forwards you to the fine calibration mode: Now center the object in the eyepiece using the arrow keys (slow slew rate)**.
- When the object is well centered in the eyepiece, continue by pressing the "ALIGN" key again. StarSense now takes a picture of the sky and, after some calculations, completes the calibration procedure.
- Finally, you will be prompted for another "Auto Align."
*) Alternatively, as shown in some videos (e.g. this
one) and written in Michael Swanson's book, you can press "BACK" twice,
then press the "MENU" key, where you will find the (undocumented) "StarSense" menu
with item "Calibrate" in first place; press "ENTER" again
to get to the calibration procedure.
**) Use the keys "UP" and "RIGHT" as last keys (after
that, a small check mark appears in the upper right corner of the display;
this procedure avoids gear backlash of the mount).
Note: According to the "latest" manuals, the StarSense module no longer needs to be switched off and on again, and the telescope tube no longer needs to be aligned horizontally before pressing the "ALIGN" key and selecting "Auto Align" for a second time.
Second AutoAlign
- After a successful second "Auto Align," the StarSense module is calibrated and aligned to the telescope so that you can start observing. Alternatively, you may want to increase the pointing accuracy by adding more targets, which I have not tried yet.
Further Observation Sessions
The next time, a simple "Auto Align" should be enough to get started. But always check the date and time first (menu "Time and Location"):
- Enter the menu "Time and Location" for setting location and time to check and/or set these.
- Press the key "Align" and select "StarSense Auto" from the menu; proceed with "ENTER".
Tracking
With the function "QuickAlign" it is possible to track without having to perform a complete alignment. The telescope uses its home position (tube level and pointing to the north) as the only reference point for calculating where the objects should be in the sky (based on the time and location inputs).
Conclusions
These instructions were meant to be simple, but it turned out that they became more complex than expected. Nevertheless, they helped me to find out the differences between the various alignment methods for the SynScan Wi-Fi module and also made clearer to me how to use the handbox. They furthermore helped me to clarify the usage of the Celestron StarSense module.
Links
- Sky-Watcher Company Website, USA: www.skywatchertelescope.net, ca.skywatcher.com (older
site?)
(the Star Discovery AZ GoTo Mount is not found on the company Website) - Pages from German distributors for the Sky-Watcher Star Discovery AZ GoTo
Telescope Mount:
- Teleskop-Spezialisten (here I bought the telescope): www.teleskop-spezialisten.de/shop/Montierungen/Azimutale-Montierung-ALT/AZ/Skywatcher-Star-Discovery-AZ-GoTo-Teleskop-Montierung-inkl-Stahlstativ-bis-5kg::1863.html (in German)
- Astroshop: www.astroshop.de/azimutal-mit-goto/skywatcher-montierung-az-synscan-goto-star-discovery/p,50254#tab_bar_1_select (in German) - www.astroshop.eu/alt-azimuth-with-goto/skywatcher-az-synscan-goto-star-discovery-mount/p,50254 (in English)
- Sky-Watcher Company Website, USA: www.skywatcher.com - AZ-GTi mount: skywatcher.com/product/az-gti-mount
- Pages from German distributors for the Sky-Watcher AZ-GTi mount head:
- Teleskop-Service (here I bought the mount head): www.teleskop-express.de/shop/product_info.php/language/en/info/p10011_Skywatcher-AZ-GTi---azimutaler-GoTo-Montierungskopf-ohne-Stativ.html
- Astroshop: www.astroshop.eu/alt-azimuth-with-goto/skywatcher-mount-az-gti-goto-wifi-without-tripod/p,55178
- Teleskop-Spezialisten: www.teleskop-spezialisten.de/shop/Telescope-Mounts/Skywatcher-Mount-AZ-GTI-with-Goto-and-Wi-Fi-Freedom-Find-patented-dual-encoder::3497.html?language=en
- Michael Swanson (2017). The NexStar User's Guide II. Springer. Softcover ISBN: 978-3-319-64932-0 (link)
- See also my page offering Astronomy Links.
|
made by |
| 28.11.2024 |