Astronomy | GXR · GR · RX100 M1 · RX100 M4 · RX10 M3/4 · TZ202 · X Vario · M240 · General | Photos | Conf. Places | Calendars | Art
General: Userful Software Applications (for Digicam Users)
Image Editing Applications - A Short Note... | ExifTool - Inspecting Exif Data | JPEGmini - Compressing JPGs without Loss in Quality (More or Less...) | PhotoSweeper - Getting Rid of Duplicates | CornerFix - The Ultimate Solution for Color Shading? | Depth of Field and Hyperfocal Distance | Links
On this page, I present some smaller or larger software applications that I find useful as a digicam user. Some apps may be useful only for certain cameras, others may be of general interest.
Image Editing Applications - A Short Note...
I do not want to write much about image editing applications, because there are simply too many of them on the market. I own quite a few of them (Adobe Photoshop Elements 13, Adobe Lightroom 6, DxO OpticsPro 10, DxO ViewPoint 2, Affinity Photo 1, iPhoto, Apple Photo, Picasa, ...), but I use predominantly Adobe Photoshop in its "Elements" incarnation (although I might want to use one or the other feature of the full-blown version...). This is probably, because I am used to Photoshop since version 1 on the Apple Macintosh (in black-and-white)...
Being a JPEG shooter, I never got familiar with Adobe Lightroom, and the same accounts for DxO Optics Pro. From time to time, I make short-lived attempts to use these applications, but usually this is over very soon... This may change, however, for the Leica M (Typ 240) where I may be forced to use the DNG format more often (for example, for lenses which cause color shading). I am also not fond of Lightroom keeping its own database, when the Finder already has one (why not simply add to that?).
I know that many photographers love Lightroom or DxO, it's all a matter of personal preferences, personal history, and other obscure reasons...
I also bought or downloaded for free a few photo apps for the iPad (Adobe Photoshop Mix, Adobe Photoshop Touch), but I doubt that most of them are useful beyond preparing photos for sharing them via email or social media. There is one exception, though, these are application for calculating depth of field and hyperfocal distance. But note that not all of these apps deliver correct data (they may be based on simplified assumptions or formulae).
ExifTool - Inspecting Exif Data
Note: On page Exif Data, Using ExifTool on the Mac, Links I present more information about what Exif data are, the ExifTool application, and its supplements etc.
If you have certain issues with your photos, it can be useful to find information about the camera settings in the Exif data. To inspect Exif data, you need a tool that displays them. The probably largest set of Exif data is displayed by the ExifTool application provided by Phil Harvey. This is a command-line tool that can be installed on Unix, Windows, and Apple Macintosh computers. For Windows, there is a GUI shell (ExifToolGUI) that makes working with ExifTool much easier (see the references below). Thus, my first step in getting at the largest possible set of Exif data was to download and install ExifTool on my Apple Macintosh. Using the command line editor on the Mac is, however, not very convenient if you are not used to it.
Therefore, I looked for a way to simplify my workflow and found one in Rob Lewis' three AppleScript droplets - note that there is no ExifTool GUI available as it is for Windows. The links to the droplets are provided on the Exiftool Website. I also discovered another alternative to using the "pure" ExifTool application: pyExifToolGui by Harry van der Wolf (Website). In contrast to ExifTool GUI for Windows it is available for several platforms, including Mac OS X.
JPEGmini - Compressing JPGs without Loss in Quality (More or Less...)
I became aware of JPEGmini on the dpreview.com Website, where it was featured in an article. This application promises to reduce regular JPG photos up to 80% in size, depending on the kind of motive. It is important to note that the developer points to the fact that "if you view the optimized images at 800% ... you would see the differences, but at normal viewing and for normal use you won't. These optimized files are designed to be viewed at 100% and to be printed. In print it is even harder to see the differences than on screen (from dpreview article, adapted). So, there are visible differences if you blow up the images!
I bought the "hobby" version of JPEGmini from the Website; there are also considerably "Pro" and "Server" versions available (note that tax is added to the price). My first tests showed much lower compression rates than promised (1.4 x ... 2 x), but I was not at all surprised. The more details your photos contain, the lower the compression gain - that's the simple rule here.
I also checked whether I would be able to find differences on a photo that the developers present, together with other photos, on their Website as a demo:

Figure: The photo that I downloaded from the JPEGmini Website for a quick-and-dirty quality comparison.
Yes, I did, and if I try hard, I can see it in some places even at 100%. But in many cases, this does not really matter... If you click the following Figure, you can see the comparison at 400% (the photo in the Figure was scaled down):
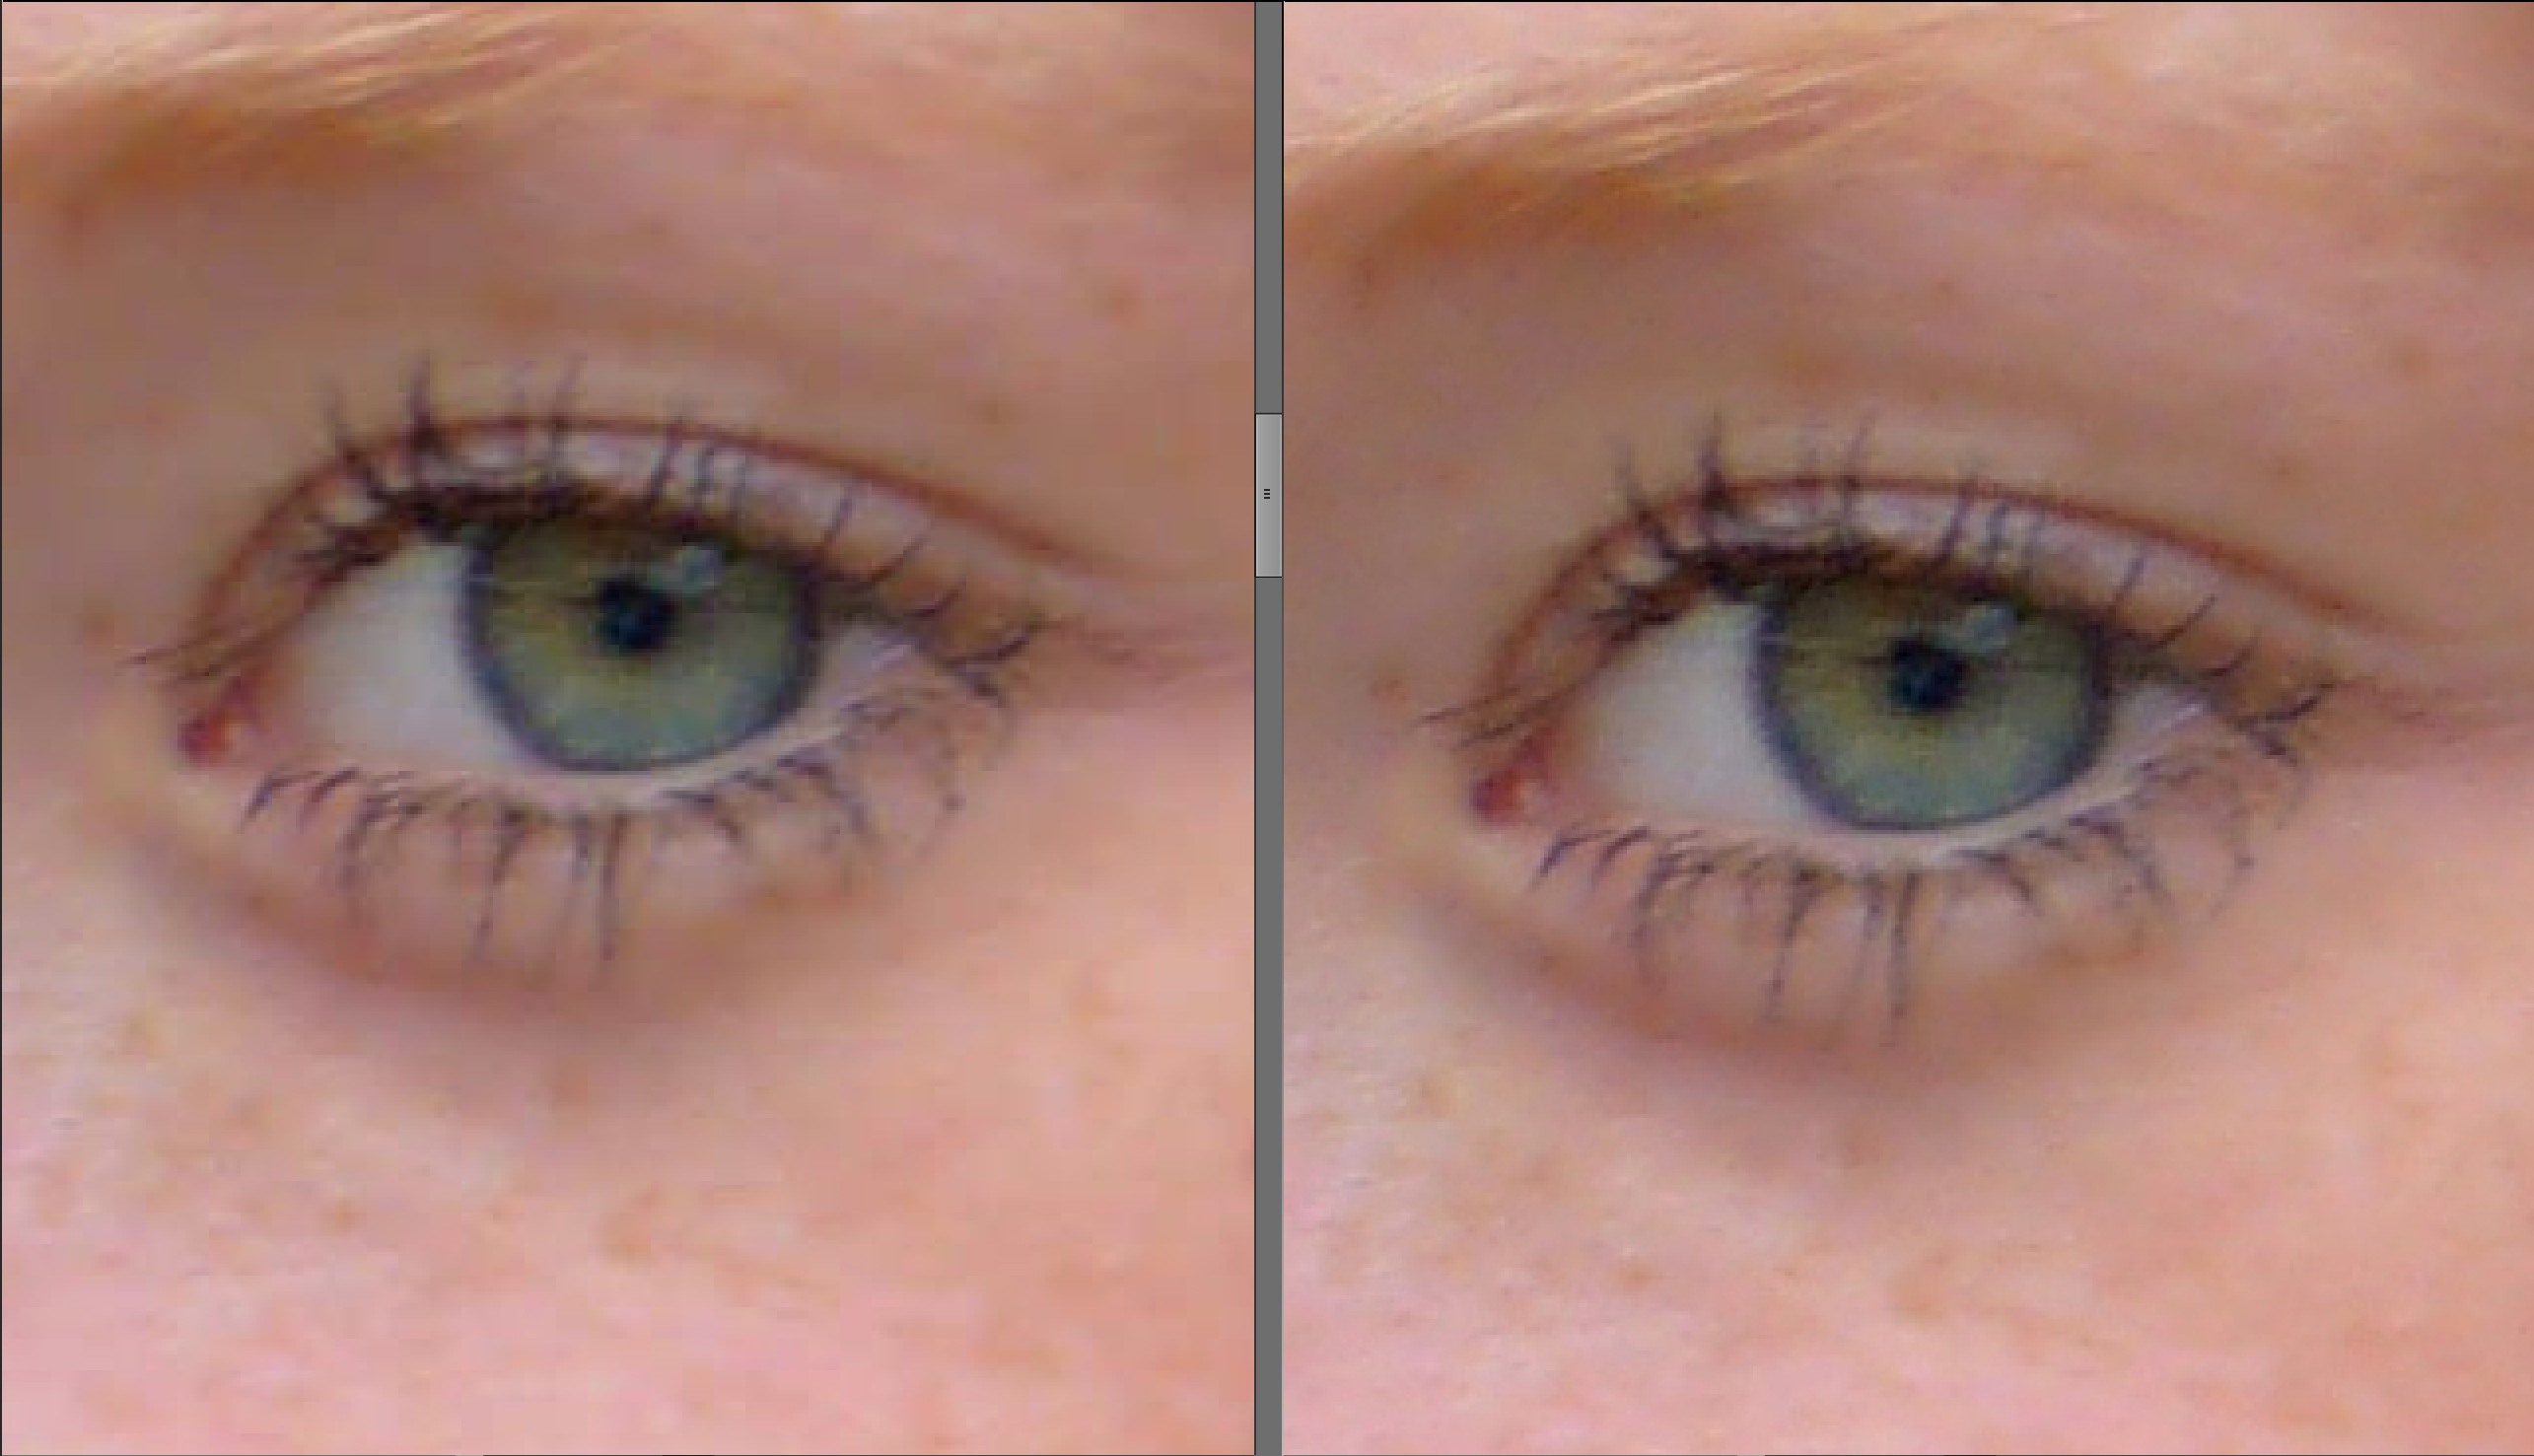
Figure: Comparison of original JPEG photo (right) and with JPEGmini compressed version (left) at 400% and scaled down; photos downloaded from the JPEGmini Website.
Please note that the comparison photo itself had to be compressed - it is a screenshot that I saved as a JPG file in highest possible quality. All in all, test the application yourself and with your own photos to decide whether JPEGmini is useful for you. I am using it primarily for Website photos and photos in emails.
Update: A visitor made me aware of an free online tool from Website Planet that compresses JPG and PNG files. Here is the link: www.websiteplanet.com/webtools/imagecompressor/ (in English) or www.websiteplanet.com/de/webtools/imagecompressor/ (in German)
PhotoSweeper - Getting Rid of Duplicates
PhotoSweeper is a "tool to eliminate similar or duplicate photos even in huge photo collections. It works with photos from Apple Photos, iPhoto, Aperture, Adobe Lightroom and Capture One libraries as well as photos from your hard drives and external storages." (from the Apple Store announcement).
It is available for the Apple Macintosh (on the Apple Store) in a "normal" and a "Lite" version. I purchased the "normal" version, but did not really use it up to now, although I have zillions of duplicate photos. For more details, see the PhotoSweeper page on overmacs Website or search for PhotoSweeper on the Apple Store.
CornerFix - The Ultimate Solution for Color Shading?
When I bought the Leica M (Typ 240) to use my M-mount lenses at a full-frame camera body, I did not expect that my wide-angle lenses would cause serious color shading and vignetting, as a simple rule, the shorter the focal length, the more. It became evident that, for these lenses, only a "post-processing" step would solve the issues.
When searching for a solution to my lens issues, I stumbled across CornerFix, a free application by Sandy McGuffog that allows to remove color shading and vignetting. It uses calibration images to create profiles that can then be used to correct DNG images. Thus, CornerFix is a DNG-only solution. Here is an excerpt from the CornerFix documentation (adapted):
- CornerFix corrects for vignetting effects in digital images. It's most often used to correct for the color vignetting that occurs when wide angle lenses are used with digital sensors that include IR filters, resulting in so-called "Cyan Corners". However, CornerFix can also be used to correct for simple optical vignetting, e.g., for stitching together panoramas, as well as to correct more complex effects e.g., "Italian flag" syndrome (green on the left, red on the right) such as found on the Leica M9.
- CornerFix was originally written for the Leica M8, but now supports
any camera that either:
- directly produces a DNG format image file, or
- produces an image that can be converted to DNG.
I took a closer look at CornerFix and report first experiences on page Part 3: Cornerfix et al. I will continue to do so in the future and add my new experience to this page. If you are interested in the tool, you can find the respective links below. The La Vida Leica article Using CornerFix to Correct Images provides a good introduction to the tool. Page Using Lenses without Lens Codes - Part 1: Theory also provides a brief introduction to CornerFix (parts of the text above were taken from the page).
Depth of Field and Hyperfocal Distance (iPad)
There are many approaches to calculating depth of field and hyperfocal distances for your lenses and cameras. There are some Websites that allow you to do these calculations, some iPad apps, but you can do it also on your own using Excel or programming.
Websites for Calculating Depth of Field and Hyperfocal Distance
Probably the best known source on the Web is Don Fleming's DOFMaster Website that allows you to calculate both, depth of field and hyperfocal distance. I took the formulae listed on the site and built Excel spreadsheets to do the calculations on my own, which allowed me to adapt the calculations to my own needs (camera, lenses, sensor formats, etc.).
Recently, I found the Bokeh simulator & depth of field calculator Website by Michael Bemowski, which is also be useful for this purpose. The page can be switched to a mobile version, which is not as wide.
Profondeur de Champ (Desktop, Android)
Pierre Chauveau offers the free DOF calculator application "Profondeur de champ" version 1.6 for Windows (in French). Versions for Linux and Android are also available.
LensLab (iPad)
Of course, the idea to write an iPad app for this purpose is evident, and indeed, you can find quite a few of them in the Apple App Store. However, I found out that not all of them can actually be trusted. Some apps seem to use simplified formulae or do not use the exact aperture values. However, the Lens*Lab app seems to calculate all the values correctly, and therefore, I purchased it. You can interact with the app via rulers, so there is no need to enter numbers (if that should frighten you...).
More information
For more information, read Hyperfocal Distance on Wikipedia or see page Calculating Hyperfocal Distance and Depth of Field.
Links
ExifTool and More
- ExifTool (Phil Harvey): www.sno.phy.queensu.ca/~phil/exiftool
Download links are provided on the page; as they include the version number, they would soon break if provided here... - ExifTool GUI for Windows v5.xx: u88.n24.queensu.ca/~bogdan/
- Three List Exif Metadata droplets (Apple Macintosh, uses AppleScript, ExifTool needs to be installed): owl.phy.queensu.ca/~phil/exiftool/List_Exif_Metadata.zip
- pyExifToolGui Website (Harry van der Wolf): hvdwolf.github.io/pyExifToolGUI
JPEGmini
- Byte sized: JPEGmini claims no loss of perceptual quality, up to 80% smaller files (dpreview): www.dpreview.com/articles/0896048182/byte-sized-jpegmini-claims-no-loss-of-perceptual-quality-with-80-smaller-files
- JPEGmini Website: www.jpegmini.com
- Website Planet online tool for compressing JPG and PNG files: www.websiteplanet.com/webtools/imagecompressor/ (in English) or www.websiteplanet.com/de/webtools/imagecompressor/ (in German)
PhotoSweeper
- PhotoSweeper page on overmacs Website: overmacs.com/?p=photosweeper
CornerFix
- CornerFix homepage (Sandy McGuffog): sites.google.com/site/cornerfix
- CornerFix download page (sourceforge.net): sourceforge.net/projects/cornerfix/files
- Using CornerFix to Correct Images (La Vida Leica): lavidaleica.com/content/using-cornerfix-correct-images
- Link - Collection for CornerFix Profiles (Thread started byDoc_P on l-camera-forum): www.l-camera-forum.com/topic/120279-link-collection-for-cornerfix-profiles
- Using the Voigtlander 12mm and 15mm lenses on the Leica M (240) (Tom Grill, About Photography): aboutphotography-tomgrill.blogspot.de/2013/06/using-voigtlander-12mm-and-15mm-lenses.html
Depth of Field and More
- DOFMaster Website (Don Fleming): www.dofmaster.com/dofjs.html
- Bokeh simulator & depth of field calculator Website (Michael Bemowski): dofsimulator.net/en
- Profondeur de champ (DOF calculator, version 1.6, French, Windows) (Pierre Chauveau): pr.chauveau.free.fr/spip/spip.php?page=article_pgm&id_rubrique=15 (versions for Linux and Android are also available)
|
made by |
| 11.08.2023 |