Panasonic TZ202: Manual Focusing and Focusing Support
How Is Manual Focusing Supported on the Panasonic TZ202? - Overview | Panasonic TZ202 Manual Focus Methods | Locking Focus | Support for Manual Focusing | Conclusions | References
On this page, I describe how manual focusing works with the Panasonic TZ202 camera and how it is supported.
Note: For an overview of manual focusing methods, see page Manual Focusing Methods.
How Is Manual Focusing Supported on the Panasonic TZ202? - Overview
Depending on the needs of the photographer, the Panasonic TZ202 offers several methods of focusing manually:
- Manual Focus (MF): The user sets the focus manually by turning the Control Ring.
- AF+MF (aka Direct Manual Focus*): The user manually overrides
the distance set by autofocus
*) I do not know whether Panasonic uses this term.
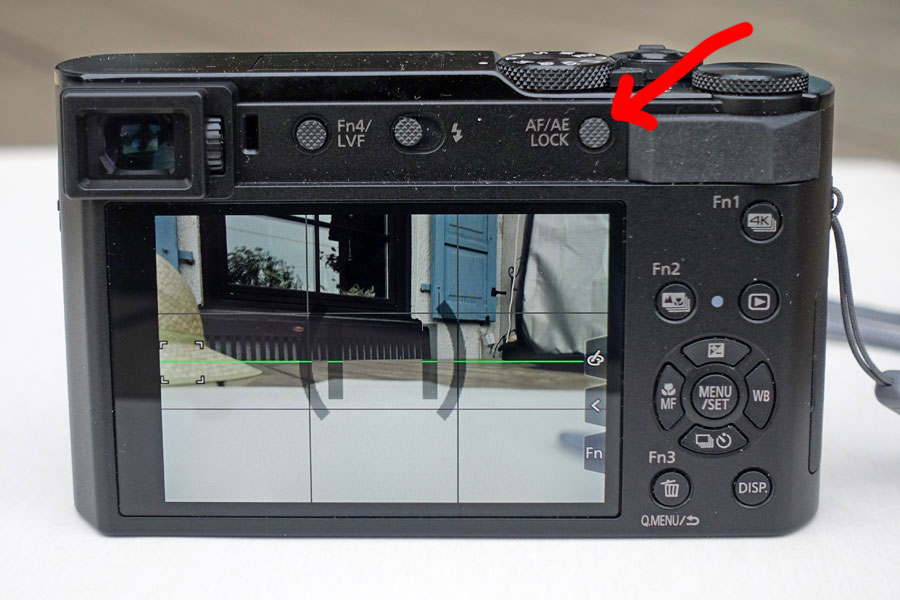
The Panasonic TZ202 allows you to lock focus using the AF/AE Lock button:
- Focus Lock: Locking the focus at a certain distance
This button can be configured to either lock focus, exposure, both, do nothing, or start AF; it can be configured as a toggle or hold button. I use this button, however, for locking exposure only (AE Lock Hold*).
*) Note that this corresponds to what Sony calls a "toggle" button; there "hold" means that you have to press the button all the time.
Manual focusing is furthermore supported in several ways (but note that these methods can also be used for autofocus):
- (Focus) Peaking: Contours that are in focus are highlighted in various ways
- MF Assist: Magnifies a section of the screen, either as picture in picture (PIP) or full screen (MF Assist Display)
Panasonic TZ202 Manual Focus Methods
Manual Focus (MF)
To focus manually, first set Focus Mode to MF (using the Focus Mode button). Focus mode selection can also be assigned to any Fn or touch Fn button.
Focusing manually is done using the control ring at the lens. Some people say that this is intuitive and provides a focusing experience similar to an camera with manual focus. Others, however, say that the experience is rather "indirect", since focusing is "by wire," and turning the wheel is rather tedious because there are no stops at the end (which a manual lens provides). All in all, I have to agree with the latter. Panasonic should have taken a look at the Leica X Vario, which does manual focusing so well that is "feels" manual, even though it is "by wire." But at least, this works much better than on our Sony RX cameras - see below...
The TZ200 displays a coarse distance scale, which helps a lot because I cannot remember, in which direction to turn the control ring (you have to turn it left for moving towards infinity...). The distance scale appears as soon as you turn the control ring and disappears a number of seconds after you stopped turning the ring.
On the Panasonic TZ202, manual focusing feels sluggish for me, and it has a hysteresis, that is, if you change direction, you have to turn the focus ring quite a while before focusing resumes. This is quite nerve-straining. I find it fairly cumbersome to turn the control ring while looking through the EVF on Sony the RX100 M4, because the camera is so small. This is much more comfortable on the Panasonic TZ200, which is quite a bit larger.
On our Sony cameras, I also observed that if I move the focus ring to and fro to find the optimal focus, the optimal focus point moves to different positions of the ring. So when you keep the hand on the ring all the time, the position of your hand changes over time for the optimum focus point, which may become quite awkward... The Panasonic TZ202 does not seem to show this behavior, that is, the focus point seems to stay fixed on the scale during turning the control ring. So, it is possible, as Panasonic demonstrates!
One more problem with manual focus on the Panasonic TZ202 is that at longer focal lengths you cannot find the "infinity position" for the control ring when there are no objects at infinity that you can focus on. With a mechanical manual focus, you simply turn the ring to the infinity position (or sometime to a different position). But here, the optimal position seems to be "shortly" before the "infinity marker" on the distance scale. Actually, the scale turns from white to read shortly before infinity, and the "infinity point" seems to be nearly at the transition between white and red (still a tiny bit in the white area). I do not know, what the camera wants to reveal to the user with this behavior... So, simply turning the focus ring to the "infinity marker" on the distance scale therefore delivers fuzzy results. Thus, it is nearly impossible to focus on stars at night, whereas it is possible to focus on the moon because there is something to focus on in the EVF or on the LCD screen. I found a somewhat similar behavior for the Sony RX100 M4 and on the RX10 M3, where it is much more pronounced because of the longer focal length.
Another problem that I have with focusing manually on the Sony RX100 M1 is that, being used to an EVF, I find it hard to recognize on the LCD screen when an object is in focus - even focus peaking and magnification do not help me much, particularly in bright light. The Panasonic TZ202, on the other hand, offers an EVF, and my first impression is that it does help, but that still a lot of fiddling is required because of the sluggish behavior of the control ring.
AF+MF
AF+MF (aka Direct Manual Focus*) allows you to override
autofocus manually.
To use this function, first set focus mode to AF (using
the Focus Mode button) and then activate AF+MF in the menu (Custom menu,
section Focus/Release Shutter, screen
3).
*) I do
not know whether Panasonic uses this term.
Note that AF+MF works only in one direction, not in two as on Sony cameras (though I never used the other direction there...): You focus automatically and then override the focus manually by turning the control ring at the lens. Also note that when using AF+MF, manual focus support is available (for details see below), provided that you activated it in the menu. Here is the detailed procedure for using AF+MF:
- To use AF+MF, you have to half-press the shutter button to focus automatically. Then turn the control ring to adjust the focus manually while still pressing the shutter button half-way.
- If you activated Manual Focus Assist, the screen will be magnified for 2 s, 5 s, or as long as you half-press the shutter button.
- You can also change magnification if you assigned the Focus Magnifier function to a function button and press it briefly. This function will be active all the time, not only while half-pressing the shutter button.
- If you activated Focus Peaking, it will also be active all the time, not only while half-pressing the shutter button.
Locking Focus
Locking the focus at a certain distance for one or more shots is useful in a number of occasions, such as sports photos where AF is too slow, series of photos, etc. (one might debate whether this is a manual focus method, but it fits in here...). The Panasonic TZ202 provides the following options for locking focus:
- Pressing the shutter-release button halfway down. Note that this also locks exposure (but not always, the behavior can be more complex)!
- Pressing the AF/AE Lock button (see photo below). Depending on how you configure this button, you can either lock focus, lock exposure, or lock both by briefly pressing this button (configured as AF/AE Lock Hold = ON) or pressing and holding it (configured as AF/AE Lock Hold = OFF).
- Switching from AF to MF by using the Focus Mode function: This may be achieved by pressing the Focus Mode button or by assigning the Focus Mode function to an Fn button and then pressing this button (in principle, using a menu would work as well, but this is far too cumbersome). This approach is far too cumbersome to be discussed here any further...
Figure: The AF/AE Lock button
Since locking exposure and/or focus is interwined, I dedicated an extra page to the topic of "locking": Locking Focus and Exposure. Please read this page for details!
Support for Manual Focusing
The Panasonic TZ202 offers two tools that are meant to make manual focusing easier:
- (Focus) Peaking: Contours that are in focus are highlighted
- in two intensities (High, Low) and
- in five different colors (Blue, Yellow, Green, Red, White).
- MF Assist (Magnification) comes in two flavors:
- Full screen: Magnifies the center section of the image full screen
- PIP (picture in picture): Magnifies an image section in the center of the screen
In the following, I explain these tools in more detail.
(Focus) Peaking
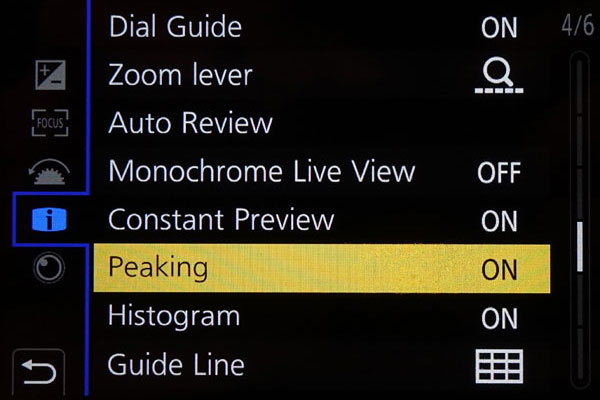
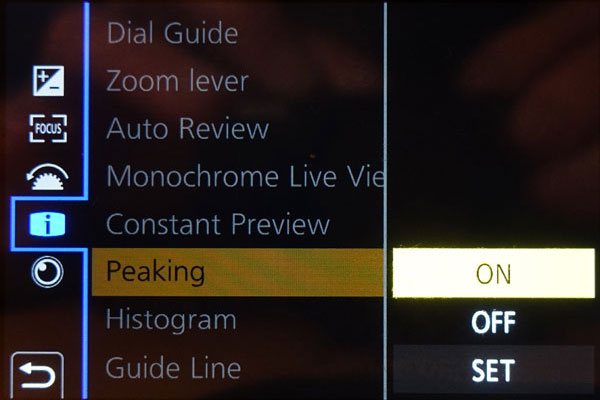
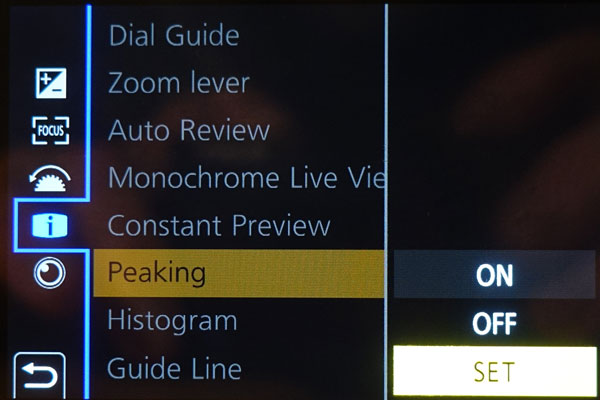
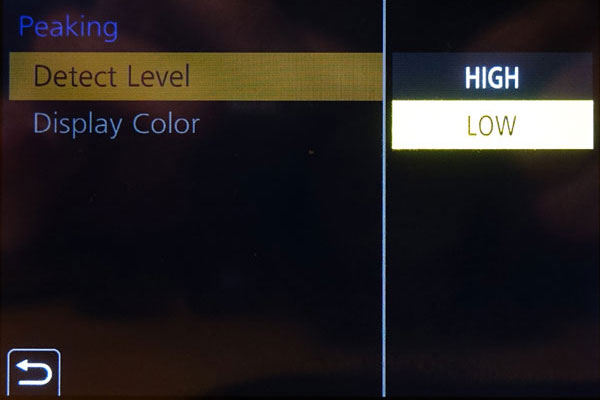
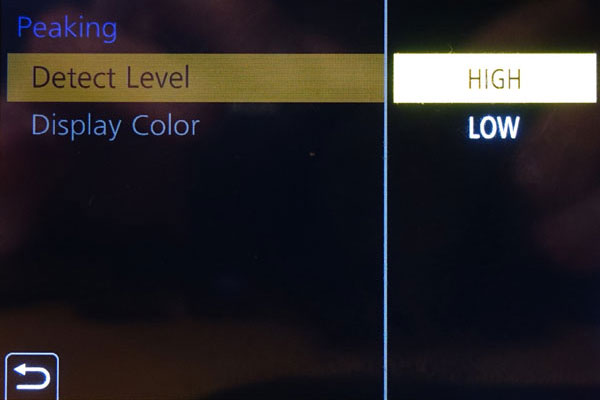
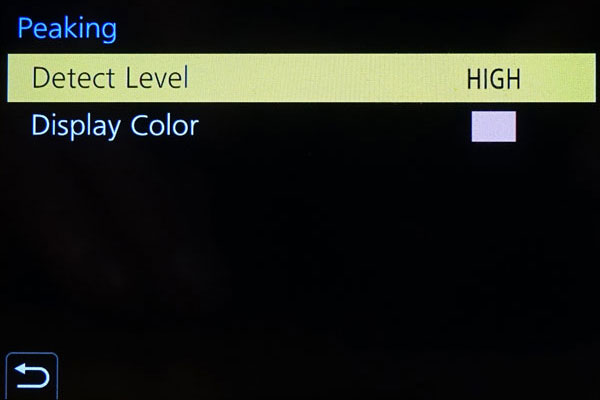
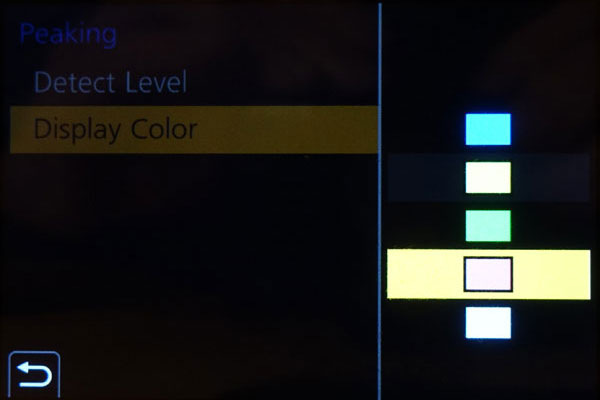
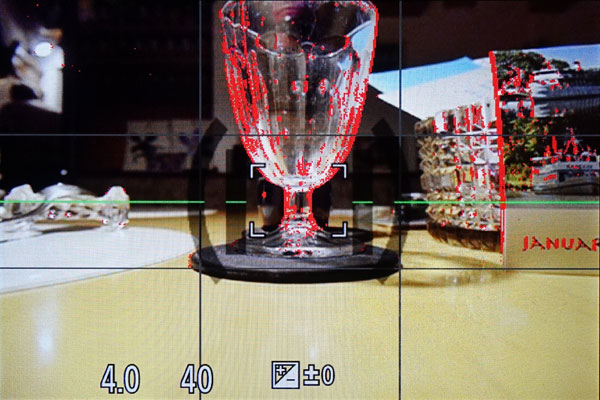
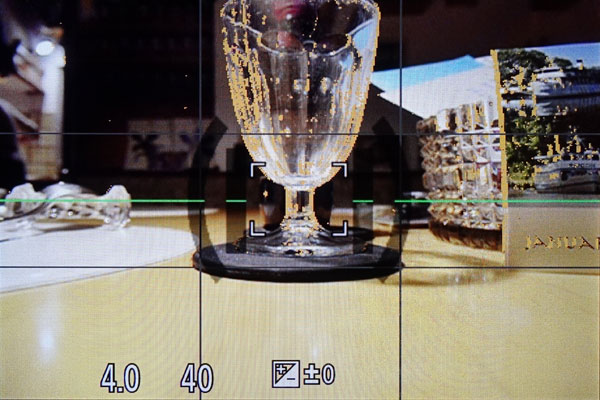
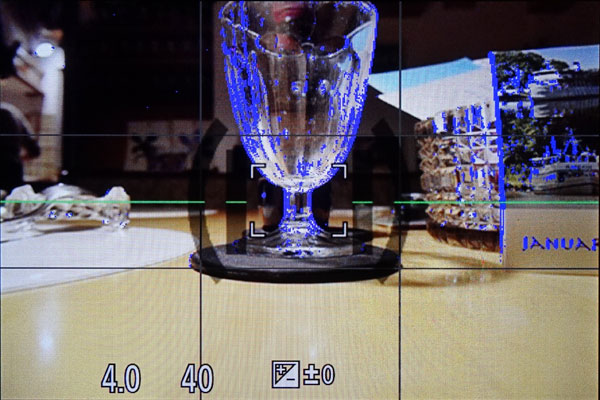
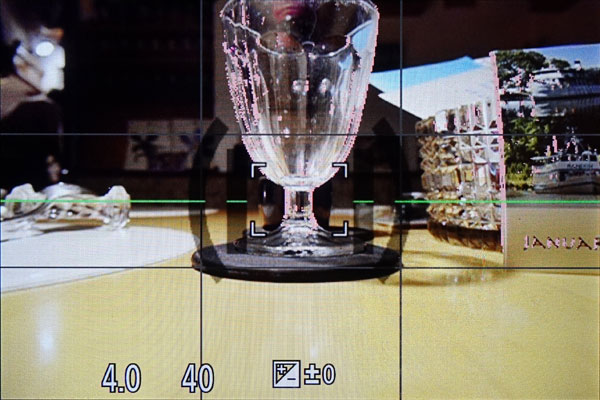
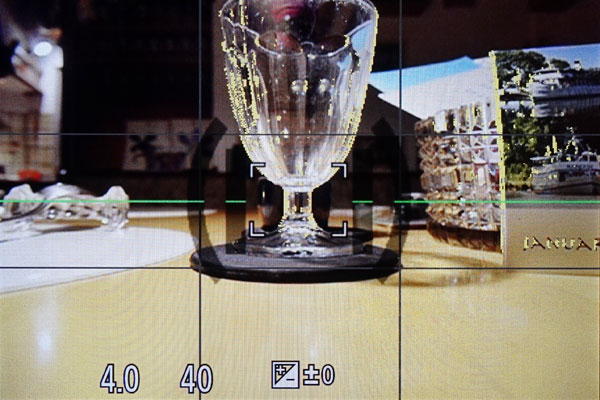
(Focus) Peaking is an approach to highlight contours that are in focus. In the Custom menu, section Monitor/Display, screen 4) you can set Peaking to "On and "Off". On the Panasonic TZ202, contours are highlighted
- in two different intensities (Detect Level: High, Low)
- in five different colors (Display Color: Blue, Yellow, Green, Red, White)
In contrast to other cameras, you get a stronger effect, when you set the Detect Level to Low. The display colors are in this case bright, whereas they are subdued, when the Detect Level is High.
Figures: Setting Peaking (top row), Detect Level, and Display Color in the Custom menu (Section Monitor/Display, page 4)
 |
 |
 |
||
 |
 |
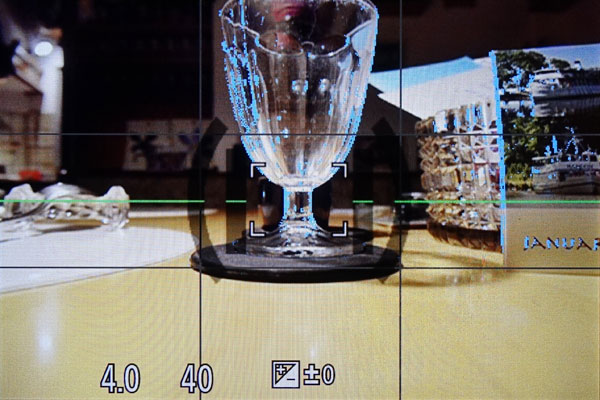 |
Figures: Peaking Colors red, yellow, and blue (from left to right; Detect Level: Low on the top, High at the bottom)
MF Assist (Magnification)
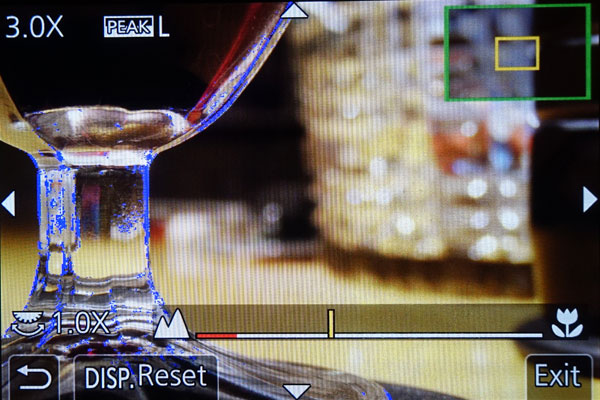
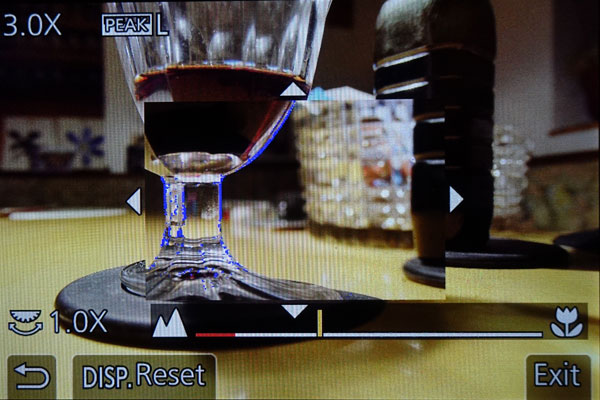
Manual Focus Assist (or MF Assist) magnifies an image section for a certain time as soon as you turn the control ring at the lens to focus manually, starting at a magnification of 3 x. If you turn the rear dial, magnification can be increased up to 6 x. Half-pressing the shutter button (or if you take a photo...), cancels magnification, and you have use the to control ring again to re-activate magnification. You can activate MF Assist in the Custom menu, section Focus/Release Shutter, page 3.
MF Assist (magnification) comes in two flavors (MF Assist Display):
- Full screen: Magnifies the center section of the image full screen
- PIP (picture in picture): Magnifies an image section in the center of the screen
You can set MF Assist Display to these options in the Custom menu, section Focus/Release Shutter, page 3 (just below MF Assist).
The four cursor keys allow you to change the position of the enlarged section within the image. Pressing the DISP. button resets the sections's position.
When MF Assist is On, an indicator of the magnification appears on the screen. As already stated, you can change the magnification with the rear dial. Magnification disappears after several seconds (undocumented as far as I know...).
 |
 |
 |
||
Figures: MF Assist combined with Focus Peaking (Peaking Color red, not visible...) in full screen mode (center) and PIP mode (right); original view to the left
Conclusions
The EVF of the Panasonic TZ202 seems to improve manual focusing for me, compared with just having to use the LCD screen as on the Sony RX100 M1. There is still the sluggish behavior of the focus ring, though. But the "by wire" focusing seems to be a bit better implemented than on my Sony cameras...
One instance for using manual focus are photos of the sky. Here, autofocus often cannot find a target, and therefore I set/lock the focus to/on infinity using the distance scale. But note that for longer focal lengths you have to be careful to find the exact point where "infinity" is sharp - do not use just the end of the distance scale. I also use the "infinity" trick, with the same caveats, for situations when objects in the foreground might fool the autofocus (a fence, flowers, branches, people...).
Another instance are sports photos where autofocus is often far too slow. Here, locking focus or manual focus can be an alternative to "pure" AF as well:
- Either you pre-focus with AF on a suitable target at the expected distance, keep the shutter button half-pressed, and wait for "the" moment. This is a bit cumbersome because you have to half-press the shutter button all the time, particularly if you have to wait for a while.
- If you use AF+MF, you can additionally fine-tune the distance manually; but again, you have to half-press the shutter button all the time - cumbersome as well.
- Or you do the same, but lock the focus* after AF has found a target ("toggle"
mode), and then wait for "the" moment. Now you do not have to press
a button all the time.
*) This works only if you set the AF/AE Lock Button to AF Lock. - Of course, the same effect can be achieved with "pure" MF as well... Many roads lead to Rome...
My main application for manual focus are close-up photos, because here it often happens that autofocus does not lock or finds the wrong target. Even the 1-Area autofocus area, providing a fairly "large spot" AF, may not be of much help here. If you assign function Focus Area Set to a Fn button it is, however, easy to change the size and location of the AF area or the AF Assist screen; you can also reset its size and position with the DISP. button (see page Focusing with 1-Area/Pinpoint Focus for details).
See page Close-Up Introduction and First Samples for details on taking close-up photos with the Panasonic TZ202.
Please note that I found out that the Panasonic TZ202 handles the issue of having focus lock and exposure lock separately available in an ingenious way: you can assign one of the functions to the AF/AE Lock button, and then the other is handled by the shutter button, that is, by half-pressing it. So the second lock cannot be used in "toggle", but only in "hold" mode. So you may want to decide in beforehand which one should be in "toggle" mode... Regrettably, this nice feature is nowhere documented and also not included in Frank Späth's book.
Note: For a more general overview of manual focusing methods, see page Manual Focusing Methods.
References
- Frank Späth (2018). Lumix TZ202 - Das Buch zur Kamera. Point of Sale Verlag (ISBN-13: 978-3941761704).
| 21.02.2019 |
