Astronomy | GXR · GR · RX100 M1 · RX100 M4 · RX10 M3/4 · TZ202 · X Vario · M240 · General | Photos | Conf. Places | Calendars | Art
Panasonic TZ202: Focusing with 1-Area/Pinpoint Focus
Autofocus Modes - Overview | Using the 1-Area/Pinpoint AF Mode | Conclusions | References
On this page, I briefly describe the autofocus modes that can be set on the Panasonic TZ202 camera, and then I focus on how the 1-Area/Pinpoint AF mode can be set and used.
Autofocus Modes - Overview
The Panasonic TZ202 offers several types of autofocus areas that you select in the AF Mode menu (Rec menu, screen 1):
- Face/Eye Detection: Is dedicated to recognizing faces and eyes and to focus on them.
- Tracking: Tracks moving objects
- 49-Area: Activates up to 49 areas over the full expanse of the display for focusing
- Custom Multi: Allows you to customize the 49 areas to your needs or to select from predefined groups of focus areas
- 1-Area: Offers one AF area that can be changed in size and moved around
- Pinpoint: A smaller area than the 1-Area AF area for even more precision, which is magnified for a short among of time in the viewfinder/on the LCD screen, when you press the shutter button halfway.
In the following, I will briefly discuss the 49-Area, Custom Multi, 1-Area, and Pinpoint options.
49-Area
This is the default option for the AF area, and probably most users will not change this. Panasonic recommends it particularly for objects that are not at the center of the frame. We, on the other hand, rarely use it, because with our early cameras we made the experience that the camera focused on near-by objects, even though the focus fields would not touch them and thus, got blurry photos. I found this behavior recently for budget Canon DSLRs, as well. Anyway, to keep control over the focusing process, we usually use one of the "spot" options.
Custom Multi
Maybe useful when you use the camera on a tripod. Nothing for me...
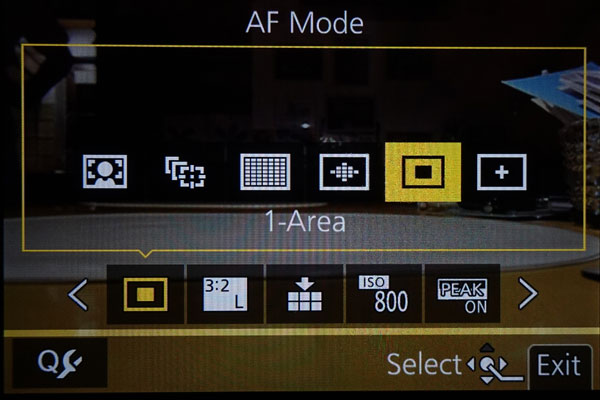
1-Area
Panasonic's 1-Area AF Mode is the main AF mode that I use, because I want to control where the camera focuses. The focus area can be changed in size and moved around. These values can be set in the AF Mode menu or in operation when you assign an Fn button to the Focus Area Set function. Thus, the 1-Area AF Mode includes Sony's Center and Flexible Spot focus areas in one function. I find this much more handy than Sony's approach.
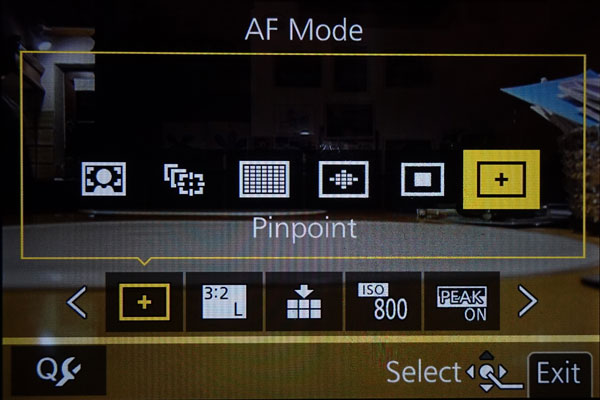
Pinpoint
The Pinpoint AF Mode offers a tiny focus area and a MF Assist functionality for even more precision when focusing. On the other hand, I know that contrast AF hunts when the focus area is too small. Only experience will show whether this option is indeed usable (it can be customized with respect to display duration and display style (PIP/Full screen). As for the 1-Area AF Mode, the focus area can be changed in size and moved around. These characteristics can be set in the AF Mode menu or during operation when you assign a Fn button to the Focus Area Set function.
Thus, the 1-Area AF Mode expands Sony's Center and Flexible Spot focus areas with respect to small focus areas. I find this much more handy than Sony's approach.
In the following, I describe how to use the 1-Area/Pinpoint AF Mode in more detail.
Using the 1-Area/Pinpoint AF Mode
Activating the 1-Area/Pinpoint AF Mode in the Menu
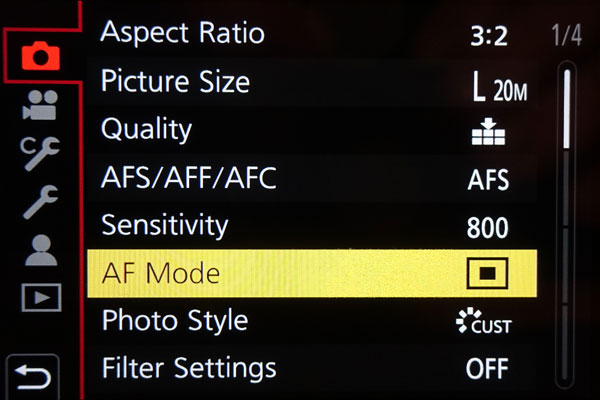
You activate the 1-Area and the Pinpoint AF mode via the AF Mode menu item, either in the Rec menu on page 1, or you add it to the Q.Menu menu as well, as I did, and access it from there. The latter is useful whenever you want to change the AF area from time to time, but you cannot customize the 1-Area and Pinpoint AF Modes in the Q.Menu.
Menu |
||||
 |
 |
 |
||
On page 1 in the Rec menu, you can set the AF Mode (here set to 1-Area) |
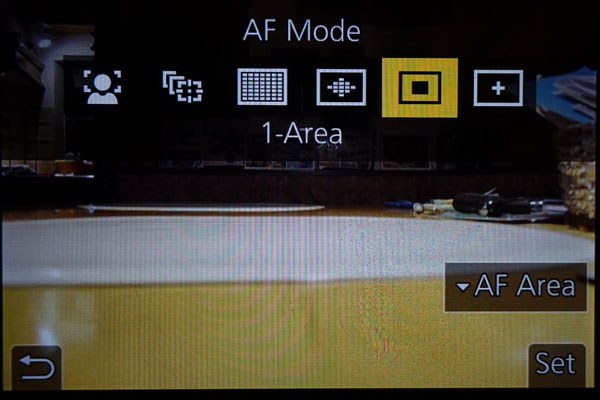
On the detail screen, you can select the type of AF Mode; here 1-Area is selected ... |
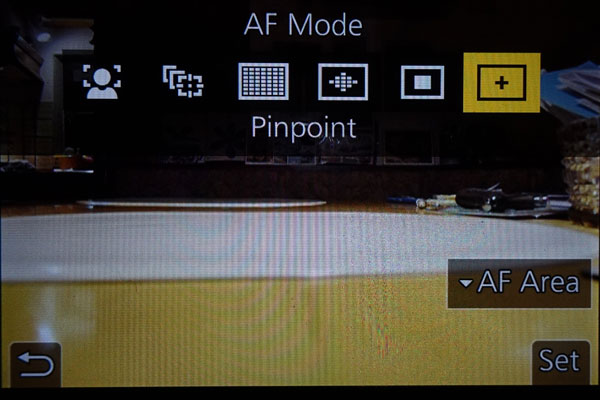
On the detail screen, you can select the type of AF area; here Pinpoint is selected ... |
||
Q.Menu |
||||
 |
 |
 |
||
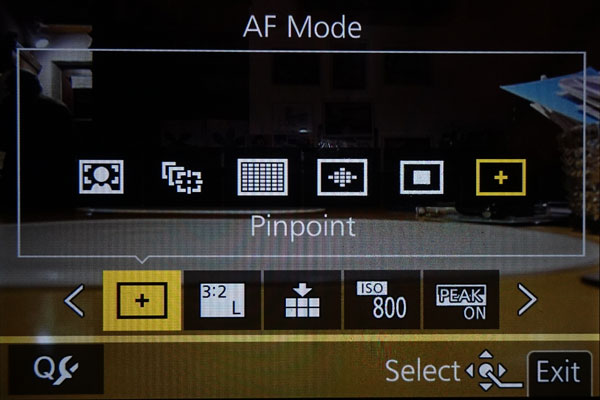
| In the Q.Menu, AF Mode selected | AF Mode submenu entered, 1-Area selected - no customizing options | AF Mode submenu entered, Pinpoint selected - no customizing options | ||
If you select1-Area or Pinpoint in the Rec menu (not in the Q.Menu!), you can move on to a screen, on which you can set the size and the position of the AF area ("Down" button), as the Figures above suggest (but see below!). Since the customizing screens look the same as when you customize these setting during the shooting, I do not present these here.
Position Setting Screen for AF Area/MF Assist
To be able to activate the moving and resizing of the AF area, as the screens above suggest (but see below!), during the shooting, you have to assign function Focus Area Set to an Fn button (I use Fn1 for this purpose) so that you can call the function easily. It cannot be accessed from the menu. The Panasonic TZ202 manual states regarding this matter:
- When [Focus Area Set] is assigned to the function button, you can display [and change; added by me] the AF area or the MF Assist position setting screen.
That means, contrary to what I assumed from the screens above, you get to a "position setting screen", in one case of an AF area, in the other of an MF assist screen, for moving and resizing things. And it turns out that on these screens, you do fairly different things.
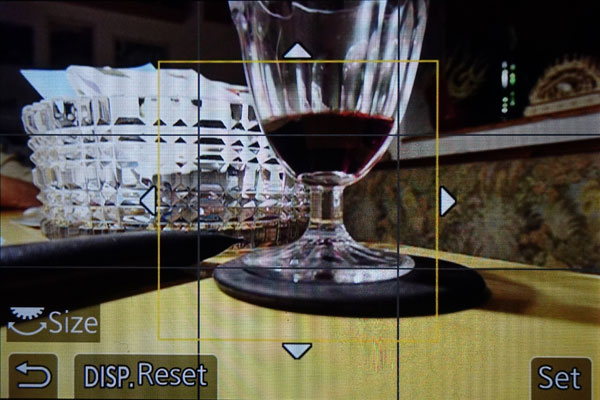
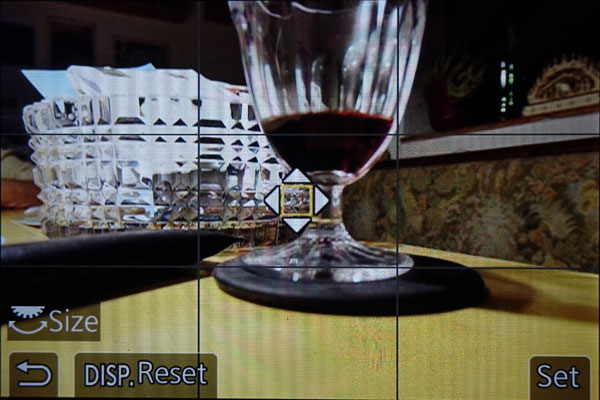
1-Area AF Mode - Position Settings Screen for the AF Area
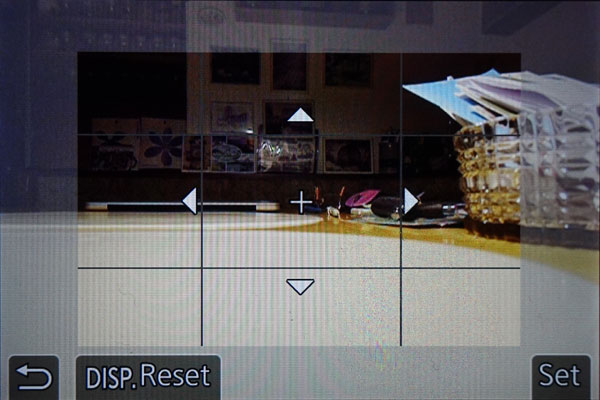
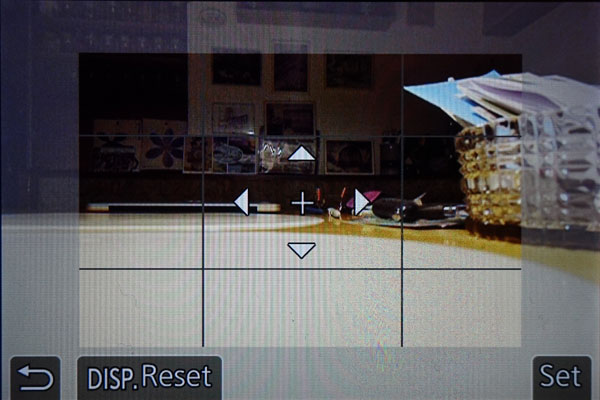
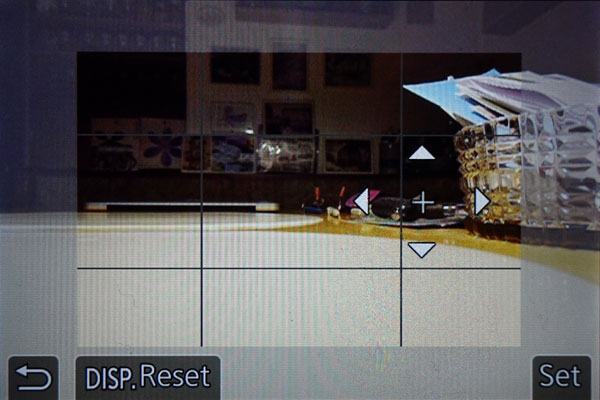
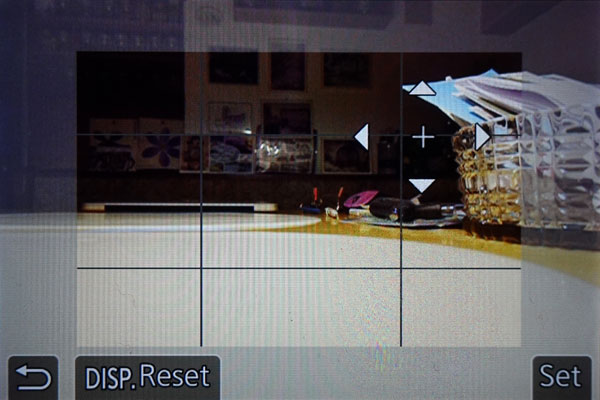
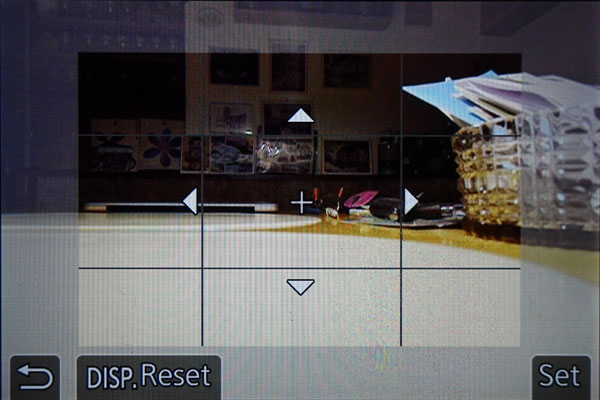
Normally, you see the current focus frame at the center of the screen in 1-Area AF Mode. When you press the button that you assigned the function Focus Area Set to, an orange square focus frame with direction arrows replaces it. The direction arrows indicate that you can move the AF area using the cursor buttons nand that you can also change its size (using the Rear Dial). If you half-press the shutter button, the orange frame and the arrows disappear, you just see the corners of the frame and can no longer move it. If you want to modify the frame again, press the function button once more to activate movement and resizing.
The DISP. button serves as a shortcut key that allows you to reset the position and size of the focus area.
 |
 |
 |
||
Default 1-Area focus area |
Focus Area Set activated |
Focus area enlarged to maximum size |
||
 |
 |
 |
||
Focus Area Set deactivated |
Focus Area Set reactivated, size set to minimum |
Focus Area Set deactivated |
||
 |
 |
|||
Focus Area Set reactivated, size set to default, position moved |
Focus Area Set deactivated with changed position |
|
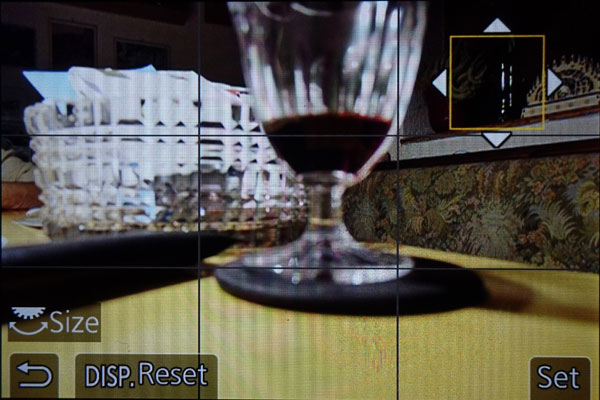
Pinpoint AF Mode - Changing the Position Settings Screen for the MF Assist
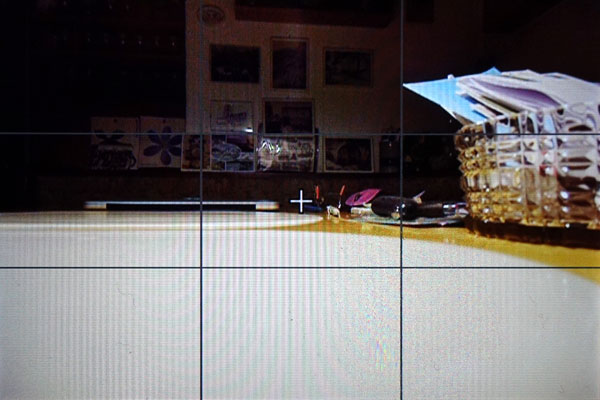
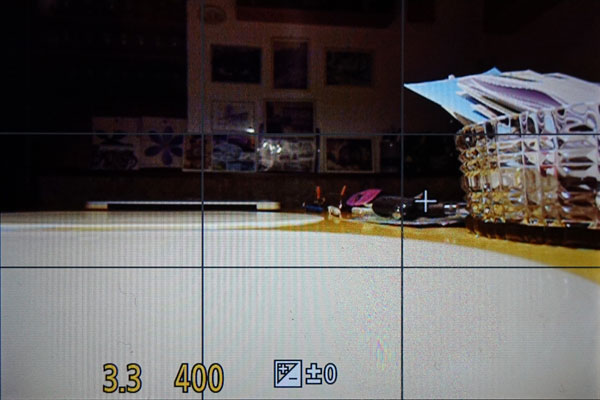
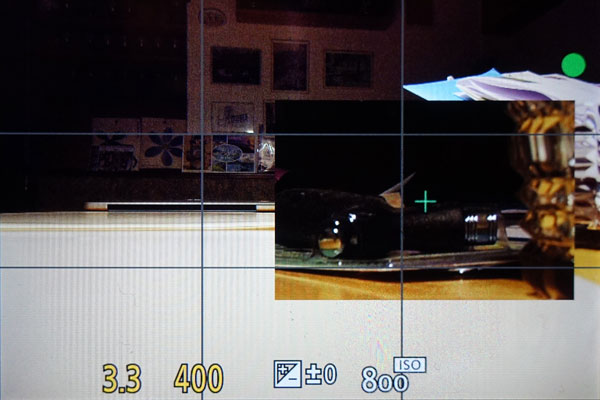
Normally, you see a cross at the center of the screen in Pinpoint AF Mode. When you press the button that you assigned the function Focus Area Set to, an magnified section with a cross at the center and direction arrows replaces it (either PIP or full screen). The direction arrows indicate that you can move the Pinpoint area using the cursor buttons. They also indicate the size of the magnified section that will be displayed during shooting (either as PIP or full screen), which you can change by turning the Rear Dial. The effect of changing the size will be that, during shooting the content, of the magnified section will be more or less enlarged. As far as I can see, however, the "preview" does not show the exact enlarged section that you will see later...
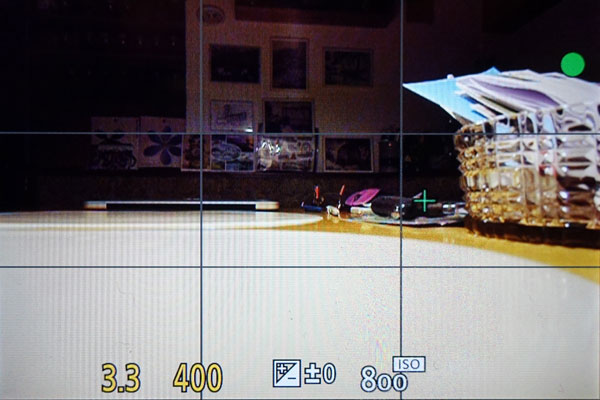
If you half-press the shutter button, the magnified section and the arrows disappear, you just see the pinpoint cross and can no longer move it. If you want to modify the magnified section again, press the function button once more to activate movement and changing magnification.
The DISP. button serves as a shortcut key that allows you to reset the position and size of the focus area.
 |
 |
 |
||
Pinpoint focus marker |
Focus Area Set activated (minimum magnification) |
Focus area changed to maximum magnification |
||
 |
 |
 |
||
Focus area moved |
Ditto |
Focus area reset |
||
 |
 |
|||
Focus area enlarged to minimum magnification |
Focus Area Set deactivated again |
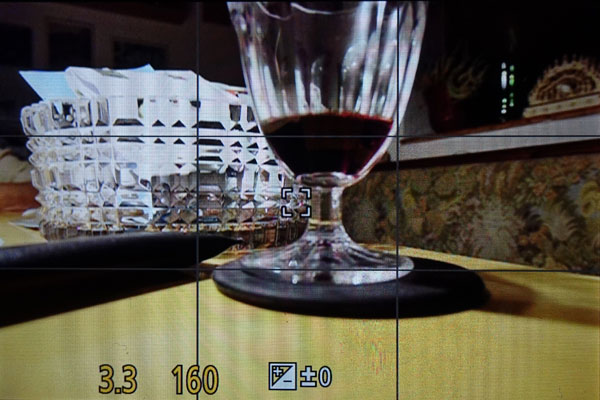
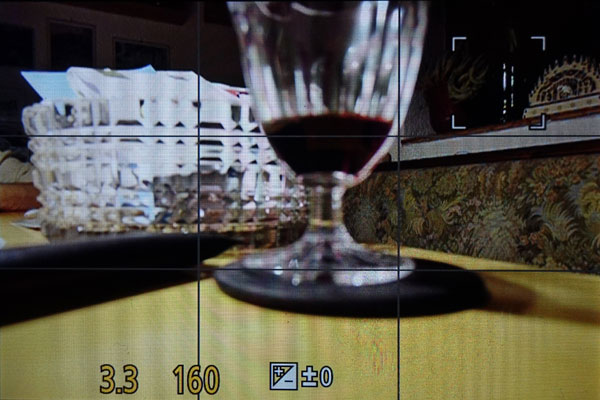
Pinpoint AF Mode - Taking a Photo
When you are in normal shooting mode (that is, resizing and moving are not active) and you half-press the shutter button, a magnified area (AF Assist; you can set whether it appears full screen or as picture in picture - see below) appears with a white cross at the center. As soon as the AF found its target, the cross turns green and is surrounded by a frame. The frame and the magnified section disappear after a certain time that you can set (see below), but the cross remains green as long as the shutter button is depressed. Note that the magnification within the magnified section depends on the size that you set when you customized the AF area for the Pinpoint AF Mode (see above).
|
 |
 |
||
Focus Area Set not active (moving and resizing not possible), the Pinpoint marker is white |
Shutter button depressed, AF Assist shows enlarged section (PIP) and white cross first; it shows a green cross with a frame after focus confirmation. |
Sometimes, the green cross remains a little bit longer than the frame... | ||
 |
|
|||
Frame gone away quickly (you can set the time in three steps), shutter button still depressed (green cross hard to see) |
After the shutter button was released, the cross turns white again |
|
Pinpoint AF Mode - Setting Pinpoint Characteristics
In the Custom menu, section Focus/Release Shutter, page 2, you will find the menu item Pinpoint AF Setting with two options:
- Pinpoint AF Time: Long, Mid, Short
- Pinpoint AF Display: Full (full screen), PIP (picture in picture)
Here, you set the characteristics of the MF Assist feature for the Pinpoint AF Mode (not for MF). These settings do not have any influence on the display while moving and resizing the Pinpoint AF area (as shown above). They are separate settings and not affected by the "regular" MF Assist settings for MF in the same menu section (page 3).
Conclusions
It is easy to activate the 1-Area and Pinpoint AF Mode on the Panasonic TZ202, particularly if you add the AF Mode function to the Q.Menu, as I did (but you cannot customize the focus area in the Q.Menu). And if you assign function Focus Area Set to a Fn button, it is also easy to change the size and location of the AF area or the AF Assist screen; you can also reset its size and position with the DISP. button.
Being able to move the position of the focus area is particularly useful when using the camera on a tripod where you cannot move it for focusing. A small AF area may also be helpful in cases where autofocus does not find a target (alternatively, you can resort to manual focus in this case). The usefulness of the AF Assist feature for Pinpoint AF Mode has still to be revealed to me...
Nevertheless, I find Panasonic's approach to this topic much better than Sony's...
References
- Frank Späth (2018). Lumix TZ202 - Das Buch zur Kamera. Point of Sale Verlag (ISBN-13: 978-3941761704).
|
made by |
| 13.03.2019 |