Panasonic TZ202: First Impressions
Some First Comments by Me | It's all there! | Some of My Settings | Weight and Size | The Lens | The Viewfinder and Touchscreen | What Is Missing or Could Be Improved (in My Opinion)? | Conclusions
On this page, I would like to give away my first impressions of using the Panasonic TZ202 camera.
Some First Comments by Me
So what can I say about the Panasonic TZ202 after a couple of months of use? First of all, I had to get used to it! Second, here are some first observations:
- The camera is small and light, but larger and heavier than the Sony RX100 models. This makes it, in my eyes, easier to use. For details see below...
- It has enough external buttons and controls so that I can access the for me most important functions. So, there is less need to dive into the menus than for other compact cameras. On the other hand, I really had get to used to the logic of the Panasonic menu system and new "speak"...
- Regrettably, the viewfinder image is comparatively small. I find it also fairly dull, lacking contrast, and often appearing somewhat fuzzy to me. I cannot see the pixels, which is nice, but this is not that important for me. It is really the size of the viewfinder image that matters for me, not only for manual focusing, but also in general.
- The camera is easy to carry around on a walk. Usually, I hold it at its grip, but for safety reasons, I always use a wrist strap when taking the camera on a photo trip...
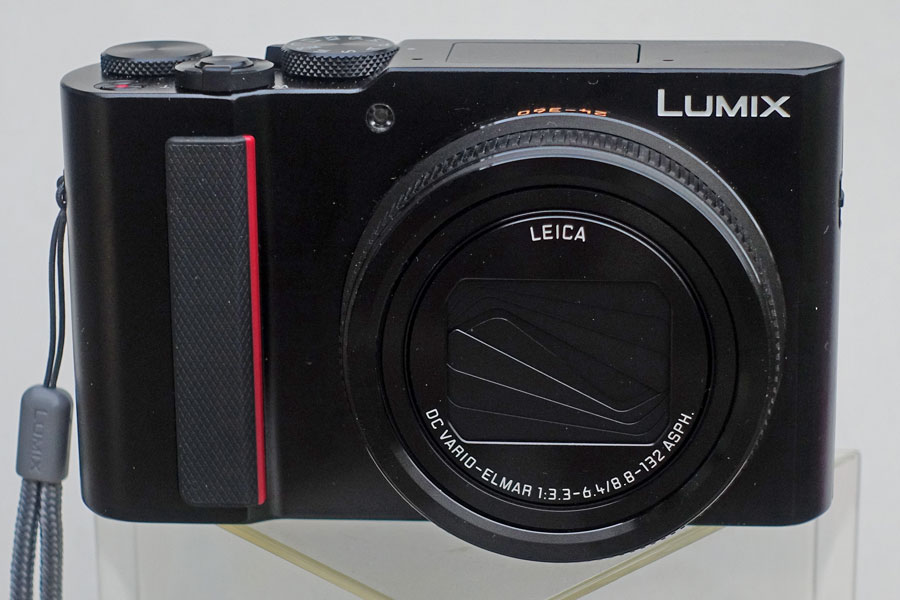 |
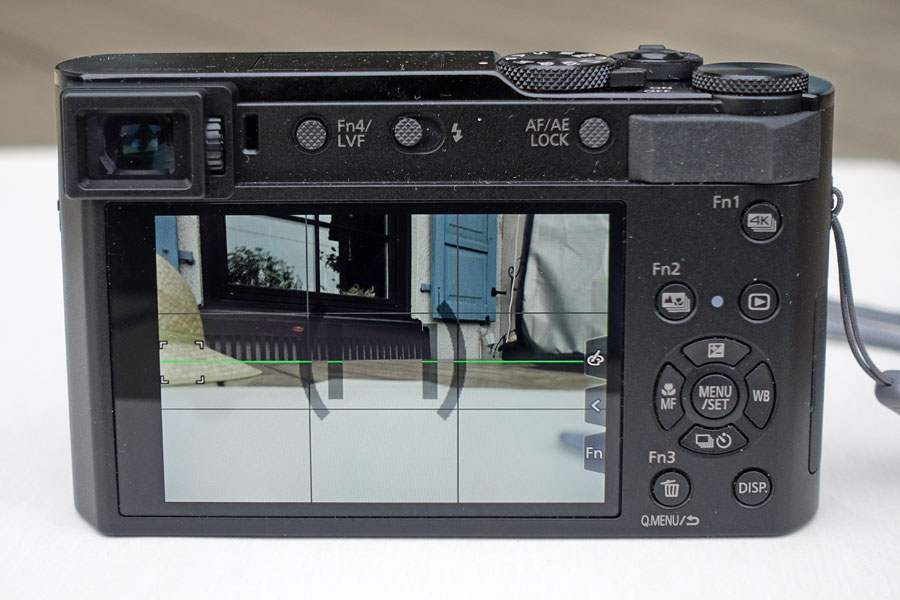 |
|
Front view |
Rear view, on |
Photo: The Panasonic TZ202
It's all there!
When using the Panasonic TZ202, I have to say that "it's all there" what I need:
- Focusing (Control Ring): Can be "manually" set
at the lens by turning the Control
Ring - and needs some practice, because it it "by wire" and
not mechanical. But using MF Assist (screen magnification) and (Focus)
Peaking, I am successful most of the time.
Cons: The manual focus has some hysteresis, but it works better than on my Sony cameras. - Zooming (Zoom Lever): Can be done using the Zoom Lever. You can also set step zoom (zooms in predefined steps that correspond to "standard" focal lengths).
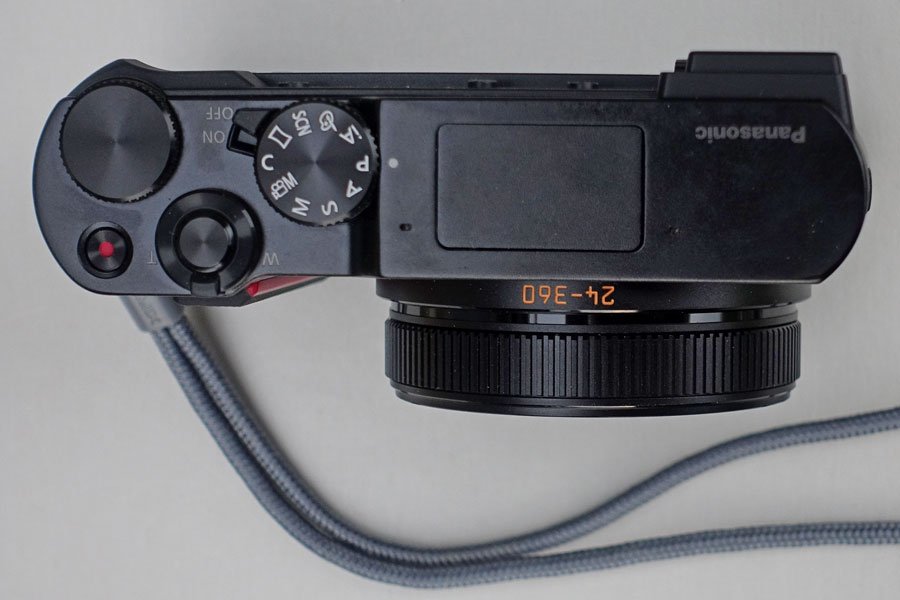
- Mode: Mostly, I use the camera in P mode, sometimes in A or M mode. Switching to A or M mode is easy thanks to the Mode Dial on the camera top.
- ISO: Can be accessed faster using a function button. I reassigned the Fn2 button to ISO...
- Exposure compensation: The "Up" cursor key is firmly assigned to exposure compensation. Exposure can be corrected by pressing this button and then rotating the rear dial. Occasionally I had fixly assigned exposure correction to the rear dial, but this resulted in unwanted limitations, so that I canceled this assignment.
- MF Assist (Screen magnification): I set it to "automatic" so that it is activated whenever I turn the control ring at the lens (MF Assist). By turning the rear dial, you can increase magnification up to 6 x.
- Focus area: Changing the size and position of the focus field (Focus Area Set) can only be accessed using a function button. I reassigned the Fn1 button to function Focus Area Set.
- Level: Can be activated using the DISP button; I use it most of the time.
- Self-timer: Is rarely used by me... I can access it by presssing the "Down" cursor key, which is firmly assigned to Drive Mode.
- Focus mode: The left cursor key is firmly assigned to the Focus Mode function (AF, MF, and more...).
- Lock focus (AF/AE Lock Button): AFL is provided by the AF/AE Lock Button. Since I set it to AE Lock, the AF Lock function is no longer available to me...
- Lock exposure (AF/AE Lock Button): AEL is provided by the AF/AE Lock Button, which I set to AE Lock and also to toggle mode so that I need not press the button all the time (this is called "hold" by Panasonic)...
- Q.Menu (Fn3 Button): Provides access to some functions that I use more often so that I need not dive into the menu system for these functions.
Much more I (usually) do not need...
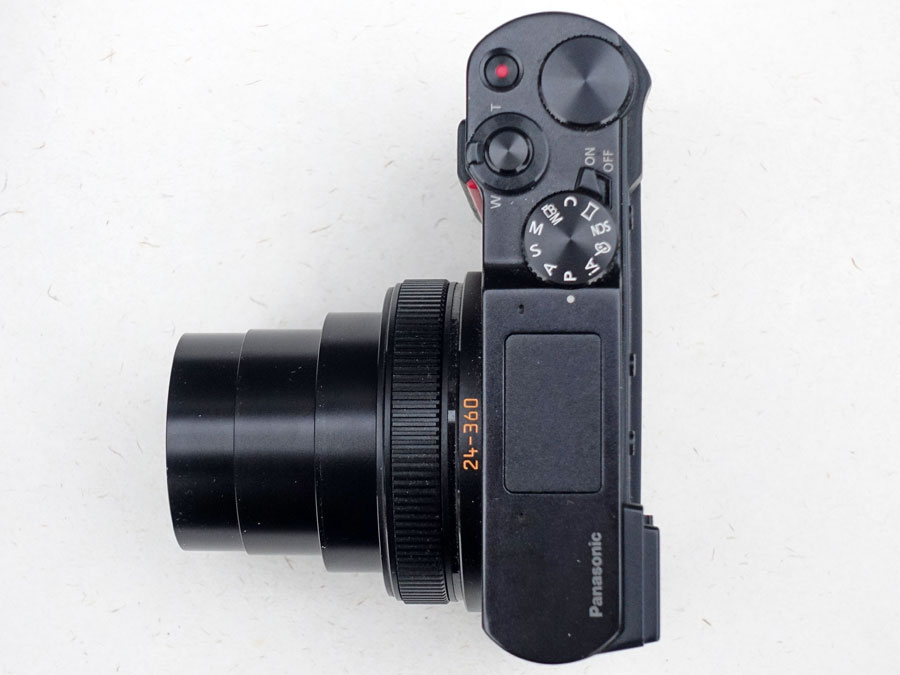 |
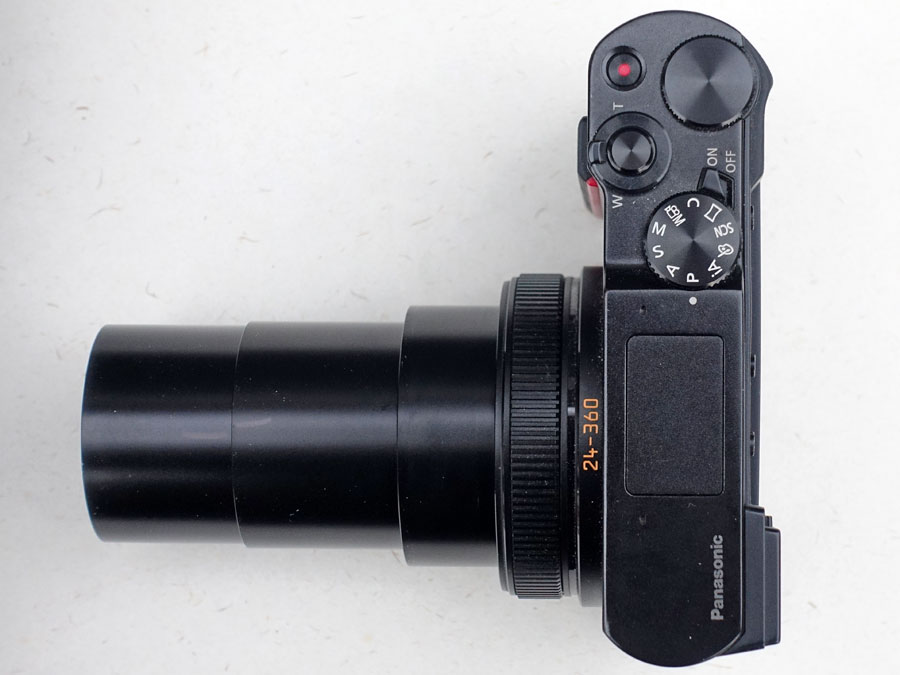 |
|
Top view, on, wide angle |
Top view, on, telephoto |
Photos: Views of the Panasonic TZ202
Some of My Settings
In progress
Favorite camera settings vary from photographer to photographer and also depend on the situation at hand. Therefore, it is difficult to recommend camera settings to other people. Nevertheless, I list some settings that I typically use - maybe, they offer one or the other inspiration for others:
- Image Format: JPEG extra fine, 20 MP
- ISO: Between 125 and 1600 (often between 200 and 800), when it is dark ISO 1600, rarely ISO 3200
- Exposure Simulation: I set the function Live View Display to Settings Effects On - that is, yes!
- Exposure Compensation: Usually 0, sometimes -0.3 or even -0.7. Other values in special situations. I had set my previous cameras often on EV -0.3 to avoid blown-out highlights, but the sensor is "better behaved" in this respect...
- (Light) Metering Mode: Multi
- Focus Area: Flexible Spot or Center
- White Balance: Auto
- Acoustic Signal: Off
- Contrast, Sharpness, Saturation: Standard
- Focus Magnification: Automatic = As soon as you turn the Focus Ring on the lens, the enlarged detail appears (MF Assist). Moreover, I reserved a function key for activating this functionality manually (Focus Magnifier). In both cases, the enlargement factor can be changed pressing the OK button.
- Focus Peaking: Red and Mid
- Level: On
For details see page Configuration.
 |
 |
|
Top view, off |
Rear view, off |
Weight and Size
With 340 g "operating weight," the Panasonic TZ202 is not light, but it is also not heavy. It appears almost lighter than the actually lighter Sony RX100 M4, probably because it is larger.
The Panasonic TZ202 is not a camera for your trouser pocktes, but still a pocket camera, for example for your coat pockets. It is bigger than the Sony RX100 M4, but for me easier to use for this reason. Compared with the Sony RX10 M3, it looks like a dwarf - even when the lens is extended.
Size and weight comparisons can be found here.
The Lens
All in all, the lens is definitely the most important component of this camera. With a focal length ranging from 24 mm to 360 mm (equivalent), it offers the largest range yet for a compact camera with a 1" sensor (February 2019).
For me, the close-ups behavior of the lens is also important. This means, above all, that I want to achieve high magnifications even from greater distances (1 m and more). This requires long focal lengths, and therefore the close-up limit at these focal lengths must be short enough for sufficient magnifications to be achieved. The lens of the Panasonic TZ202 has its "sweet spots" at 160 mm and 360 mm, where the minimum object width is about 11 cm - at 160 mm at a distance of 50 cm, at 360 mm at a distance of 1m.
Of course, high magnifications at the wide-angle end are also welcome if the objects are close enough and do not run or fly away (shading can be a problem, though). The lens magnifies the most at 28 mm (minimum object width 5 cm), where shading can be a problem.
Details can be found here.
The Viewfinder and Touchscreen
Viewfinder
Here are the technical data for the viewfinder of three of my cameras:
- Panasonic TZ202: Field-sequential display 2,330,000 dots / 0.53 x magnification
- Sony RX100 M4: 0.39-type electronic viewfinder (OLED) / 2,359,296 dots / 0.59 x magnification
- Sony RX10 M3: 0.39-type electronic viewfinder (XGA OLED) / 2,359,296 dots / 0.7 x magnification
So, the viewfinders all have the same resolution, but offer a different magnification.
I like the Panasonic TZ202's viewfinder the least of the three. It has the lowest magnification, and often the view looks of pale and blurred.
Touchscreen
The Panasonic TZ202 is my first camera with a touchscreen - that I do not use. Since I look through the viewfinder with my left eye, my nose smears the screen und would also move the focus point...
What Is Missing or Could Be Improved (in My Opinion)?
In progress
- Manual focusing: Manual focusing with the control ring at the lens is a pain for me, because it is "by wire" and sluggish.
- Image processing: I would like to see a similar (but not as aggressive) image processing as with the Sony RX cameras. All my changes of possible adjustments (especially Photo Style) has not much achieved so far...
- AE Lock indicator: The activation of the AE lock is only shown on
certain screen displays (display with detailed information) at the bottom
left. In my opinion, it should appear on every screen (like Sony does it),
because this information is so important.
Note: If you set the viewfinder or monitor to viewfinder style (information partially displayed outside the viewfinder image) instead of monitor style (information in the viewfinder image), the AE Lock indicator will always appear at the bottom left. I really wonder why this is not also the case for monitor style...
The function for switching the display style is a bit confusing for me - it is always done for the currently active part, i.e. the viewfinder (when you are currently looking through it) or the monitor (on which you are currently looking)!
Conclusions
These are just a few preliminary ideas, comment, habits, opinions, and so on. This page will therefore change and perhaps also grow a little over time...
| 11.02.2019 |