Leica M (Typ 240): Close-Up Experiences - Part 3: Practice II
Introduction | Extension Bellows | Using the Bellows II with Quenox Extension Tube and M39 Adapter 16590 | Summary and Conclusions | References
Archive
This page presents my practical experiences with close-up shots using an extension bellows with the Leica M (Typ 240) in live view mode.
See page Close-Up Options (Live View) - Part 2: Practice I for my practical experiences with close-up lenses or achromats and extension tubes and page Close-Up Options (Live View) - Part 4: Practice III for my practical experiences with a macro lens.
See also page Close-Up Options (Live View) - Part 1: Overview for an overview of the options that you have for close-up shots when using the Leica M (Type 240) in live view mode and pages Close-Up Options (Live View) - Part 5: Samples I and Close-Up Options (Live View) - Part 6: Samples II, and Close-Up Options (Live View) - Part 7: Samples III for sample close-up photos with the Leica M (Typ 240).
Note: Page Close-Up Behavior of the M-Mount Lenses describes the close-up characteristics of the lenses when used without any close-up options.
Introduction
On page Close-Up Options (Live View) - Part 1: Overview, I mentioned that rangefinder camera are not well suited to close-up photography because of the parallax. With the Leica M (Typ 240), however, this has changed, because Leica added live view to the camera. With respect to close-up/macro photos, in live view mode the M behaves like a system camera (or like a DSLR) and can use all the techniques that these can use: close-up lenses, extension tubes, extension bellows, and macro lenses. On that page, I provide an overview of the options that you have for close-up shots when using the Leica M (Type 240) in live view mode. On this page and two other pages (see on top of the page), I would like to present my practical experiences in this domain, which are, of course, of anecdotic nature.
Because of the length of this page, I prepared three pages for presenting sample close-up photos (see on top of the page).
Calculating Magnification
From dkpeterborough (l-camera-forum) I adopt the way how magnification is calculated:
- Sensor width / object width = 35.8 [mm] / object width [mm] for the Leica M (Type 240) full format sensor.
Below, I will use this formula for calculating the achievable magnification under various conditions.
Extension Bellows
After I had bought the M-mount expansion unit for the Ricoh GXR, I also purchased a old and used Leitz extension bellows (Bellows II, 16556) at eBay with the standard adapter for lens heads (16558):
 |
 |
|
 |
 |
Photos: Leitz Bellows II; the bottom left photo shows the adapter 16558
However, I never found out, which adapters I would need for my 50 mm Nikon enlarger lens, other M39 lenses, and M-mount lenses. The seller named some adapters, but these were not suitable for the bellows - and he admitted that he did not know much about bellows... So the bellows went into the cupboard for a longer sleep...
After purchasing a Leica M (Typ 240), my interest in the extension bellows revived, and I even found out the names of the adapters for M39 (16590) and M-mount (16596) lenses.
Caution!!!
But then I read a shocking note about the Bellows II on the Leica Wiki:
- Limitations - DON´T ever mount the Bellows II directly onto the M 240 body (or any M body)! It will fit, and lock in place, but will cover the bayonet release button so well that one cannot reach it to release the bellows again! (From Leica Wiki).
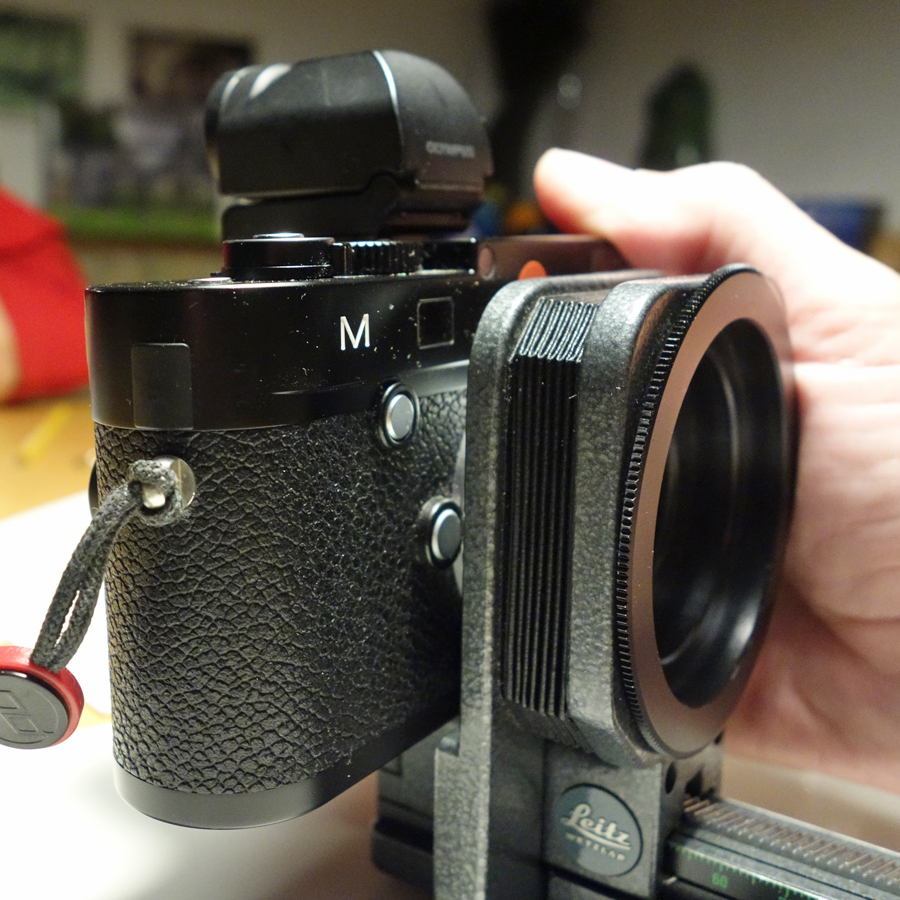
Read also the original posting from farnz in the l-camera-forum: WARNING! M (Typ 240) and Bellows II. The whole thread is an interesting read. I checked the information for my bellows, and the photos below illustrate that the bellows indeed covers the M's bayonet release button:
 |
 |
Photos: Bellows II at the Leica M (Typ 240) - the bayonet release button is covered
So what can you do? You need some kind of adapter tube that creates a distance between camera housing and bellows that you can still operate the bayonet release button. In found the following proposals in the forum (same thread as above), and have another one myself:
- Get the M>R adapter then put the 14167 (or 14127) R>V Adapter. That will provide the same design spec as the Bellows II requires (swamiji).
- Novoflex LEM/VIS adapter; the Novoflex LEM/VIS II set seems to replace the older version
- Quenox Extension Tube for Leica M (replaces Leica OUFRO / Leitz 16469Y, 1 cm extension) - my proposal
- Leica OUFRO / Leitz 16469Y (1 cm extension) - a variation of my proposal; it should work since the Quenox Extension Tube for Leica M does work
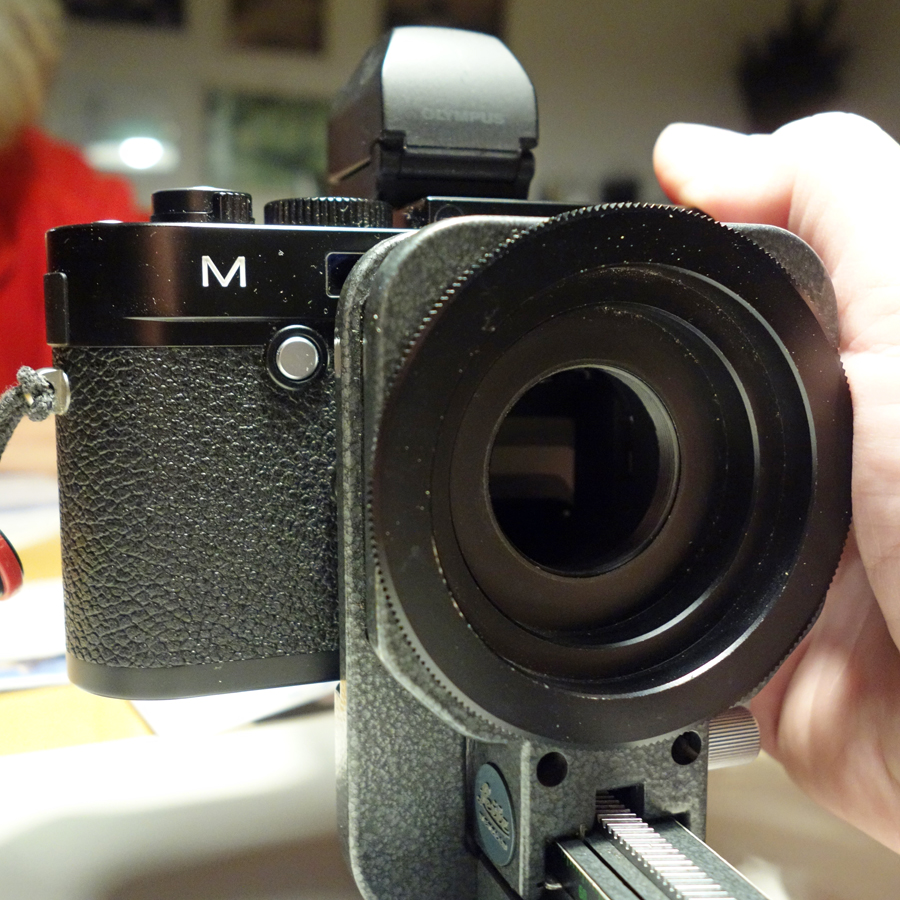
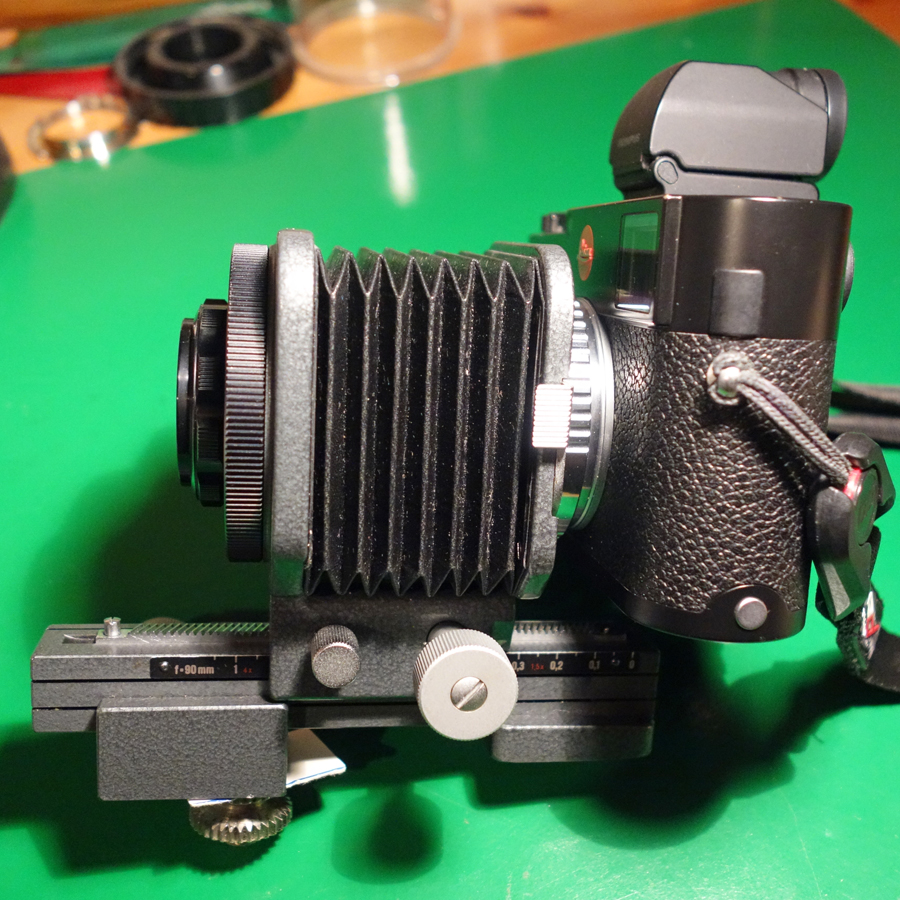
As soon as the Quenox Extension Tube for Leica M arrived at my home, I tested whether it would allow me to mount the Bellows II to the Leica M (Typ 240). As the photos below demonstrate, I was successful in attaching the bellows to the camera (as others were - removing it was the issue...):
 |
 |
|
 |
 |
Photos: Leitz Bellows I at the Leica M (Typ 240) connected via the Quenox Extension Tube for Leica M
Actually, connecting the bellows to the extension tube was a bit difficult because I had problems with turning the camera far enough - a problem that was even more severe when I tried to remove the bellows.
But the more important news is: I can confirm that I was also able to remove the bellows from the camera, but this was again quite an effort. The main obstacle was that the halfcase got in contact with the bellows when I turned the camera so that I could not turn it far enough to be able to remove the bellows. It looked as if just a few millimeters were missing... Doing all this without the halfcase might have worked, but might also have scratched the camera at the bottom. All in all, attaching and removing the bellows is not something that I would like to do every day...
When I received my M39 adapter for the bellows (see below), I mounted the camera to the bellows for a second time to take some test shots. This time, I removed the halfcase before I connected the camera via Quenox Extension Tube to the Bellows II. And I also found out that you better remove the bellows together with the tube from the camera body (that is, you remove the tube from the camera body). And it is also important to move the slider to the front so that the camera does not hit against it when you turn it to remove it from the bellows. The following photos may help to show what I mean with this:
 |
 |
Photos: On the left photo, the bellows slider is too close to the camera so that the body hits the knob when the camera is turned during dismounting. On the right photo, the bellows slider was moved to the left so that the camera can be turned for dismounting.
Adapters...
Moreover, having solved the problem on the camera side, did not mean that it was completely solved, because I still lacked the corresponding adapters for M39 (16590) and M-mount lenses (16596). Thus, I also had to solve the problems on the lens side... I was therefore trying to find these adapters in used but good condition on the Internet - and they should not be too expensive (the Bellows I cost was just 120 EUR...).
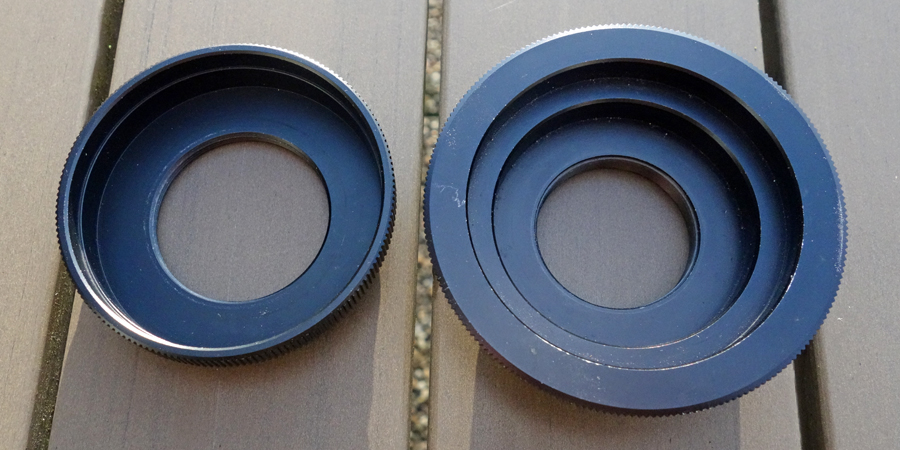
As a start, I bought a M39 adapter 16590 at eBay (from UK; for about 44 EUR). It arrived just before Christmas 2015, and I took it on an immediate test (see below).
Below are some photos showing my two adapters, the new 16590 adapter for M39 lenses and the 16558 adapter for lens heads that was included with the bellows:
 |
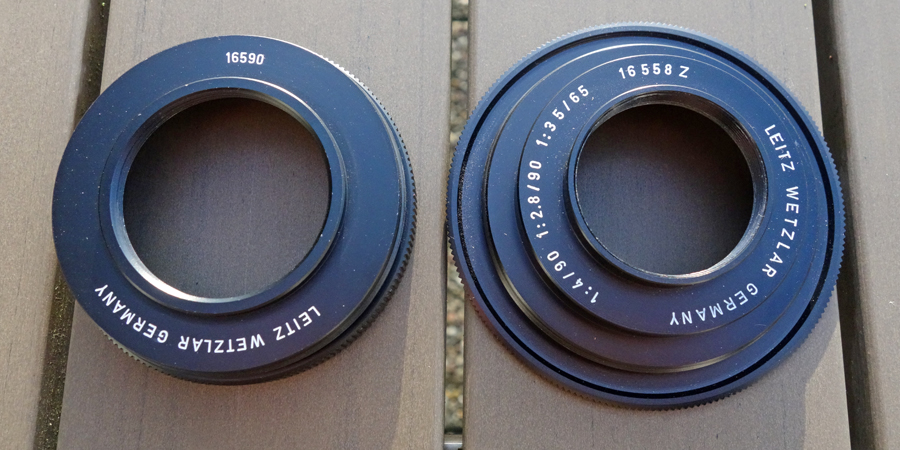 |
Photos: 16590 adapter for M39 lenses (left) and the 16558 adapter for lens heads (right) that was included with the bellows
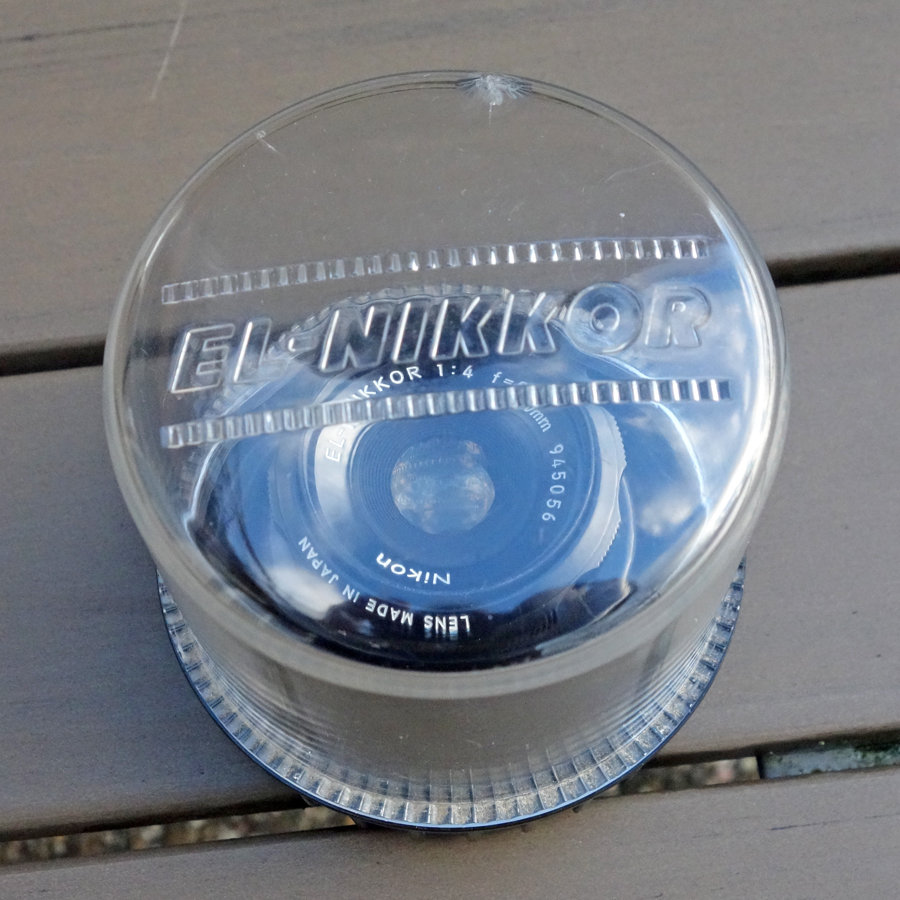
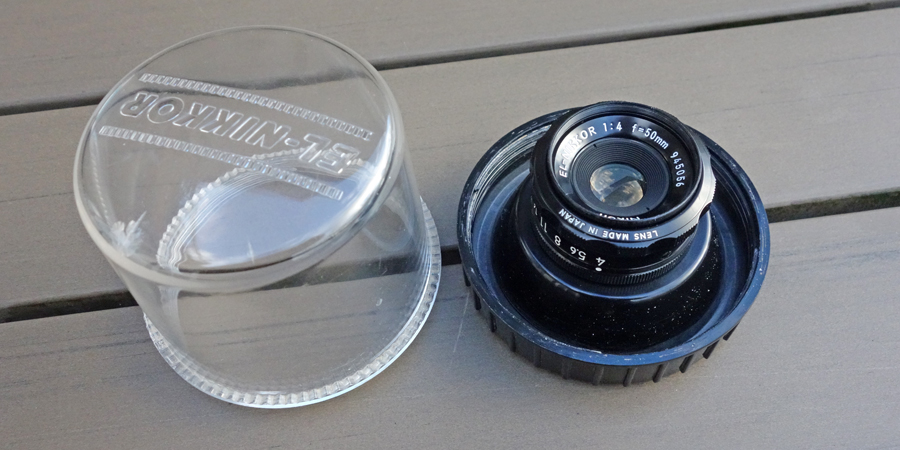
EL-NIKKOR 50mm f/4 Enlarger Lens
I have an old enlarger lens that I kept when I gave the enlarger away and hoped that it could be used on the Bellows II. In the end, this was indeed the case. Below are some photos of the lens:
 |
 |
|
 |
||
Photos: EL-NIKKOR 1:4/50 mm enlarger lens (M39) with case (lens cap missing on photo)
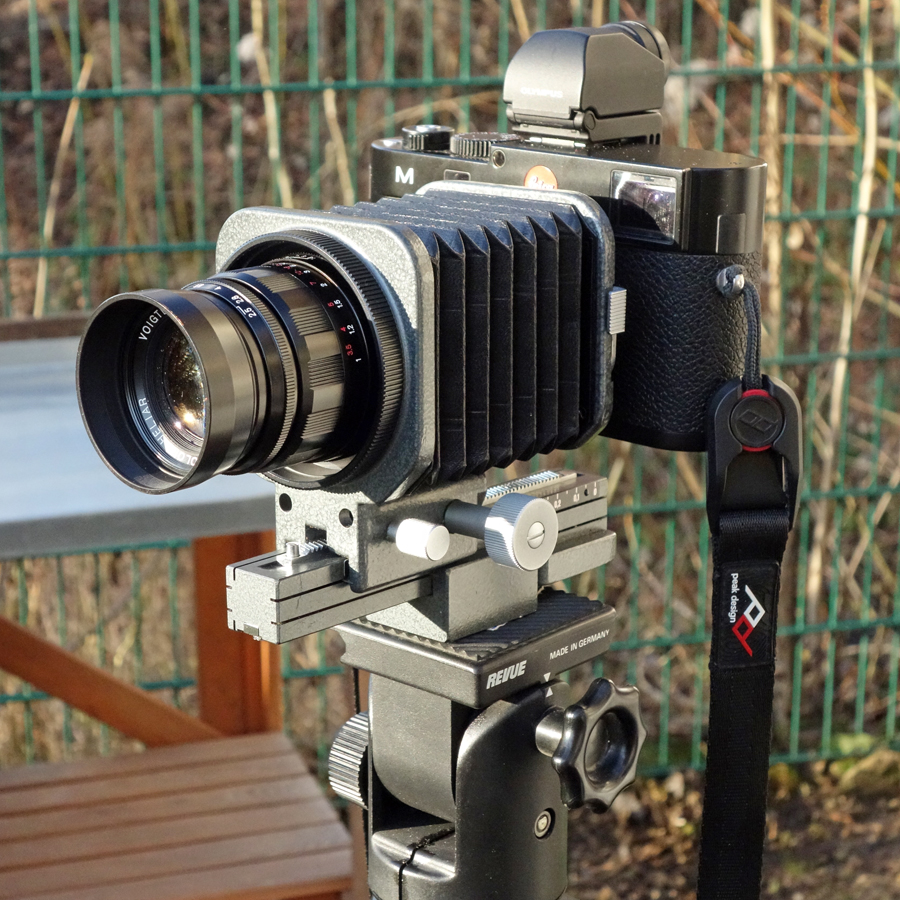
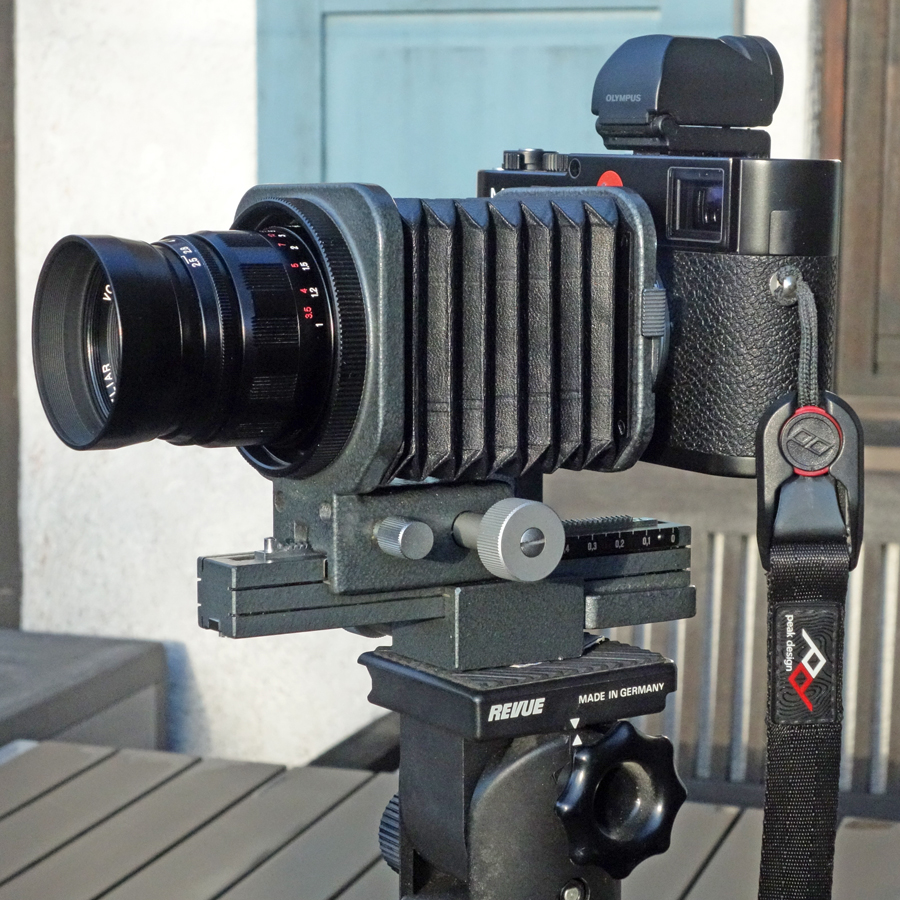
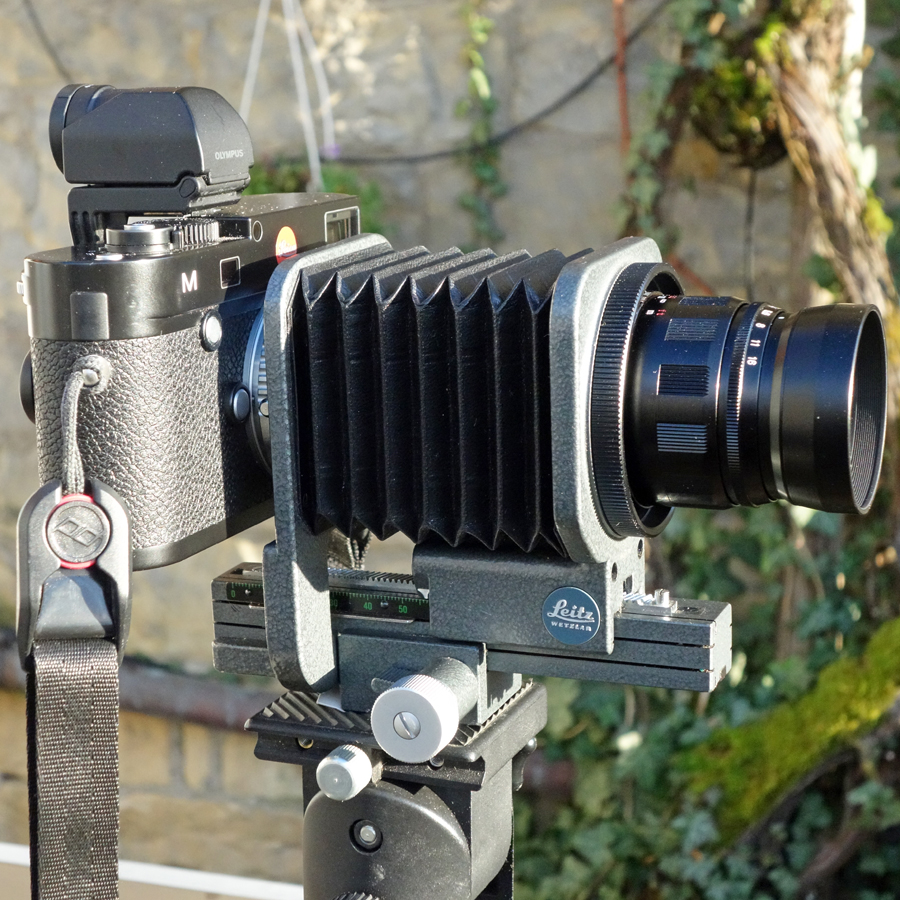
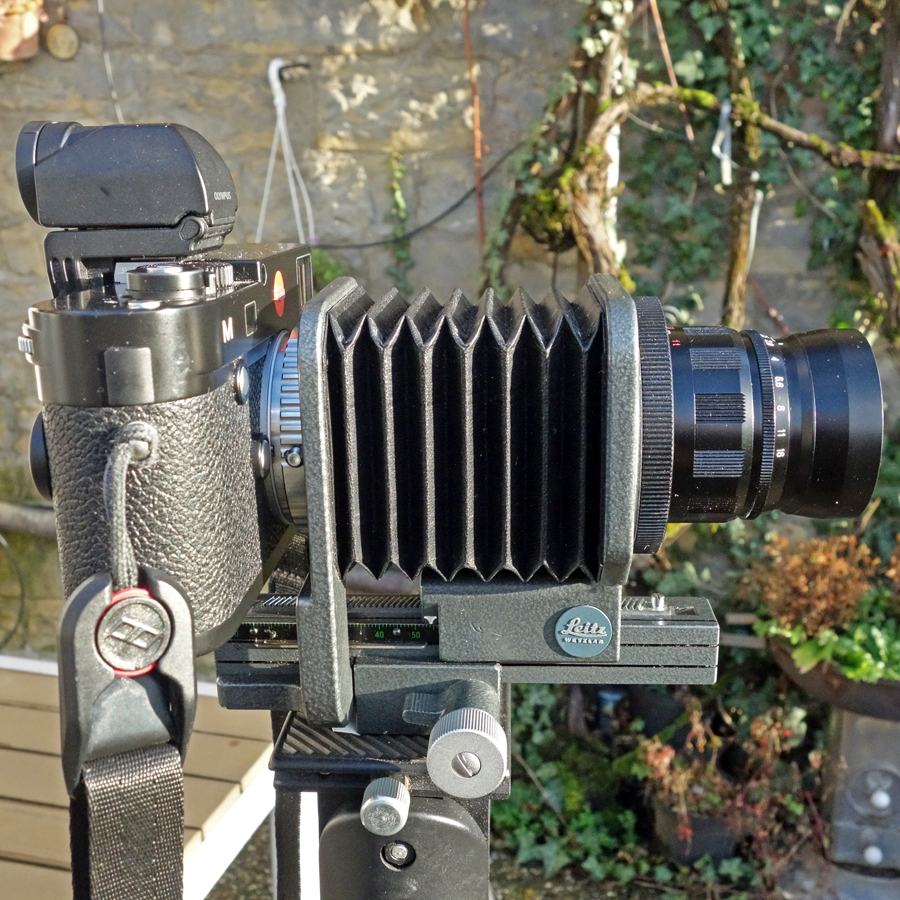
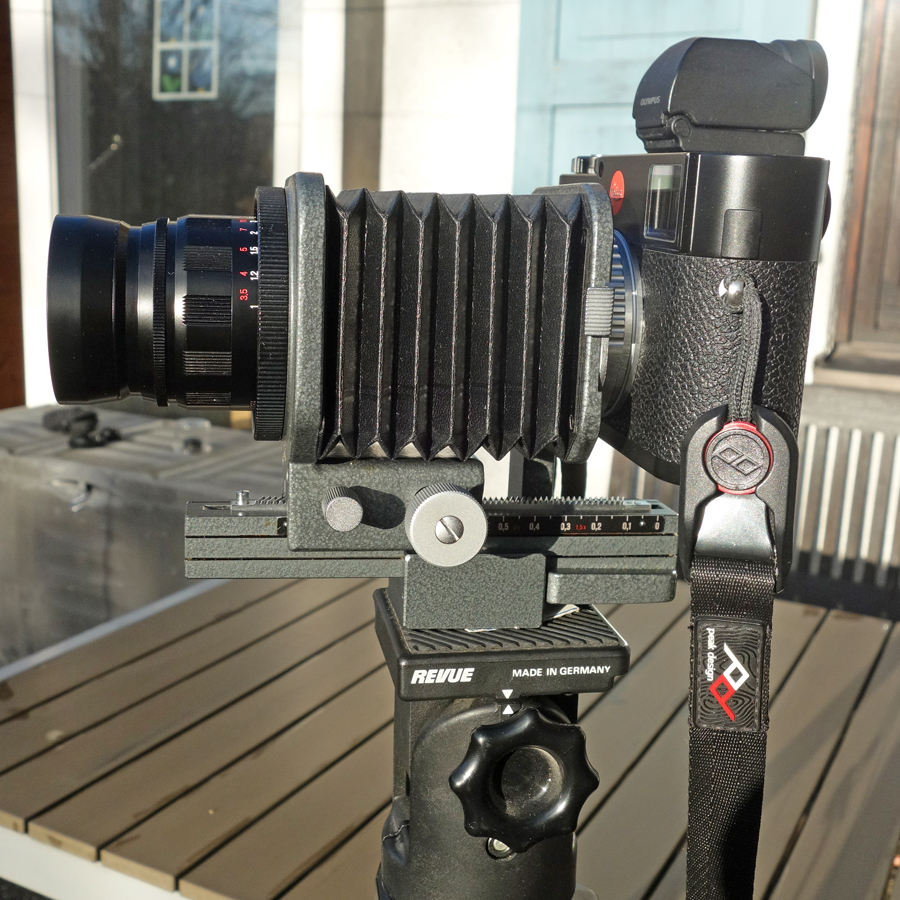
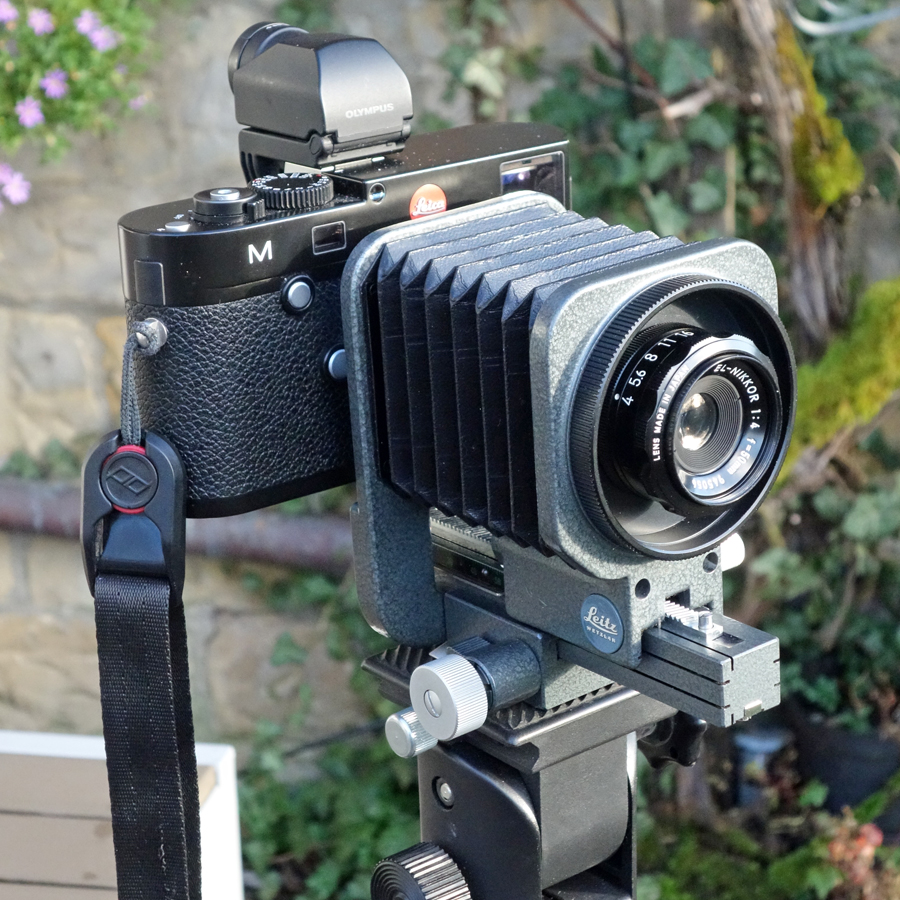
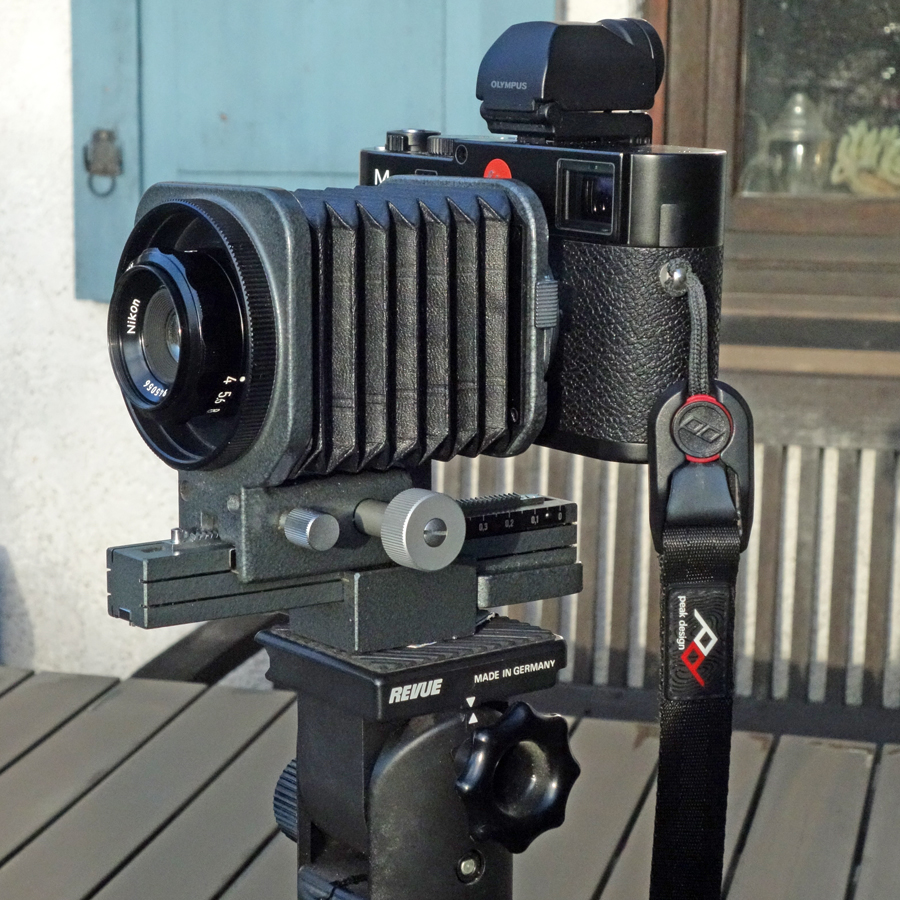
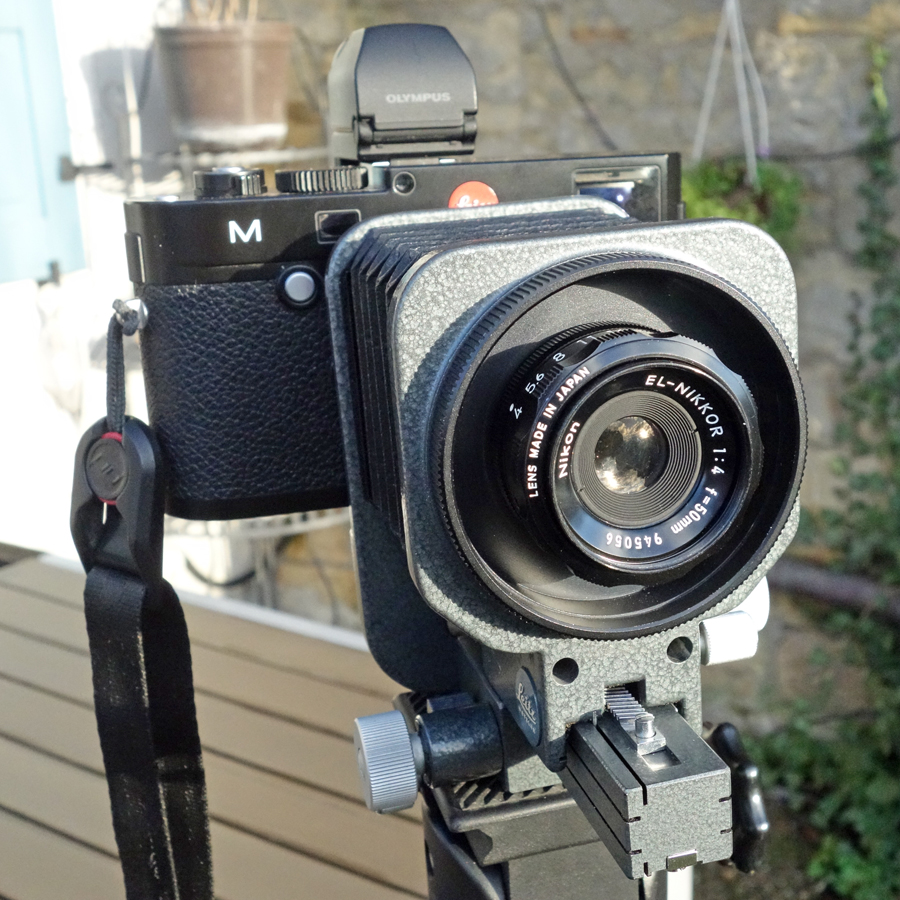
The Whole Setup
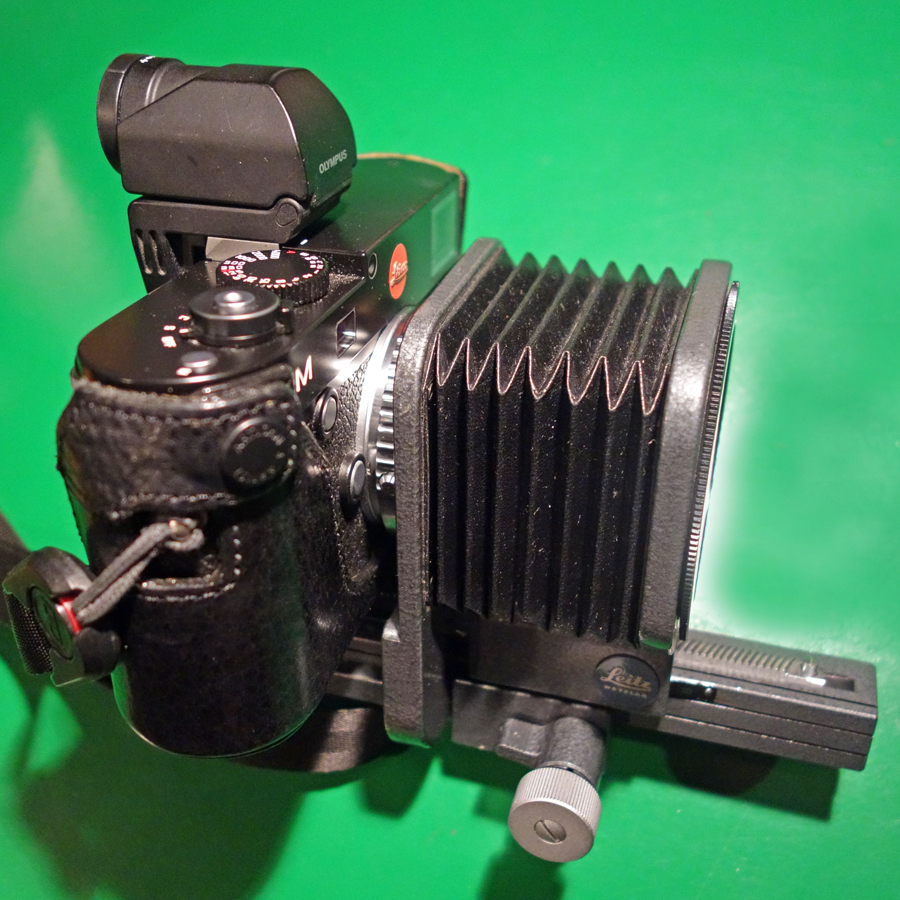
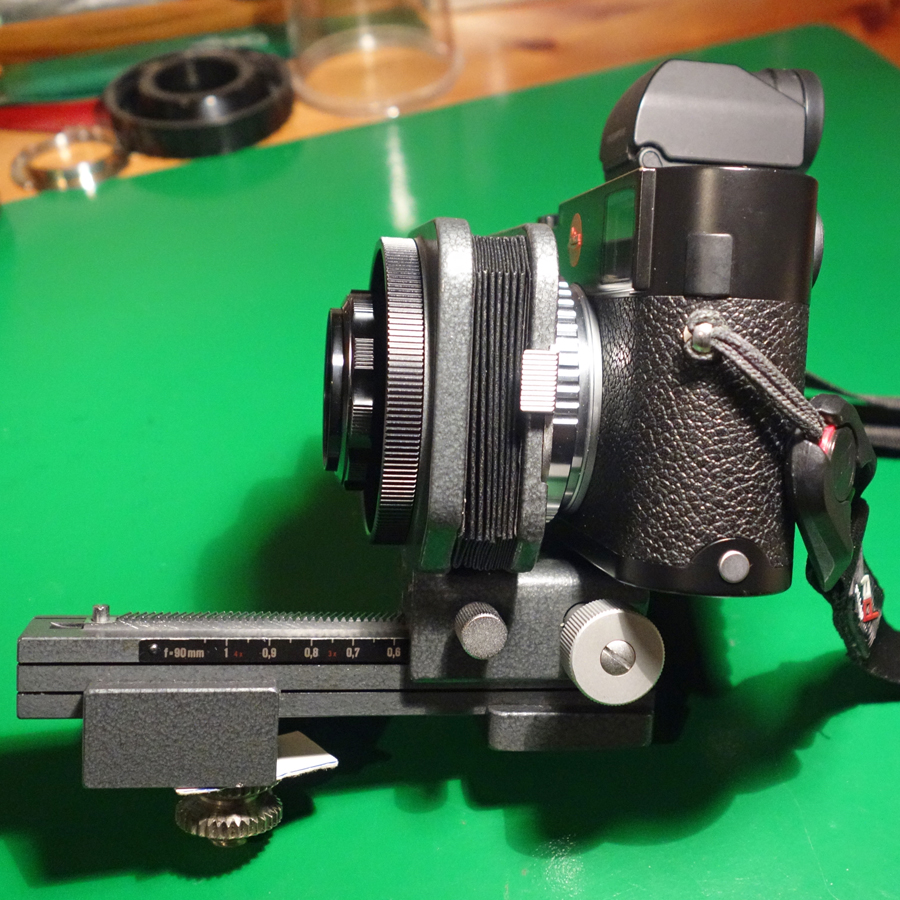
The following photos show the Leica M (Typ) with mounted bellows and two of my lenses that I intend to use with the bellows, the EL-NIKKOR 1:4/50 mm enlarger lens (M39) and the Voigtländer Color Heliar 75mm f/2.5 (M39):
 |
 |
|
 |
 |
|
 |
 |
|
 |
 |
|
 |
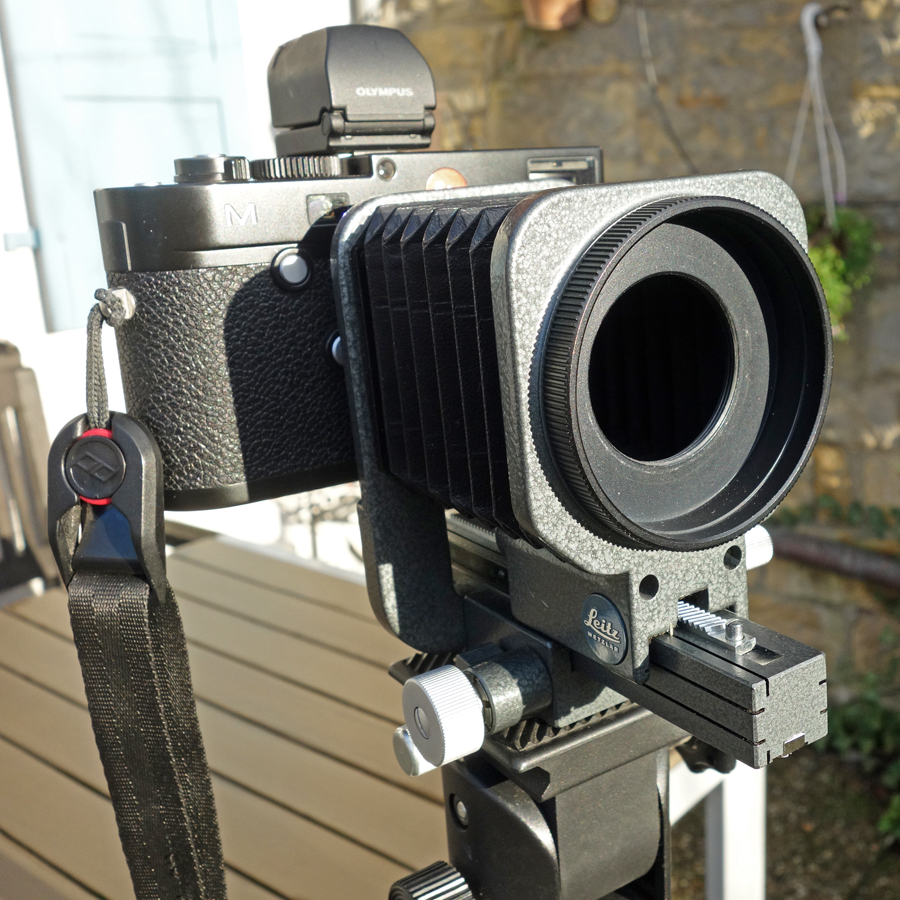 |
Photos: Bellows II with Quenox Extension Tube and two M39 lenses. Three top rows: Voigtländer Color Heliar 75mm f/2.5; two bottom rows: EL-NIKKOR 1:4/50 mm enlarger lens; Bellows II without lens at the bottom right
Using the Bellows II with Quenox Extension Tube and M39 Adapter 16590
In the following, I will provide some results of putting my Leitz Bellows II to use. As described above, the bellows cannot be directly connected to the camera, because then you can no longer remove the bellows from the camera body. I found out that the Quenox Extension Tube (1 cm; a.k.o. Leitz OUFRO / Leitz 16469Y) can be used to create enough separation between camera body and bellows. On the lens side of the bellows, I used the adapter 16590 for M39 lenses.
I used the following lenses:
- EL-NIKKOR 1:4/50 mm enlarger lens (M39) without mechanism for setting distance; that is, this lens is a kind of lens head as is being used for bellows
- Voigtländer Color Heliar 75mm f/2.5 (M39); this is one of my two M39 lenses - I used it because of the longer focal length
Calculating Magnification
I took quick-and-dirty test shots (see below) to calculate magnification for the following conditions:
- Lens: EL-NIKKOR 1:4/50 mm enlarger lens (M39), Voigtländer Color Heliar 75mm f/2.5 (M39)
- Distance: closest and infinity (Voigtländer lens only)
- Bellows settings: nearly closest, nearly widest*
*) Since the screw to fix the bellows' extension does not work, setting the bellows at the extreme ends was not possible.
The following table summarizes my results for the extension bellows:
EL-NIKKOR 1:4/50 mm |
Voigtländer
Color Heliar 75mm f/2.5 |
||
Distance |
Distance |
Bellows II + Quenox Extension Tube* | |
| Cannot be set | Infinity | 1.0 m (closest) | |
| 129 mm 0.28 = 1:3.6 approx. 1:3.6 |
93 mm 0.385 = 1:2.6 approx. 1:2.6 |
76 mm 0.47 = 1:2.1 approx. 1:2.1 |
short extension (nearly shortest)** |
| 18.5 mm 1.94 = 1:0.52 approx. 1:0.5 |
23 mm 1.56 = 1:0.64 approx. 1:0.6 |
22 mm 1.62 = 1:0.61 approx. 1:0.6 |
long extension (nearly longest)** |
Notes: Minimum object distance taken from the test shots below; maximum object size roughly estimated; magnification ratios calculated from the exact values via inverse function
*) The Quenox extenstion Tube is necessary to create a distance between camera
body and extension bellows so that you can remove the camera from the bellows.
**) Since the screw to fix the bellows' extension does not work, setting the
bellows at the extreme ends was not possible.
Test Shots
Below are test shots for illustration that I made with aperture wide open. Please note that they were only made for estimating magnification, not for demonstrating the achievable quality.
EL-NIKKOR 1:4/50 mm
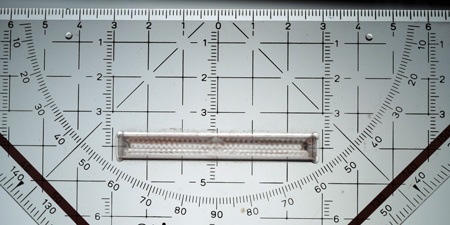 |
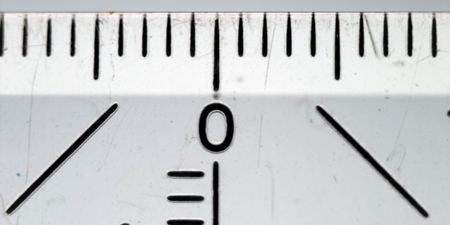 |
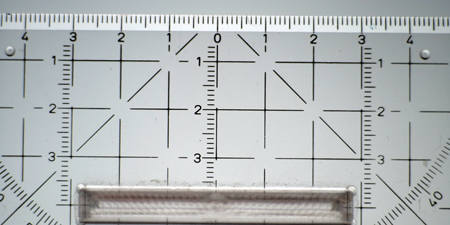
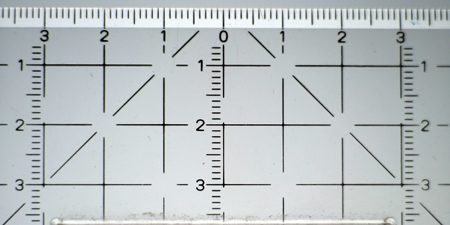
Photos: Test shots with EL-NIKKOR 1:4/50 mm and Leitz Bellows II plus Quenox Extension Tube; bellows set to nearly shortest extenstion (left) and to nearly longest extension (right); distance cannot be set (enlarger lens)
The photos show hardly any distortion.
Voigtländer Color Heliar 75mm f/2.5
 |
 |
|
 |
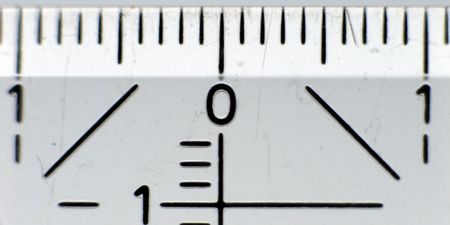 |
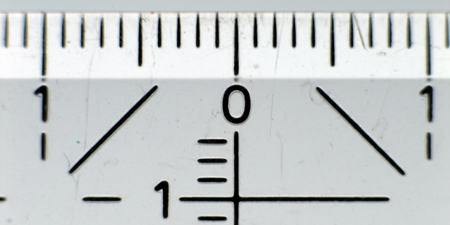
Photos: Two sets of Test shots with Color Heliar 75mm f/2.5 Leitz Bellows II plus Quenox Extension Tube; distance set to infinity (left column) or closest distance (right column); bellows set to nearly shortest extenstion (top row) and to nearly longest extension (bottom row)
The photos show weak barrel distortion, which can be neglected for most occasions.
Summary and Conclusions
In contrast to my close-up lenses, my bellows test shots exhibit no or only low distortion. Using the longest possible extension, a magnification of about 2:1 is achievable, far more than with any other solution. This involves, however, a light loss of several f-stops and the requirement to use a tripod. Thus, the bellows is best suited to small objects that do not move (see the samples part 1 and part 2)..
The EL-NIKKOR enlarger lens (a kind of lens head without a mechanism for setting distance) seems to be the easier-to-use lens, has less distortion, and also achieves a higher magnifications than the Voigtländer lens. I will therefore primarily use this lens on the bellows (this relieves me also from removing the M-mount adapter from the Voigtländer lens each time I want to use it on the bellows...).
All in all, I am quite impressed with what is possible with the extension bellows (despite all the limitations...).
Sample photos taken with extension bellows are presented on page Close-Up Options (Live View) - Part 6: Samples II.
The "practice" section continues with page Close-Up Options (Live View) - Part 4: Practice III, which discusses my practical experiences with a macro lens.
References
Extension Tubes
- Novoflex: Extension tube set Leica M (www.novoflex.com/en/products/adapters/extension-tube-set-leica-m/) / Zwischenringsatz Leica M (www.novoflex.com/de/produkte/objektiv-adapter/zwischenringsatz-leica-m/)
- enjoyyourcamera: Quenox Zwischenring für Leica M - ersetzt Leica OUFRO bzw. Leitz 16469Y (http://www.enjoyyourcamera.com/Makrozubehoer/Makro-Zwischenringe/Quenox-Zwischenring-fuer-Leica-M-ersetzt-Leica-OUFRO-bzw-Leitz-16469Y::6791.html)
Extension Bellows
- Novoflex Company Website (www.novoflex.com/en/home (English), www.novoflex.com/de/home (German))
- Novoflex: Adapted bellow systems for the Leica M (Typ 240) and S (Universal-Balgengeräte für Leica M240 und Leica S) (www.novoflex.com/de/produkte/makrofotografie--blitztechnik/balgengeraete/universal-balgengeraete-fuer-leica-neu (German only))
|
made by |
| 04.07.2024 |