Unistellar - Simple Image Processing (in Adobe PSE)
Introduction | Image Processing in a few Steps... | Conclusions | Links || Appendix: Alternative to Step 1 (Brightening)
On this page, I briefly introduce how I edit astromy photos taken with the eVscope or an astronomy camera in a simple and fast way using Adobe Photoshop Elements. This page is suited to all Unistellar eVscope versions (the images were taken with an original eVscope) as well as to the Vaonis Vespera.
Note: See page Overview of the Unistellar pages for just that! See also page Information for the Vaonis Vespera.
Introduction
On this page I present an example of how I process astronomy photos, which I took with the eVscope or an astronomy camera, with a few editing steps in Adobe Photoshop Elements. It is a process that I have "gotten into the habit" of over time, and I have always fallen back on it after trying other procedures or programs, because it yields quick results. Certainly, much better results can be achieved with more sophisticated editing methods. All in all, this is a simple "quick start" method.
 |
 |
 |
||
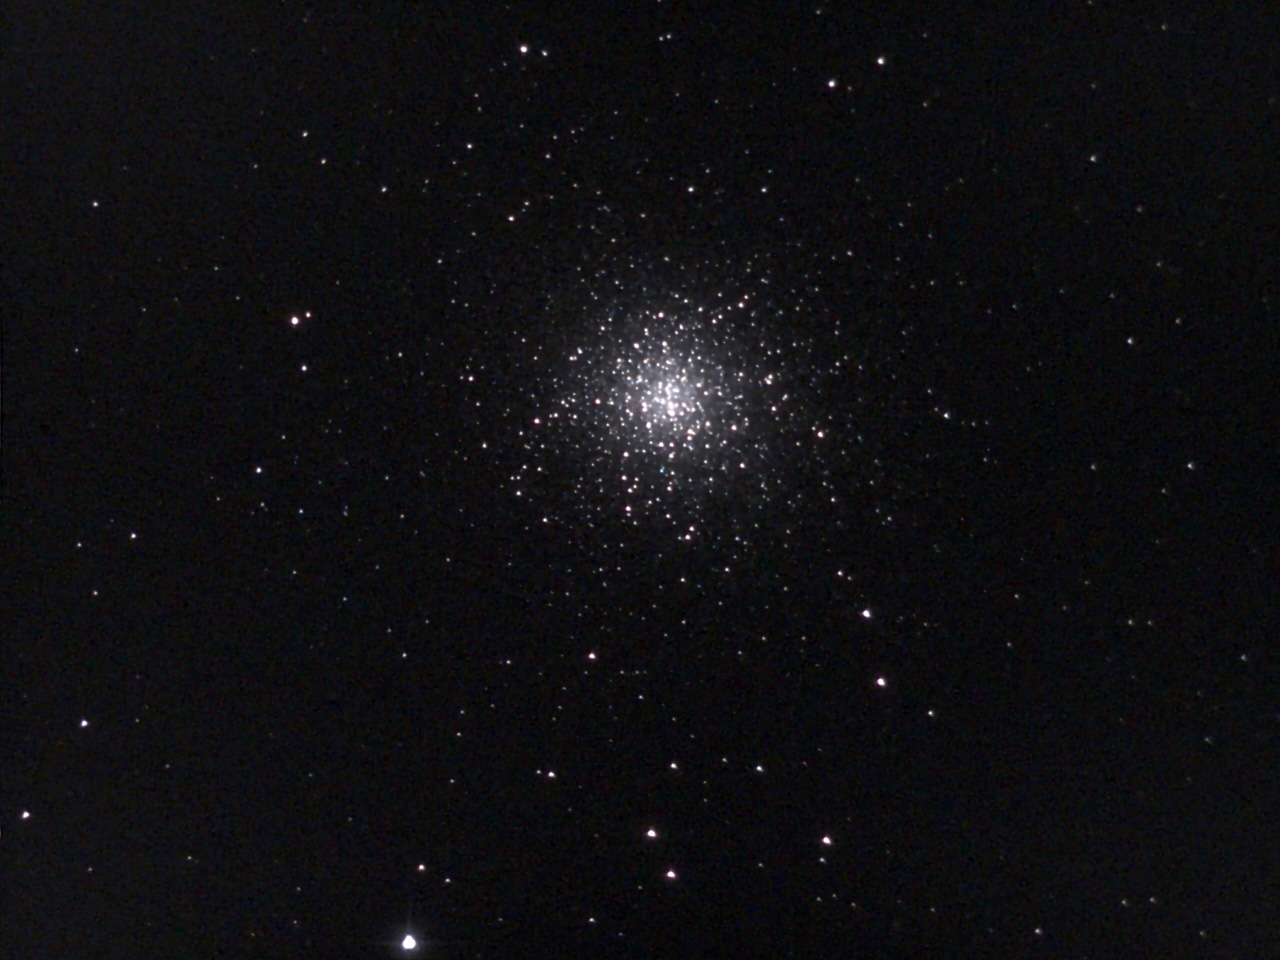
M 13 - Jul 18, 2021 |
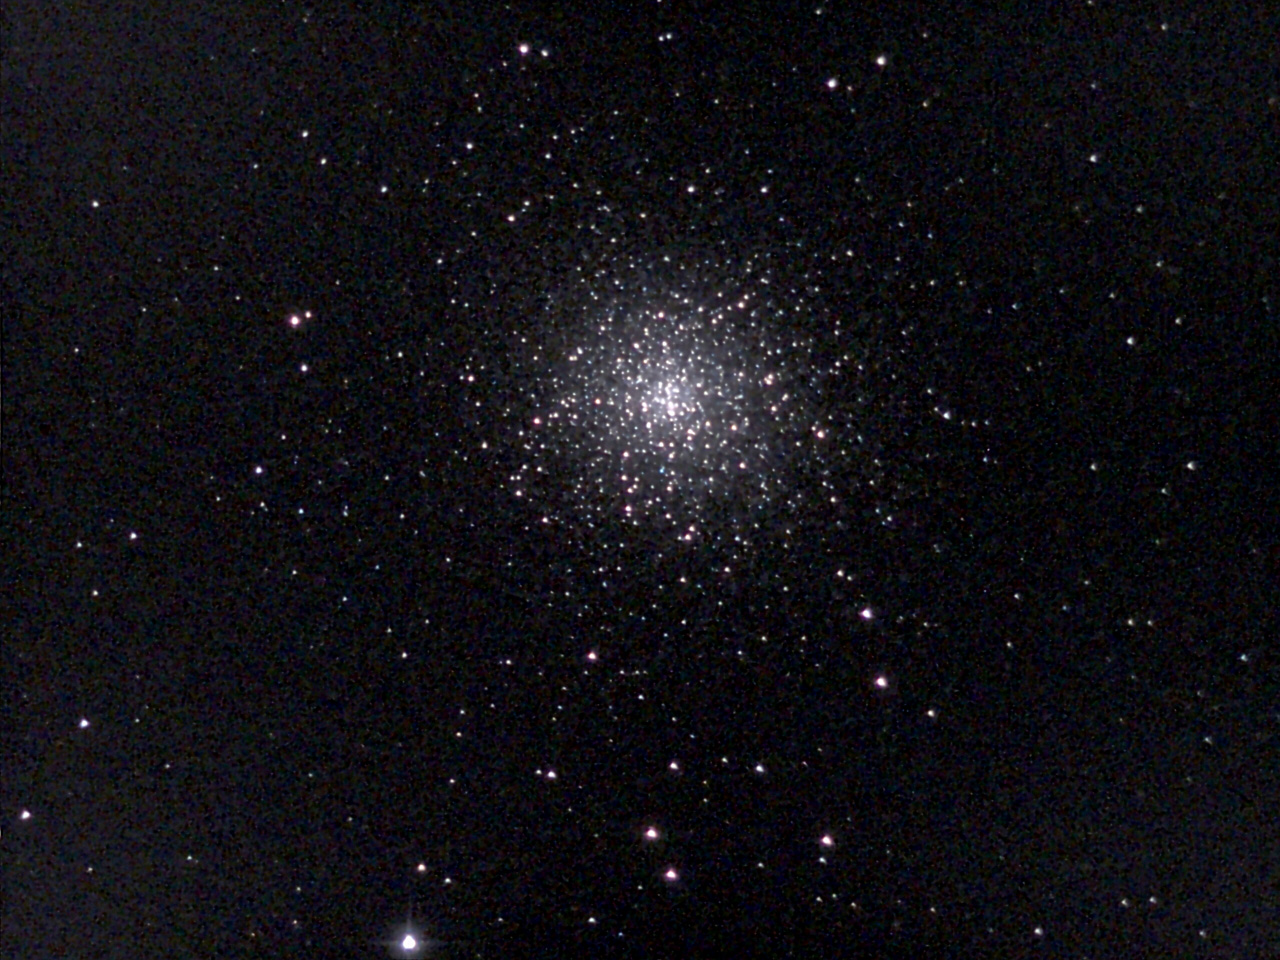
M 13 - Jul 18, 2021, processed |
M 13 - Jul 18, 2021, processed and sharpened |
||
 |
 |
 |
||
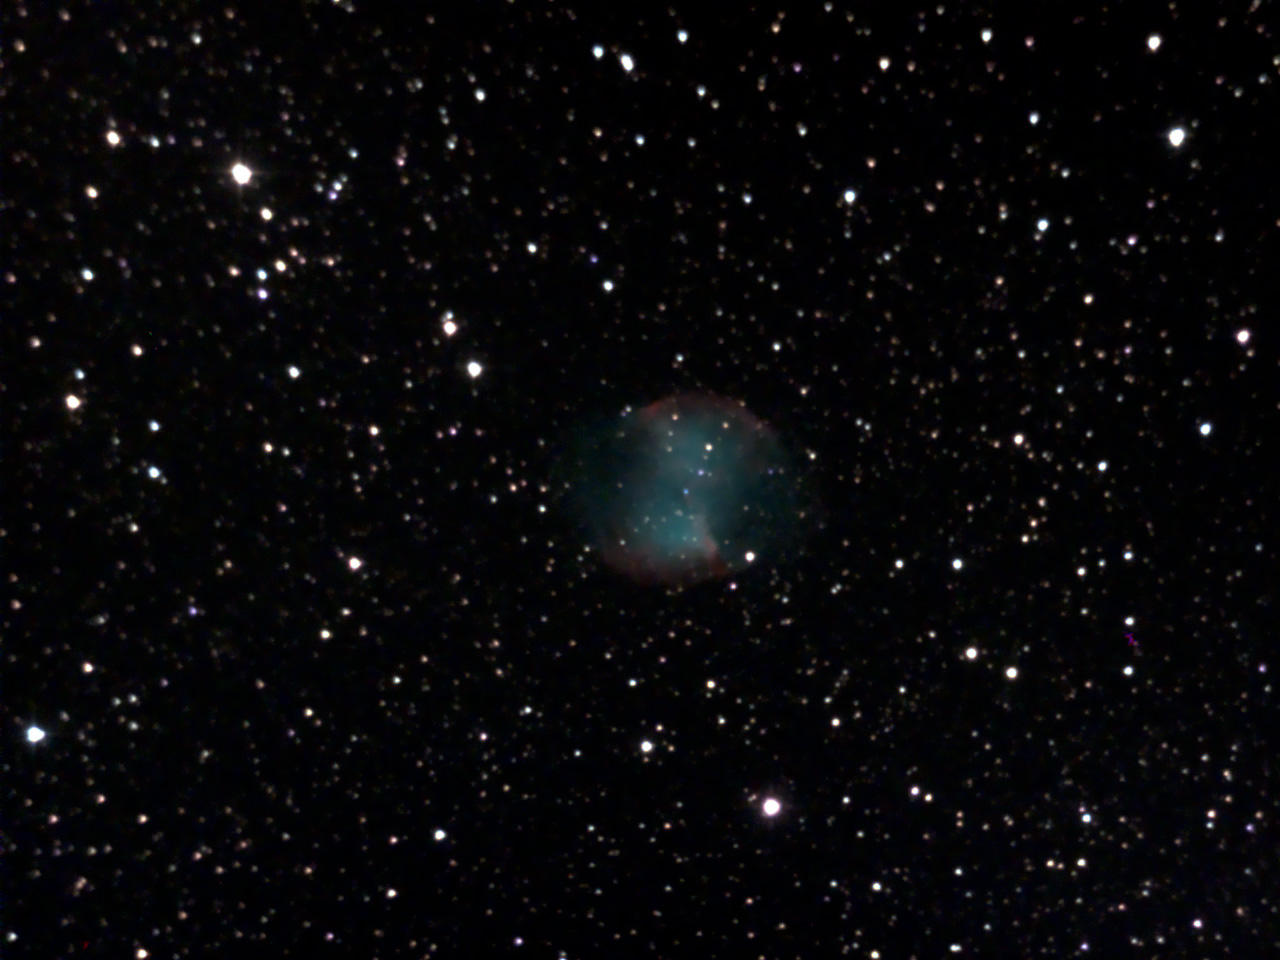
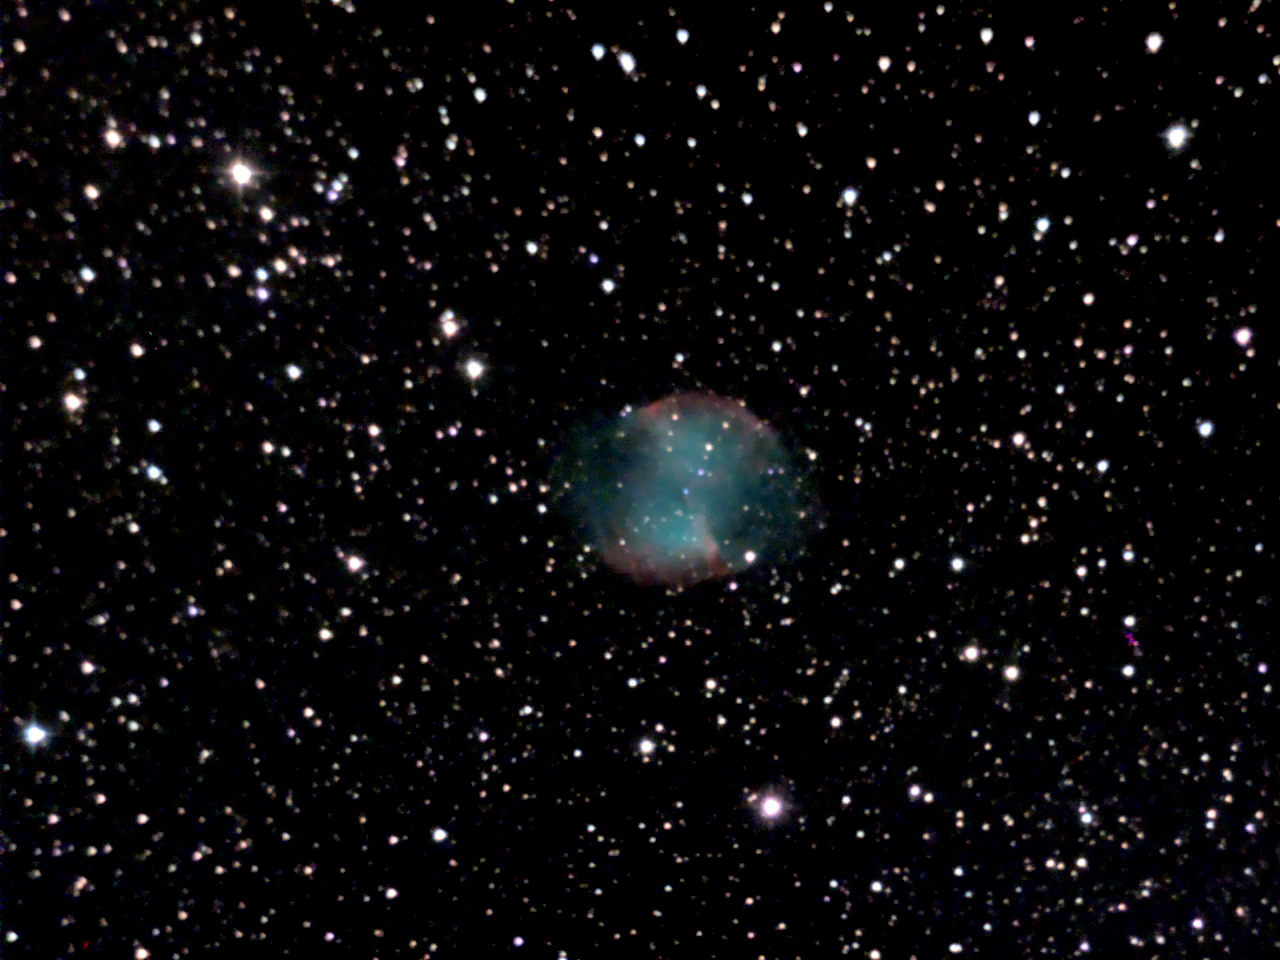
M 27 - Nov 2, 2020 |
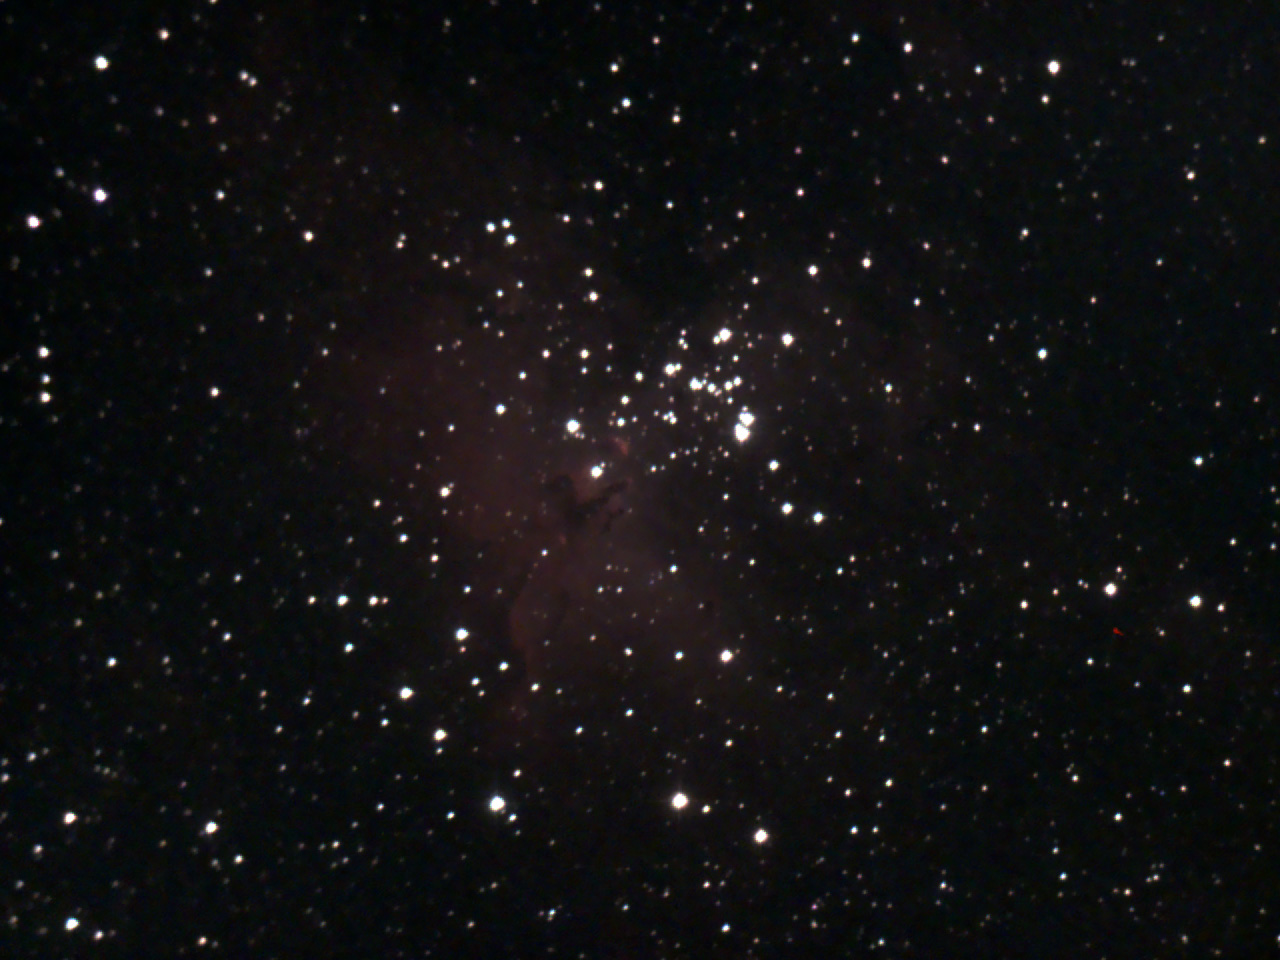
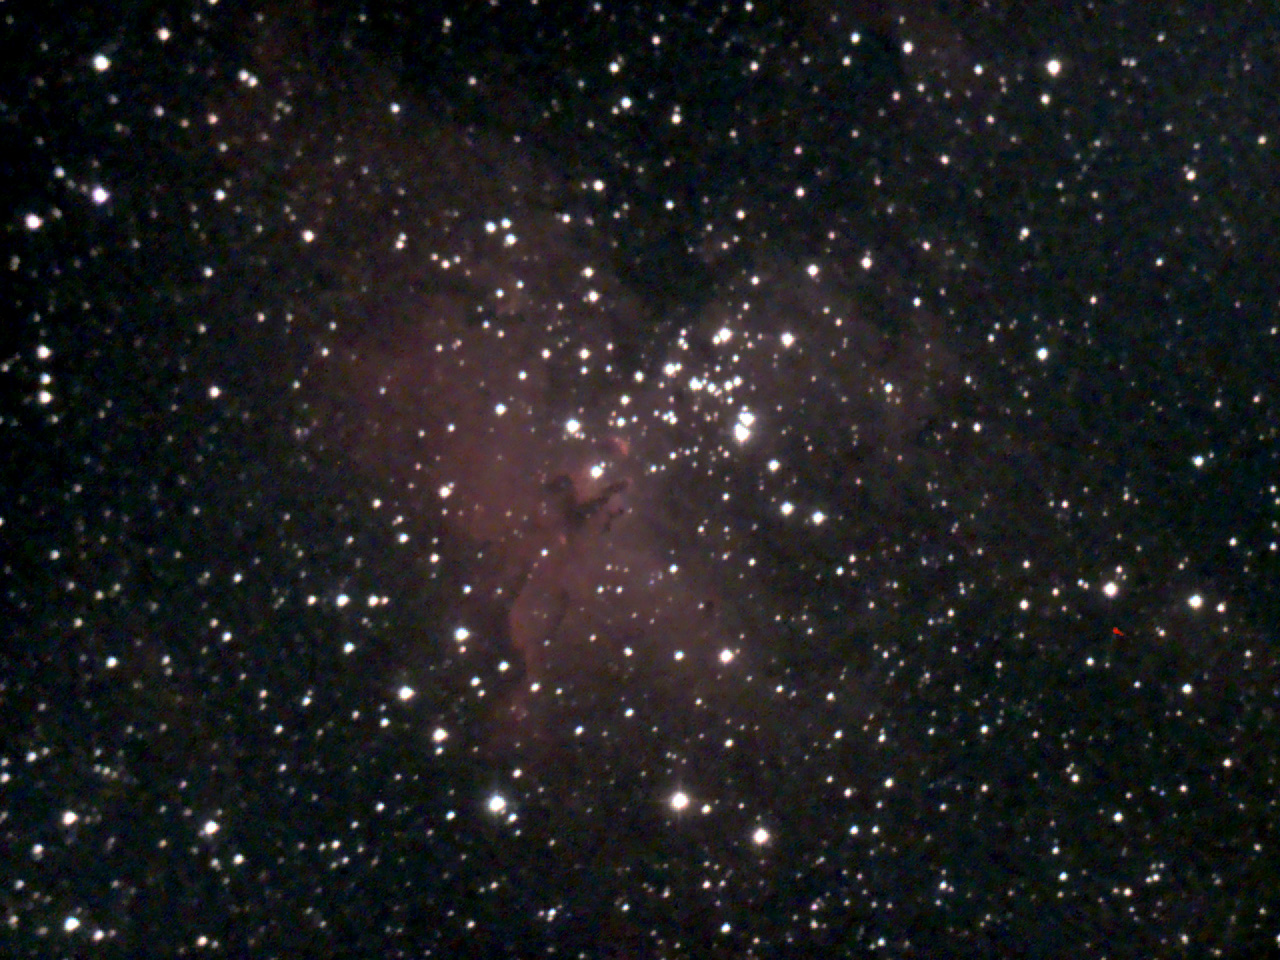
M 16 - Aug 23, 2020 |
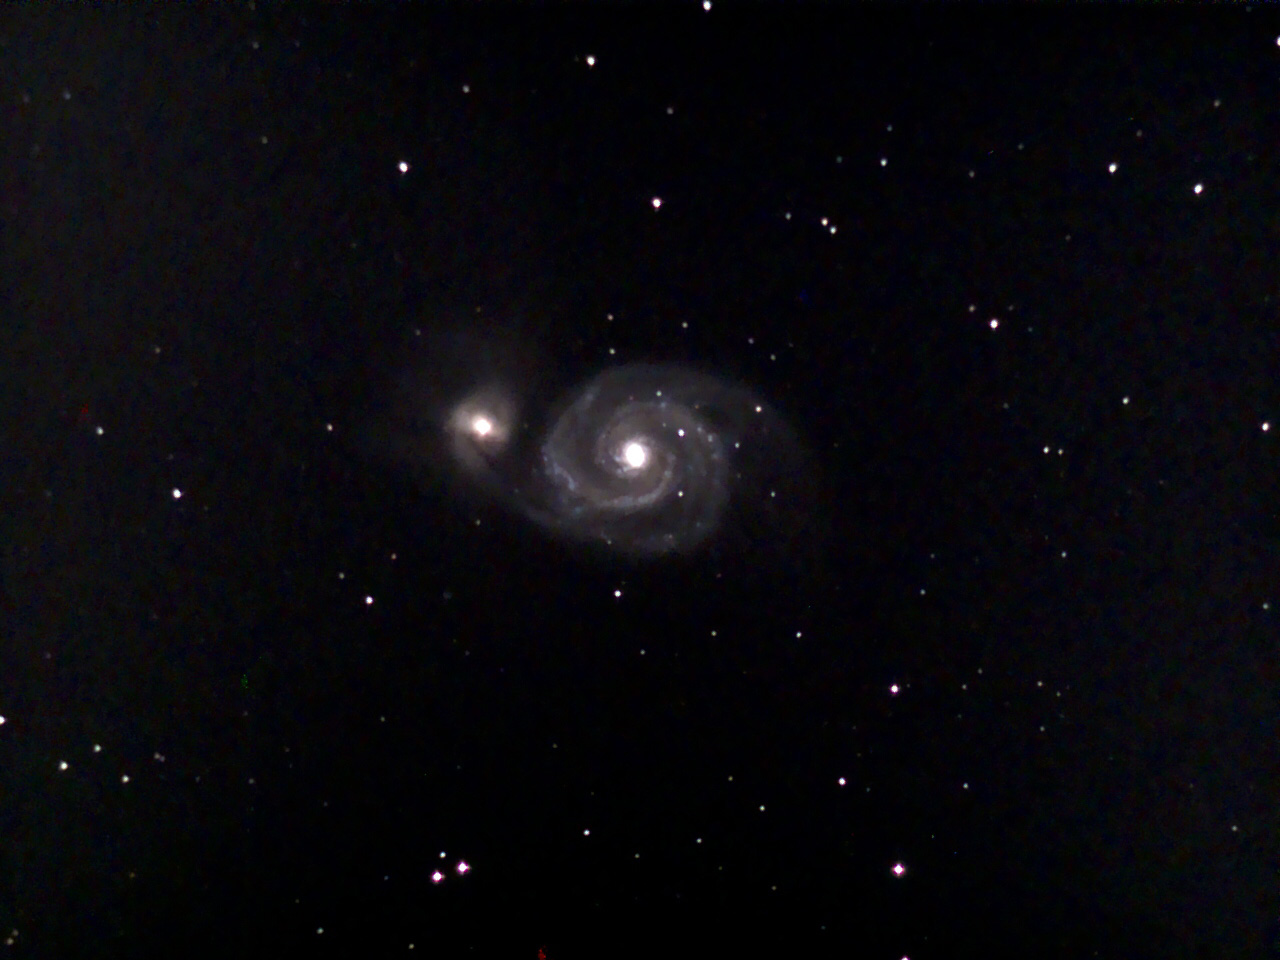
M 51 - Mar 6, 2021 |
||
 |
 |
 |
||
M 27 - Nov 2, 2020, photo on top processed |
M 16 - Aug 23, 2020, photo on top processed |
M 51 - Mar 6, 2021, photo on top processed |
Photos: Examples of unprocessed and processed DSO (taken with Unistellar eVscope)
Image Processing in a few Steps...
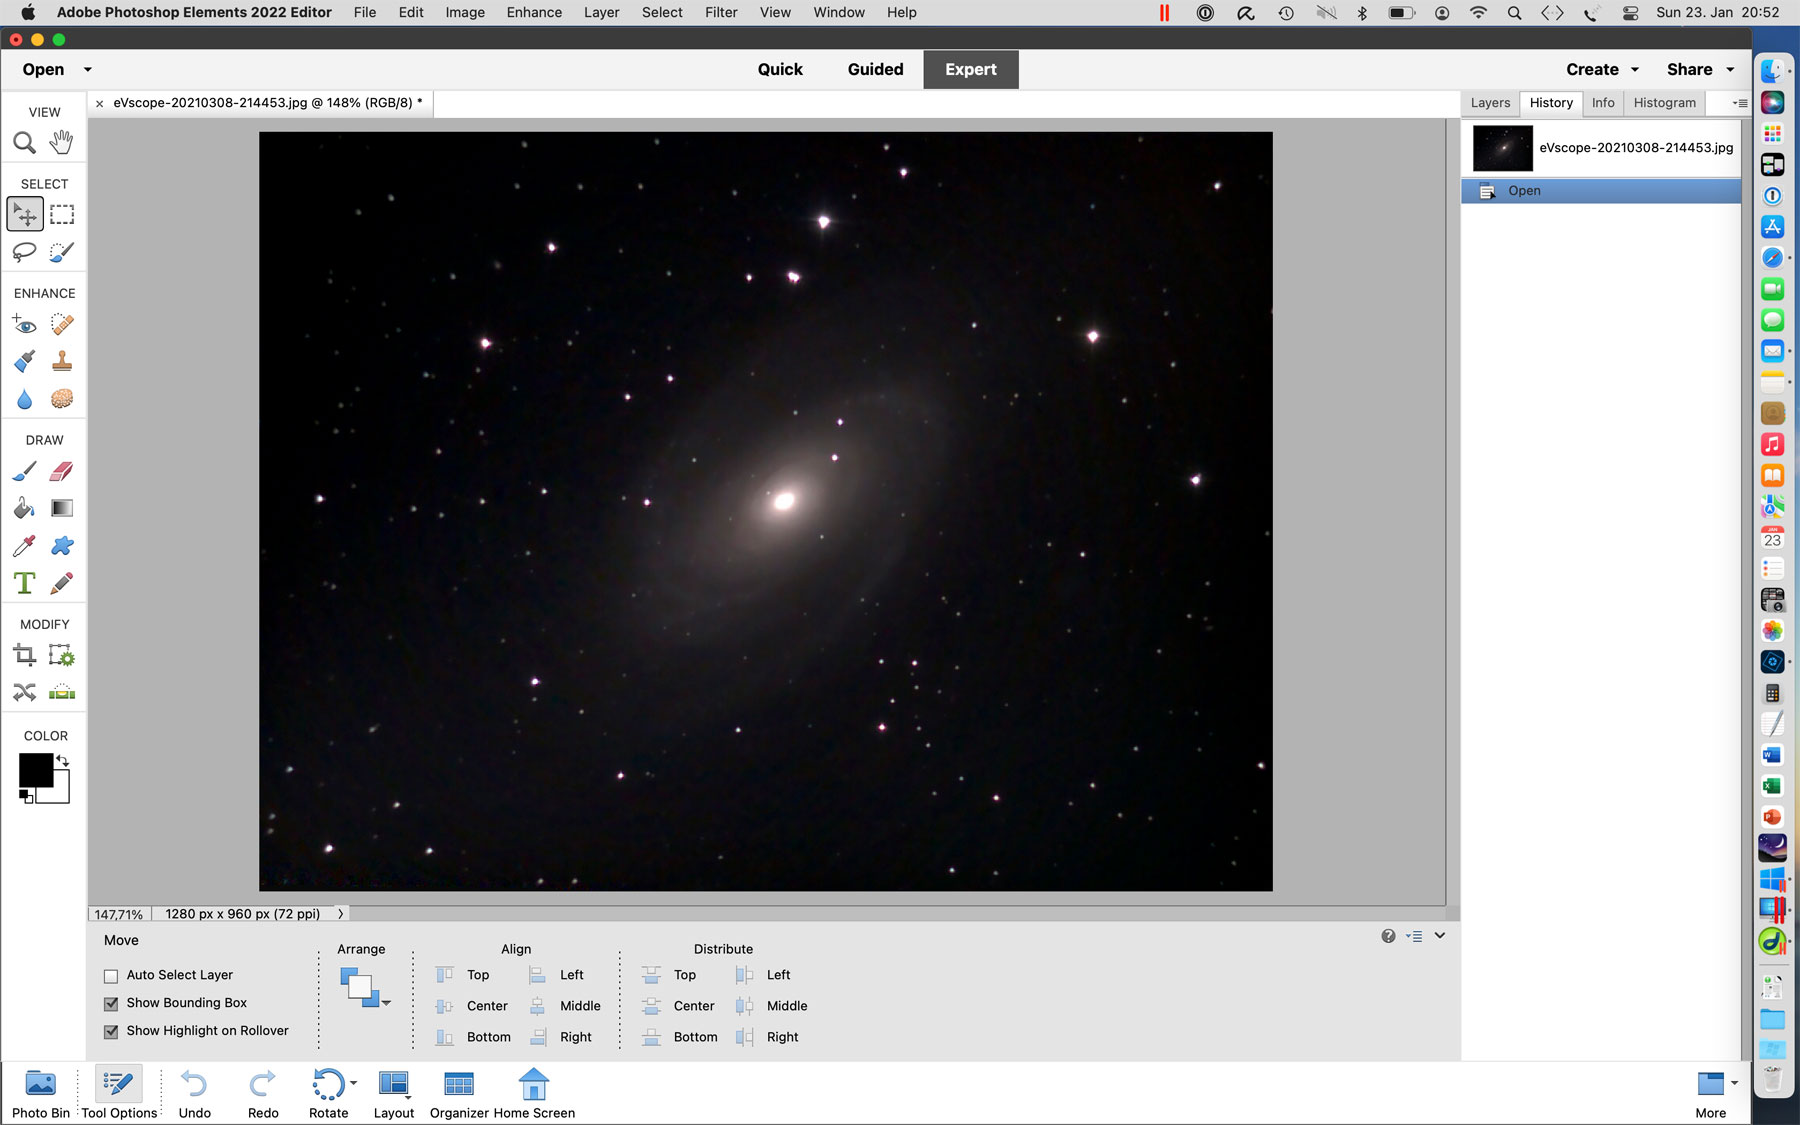
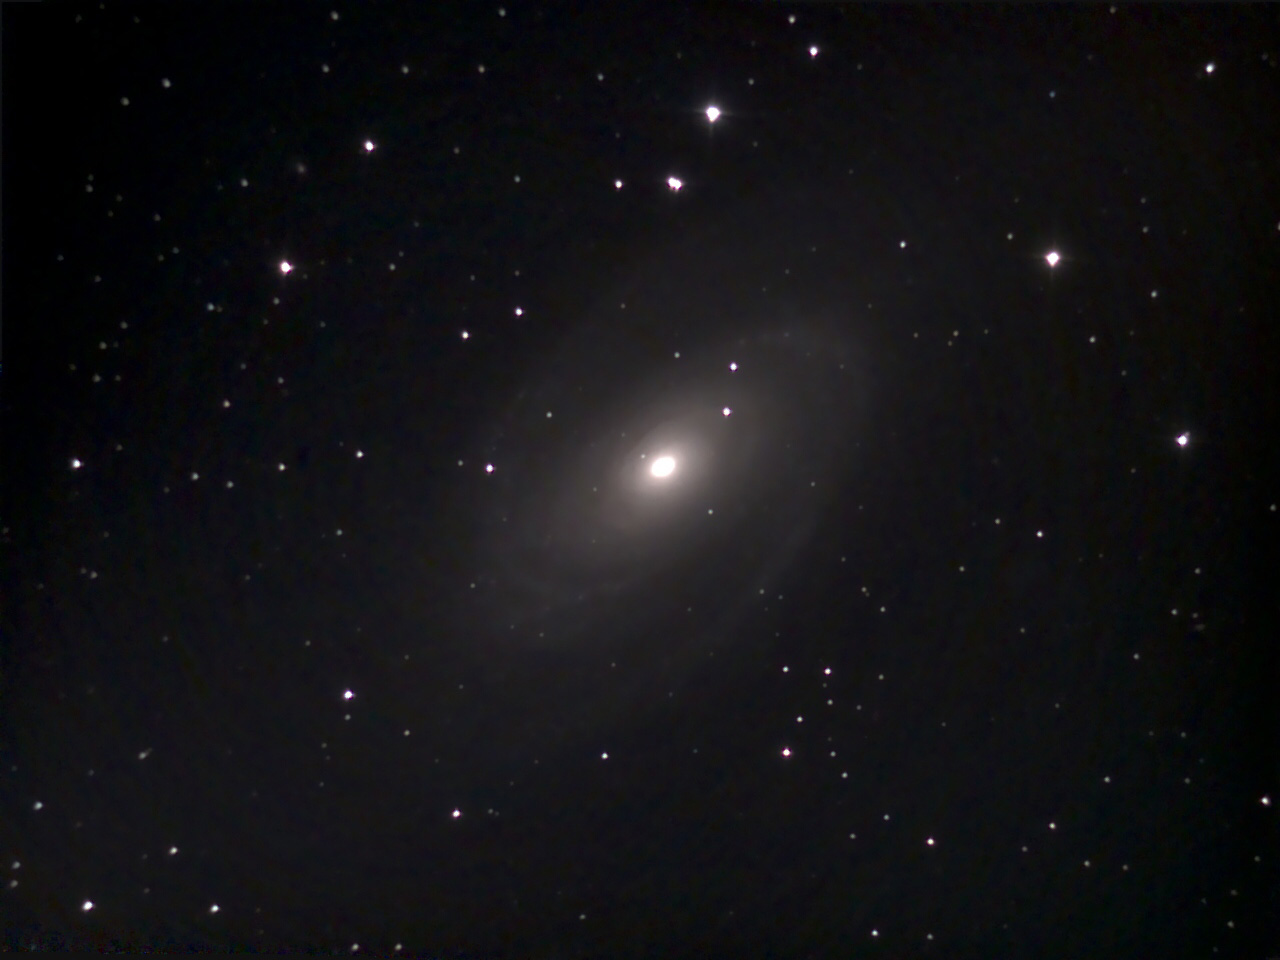
First, I load the image (M 81, Bode Galaxy) into Adobe Photoshop Elements (PSE in the following):
Step 1: Increase the Brightness (Lighten Shadows) to Reveal More Details
Note: In the appendix I describe an alternative approach to the method shown here.
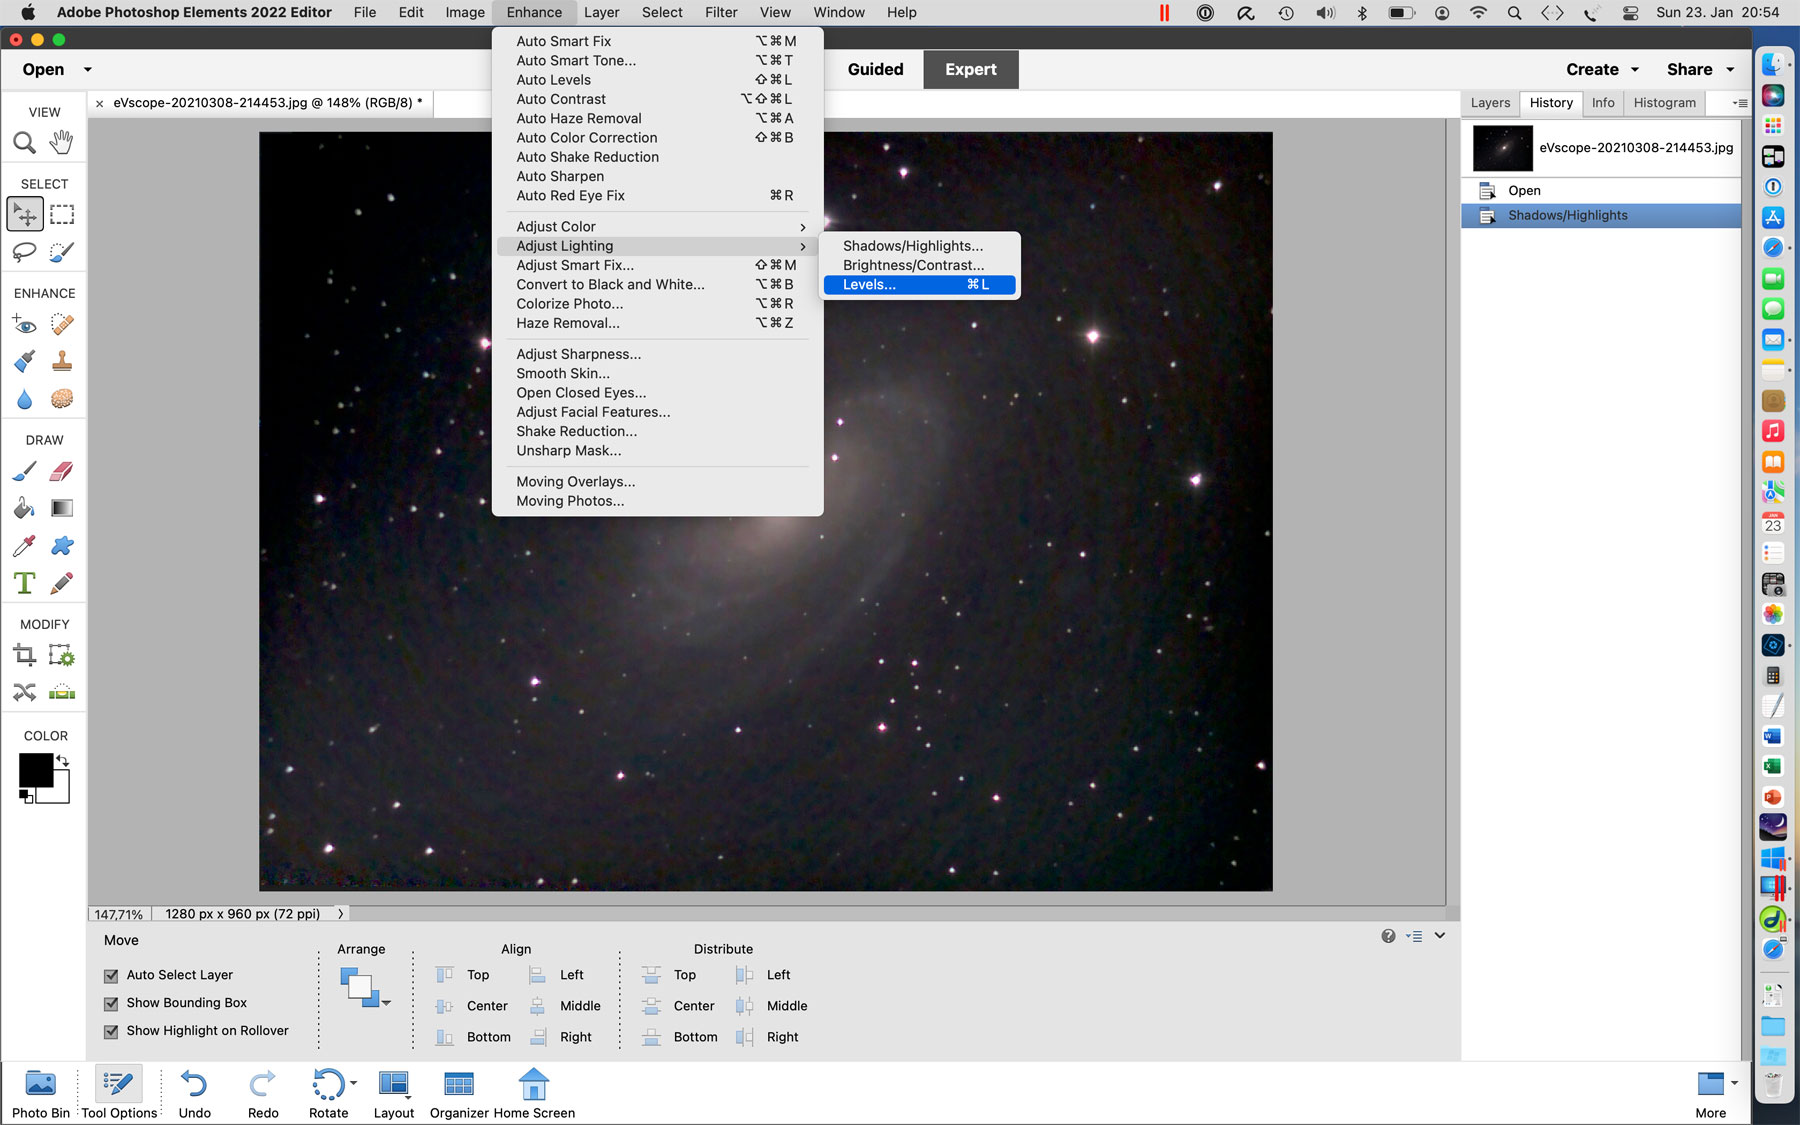
In the first step, which can also be skipped, I try to brighten the image up to reveal more details. For this, I select "Enhance > Adjust Lighting > Shadows/Highlights...":
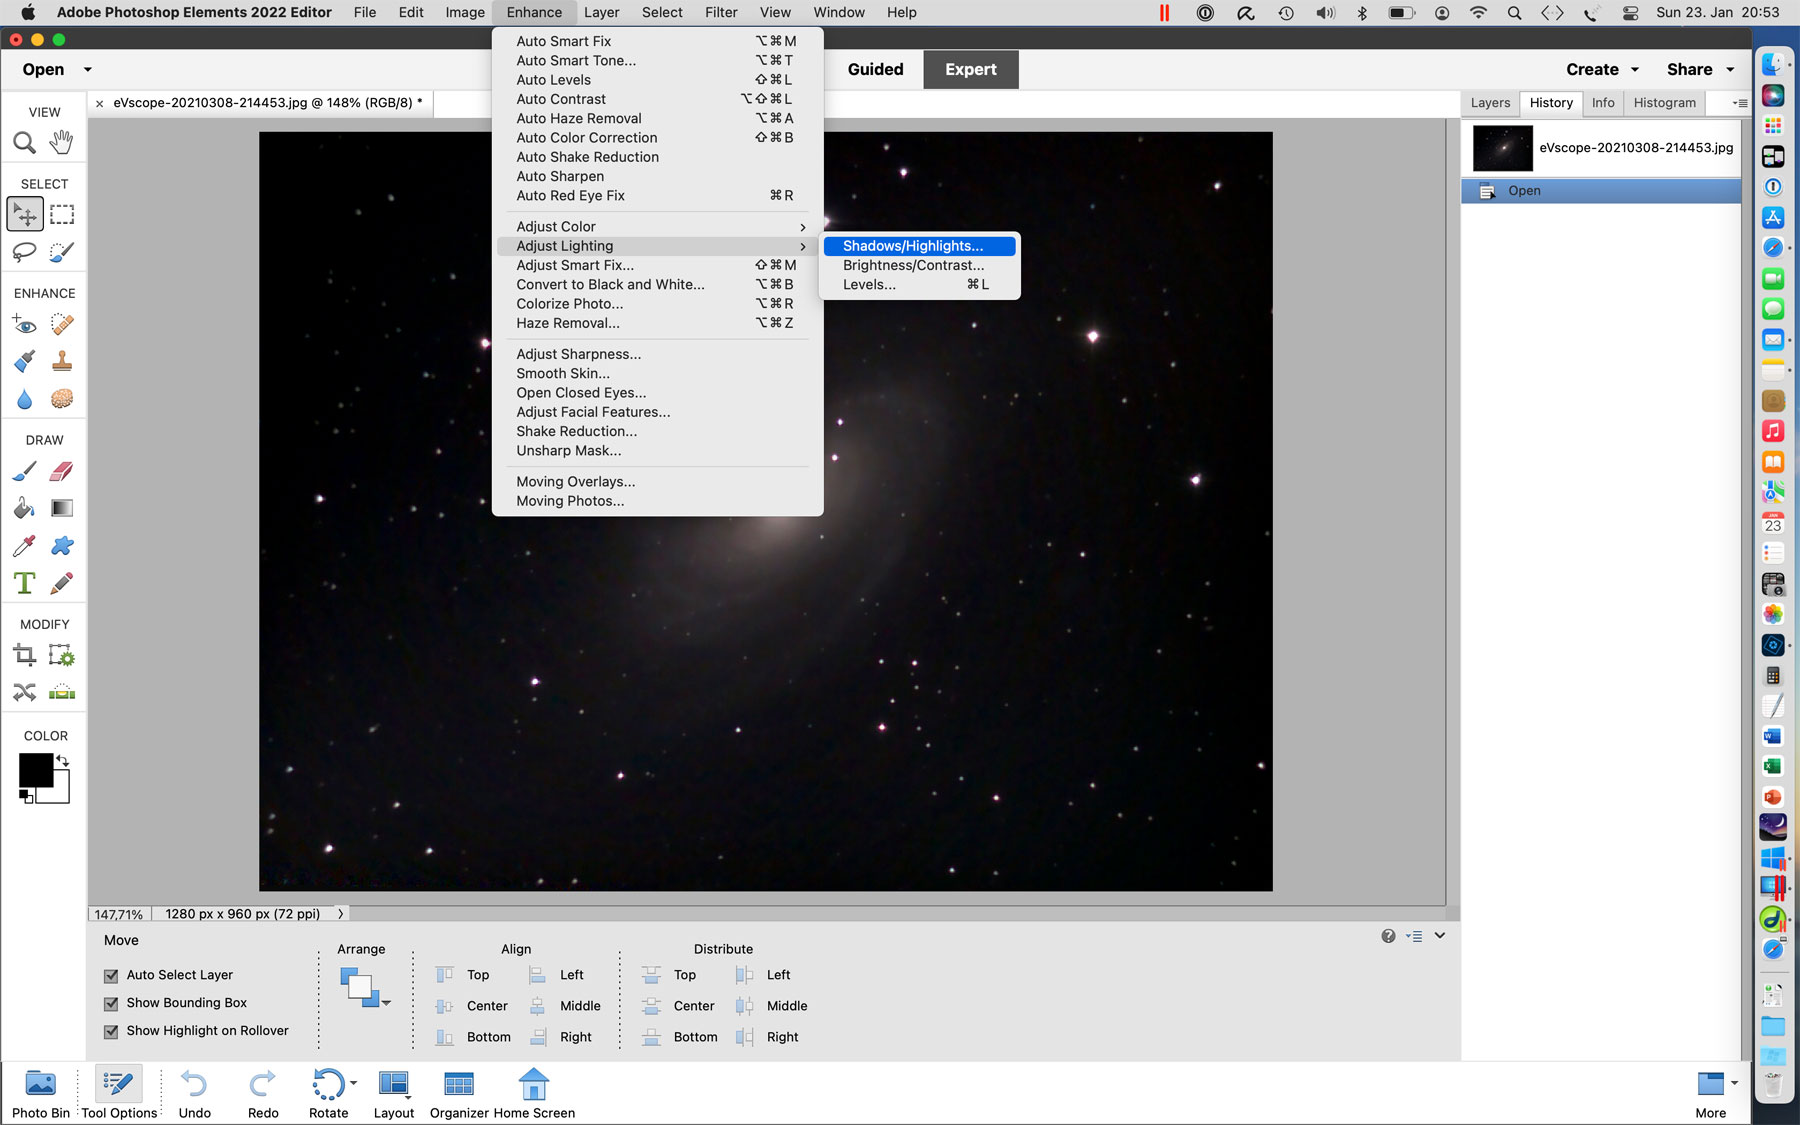
A dialog opens, where I typically only use the "Lighten Shadows" slider. If I want to darken some bright spots in the image, I also use the "Darken Highlights" slider. The preview is activated and demonstrates the effect of the preset value of 35%:
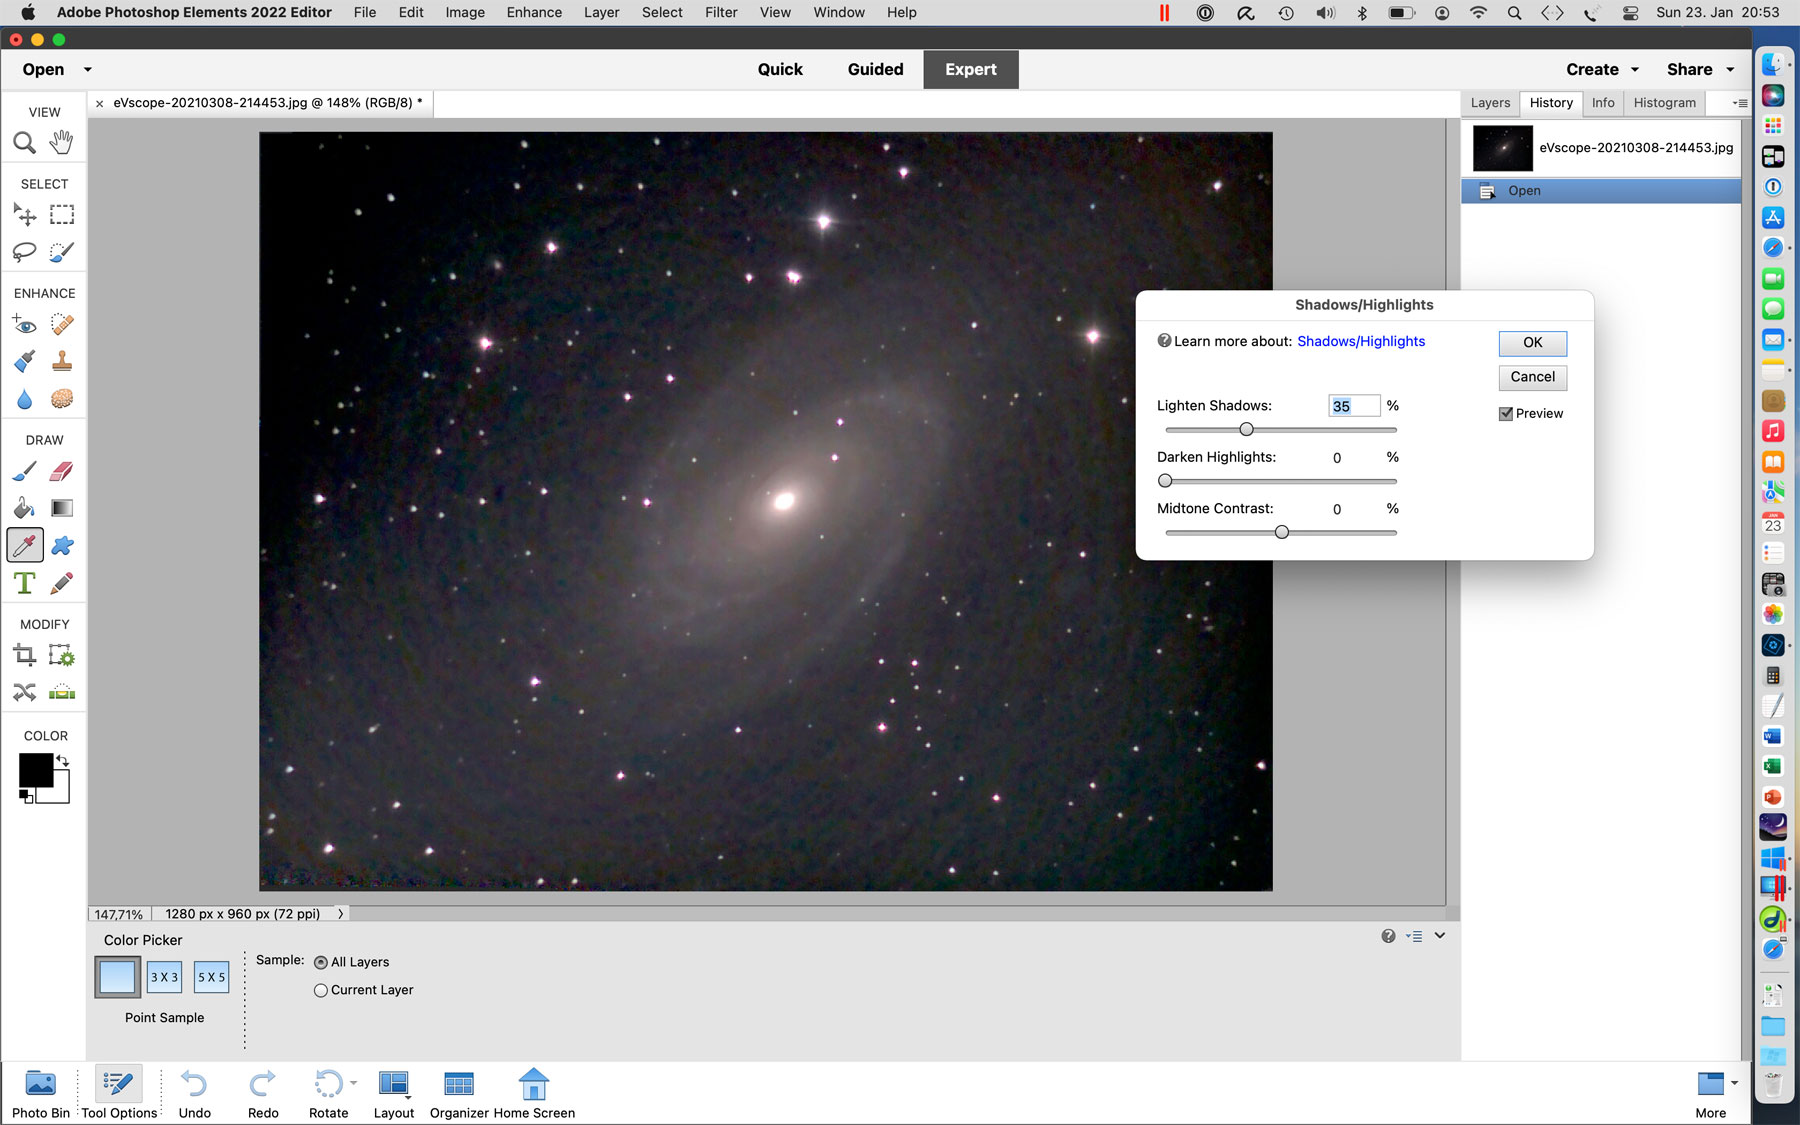
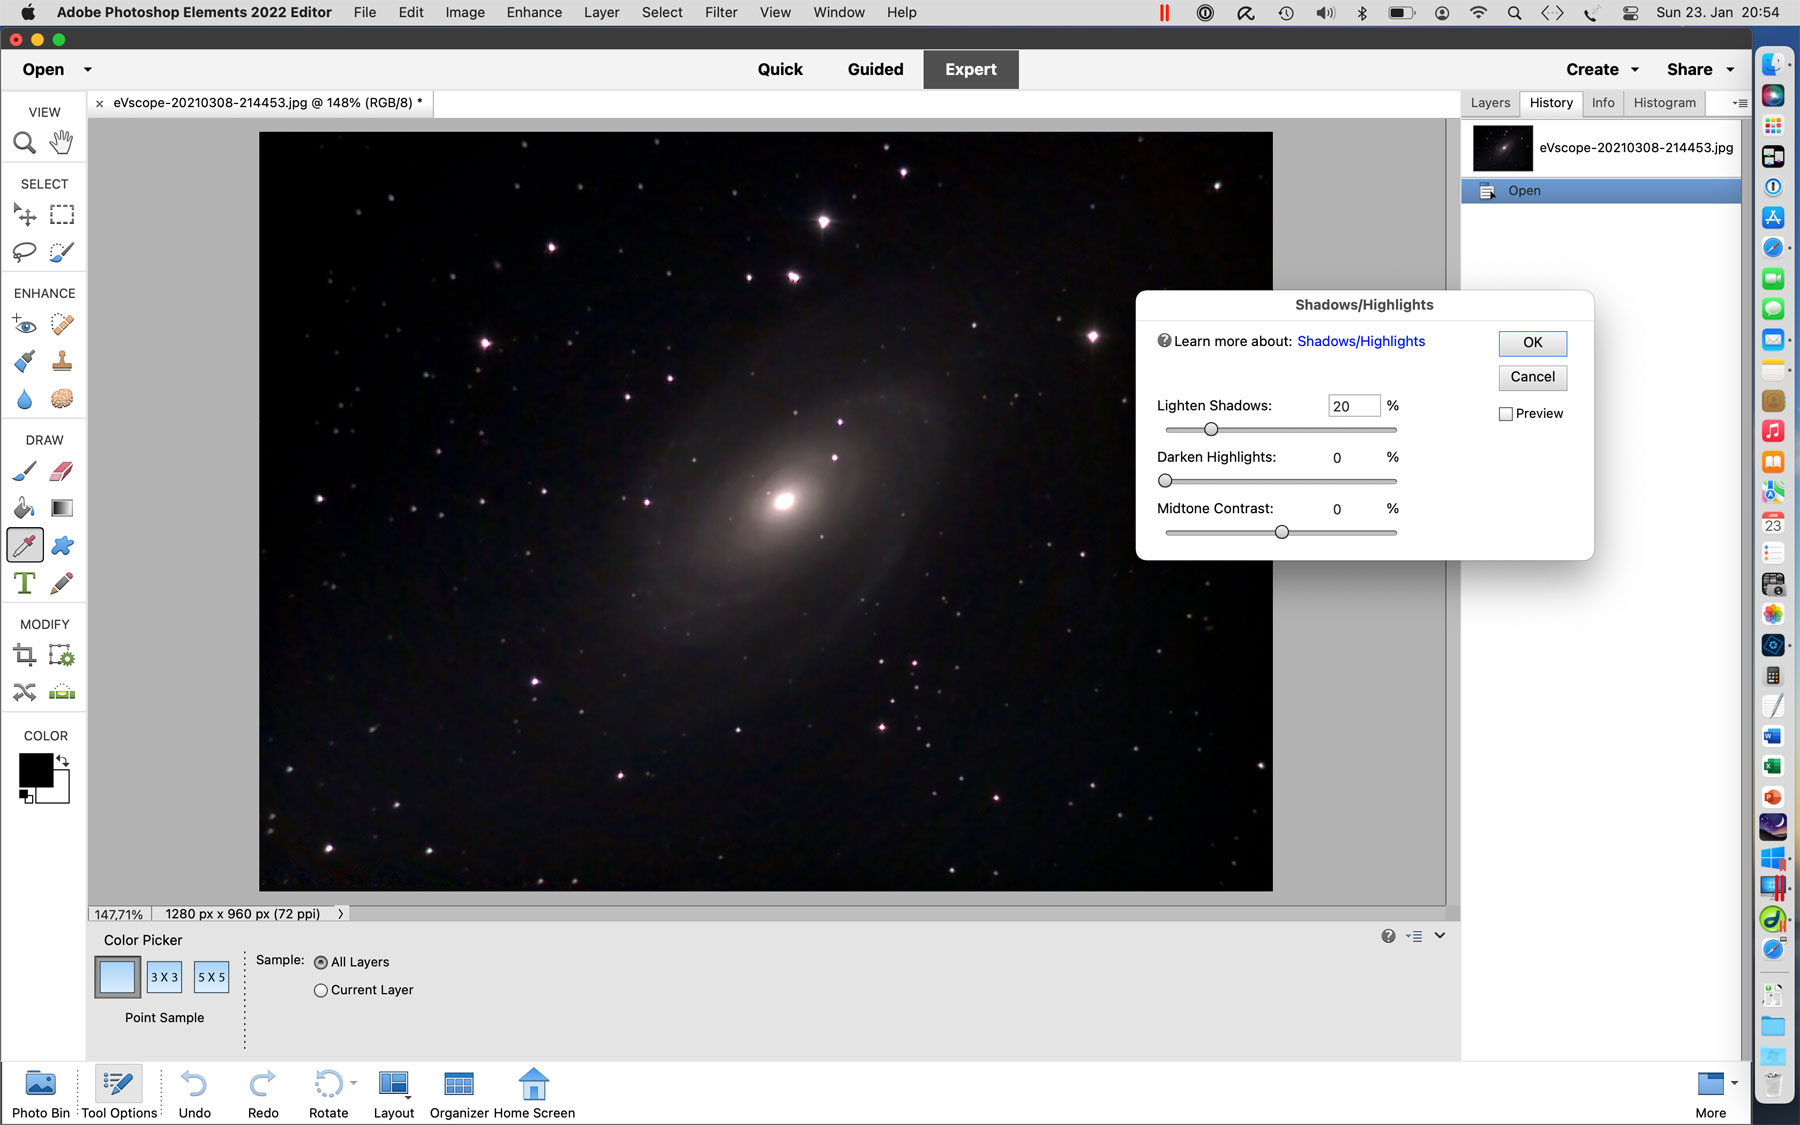
Since I regard this as too bright, I reduce the effect in this example to 20% (I set the slider "according to my taste"; the preview to "on" so that you can see the effect of the "Lighten Shadows" slider):
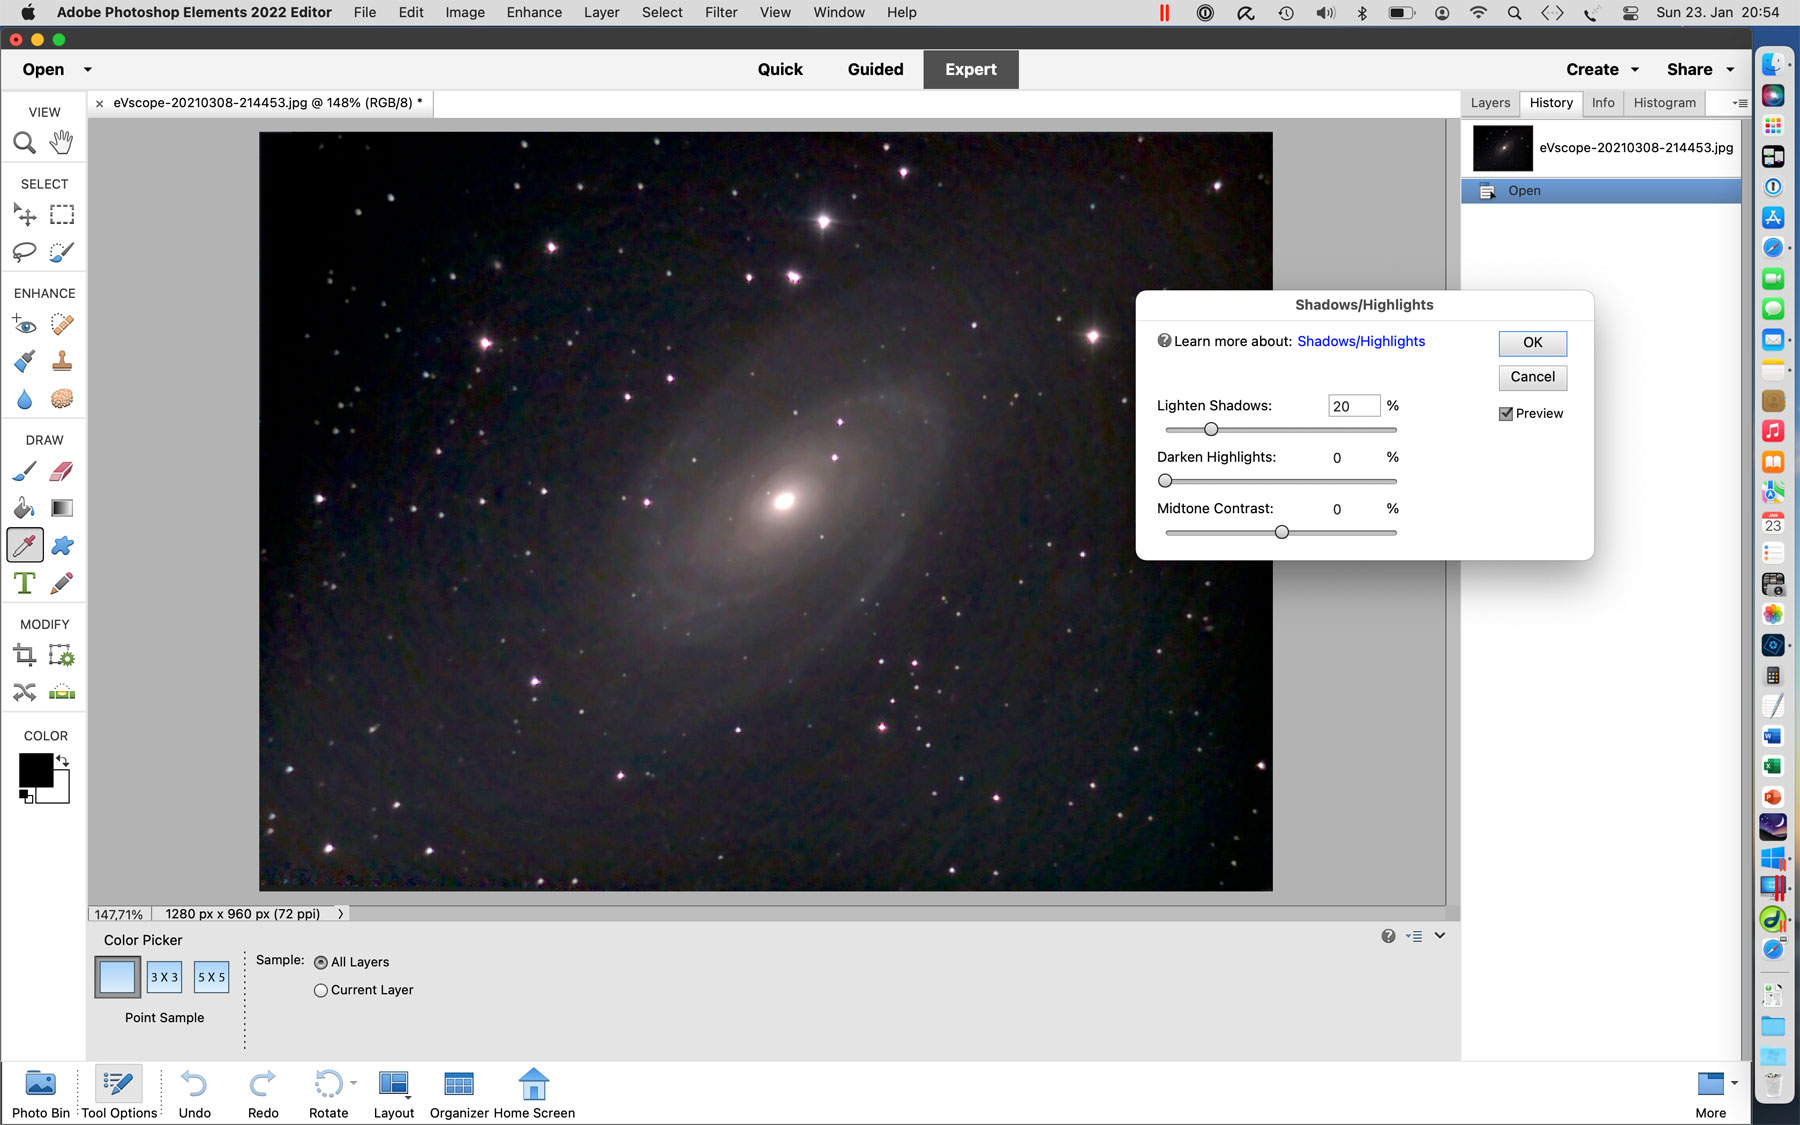
Here, I set the preview to "off" so that you can make a before-after comparison.
Step 2: Use the Levels Tool
In the next step (as written above, you can also leave out the first step...), I select the "Levels" tool, which displays a histogram of the color or b&w values:
Here, I also start with the preview "on". The sliders are for setting the "black point" (left), the "gamma value" (center), and the "white point" (right):
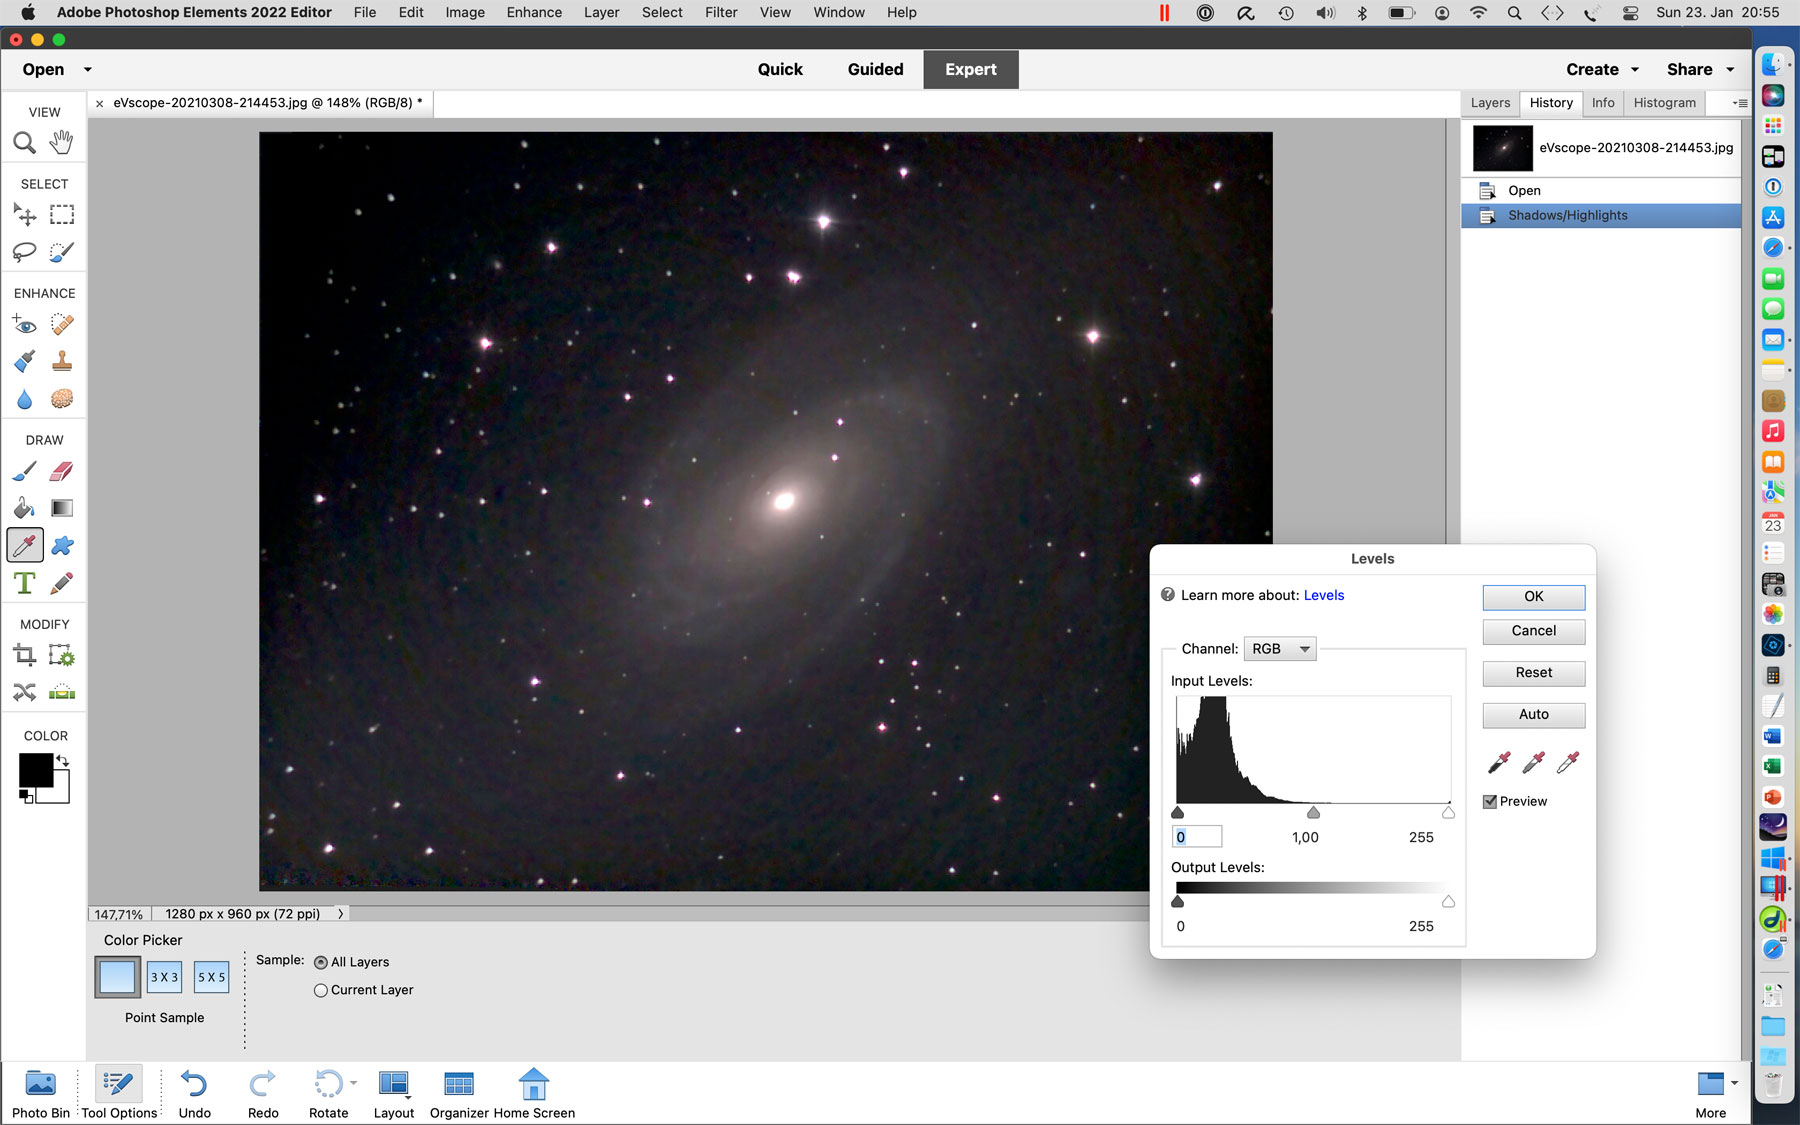
Usually, I use only the left and center sliders (the "white point" slider is said to be "forbidden" for astronomy photos...):
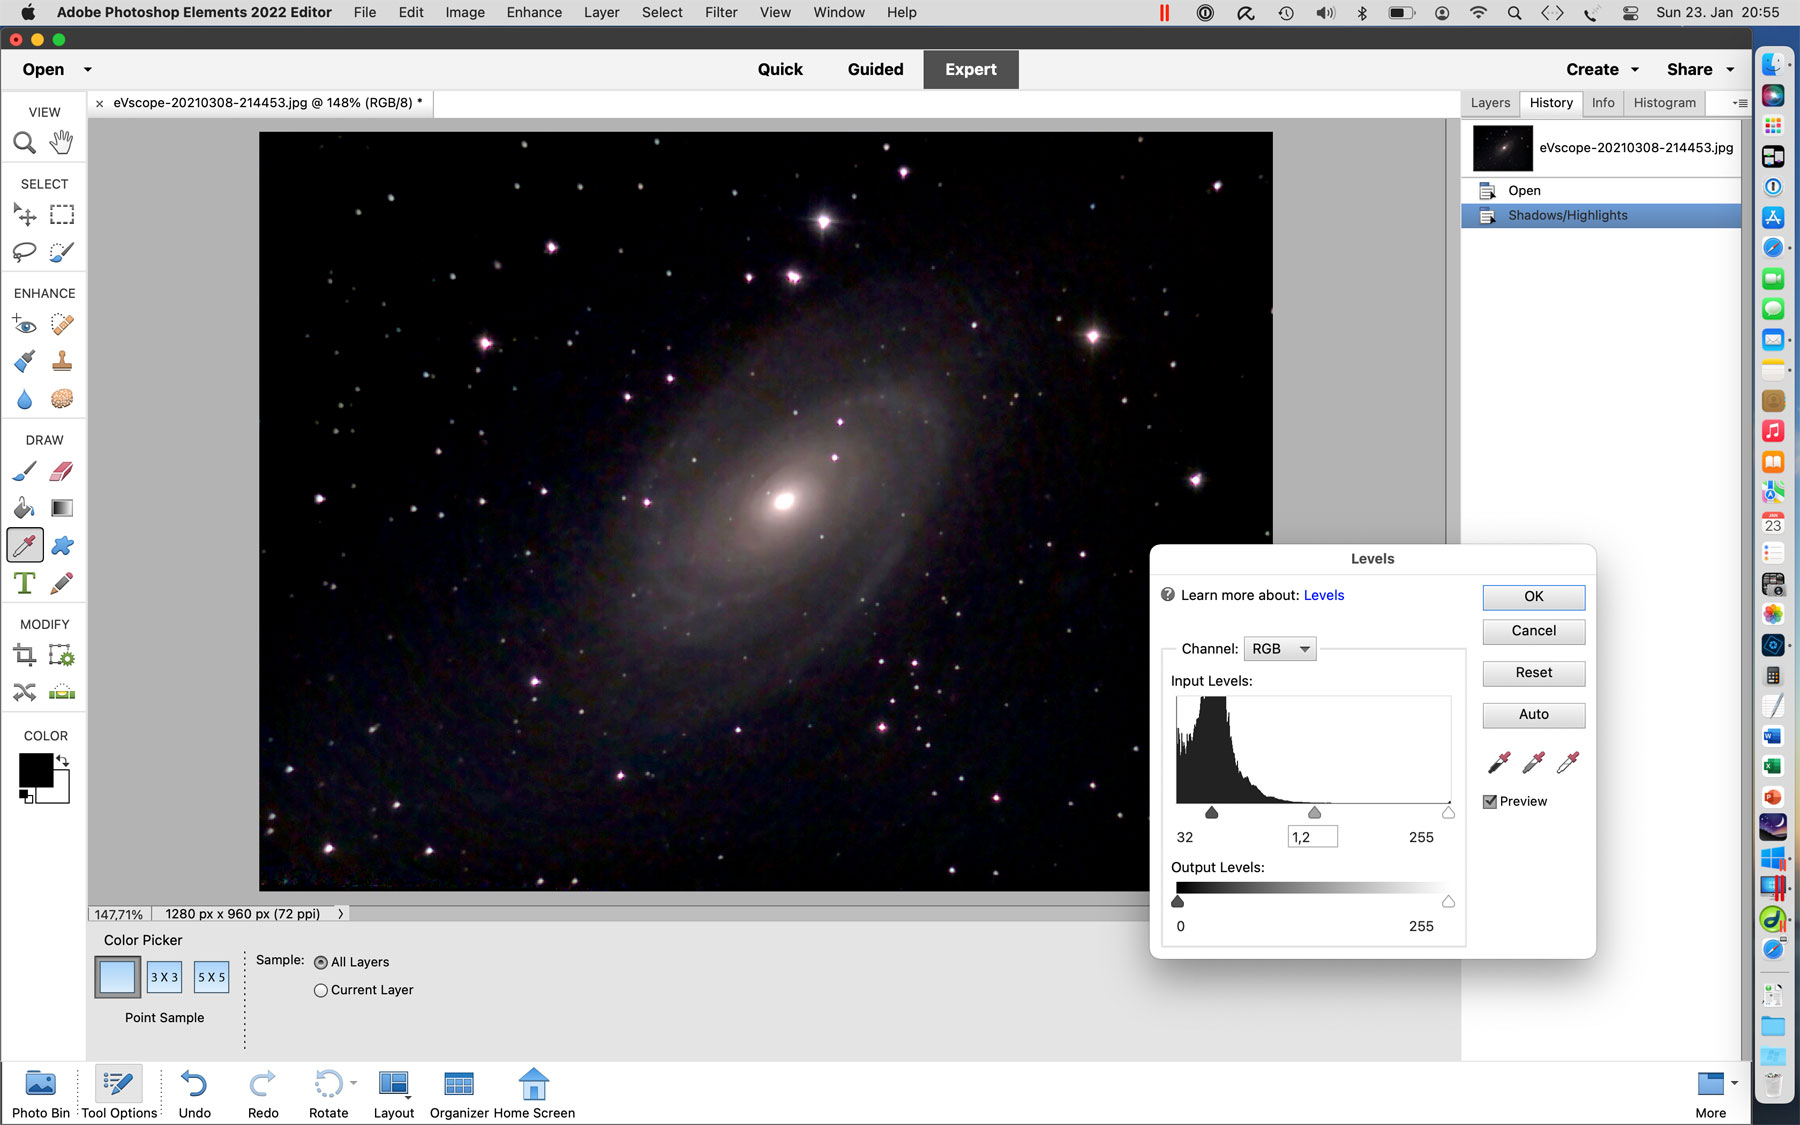
- Move the left slider to the right to somewhere on the left slope of the histogram to make the background black (or blacker).
- Move the center slider typically to the left to make the image somewhat brighter overall (it also makes the background brighter again...).
So, some fiddling with both sliders may be required for achieving optimum results. Anyway, adjust the image to your taste!
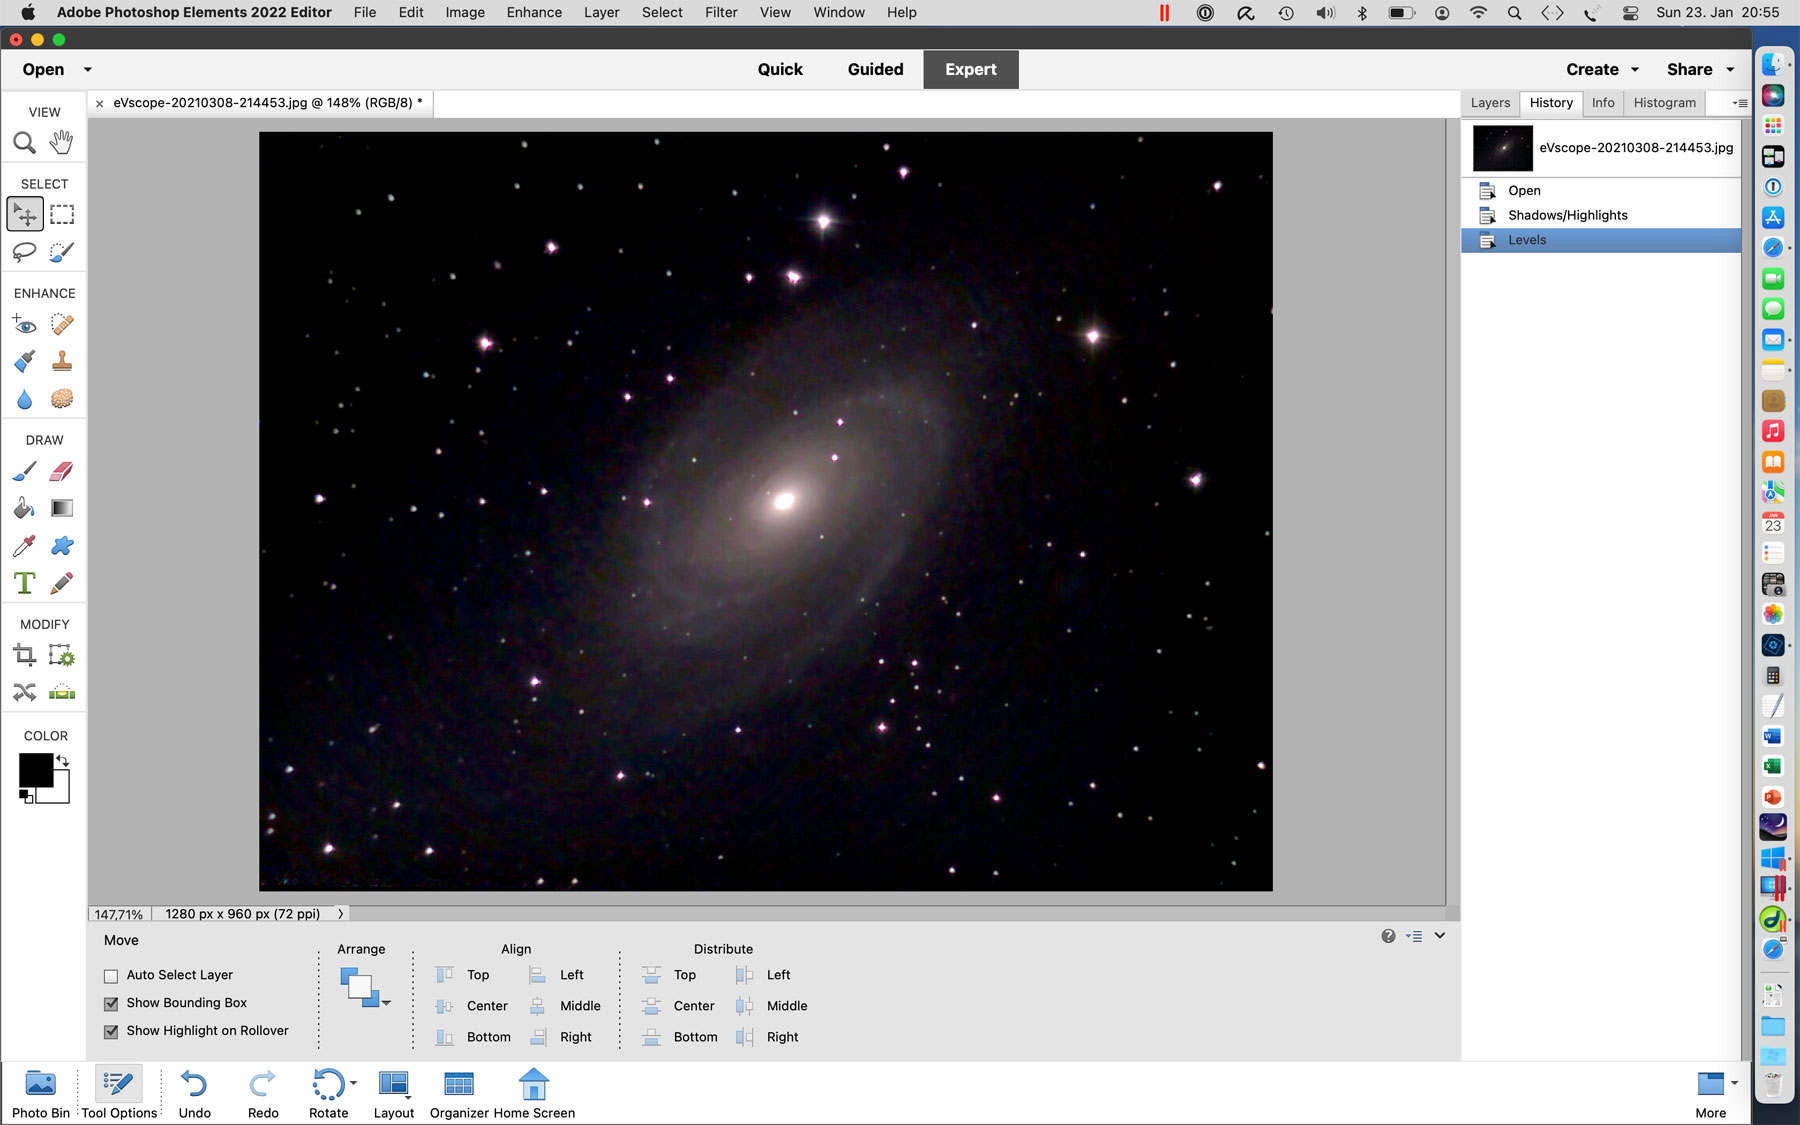
Preliminary End Result
Now, this would be the (preliminary) end result (which is a matter of taste, of course...):
Depending on the subject, I sometimes add a sharpening step (Enhance > Unsharp Mask...). I do this typically for globular star clusters and some open star clusters.
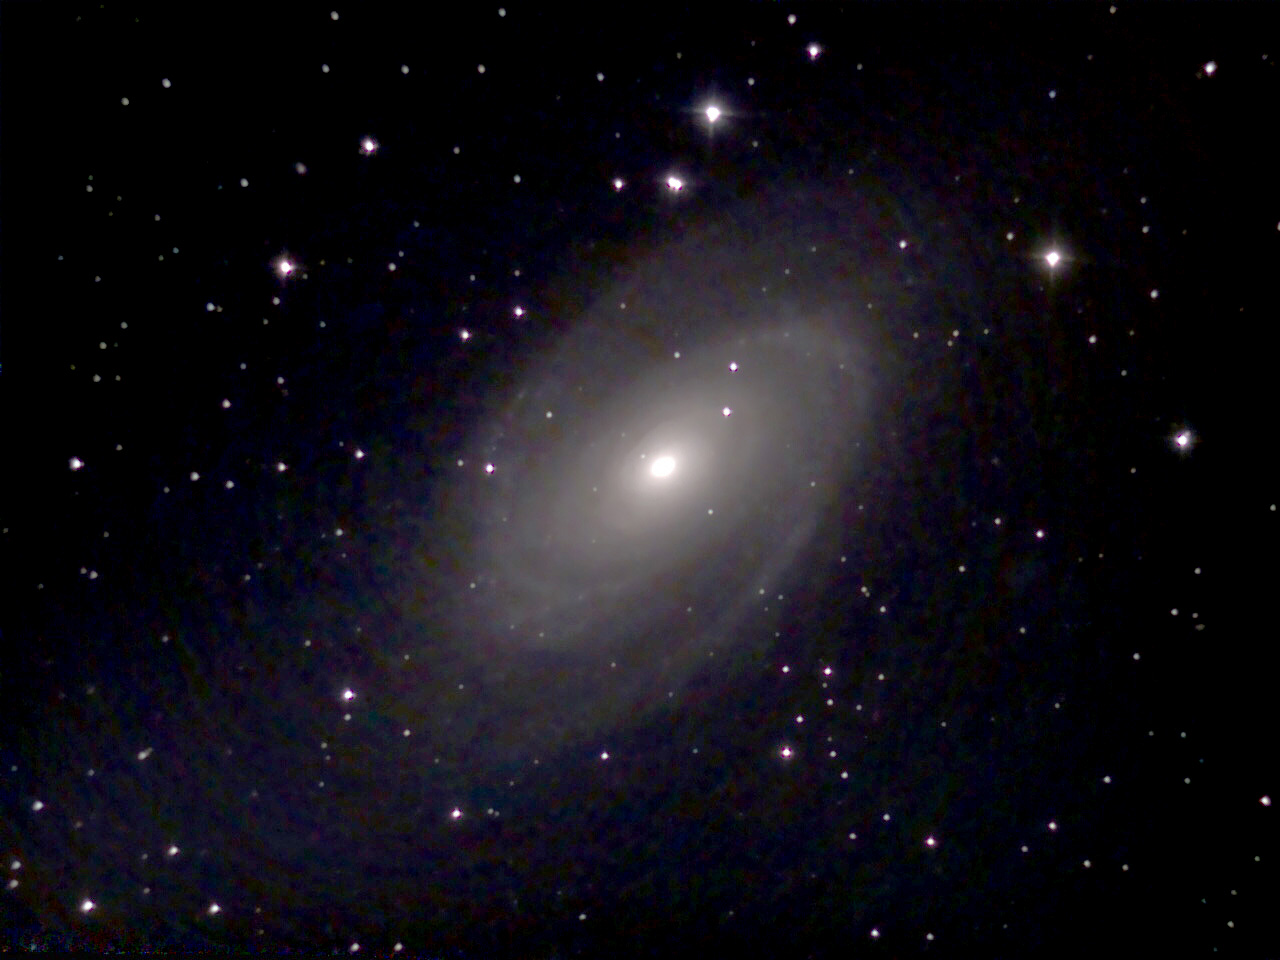
And here is the photo of M 81 before and after processing:
 |
 |
|
M 81 - unprocessed |
M 81 - processed |
|
 |
 |
|
M 81 - processed without step 1 (without Highlights/Shadows) |
M 81 - processed alternatively |
For illustration purposes, I present two more edits here: on the right, there is a stronger edit in the "Levels" correction, and on the left, there is one without the "Shadows/Highlights" step, but with higher values in the "Levels" correction.
Conclusions
This simple image processing serves only to improve the general appearance of astronomy photos in terms of brightness and contrast (and sharpness if necessary). There is no processing of colors, that is too much a matter of "taste" for me...
Links
- Unistellar Website: unistellaroptics.com
- See also my page offering Astronomy Links.
Appendix: Alternative to Step 1 (Brightening)
Step 1 is for brightening up photos; in the following, I would like to present - without illustrations - an alternative to the procedure shown above; it works with layers:
- Duplicate the layer in which the photo is located (this is normally the background layer) via the menu "Layer -> Duplicate Layer". A copy of the original layer appears in the layers window (above the original layer).
- Select the layer copy and change the layer mode for this layer from "Normal" to "Multiply Negative" (or similar...). This will make the image much brighter. The effect can be made weaker but lowering the opacity value with a slider.
This method is sometimes a bit more "powerful" than the method that I show above. Which method is more suitable for a given photo has to be tried out... By the way, as soon as you combine the two layers, the histogram looks somewhat oddly...
The following photo demonstrates the effect of this approach (it can be made weaker by decreasing the opacity (top right); sorry for the screen in German language):
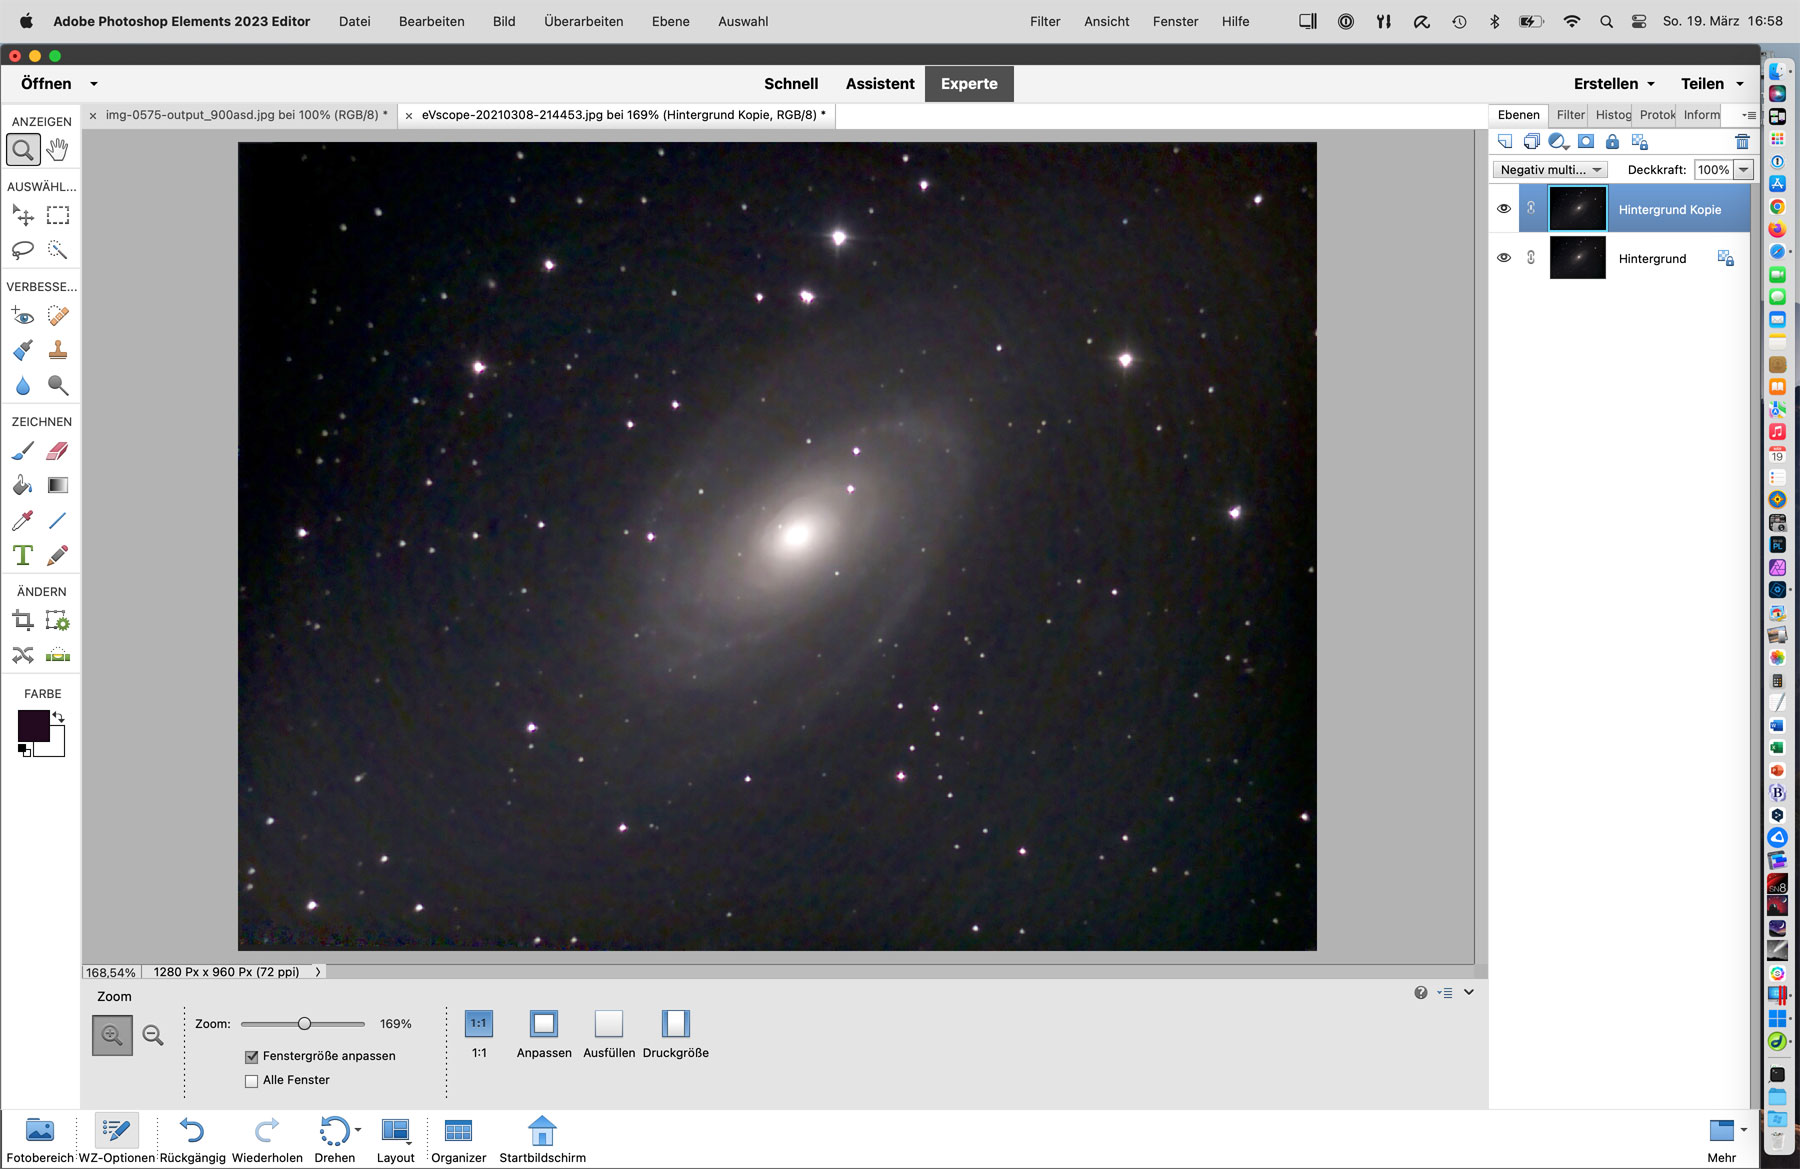
For comparison purposes, here once more the effect of lightening the shadows by 20%:
|
made by |
| 24.10.2023 |