Unistellar eVscope - Old Versus New Image Processing (since V. 1.3)
Introduction | The New Image Format and the New Image Processing | Observations... | Old and New Image Processing - Image Comparisons | How Close Can I Get to the Results of the New Image Processing? | First Conclusions | Links || Appendix: Report on App Version 1.3 for Unistellar
Archive
On this page, I contrast the old image procesing (before app version 1.3) of my electronic 4,5" Newton telescope Unistellar eVscope with the new image processing (from app version 1.3 on).
Note: See page Overview of the Unistellar pages for just that!
Introduction
 |
 |
 |
 |
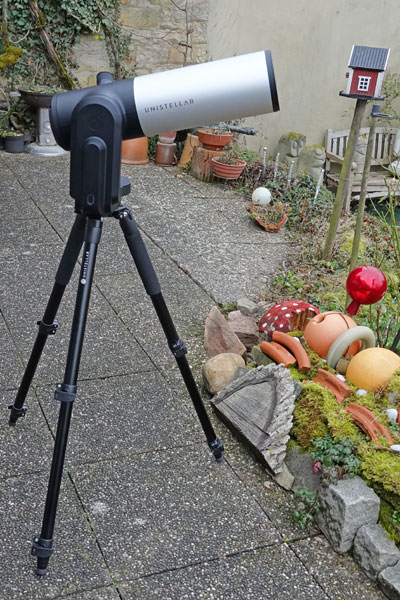
Photos: My eVscope (End of January 2020)
According to Unistellar, the following change was made regarding the functionality: Four times larger observing record for even more stunning memories of your stargazing. According to a video about the new app version, the files are now scaled up in Enhanced Vision mode to 2560 x 1920 pixels and, instead of 1.2 MB, now have 4.8 MB. Since the sensor size is still 1280 x 960, the result of this upscaling seemed questionable to me, since it does not introduce any new information. I attempt to explore this matter in the following!
Note: Obviously, nothing has changed with app versions 1.4 and 1.5 with respect to the image processing.
Note: See also my Report on App Version 1.3 for Unistellar from the beginning of September 2021!
The New Image Format and the New Image Processing
So what does the statement "Four times larger observing record for even more stunning memories of your stargazing" mean in practice? To be honest, this was not easy for me to clarify. As already written, just upscaling the sensor images does not add any new information, and the eVscope's photos, which appear blurry at full size anyway, would become even blurrier this way.
So much for the theory! But before I pass judgment, I first wanted to look at the new results and compare them with the earlier ones. This is what I present on this page. Besides, I am not interested in the new image size. I therefore compare the old results with the new ones after scaling the new ones back down to 1280 x 960 pixels. Then old and new photos are the same size again and thus directly comparable.
When comparing old and new photos or when looking directly at the new photos, I noticed the following things:
- The new photos are initially very grainy, which is reduced with longer exposure times (EV times, to be precise...), but ultimately still remains stronger than in the old photos.
- On closer inspection, the new photos appear less "painted" to me than the old ones. This may be nuances, and not everyone seems to recognize a difference, but to me this effect is evident. Thus, Unistellar would have met my desire to "paint" less when processing the images.
- Colors, contrast, background seem to have changed (modified, more saturated colors, stronger contrast, darker background).
"The bottom line" is that the new photos seem to look a "tiny bit" better than the old ones, with the "graininess" of the new photos speaking somewhat to the disadvantage of the new image processing. In the following, I will try to substantiate these observations with examples.
Observations...
Colors and Color Fringing, Star Shapes
Since app version 1.3, color reproduction has become slightly different from the older versions. Primarily, the colors look a bit more saturated, which is certainly a matter of taste. This increased colorfulness can also be seen in brighter stars, which now often have distinct color fringes, sometimes in violet, sometimes in blue, sometimes multicolored. The photos of the older versions had more of a kind of faint rainbow color fringing.
Moreover, I observed that the star shapes seem to have become less round, often stars look like small triangles. On the one hand, this may reflect differences in collimation, but I suspect, that the new image processing also plays a role here.
 |
 |
 |
||
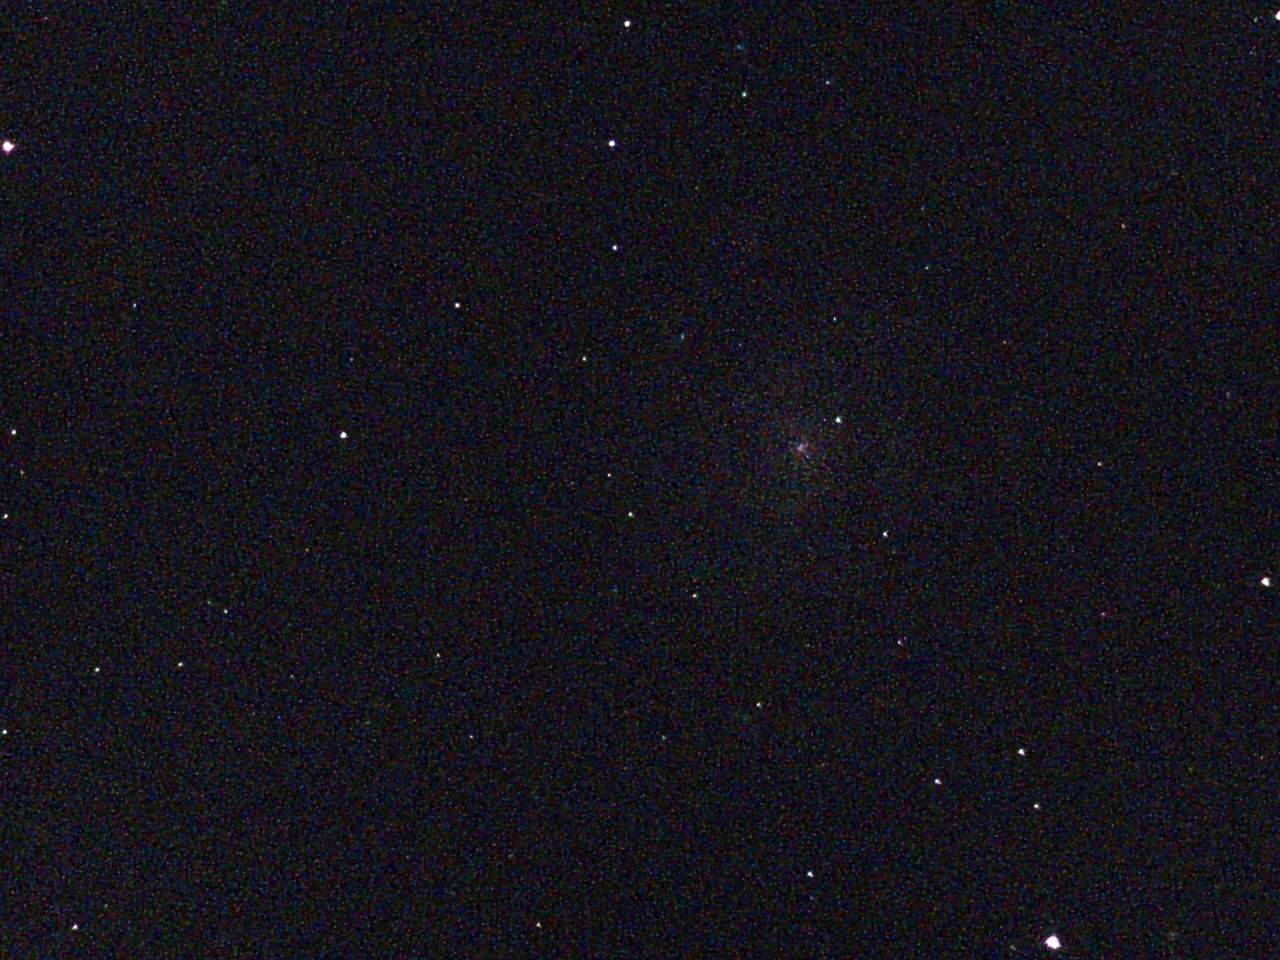
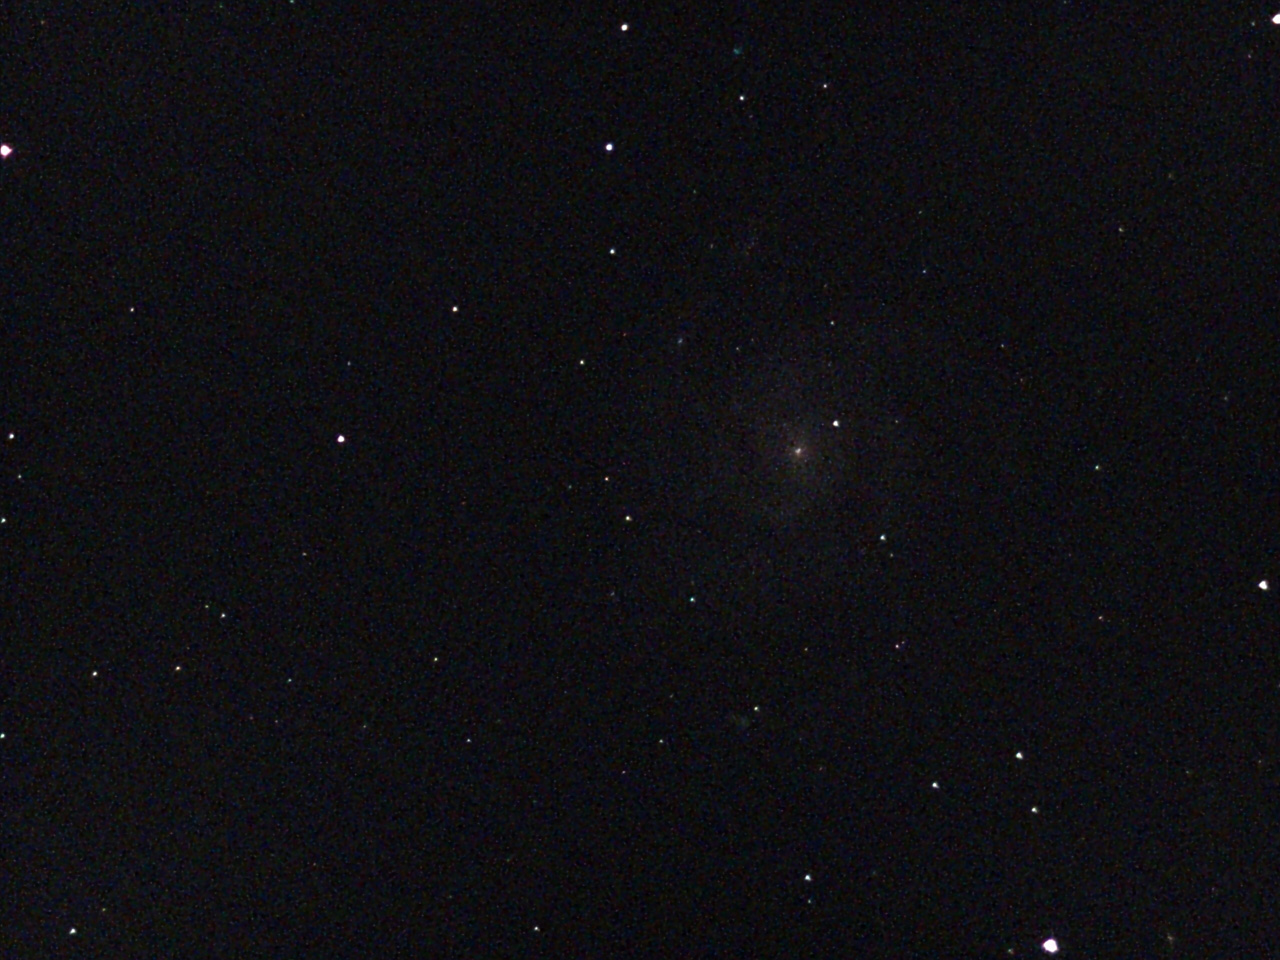
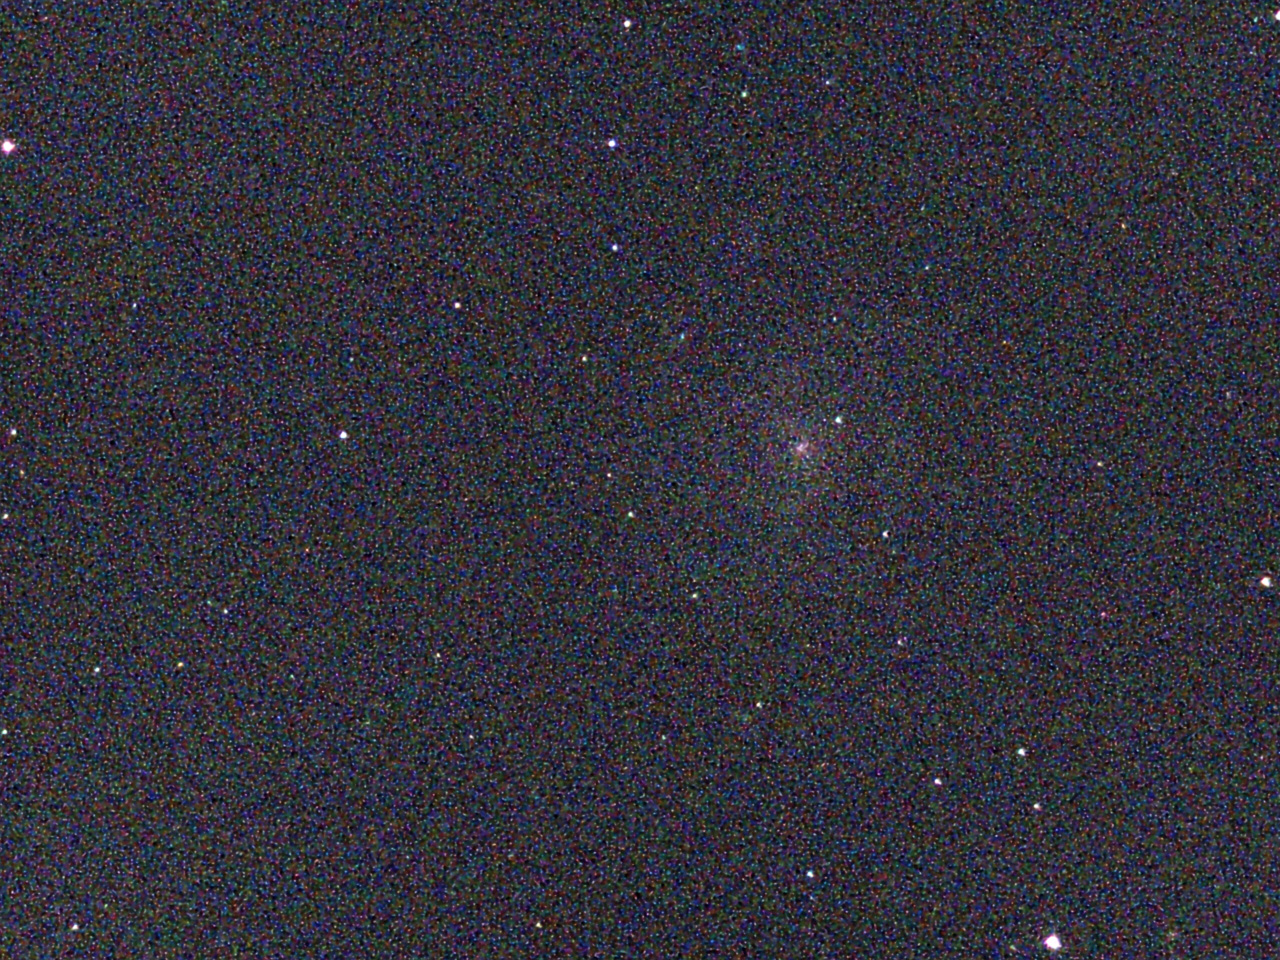
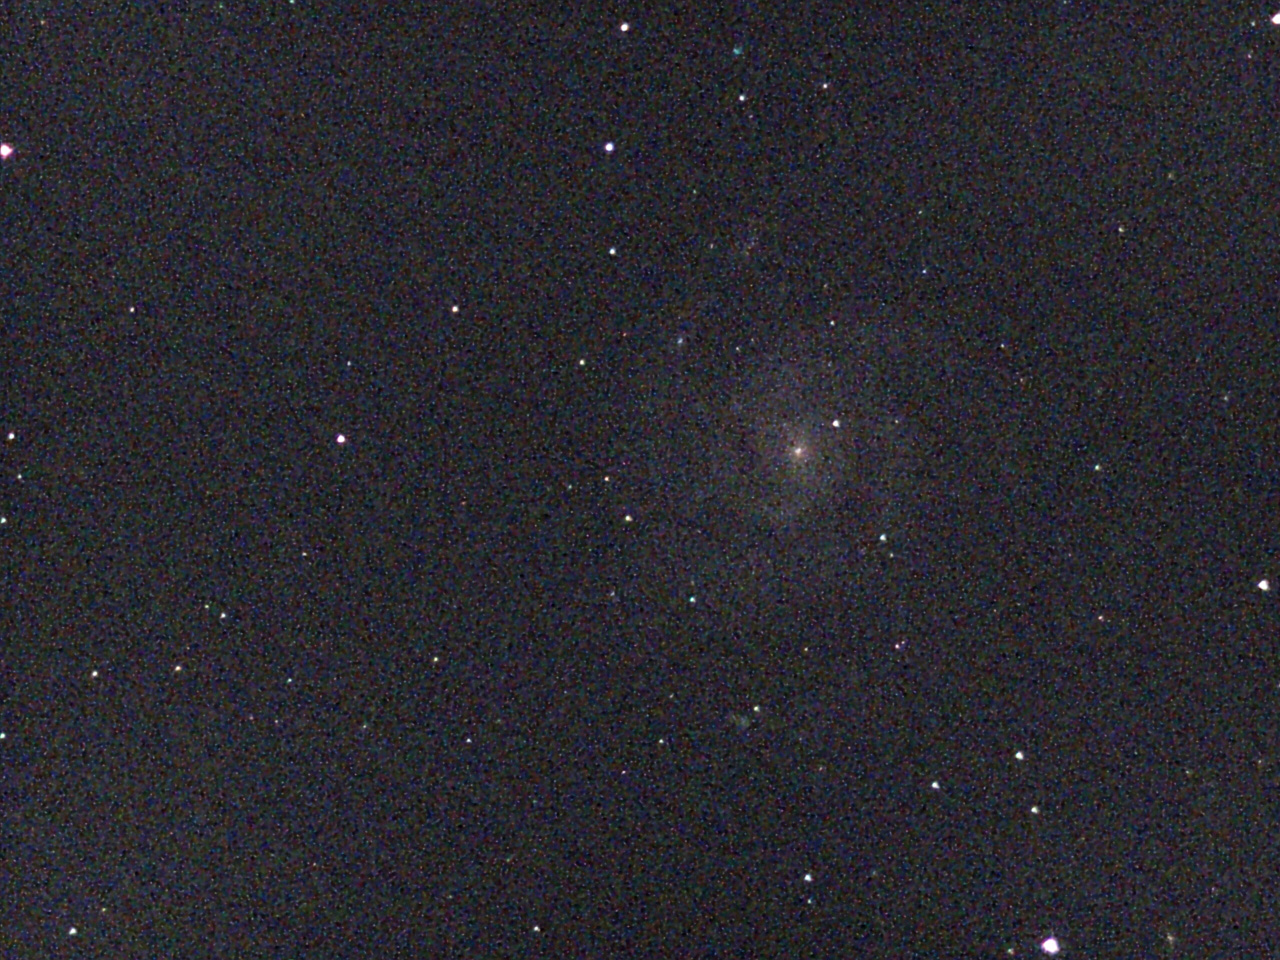
M 17 - Aug 23, 2020 |
M 17 - Jul 17, 2021 (new) |
M 17 - Jul 17, 2021 |
||
 |
 |
 |
||
M 17 - Aug 23, 2020, photo on top processed |
M 17 - Aug 23, 2020 (old) |
M 17 -Jul 17, 2021, photo on top processed |
Photos: Demonstration of the stronger color saturation and the purple color fringes around bright stars due to the new processing; also look at the differences as to the star shapes!
Contrast and Background
The contrast of the photos seems to have increased, perhaps making the photos appear more brilliant. The background also appears darker compared to my older shots. However, the higher contrast is disadvantageous for bright cores of globular clusters (and probably also for galaxies), because the washing out of the core cannot be compensated for.
 |
 |
 |
||
M 92 - Sep 15, 2020, manual exposure (old) |
M 92 - Sep 15, 2020, processed |
M 92 - Sep 15, 2020, processed and sharpened |
||
 |
 |
 |
||
M 92 - Jul 18, 2021, automatic exposure (new) |
M 92 - Jul 18, 2021, processed |
M 92 - Jul 18, 2021, processed and sharpened |
Photos: The photos demonstrate the darker background and the higher contrast - the core of M 92 is more washed out with the new processing (automatic exposure). Note also that globular star clusters look whiter with the new image processing.
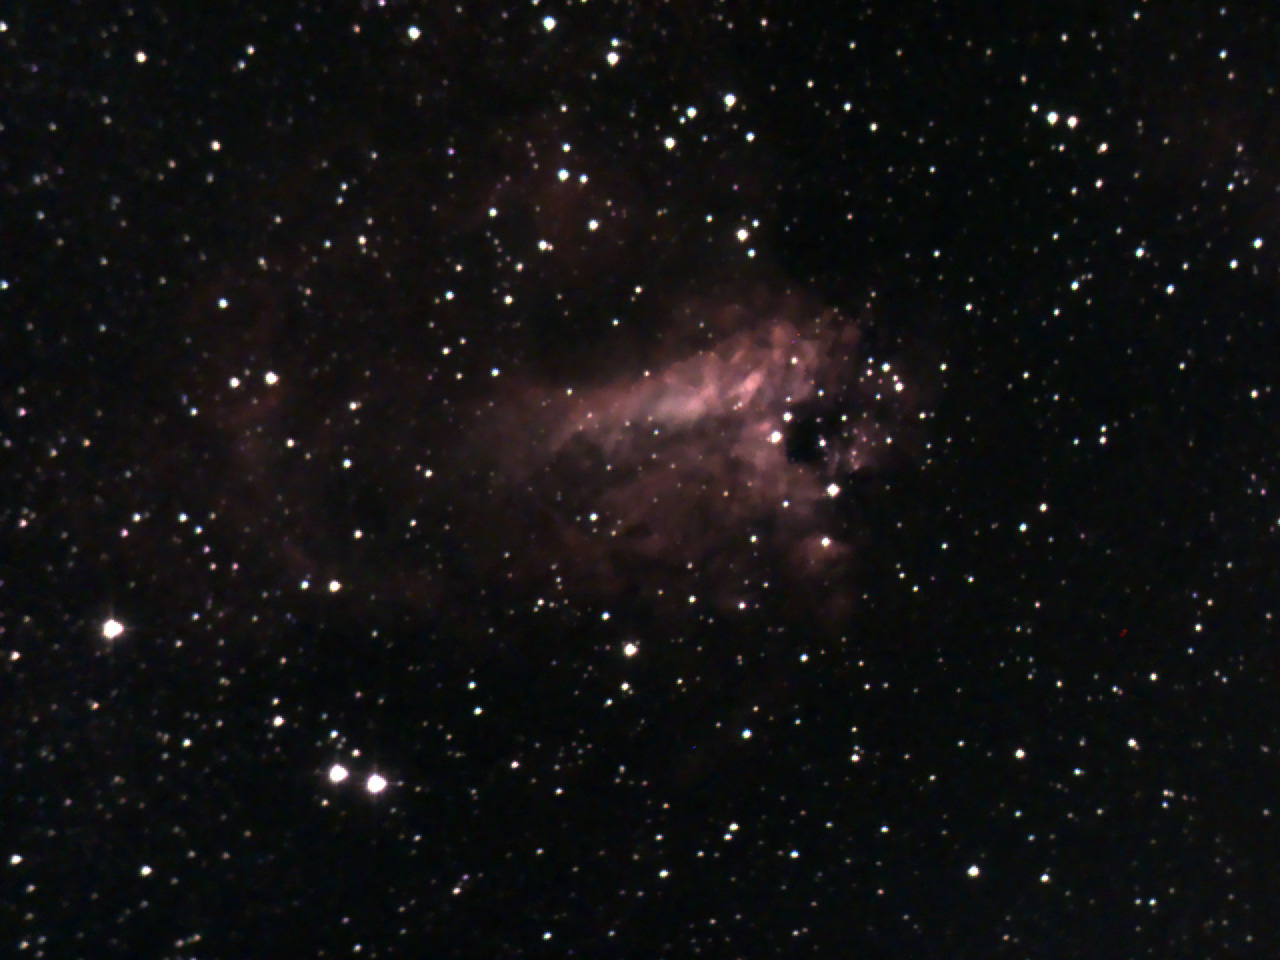
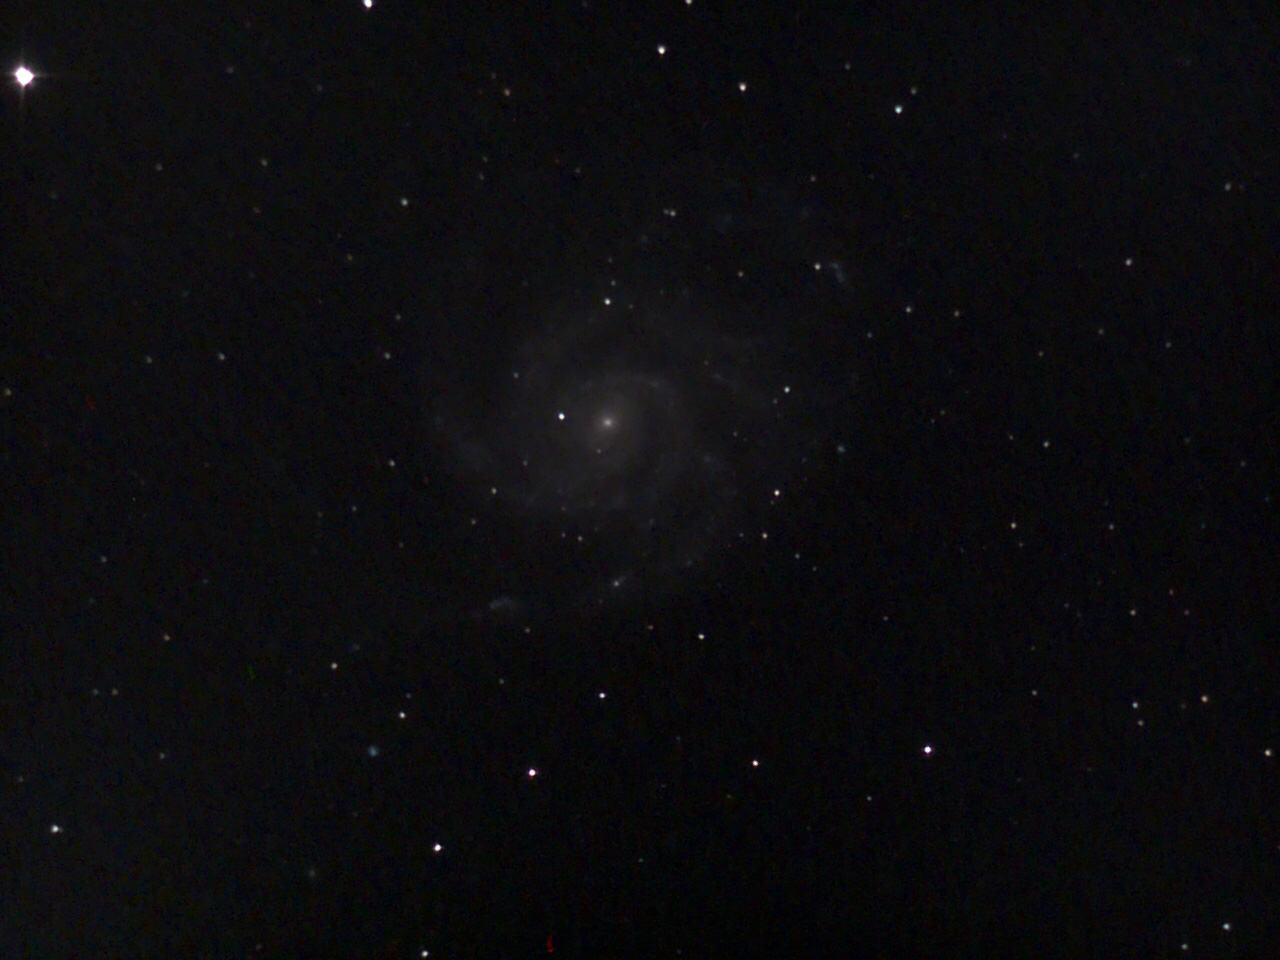
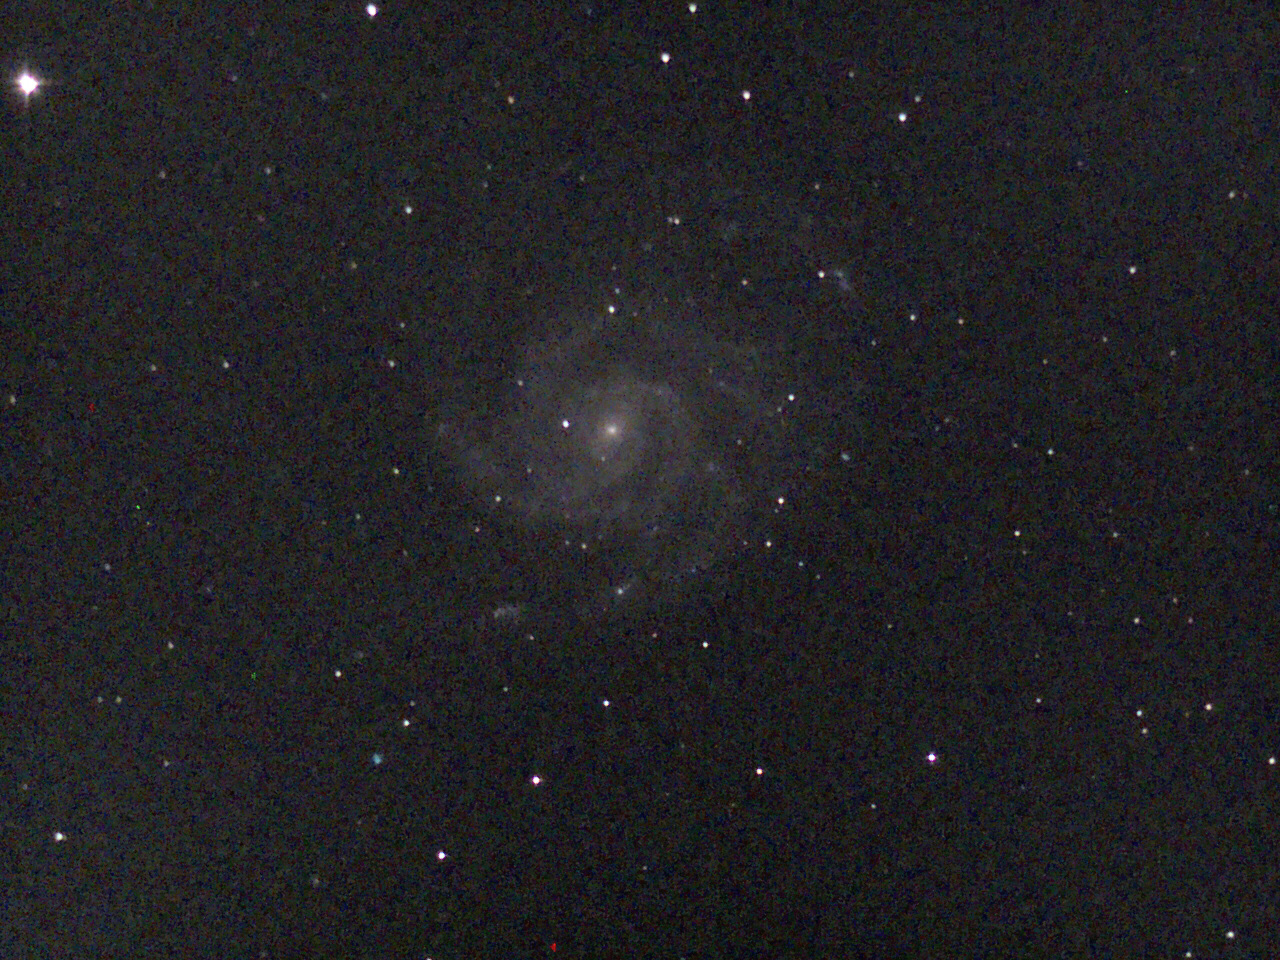
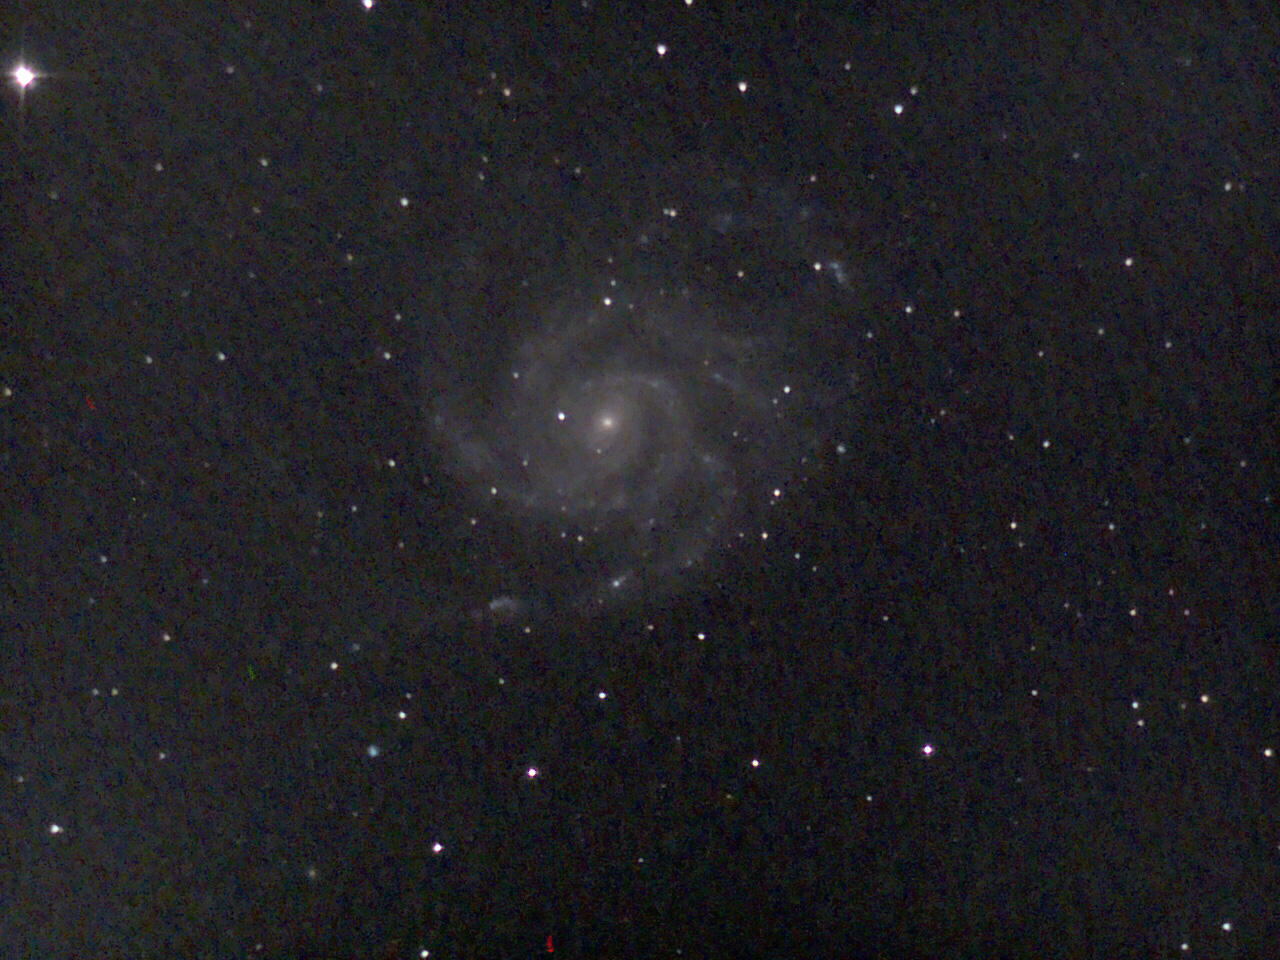
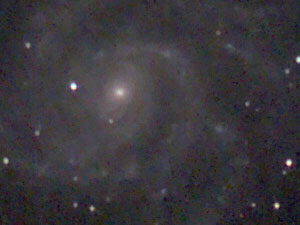
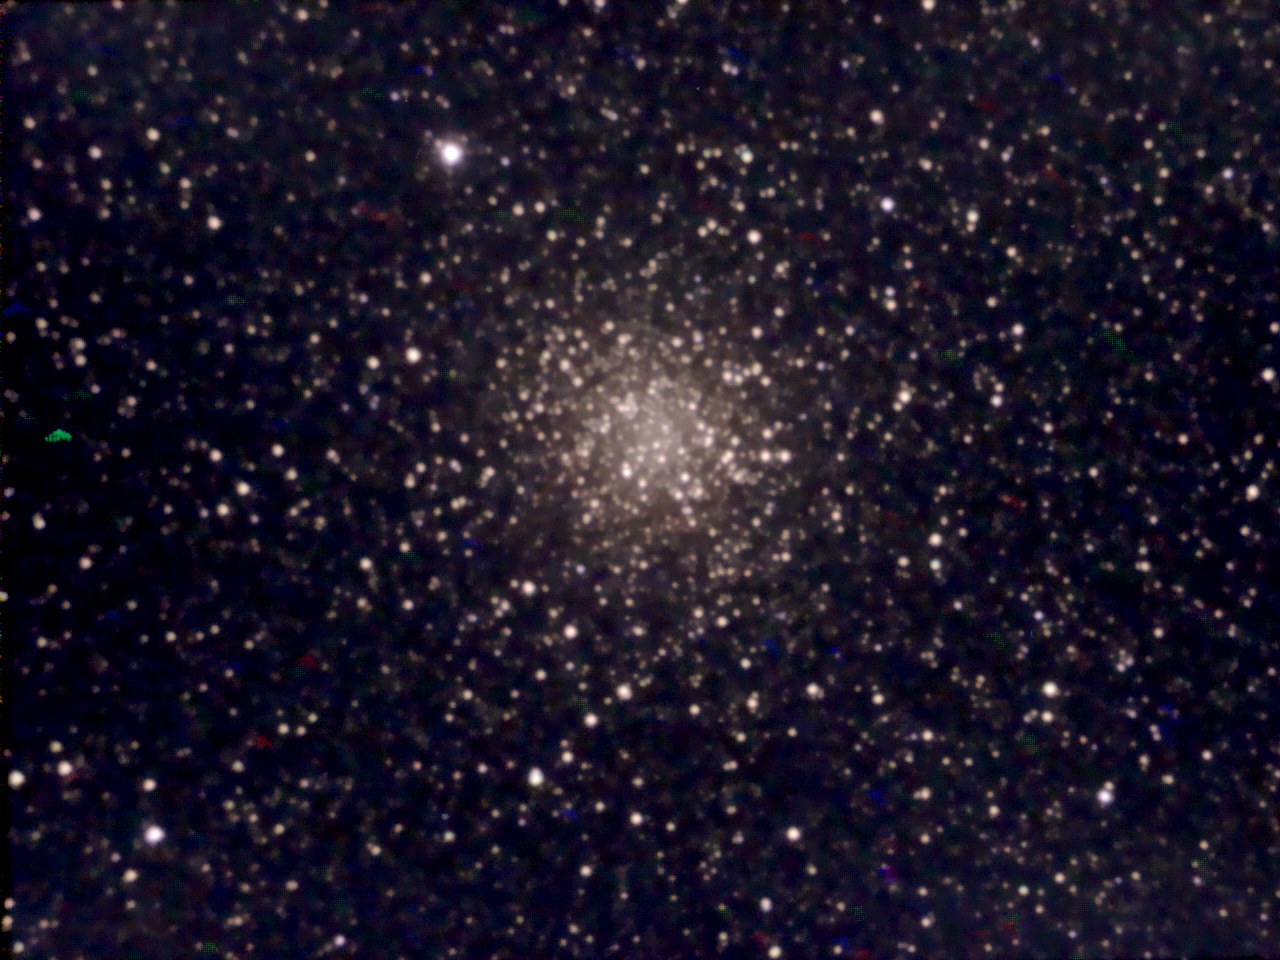
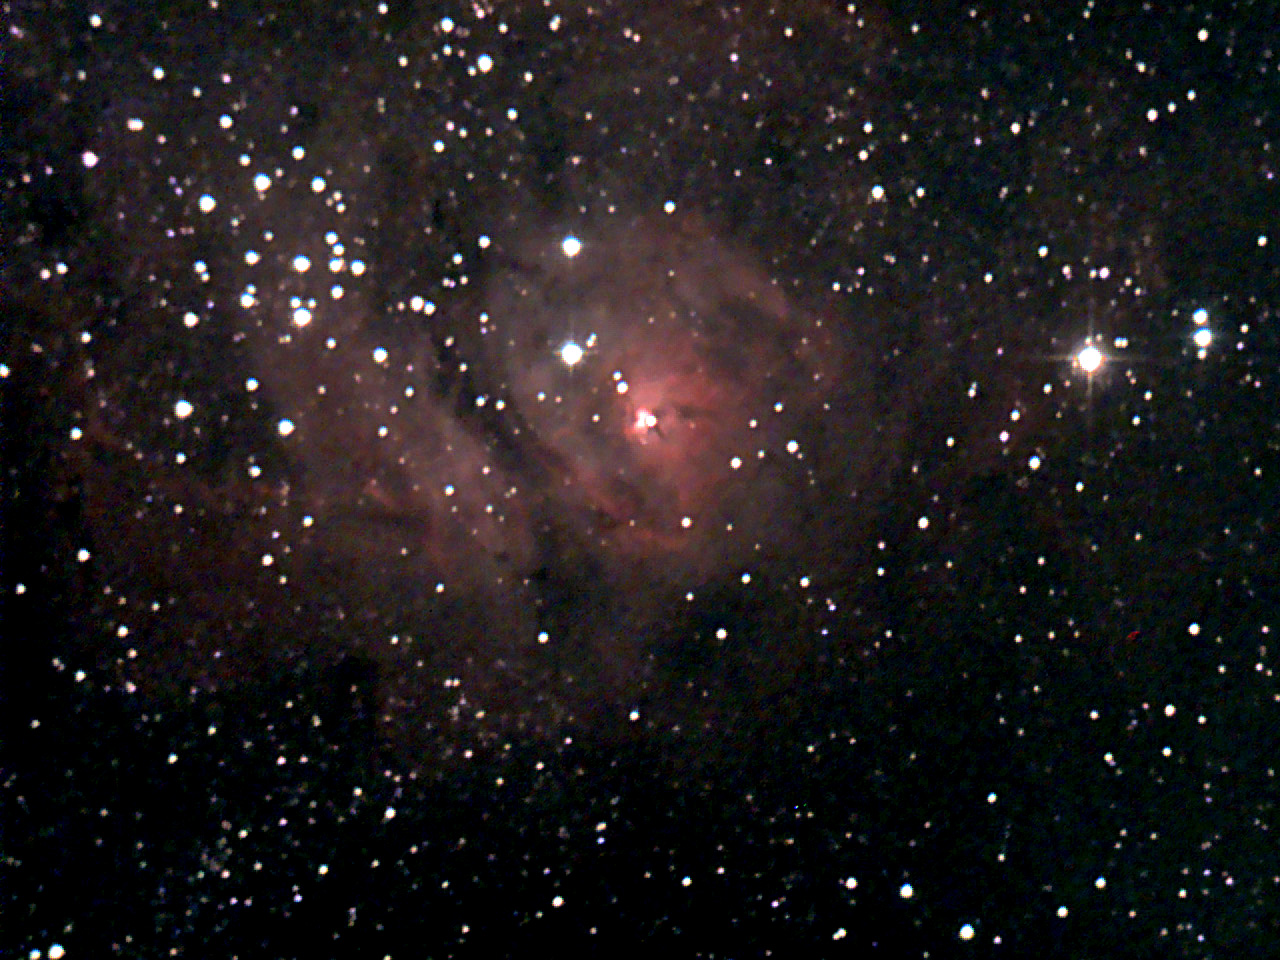
Example DSO: Comparison of Nebulae
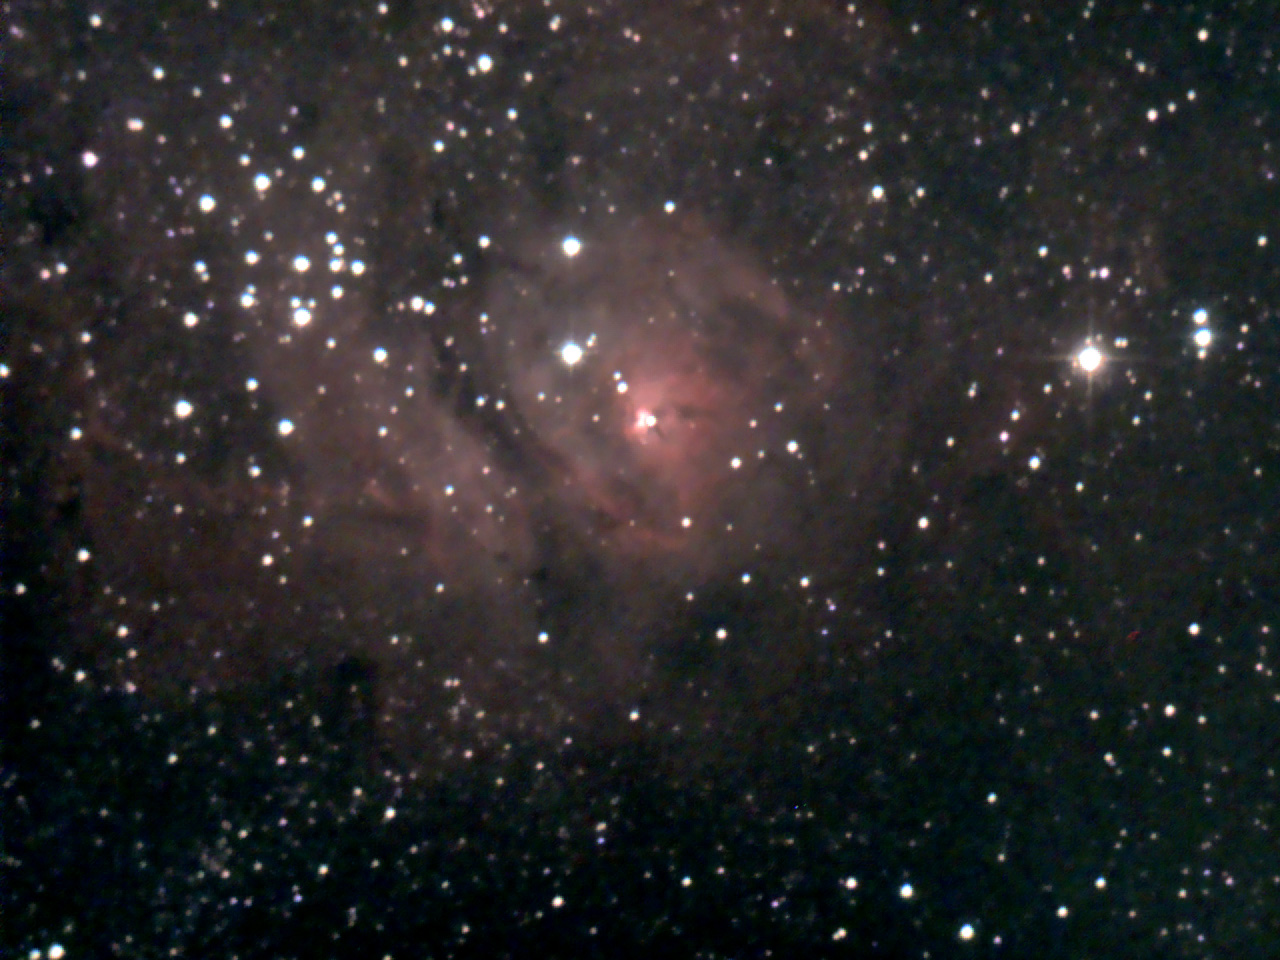
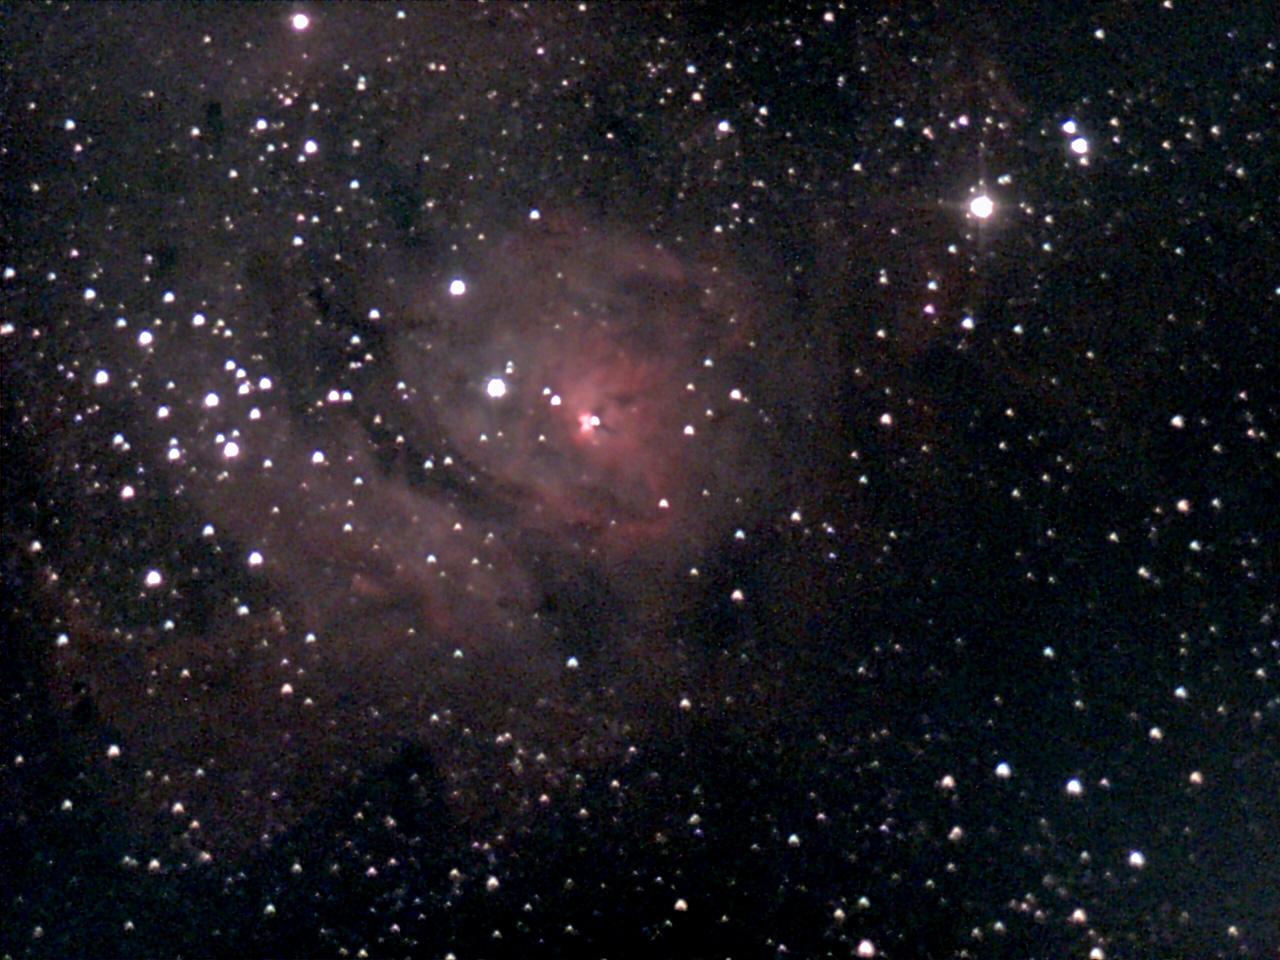
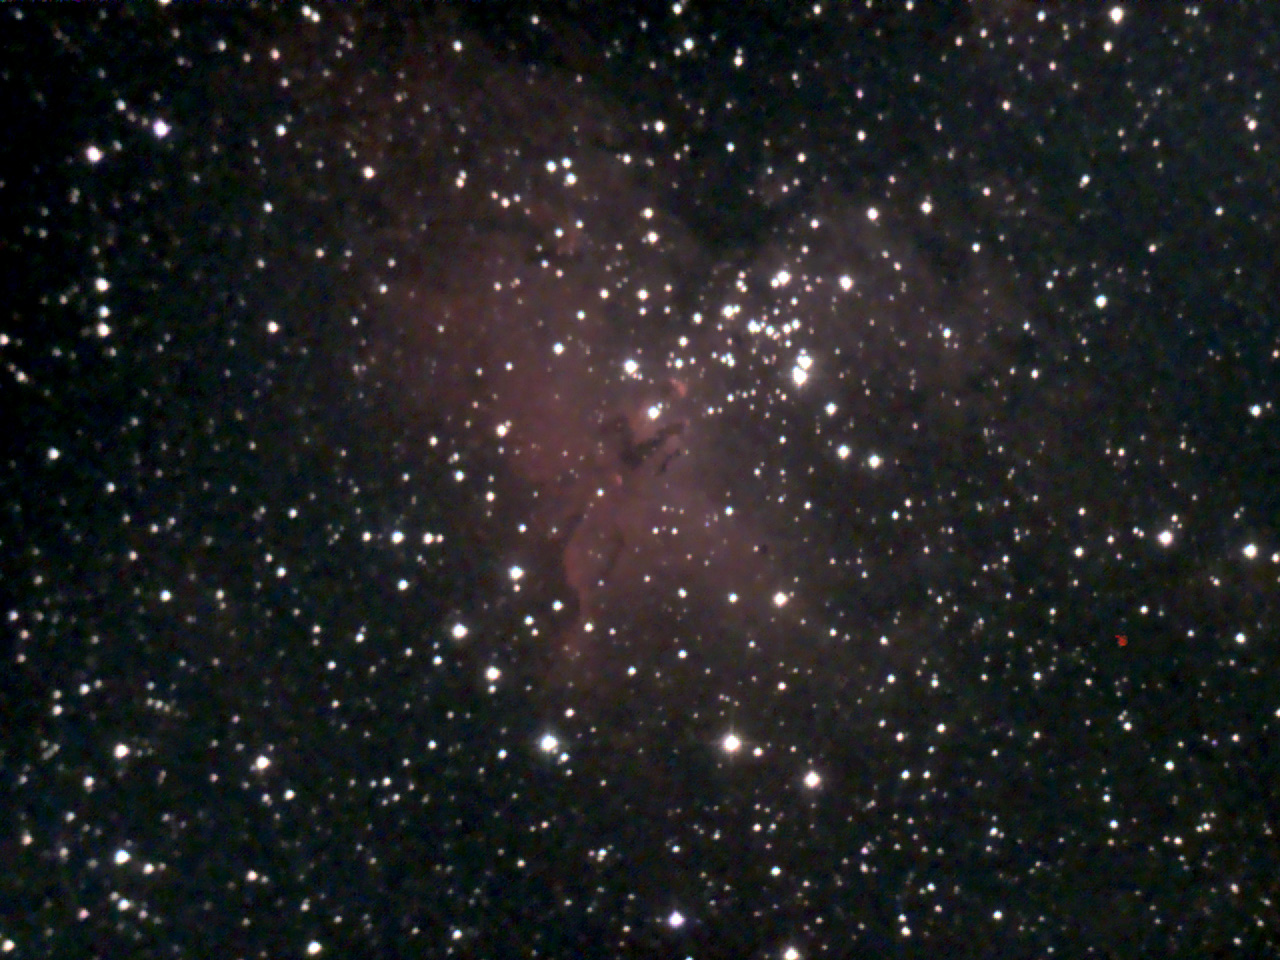
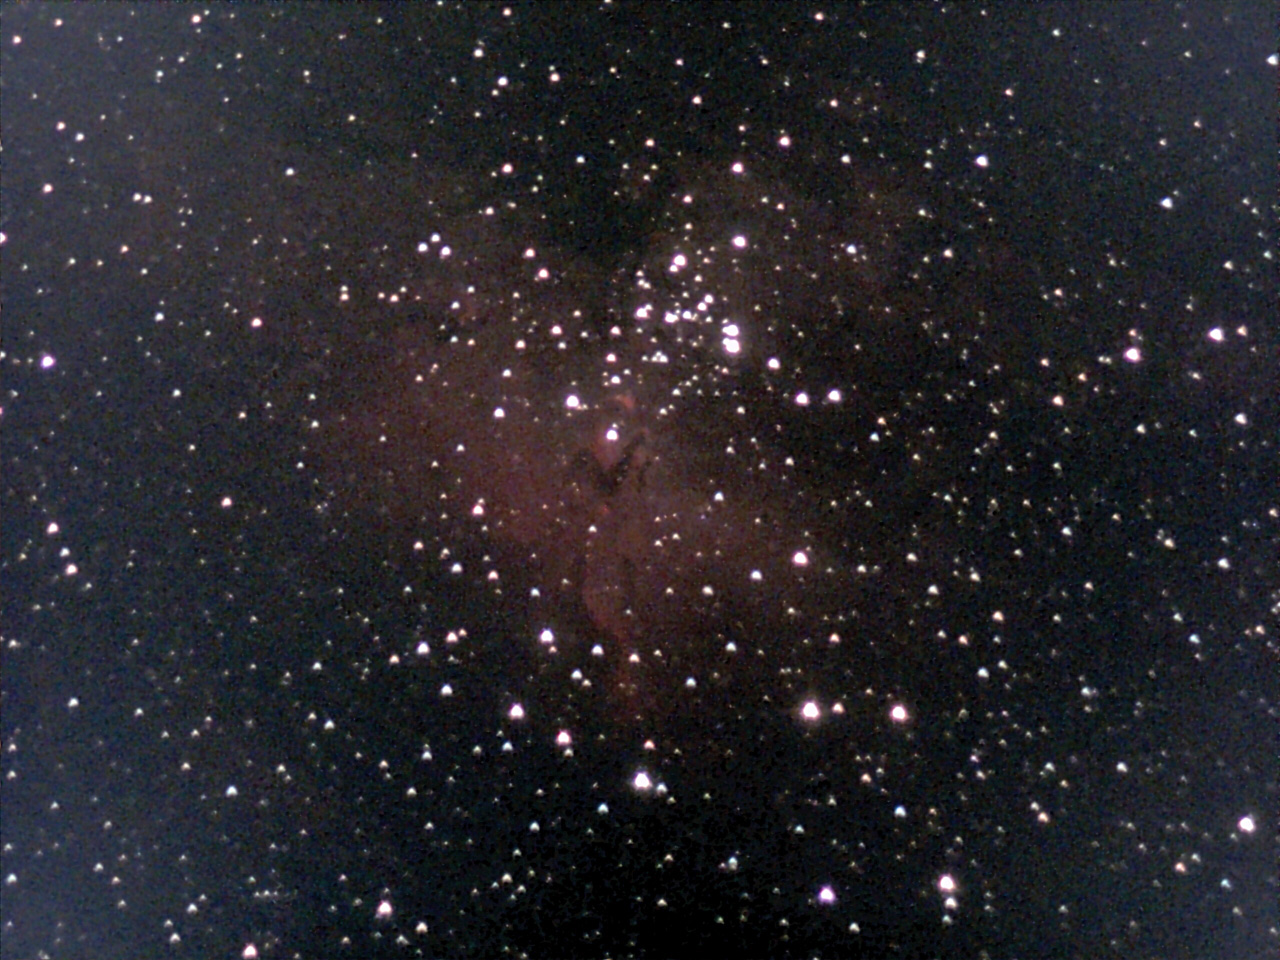
Large area (galactic) nebulae offer, in my opinion, a good opportunity to compare the old and the new image processing. For this, you should, however, look at the photos in the "sensor size" of 1280 x 960 pixels and not just at the smaller thumbnails (click the previews to see the large versions). I scaled the new photos back down to the sensor size so that the old and the new image processing can be compared more easily. Below, I present photos of M 8 (Lagoon Nebula), M 16 (Eagle Nebula), M 17 (Omega/Swan Nebula), and M 20 (Trifid Nebula). While the old photos typically represent some of the best that I was able to get out of the eVscope, the new photos were taken at half moon, and presumably the eVscope was also not properly collimated.
 |
 |
|
M 8 (Lagoon Nebula) - old processing |
M 8 (Lagoon Nebula) - Version 1.3 |
|
 |
 |
|
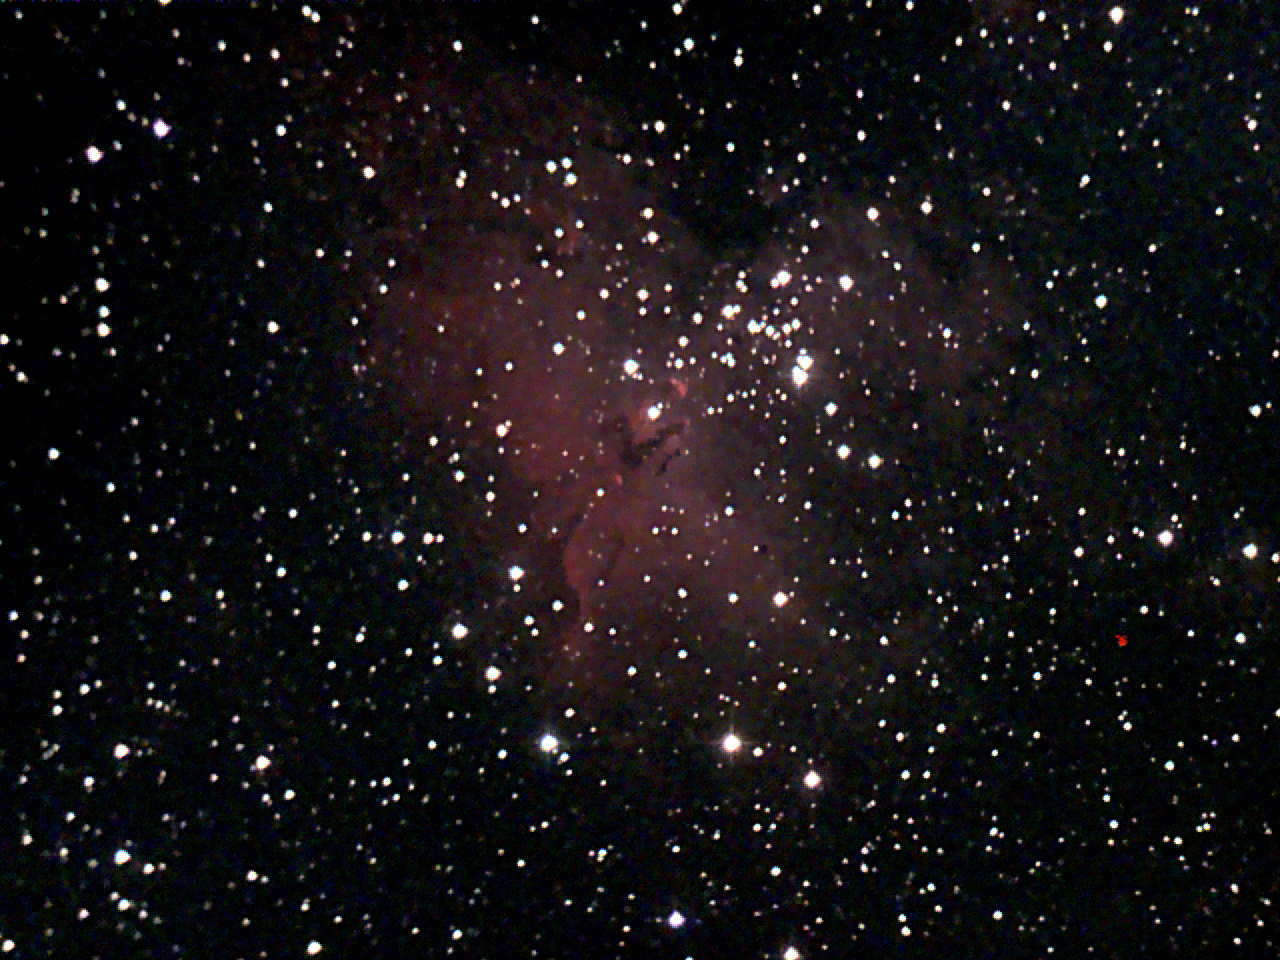
M 16 (Eagle Nebula) - old processing |
M 16 (Eagle Nebula) - Version 1.3 |
|
 |
 |
|
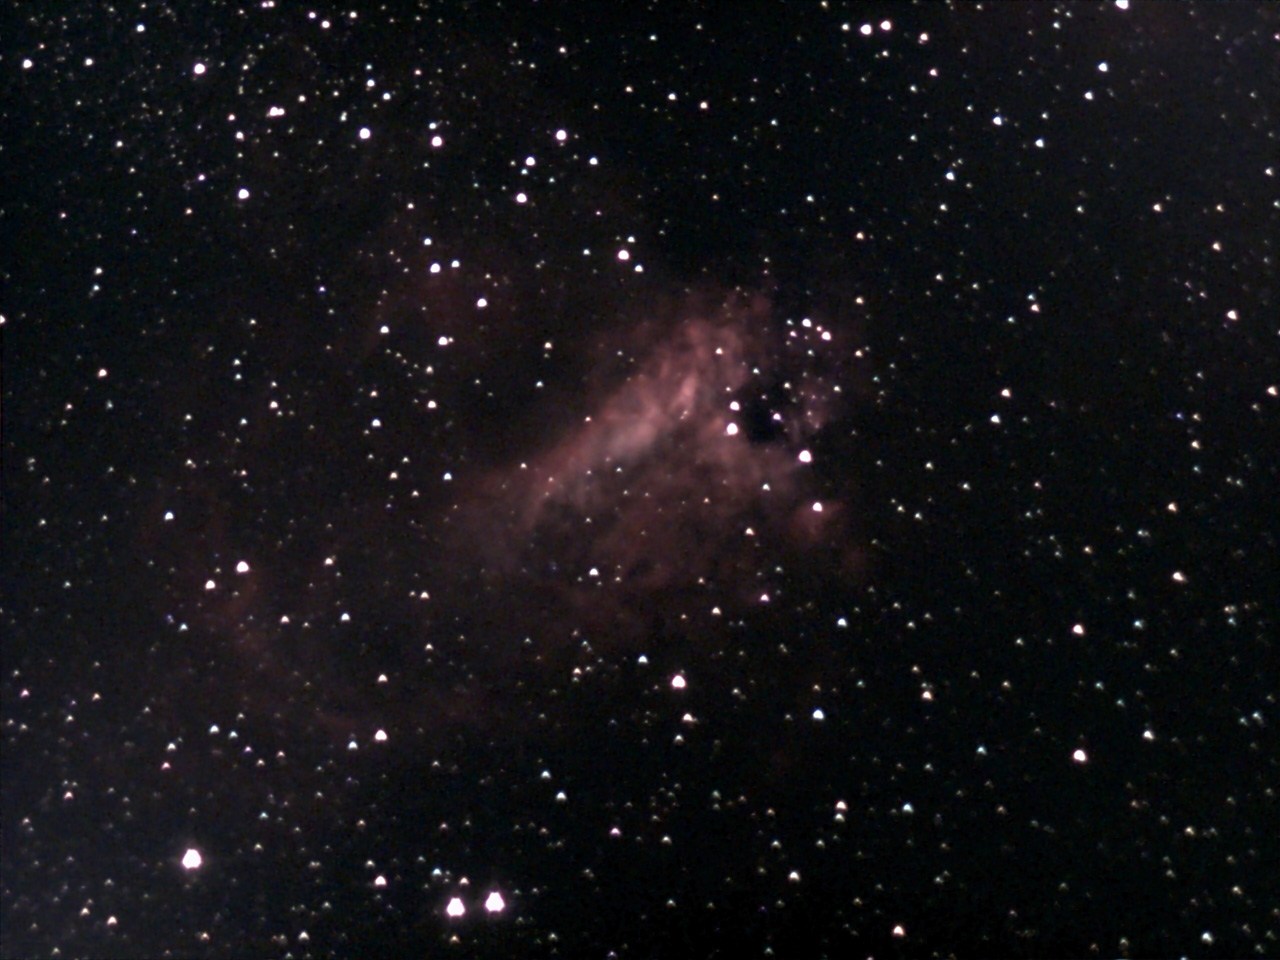
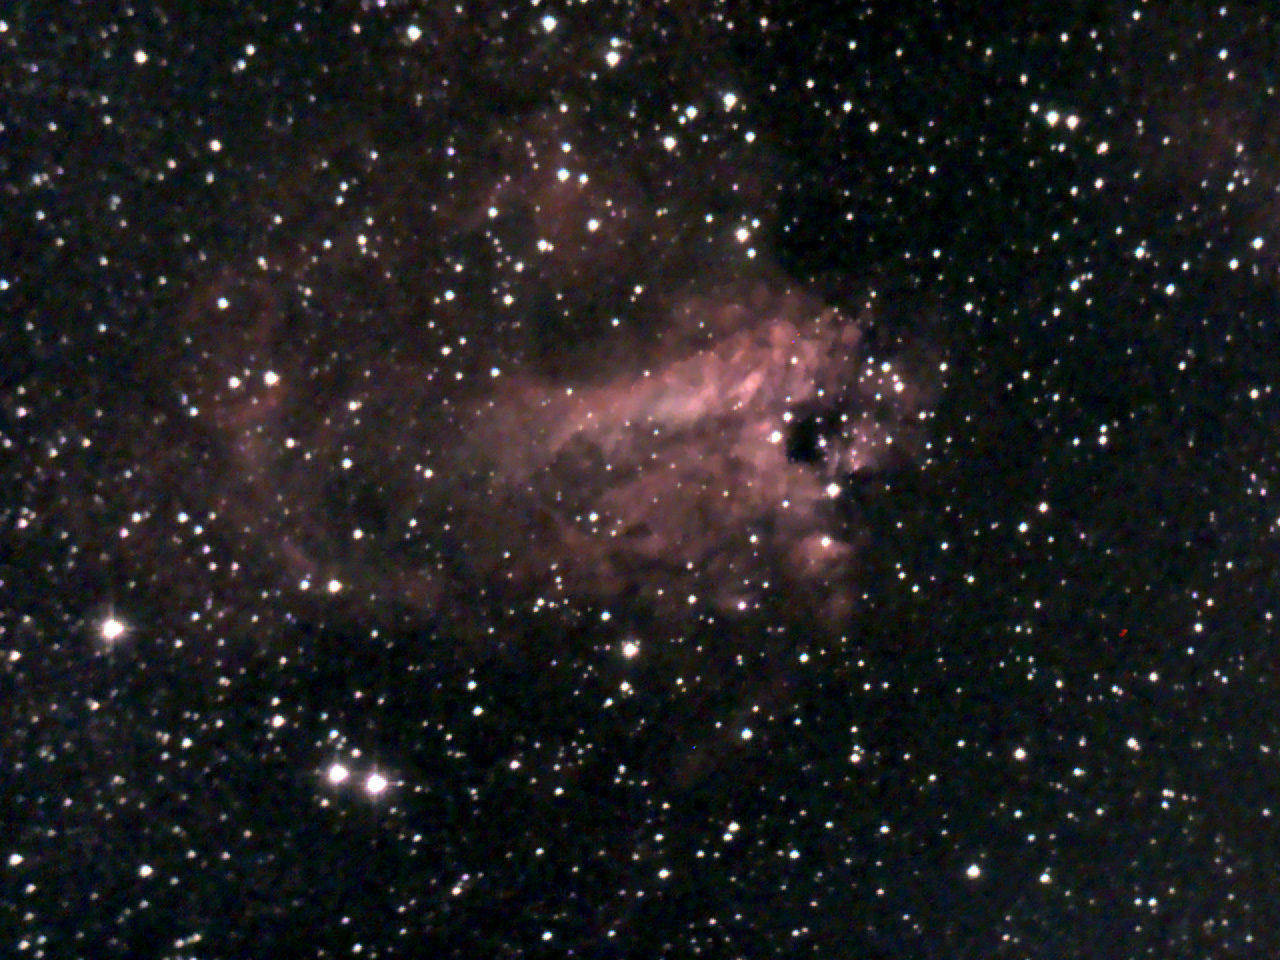
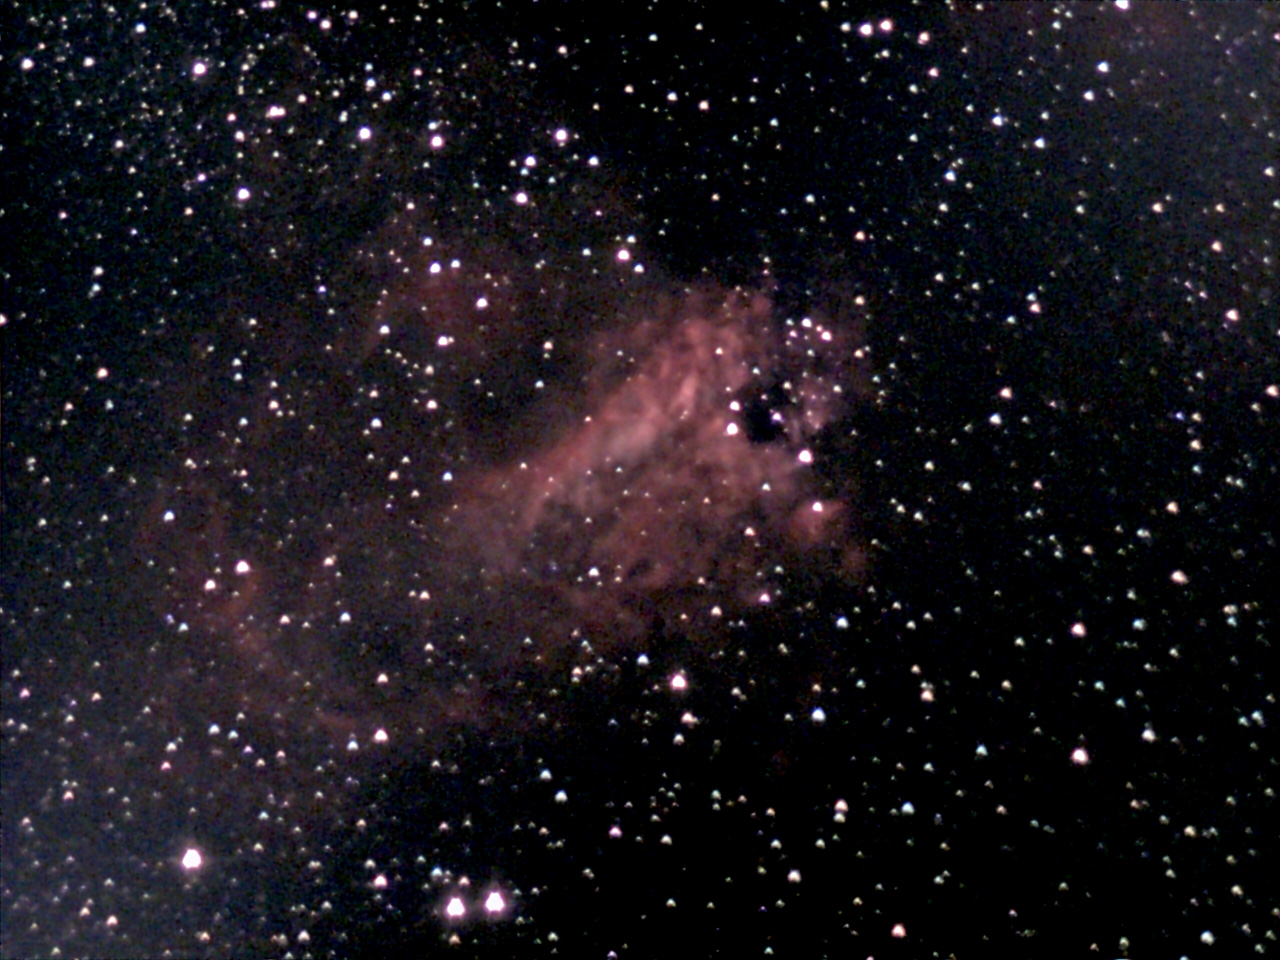
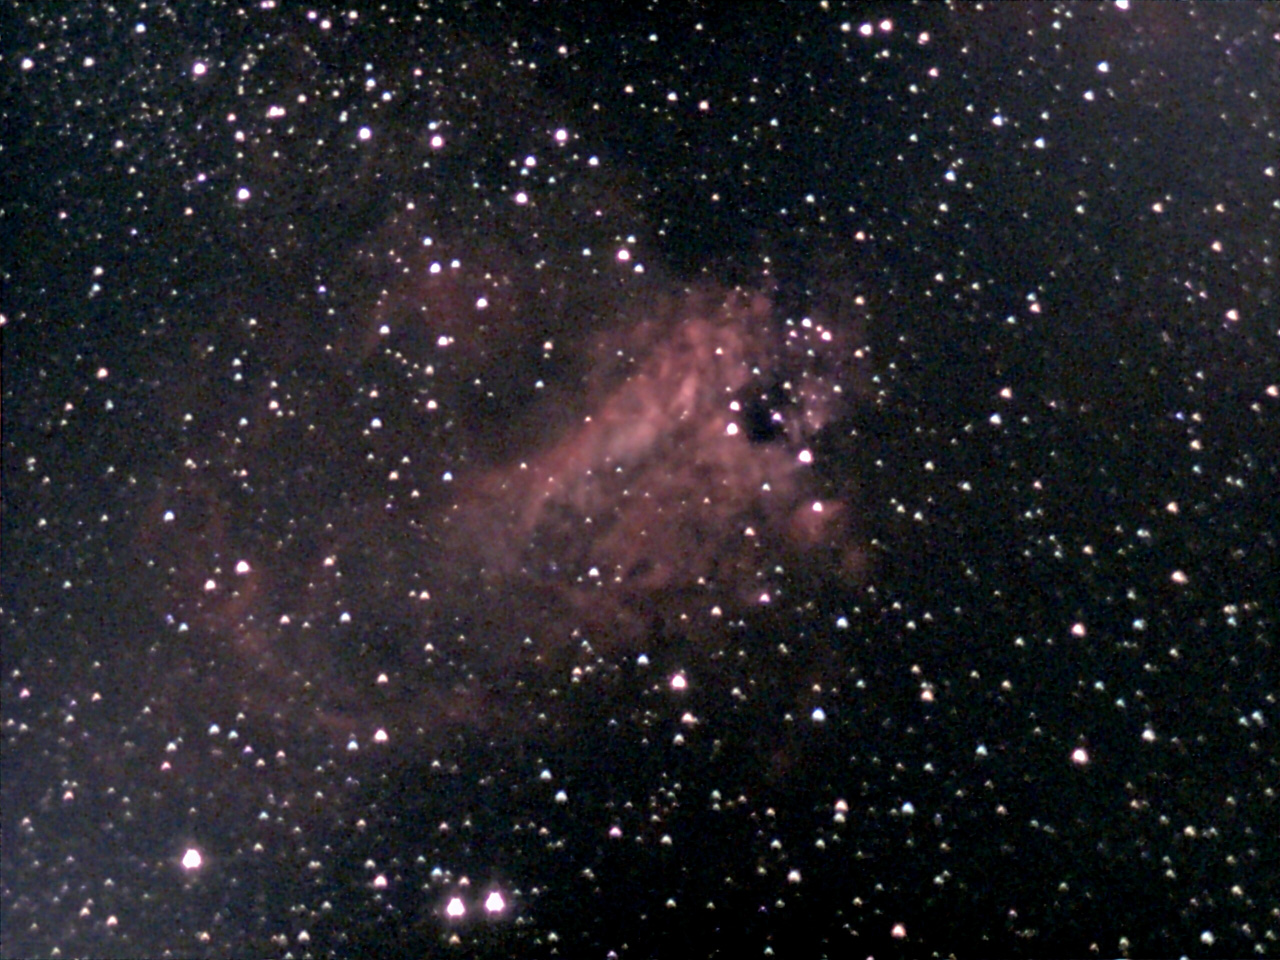
M 17 (Omega/Swan Nebula) - old processing |
M 17 (Omega/Swan Nebula) - Version 1.3 |
|
 |
 |
|
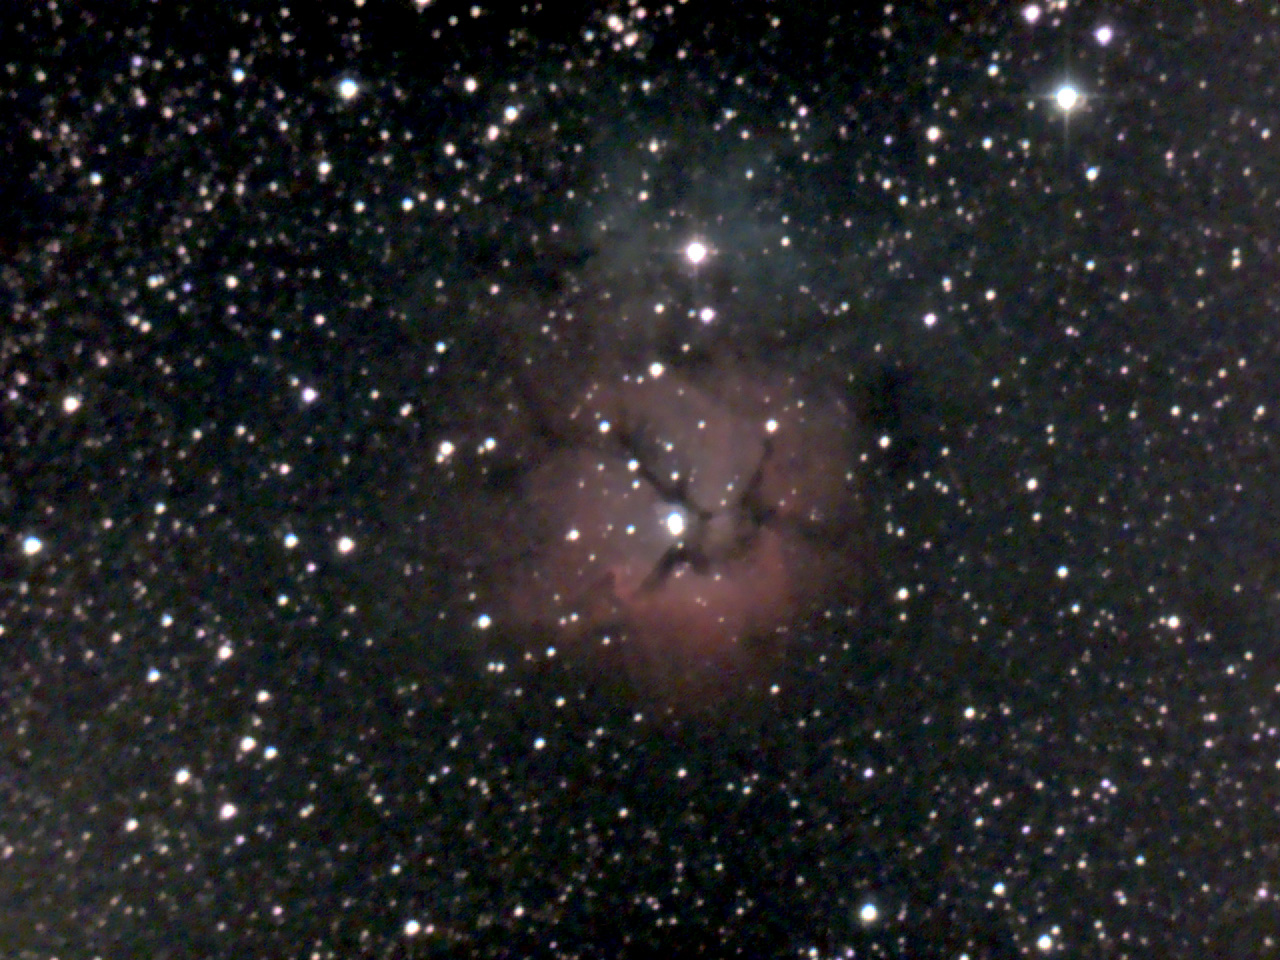
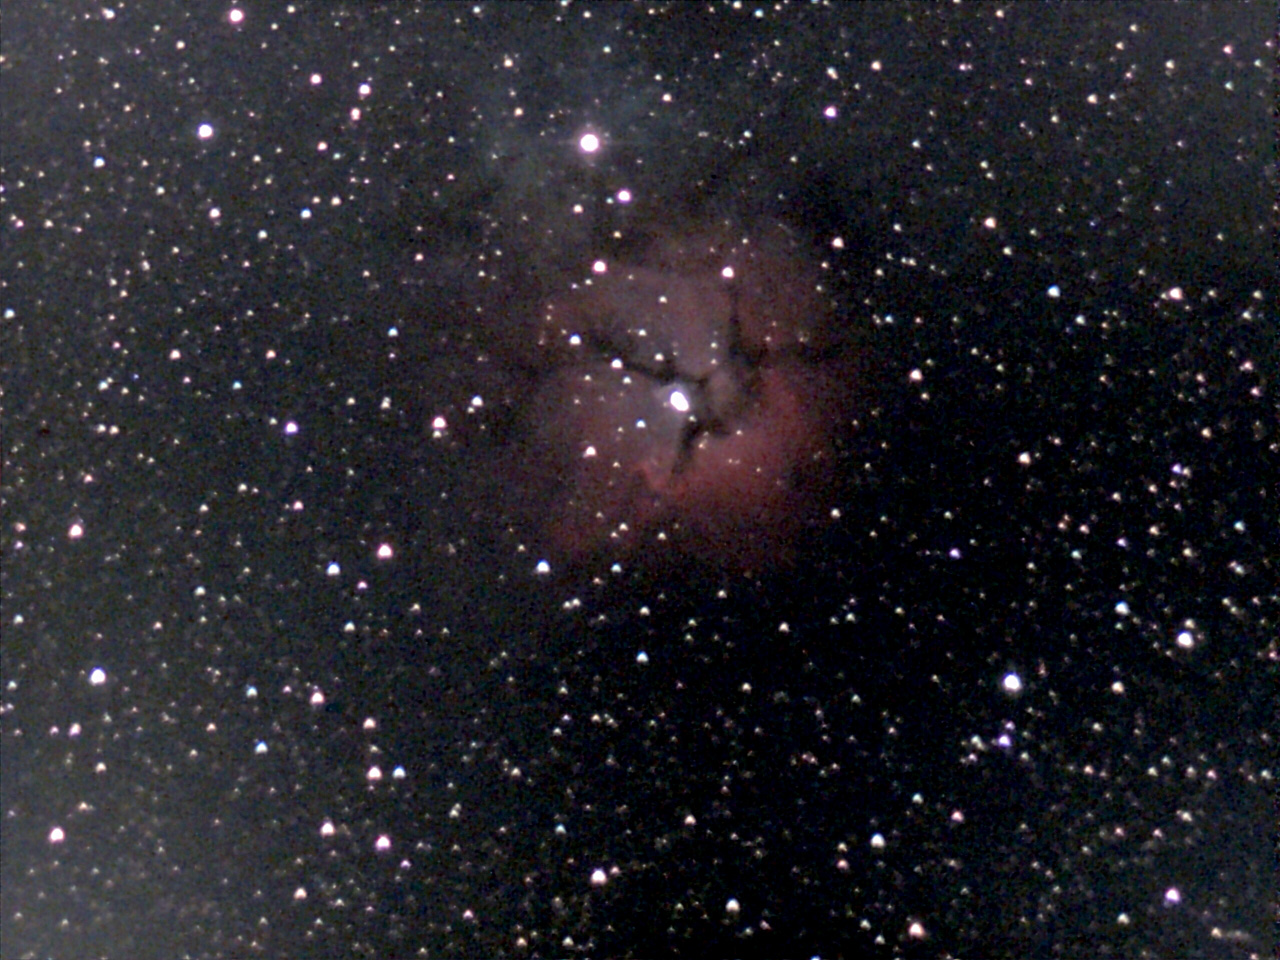
M 20 (Trifid Nebula) - old processing |
M 20 (Trifid Nebula) - Version 1.3 |
Apart from the problems of the new photos (noise, amplifier glow), the new photos look "a bit" more detailed to me and also not as "painted" as the old ones. Readers of these pages may disagree, but at least you can take a closer look at the comparison photos! After looking at these (and other) photos, I decided not to ask Unistellar for an image processing that "paints" less.
Note: Here, old and new photos have been brought to the same size, namely the sensor size, for a direct comparison. Of course, this is just one of many comparison options.
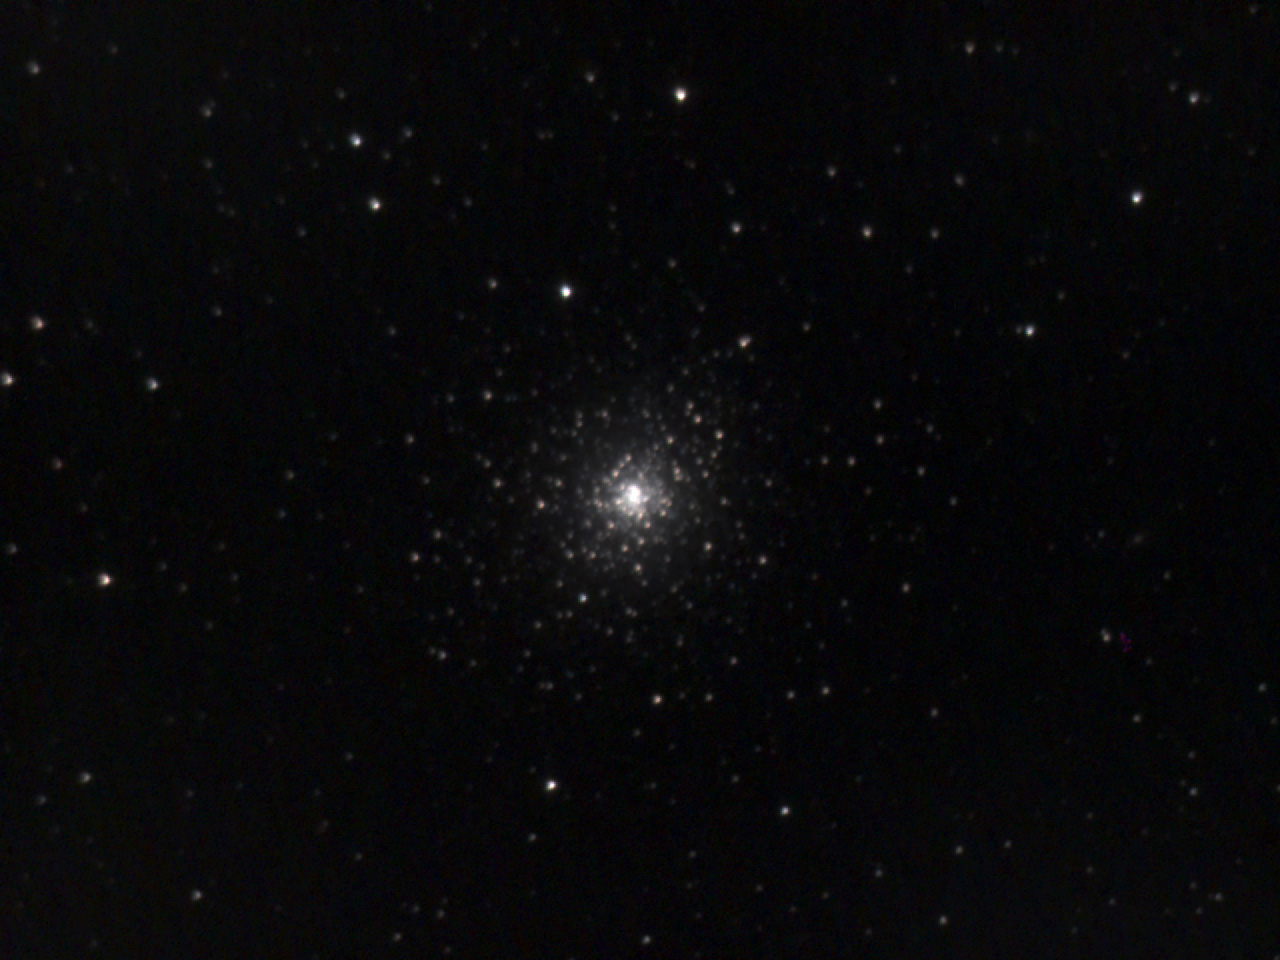
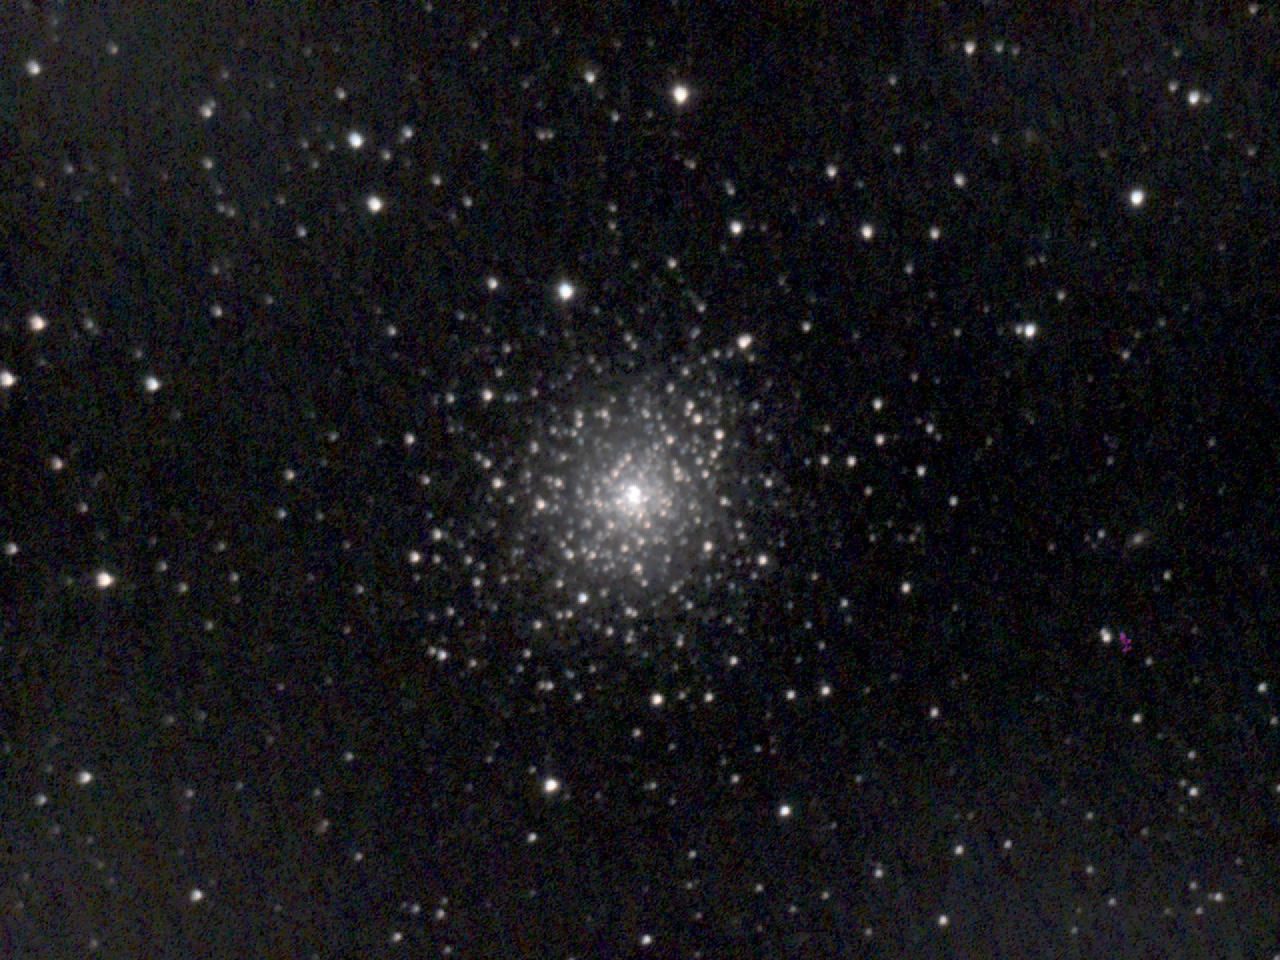
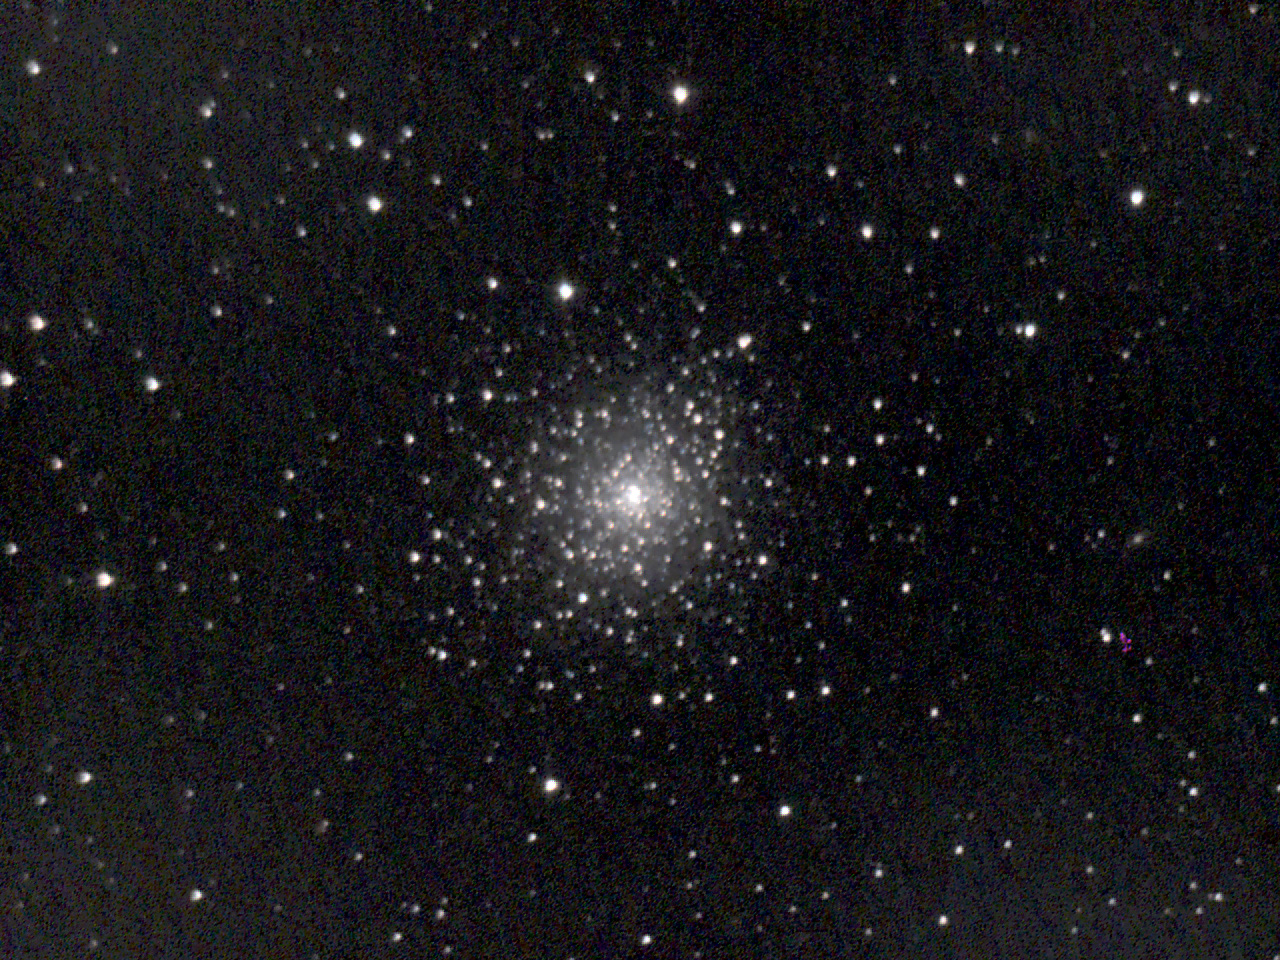
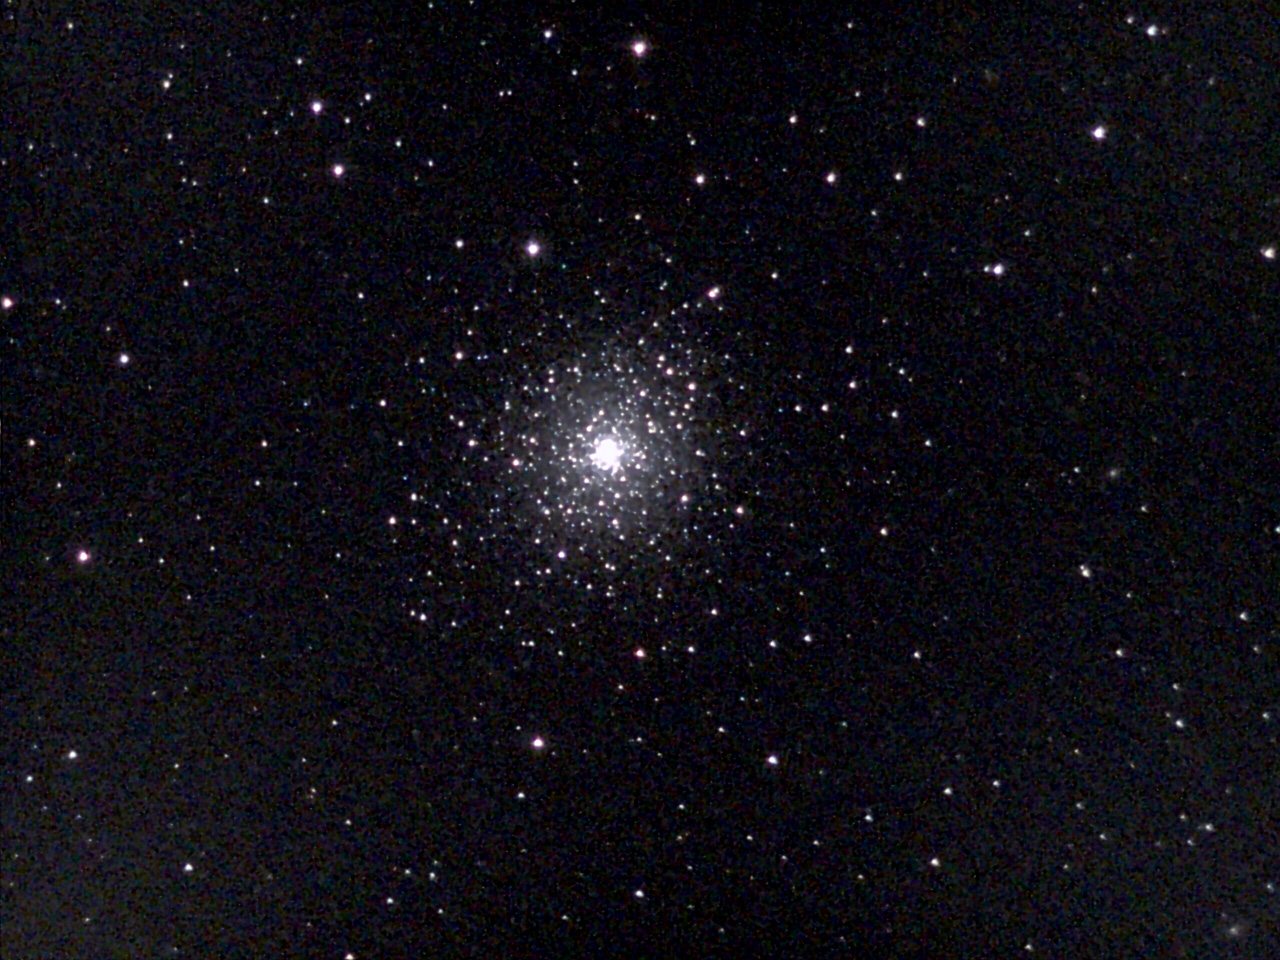
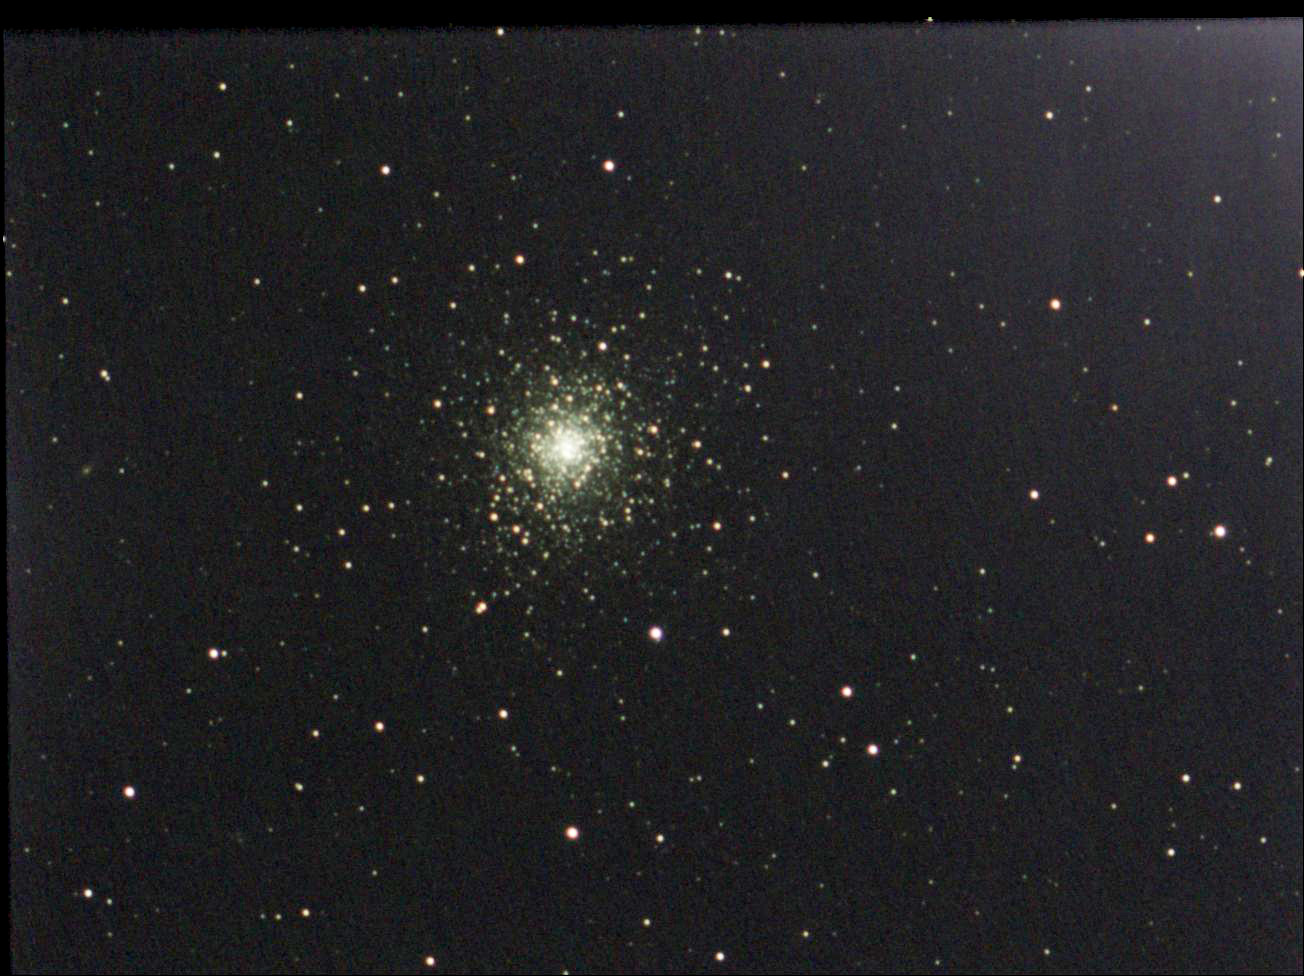
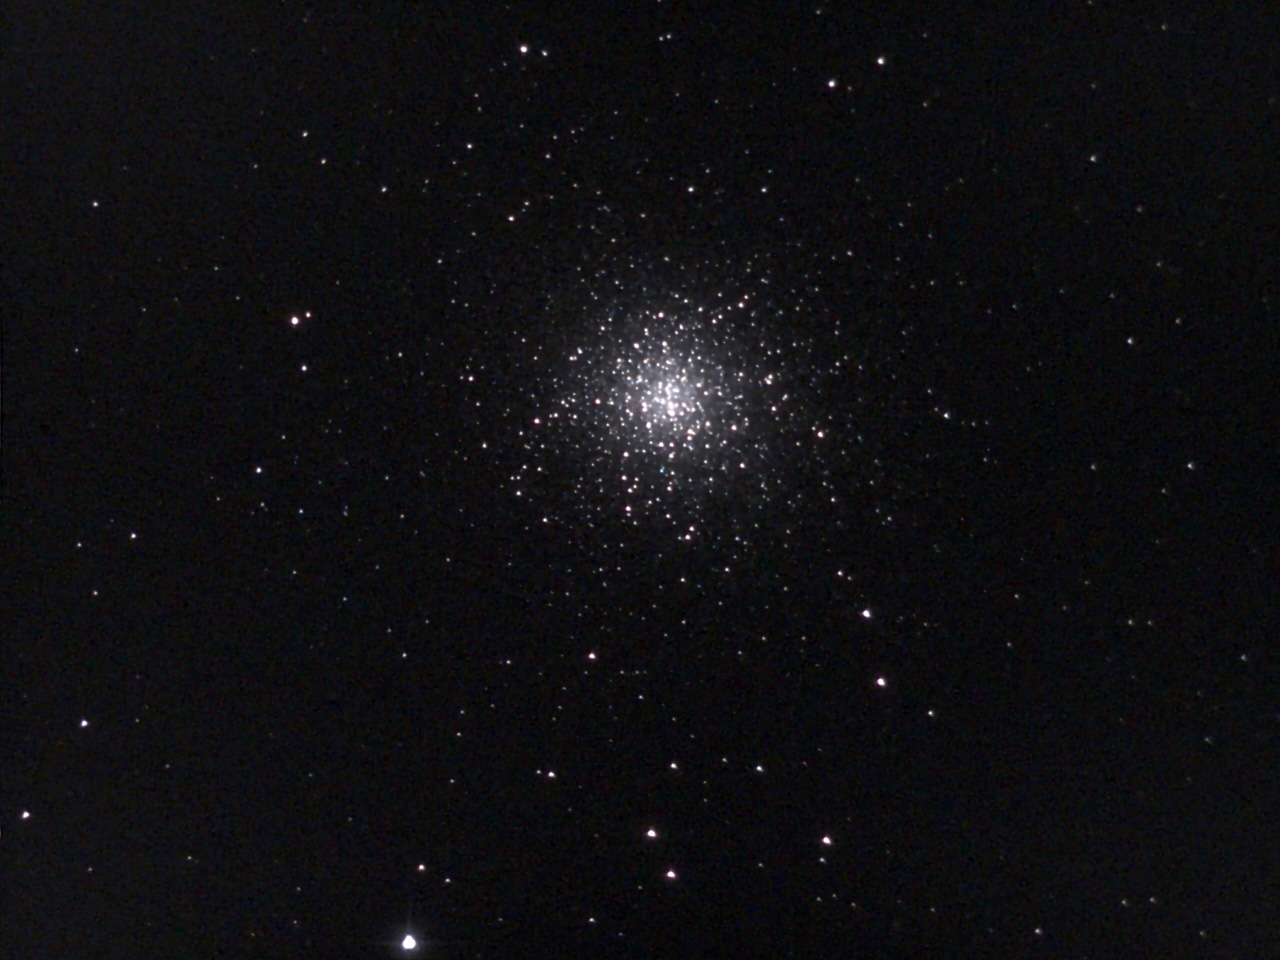
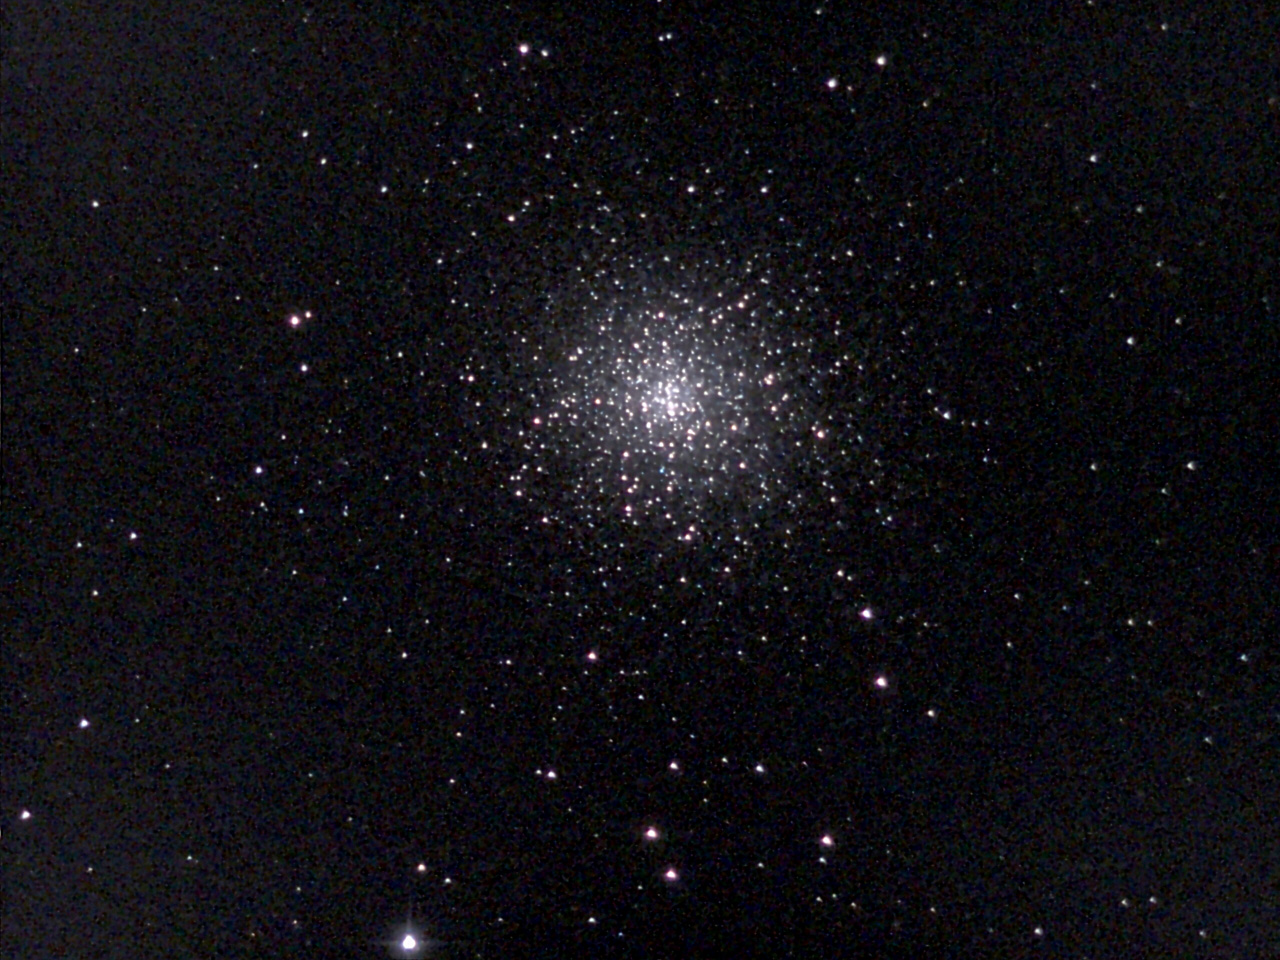
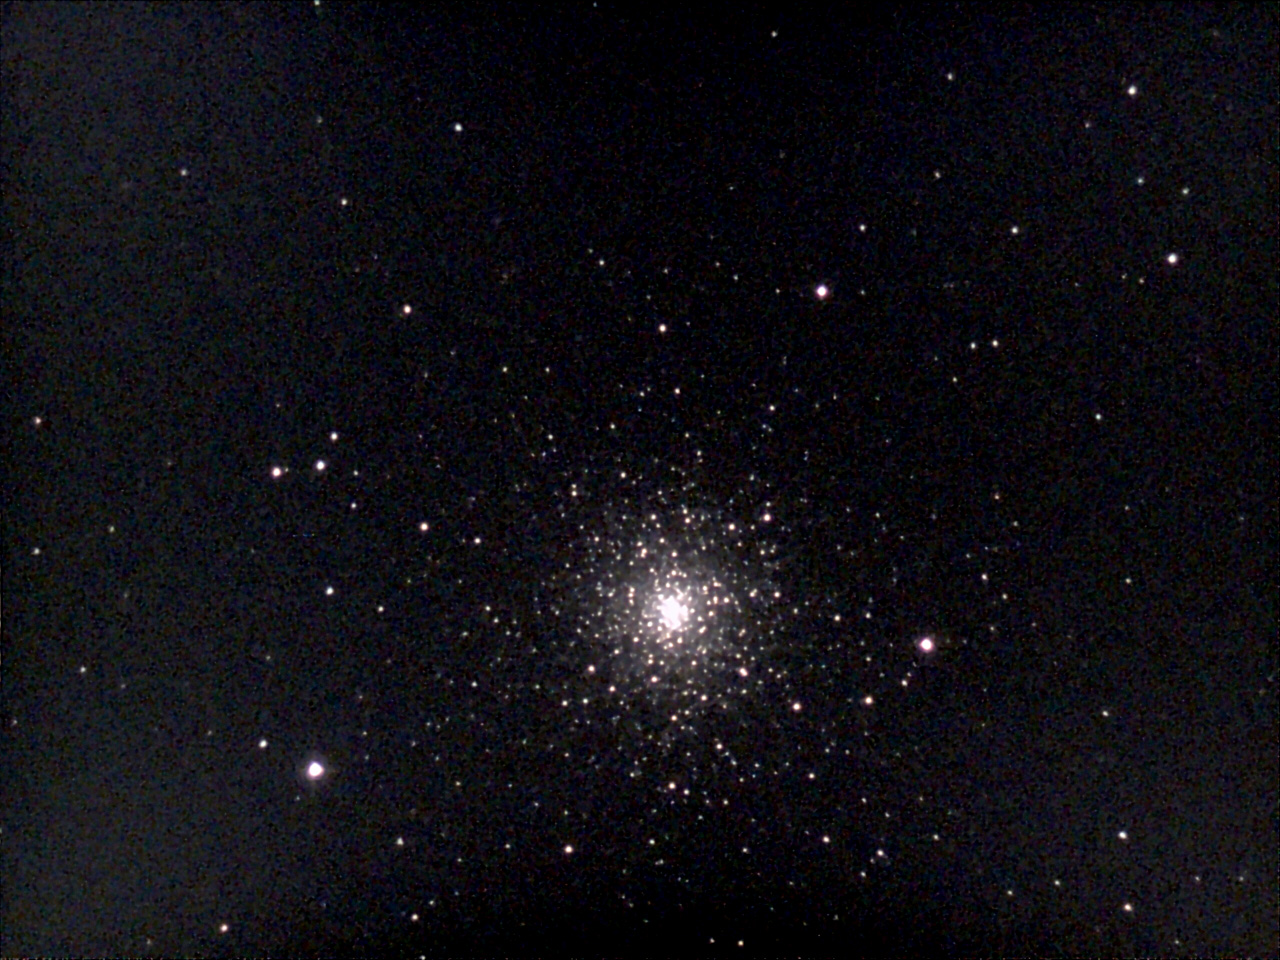
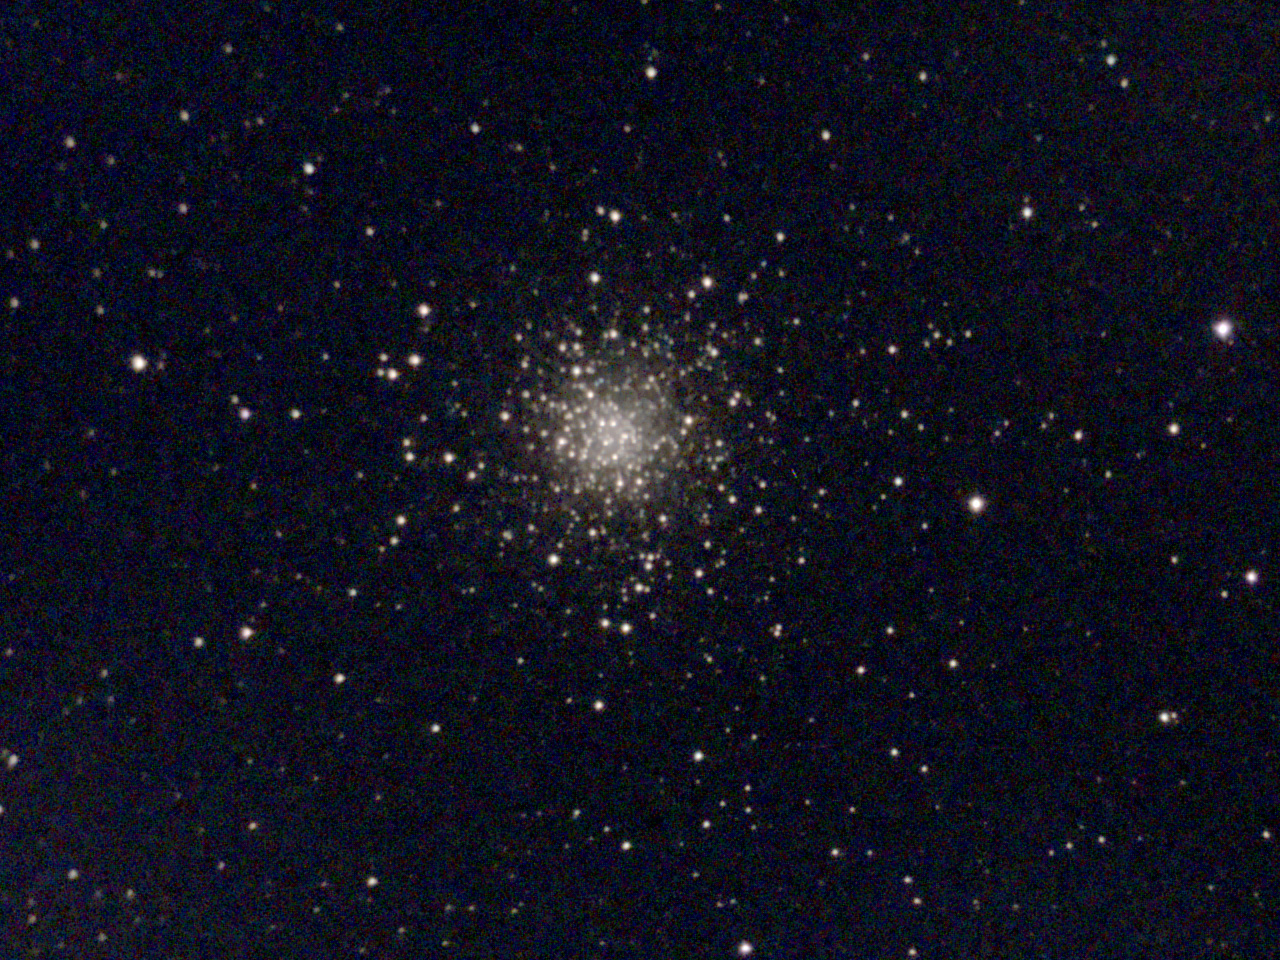
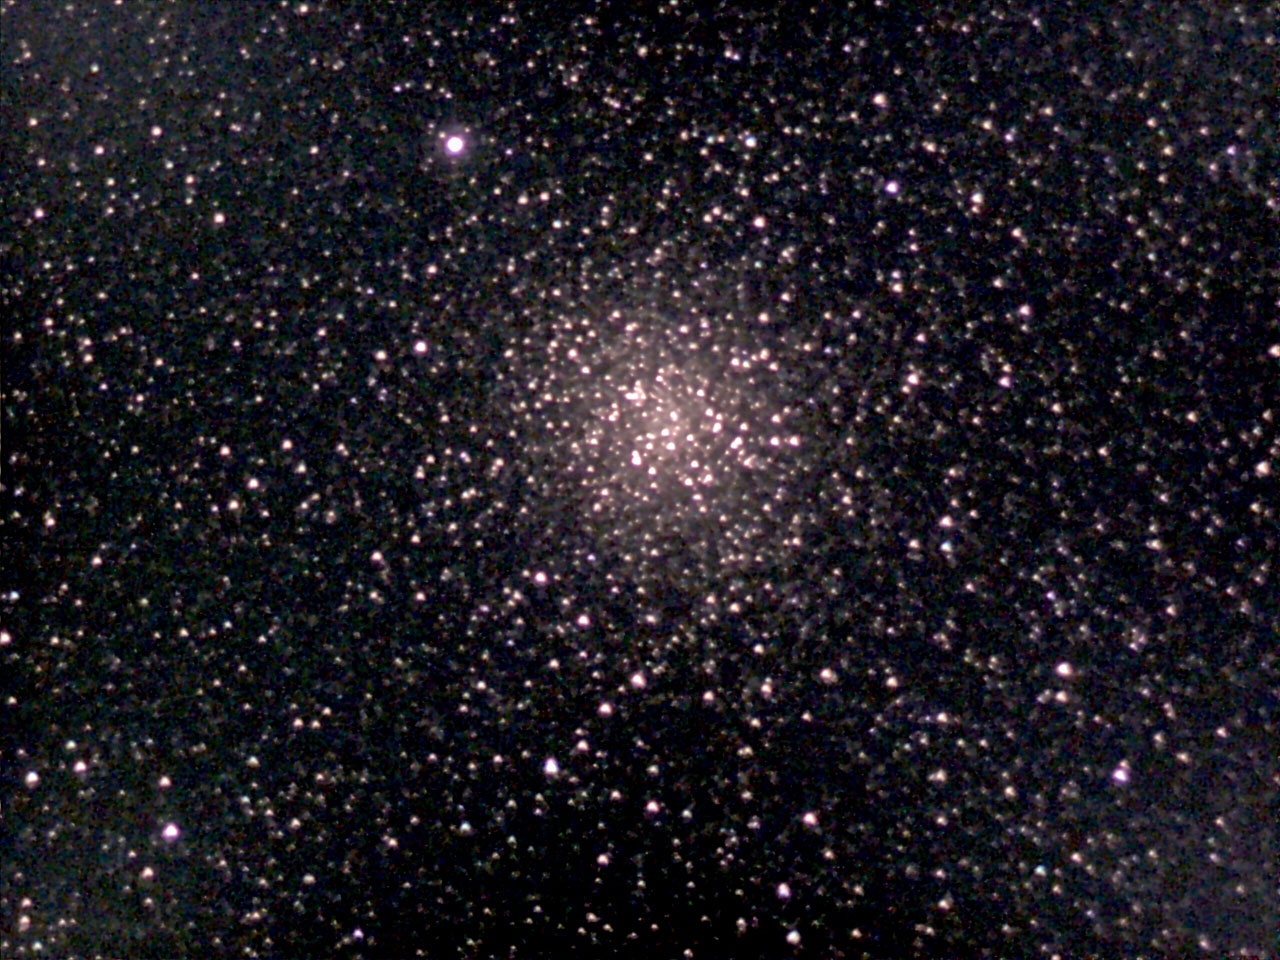
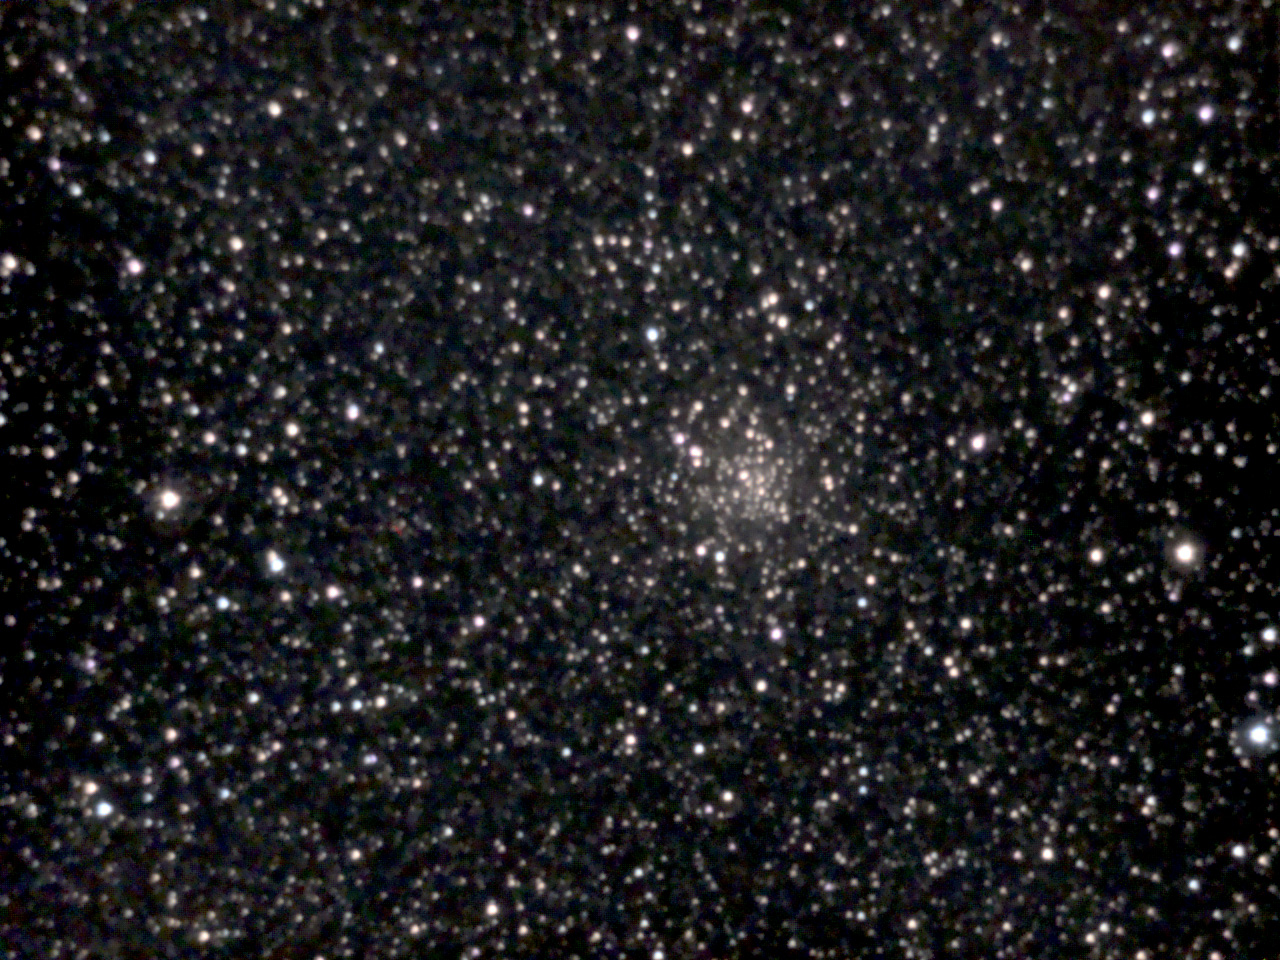
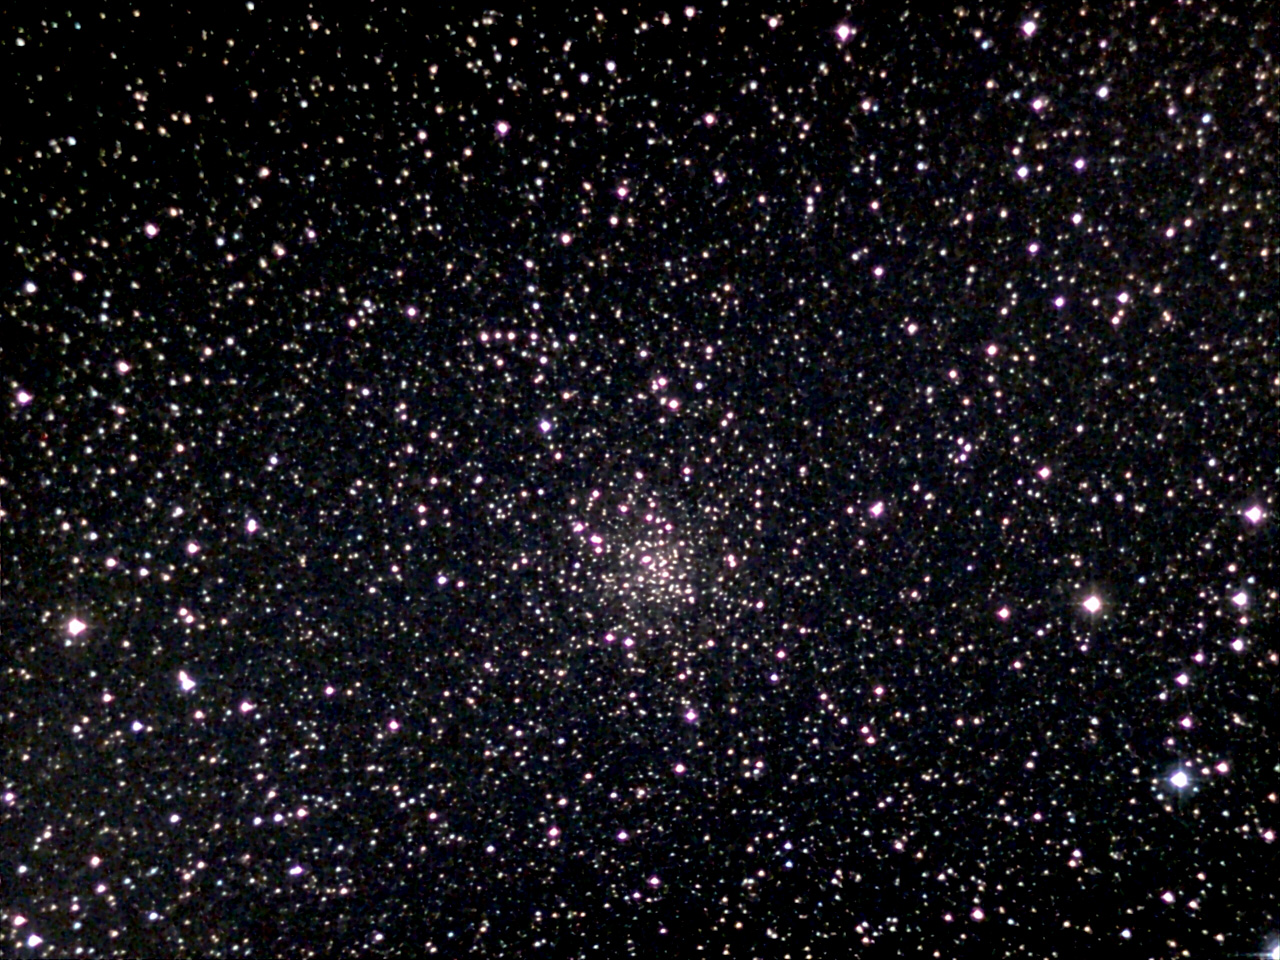
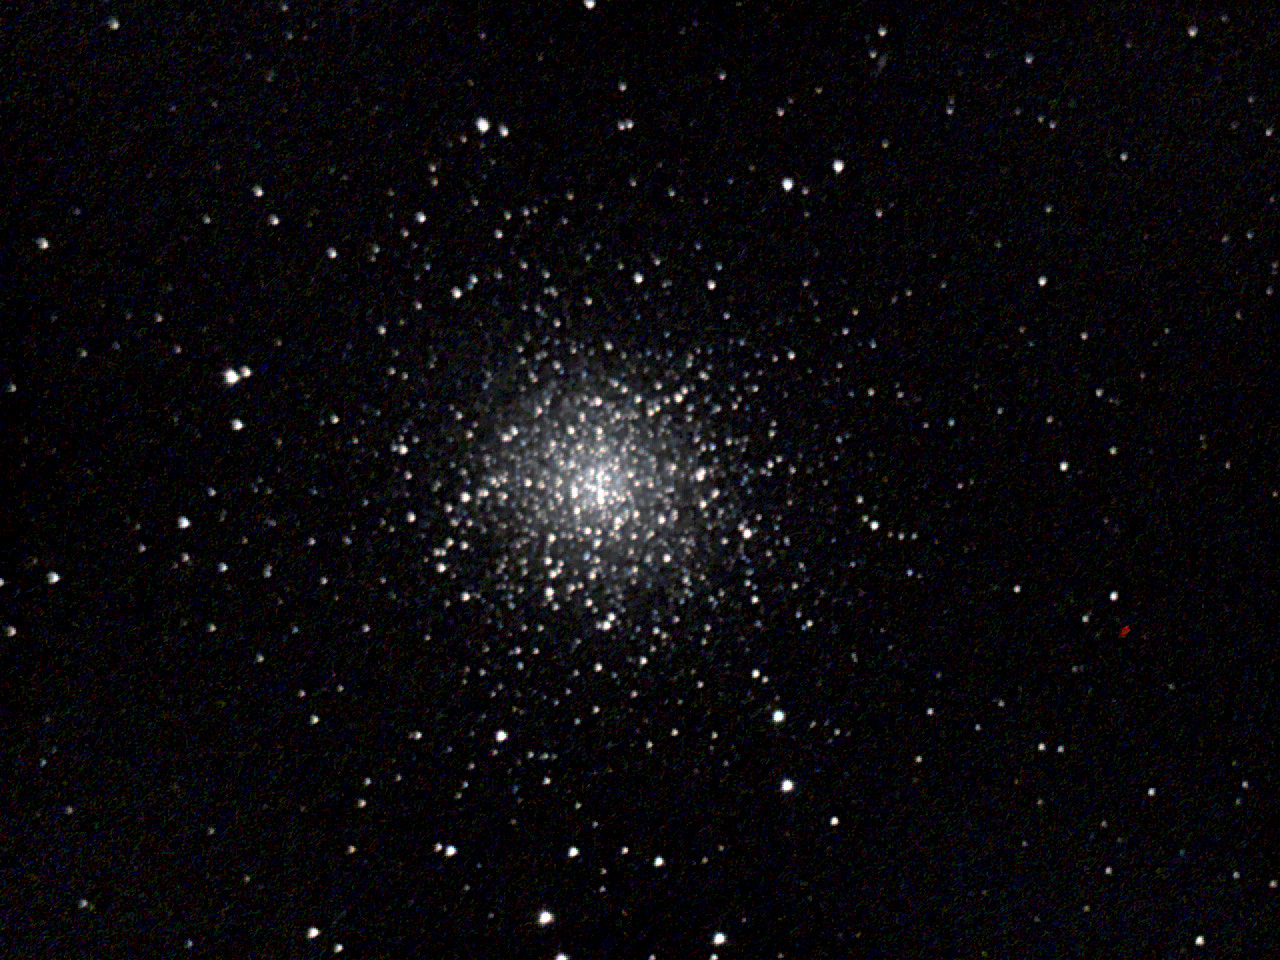
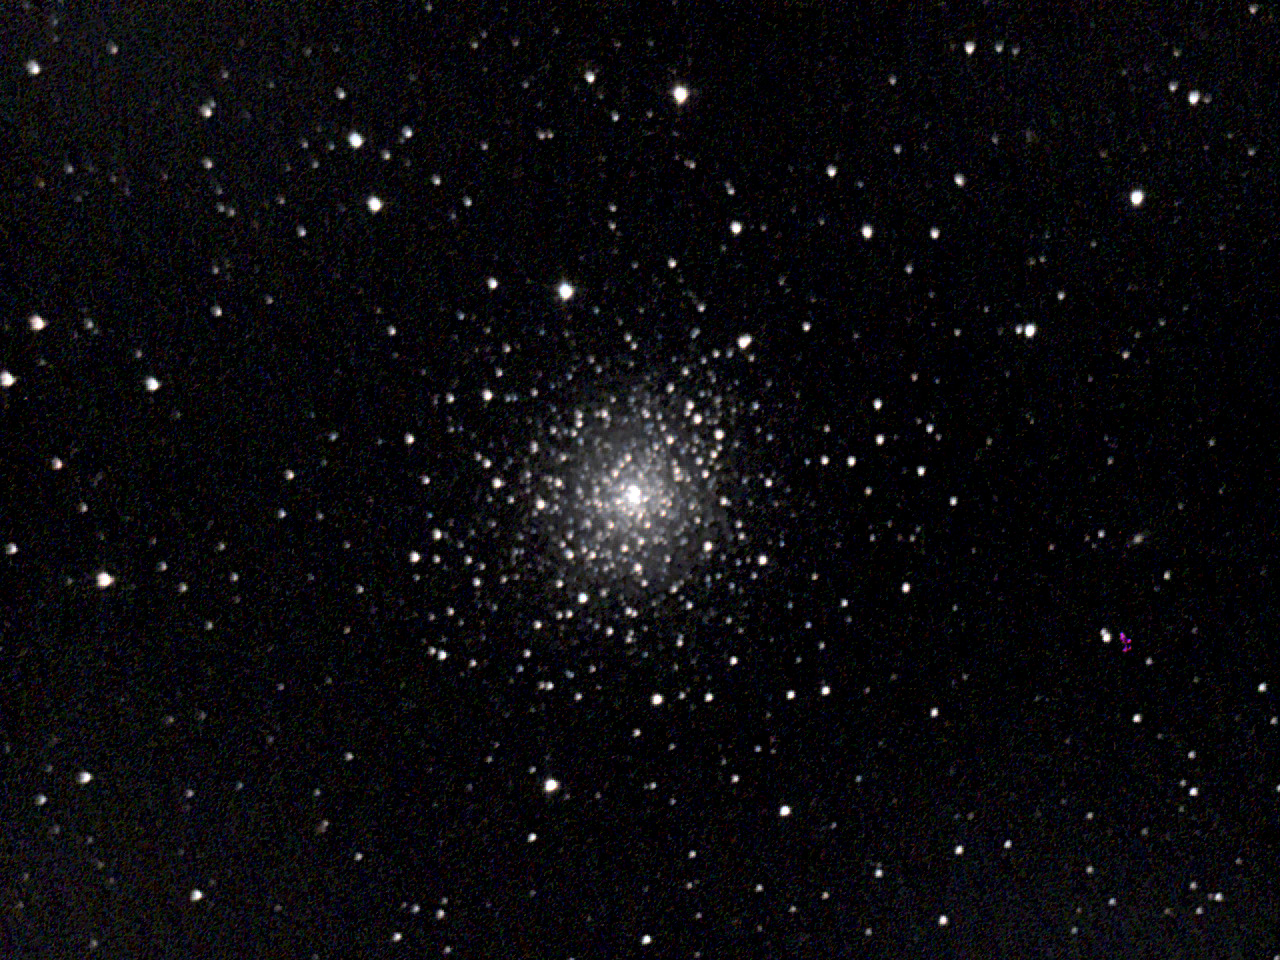
Example DSO: Comparing Globular Clusters (M 92, M 13)
Globular clusters consist of many fine stars. Here the new image processing of the new app version has also brought improvements - except for globular clusters with very bright cores (M 15, M 92), which are washed out and the details destroyed. In the following, I present an example with M 92 (with ASI224 and PS72 for comparison):
|
|
 |
||
M 92, eVscope-20200915-201415.jpg |
M 92, eVscope-20210718-222729.jpg |
M 92, PS72*, ASI224, stack |
||
|
|
 |
||
M 92, eVscope-20200915-201415as.jpg, processed and sharpened |
M 92, eVscope-20210718-222729as.jpg, processed and sharpened |
M 92, PS72*, ASI224, stack processed |
||
Old image processing |
New image processing, orignal photo downscaled to 1280 x 960 pixels |
For comparison: Photo with PS72 and ASI224 from a stack of single frames |
*) My ED refractor PS 72/432 seems to have some color issues...
With M 13, I find differences in background darkness and sharpness:
 |
 |
 |
||
M 13 - Sep 15, 2020 |
M 13 - Sep 15, 2020, processed |
M 13 - Sep 15, 2020, processed and sharpened |
||
 |
 |
 |
||
M 13 - Jul 18, 2021 |
M 13 - Jul 18, 2021, processed |
M 13 - Jul 18, 2021, processed and sharpened |
The new photos of M 13 look a little "oversharpened" compared with the old ones (look at the large versions!). They also look whiter.
"Graininess"
The first photos taken in Enhanced Vision mode looked very noisy with the old processing, since they consist of the overlay of just a few shots. The longer you stayed in Enhanced Vision mode, the less noisy and the more detailed the photos became (although there are testers according to whose opinion the photos did not improve after a certain duration in EV mode...).
Below, there are three successive stages of a photo of M 101 with the old image processing; below them are brightened-up versions to better show the noise (open the large versions!):
 |
 |
 |
||
M 101 - 20210306-215743 |
M 101 - 20210306-215831 |
M 101 - 20210306-220137 |
||
 |
 |
 |
||
M 101 - 20210306-215743, made brighter |
M 101 - 20210306-215831, made brighter |
M 101 - 20210306-220137, made brighter |
With the new image processing this is also true, but the visual impression is a bit different: Initially, the photos now seem to have a certain "graininess", which decreases over time, but according to my impression does not vanish completely, especially if you edit the photos afterwards (by increasing the contrast, for example). I can only guess where this "graininess" comes from, and suspect that upscaling the photos is the cause.
Below, there are six successive stages of a photo of M 101 with the new image processing; below them are brightened-up versions to show the noise better (open the large versions!):
 |
 |
 |
||
M 101 - 20210718-223222 |
M 101 - 210718-223246 |
M 101 - 20210718-223309 |
||
 |
 |
 |
||
M 101 - 20210718-223222, made brighter |
M 101 - 210718-223246, made brighter |
M 101 - 20210718-223309, made brighter |
||
 |
 |
 |
||
M 101 - 20210718-223349 |
M 101 - 20210718-223429 |
M 101 - 20210718-223536 |
||
 |
 |
 |
||
M 101 - 20210718-223349, made brighter |
M 101 - 20210718-223429, made brighter |
M 101 - 20210718-223536, made brighter |
In the following, I present sections with 1:1 pixels of the bright versions:
 |
 |
 |
||
M 101 - 20210306-215743 (old), made brighter, section |
M 101 - 20210306-215831 (old), made brighter, section |
M 101 - 20210306-220137 (old), made brighter, section |
||
 |
 |
 |
||
M 101 - 20210718-223222 (new), made brighter, section |
M 101 - 210718-223246 (new), made brighter, section |
M 101 - 20210718-223309 (new), made brighter, section |
||
 |
 |
 |
||
M 101 - 20210718-223349 (new), made brighter, section |
M 101 - 20210718-223429 (new), made brighter, section |
M 101 - 20210718-223536 (new), made brighter, section |
Less Aggressive Image Processing ("Painting")?
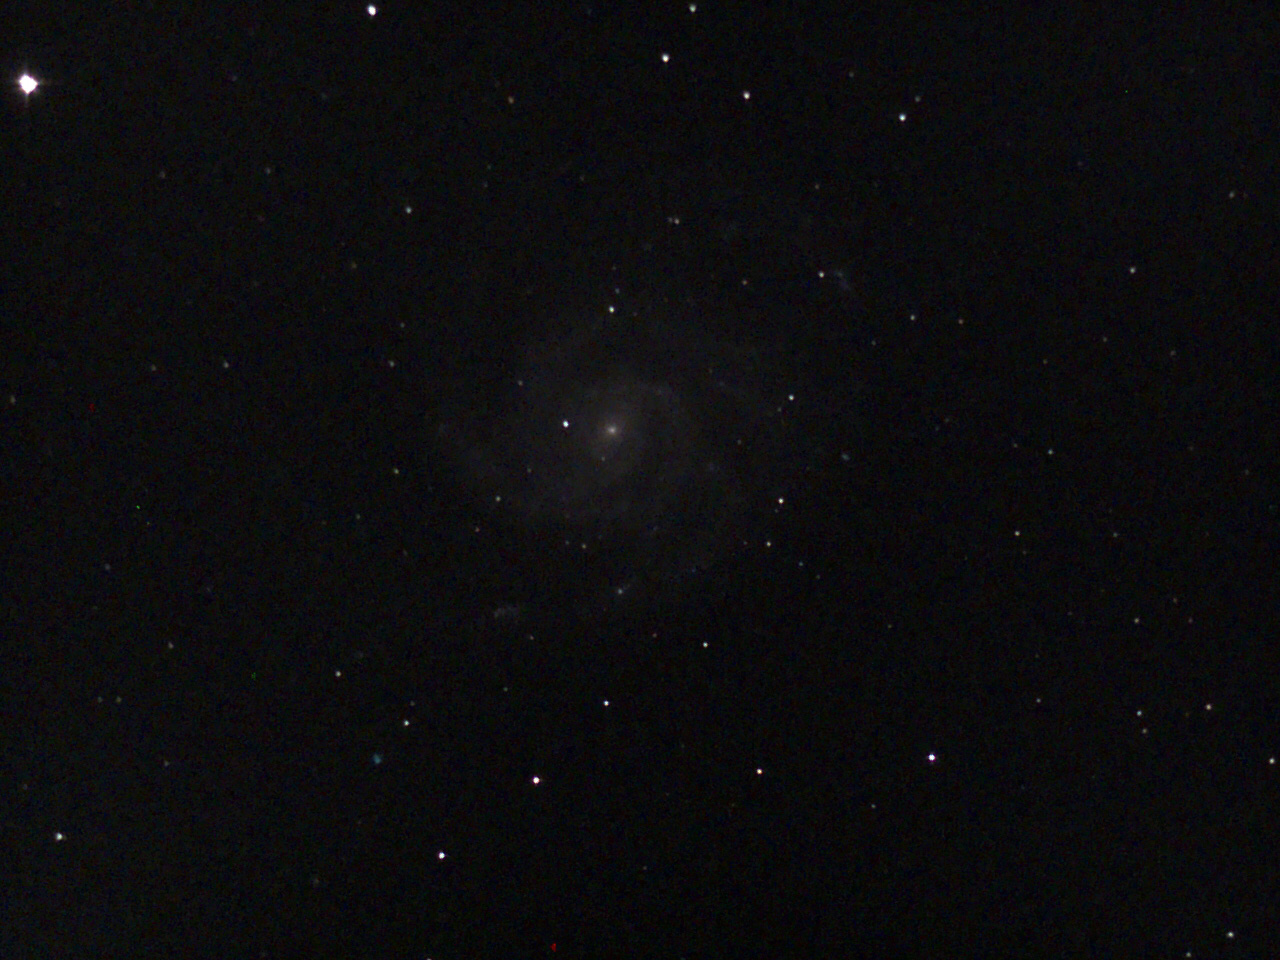
Especially when looking at photos of large nebulae or galaxies, I was not the only one who noticed that the image processing of the eVscope is quite aggressive and "brushes away" details - the photos look a bit like watercolor paintings. This is also noticeable when comparing eVscope photos to photos taken with other astronomy cameras. The most direct comparison is with the ASI224MC camnera, which uses the same sensor as the eVscope, albeit in a different mode.
Since I am currently (spring/summer 2021) unable to observe my favorite object for such tests, the Orion Nebula M 42, I made my first comparisons between the old and the new image processing using M 51 (Whirlpool Galaxy). My first impression here is that the new image processing does not "paint" quite as much as the old one (but not everyone was able to confirm this). Below, I show examples that can be used to check this assumption. I also show M 51 photos taken with the ASI224MC for comparison.
 |
 |
 |
||
M 51 - Mar 6, 2021, processed |
M 51 - 30.5.2021, processed with Polarr |
M 51, PS72*, ASI224, processed |
||
Old image processing |
New image processing, orignal photo downscaled to 1280 x 960 pixels |
For comparison: Photo with PS72 and ASI224 from a stack of single frames |
*) My ED refractor PS 72/432 seems to have some color issues... It also needs a UV/IR cut filter, which was missing.
Similar to globular clusters, the core of galaxies can be more washed out with the new image processing (not visible here). Please inspect the large versions (click on the previews) to see the differences in the image processing! The old processing looks a little like "phantasy" to me...
Old and New Image Processing - Image Comparisons
Now, I present a collection of DSO examples that contrasts the old image processing with the new one. Here the focus is on checking which and how certain DSO profit from the new image processing. Some of the examples are already shown above, so there is some redundancy involved...
Please click the previews for the larger versions (1280 x 960 pixels) for an easier comparison!
Comparison Examples
Old Processing (< Version 1.3) |
Version 1.3 and Newer |
|
 |
 |
|
M 3 - May 15, 2020, processed |
M 3 - Sep 8, 2021, processed |
|
|
|
|
M 8 (Lagoon Nebula) - Aug 23, 2020, processed |
M 8 (Lagoon Nebula) Jul 17, 2021, processed |
|
 |
 |
|
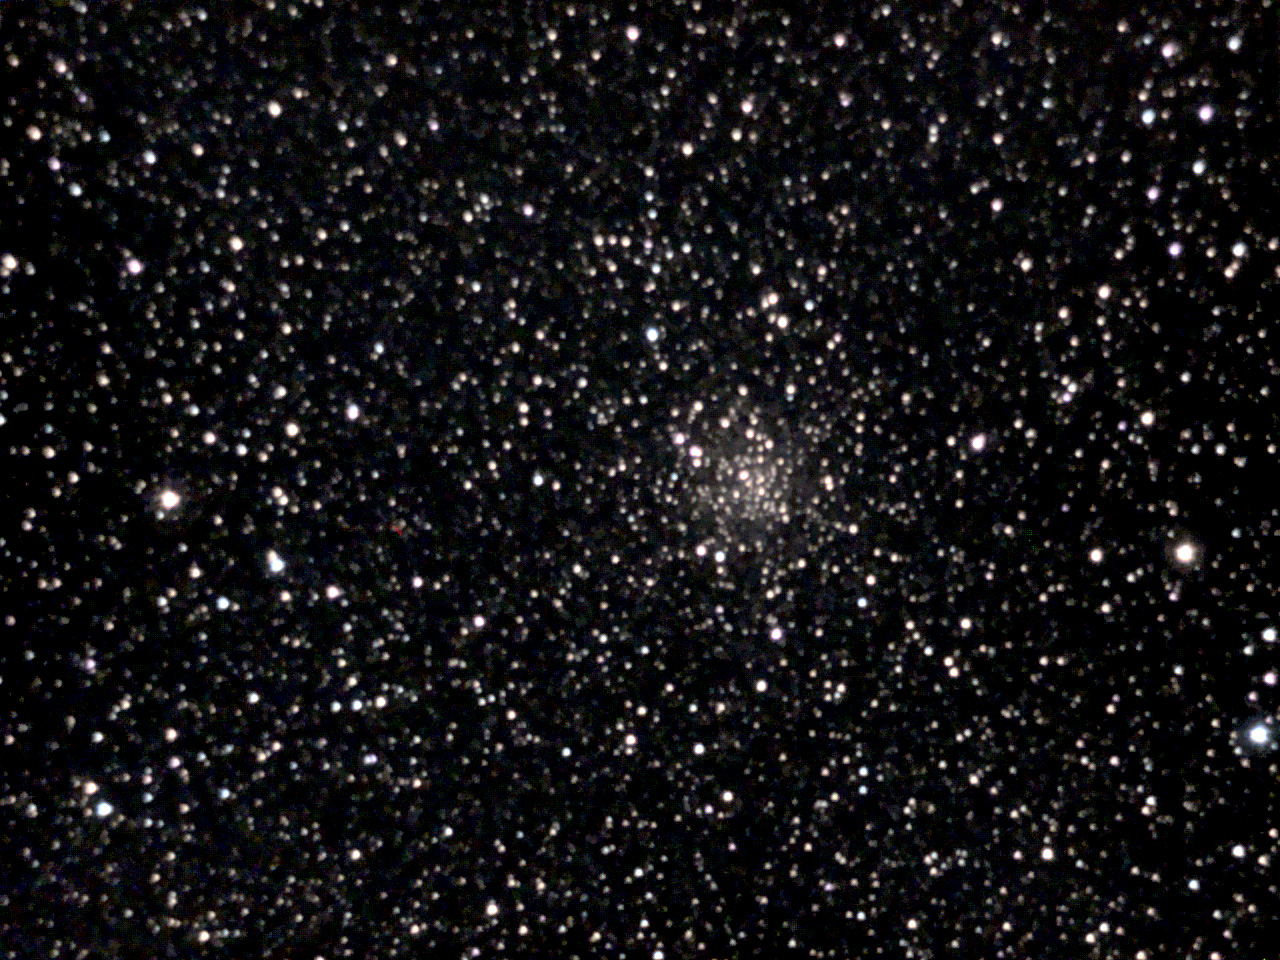
M 10 - May 29, 2020, processed |
M 10 - Jul, 17, 2021, processed |
|
|
|
|
M 13 - Sep 15, 2020, processed |
M 13 - Jul 18, 2021, processed |
|
|
|
|
M 16 (Eagle Nebula) - Aug 23, 2020, processed |
M 16 (Eagle Nebula) - Jul 17, 2021, processed |
|
|
|
|
M 17 (Omega /Swan Nebula) - Aug 23, 2020, processed |
M 17 (Omega /Swan Nebula) - Jul 17, 2021, processed |
|
|
|
|
M 20 (Trifid Nebula) - Aug 23, 2020, processed |
M 20 (Trifid Nebula) - Jul 17, 2021, processed |
|
 |
 |
|
M 22 - Aug 9, 2020, processed |
M 22 - Jul 18, 2021, processed |
|
 |
 |
|
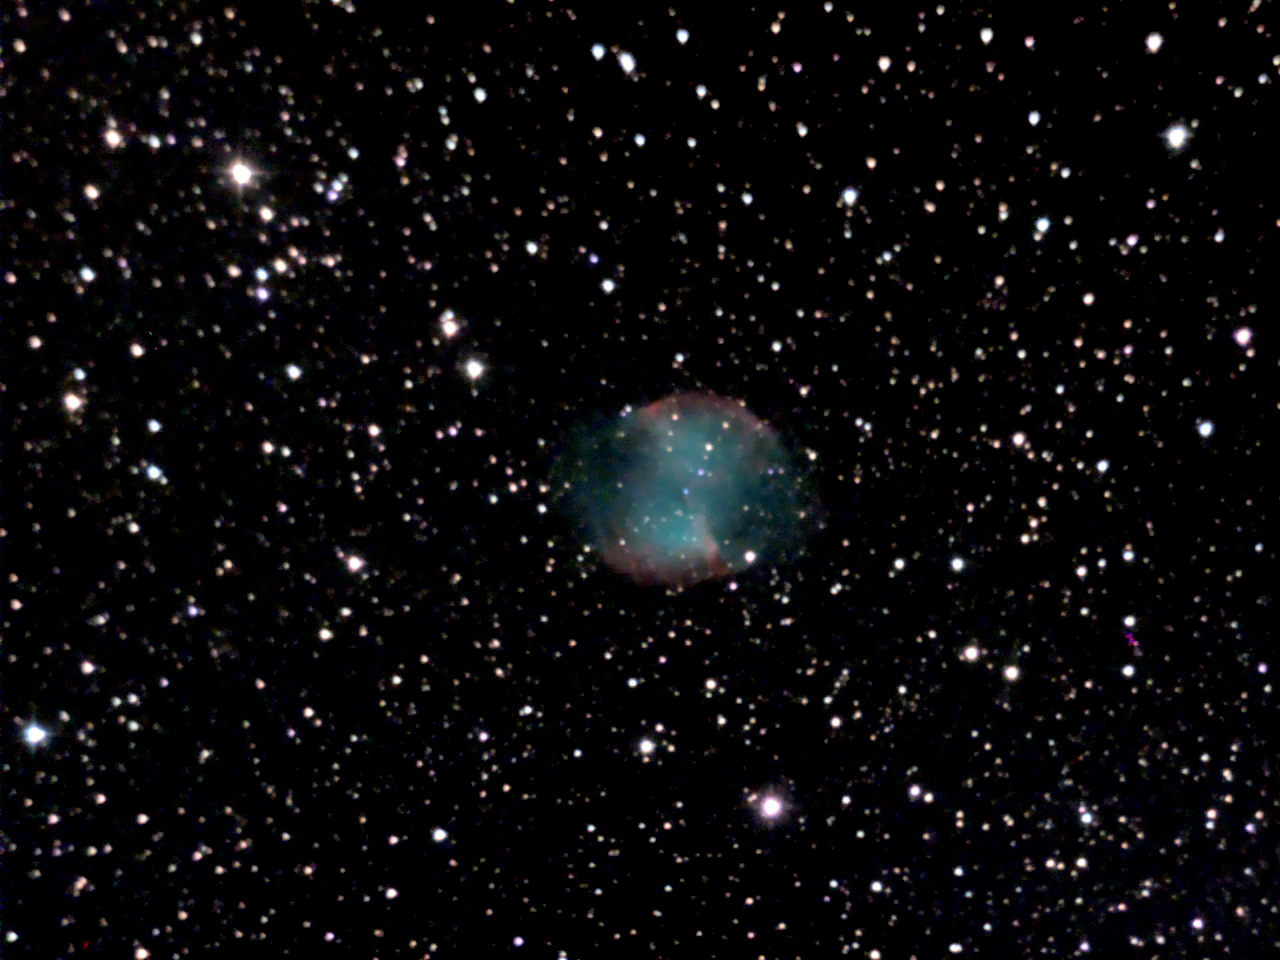
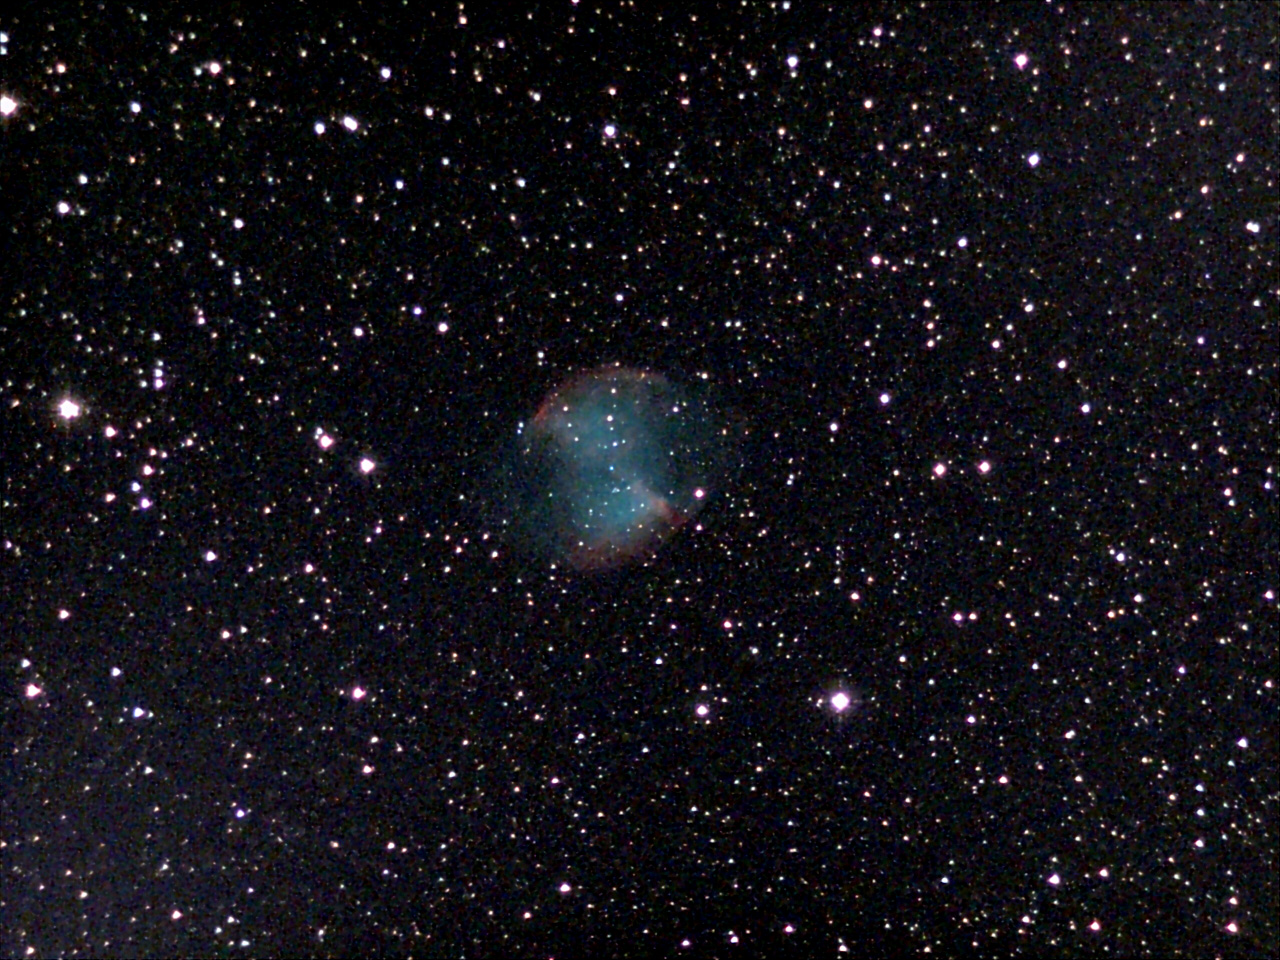
M 27 - Nov 2, 2020, processed |
M 27 - Oct 16, 2021, processed |
|
 |
 |
|
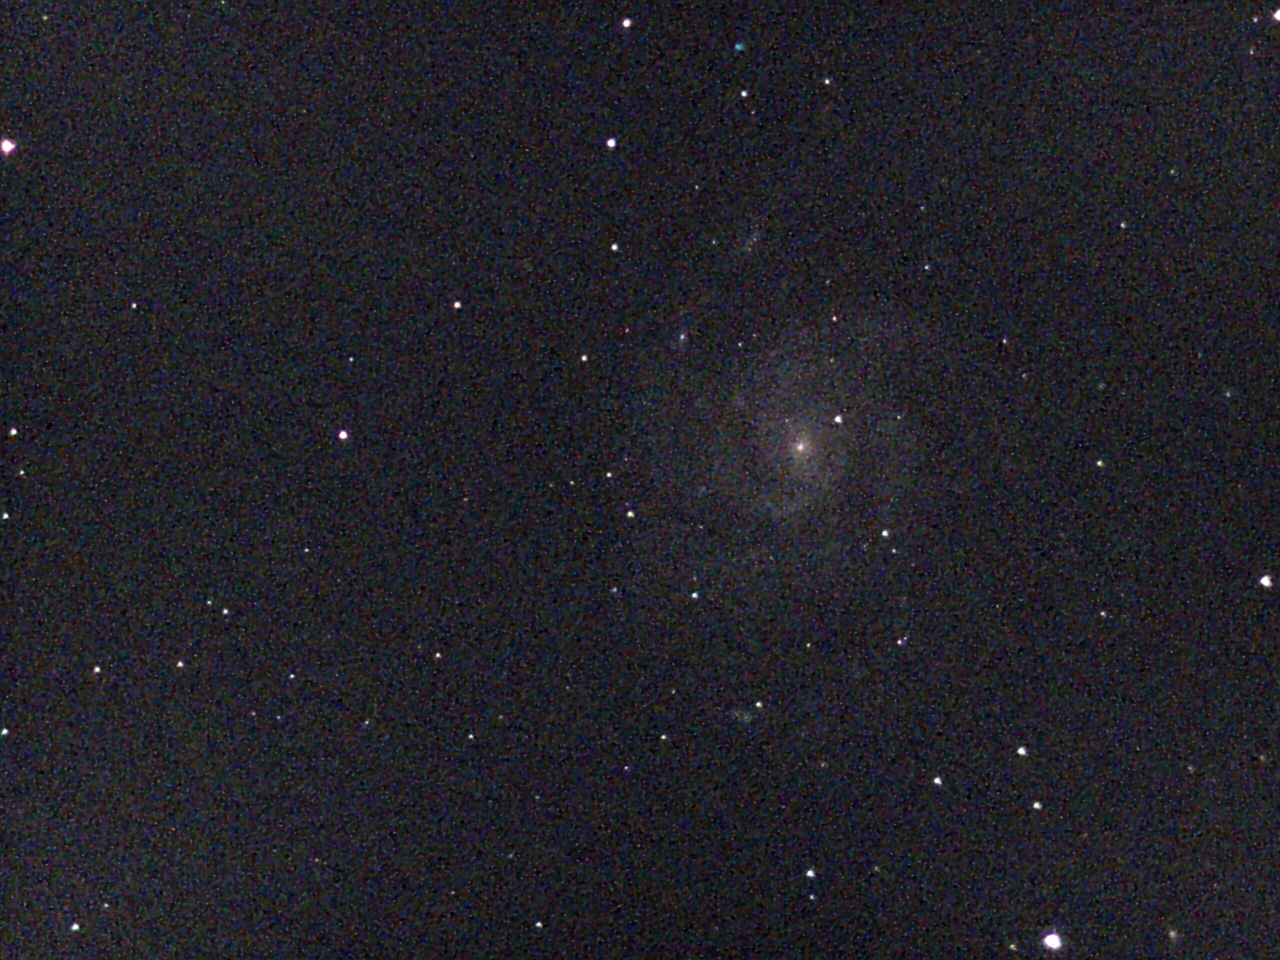
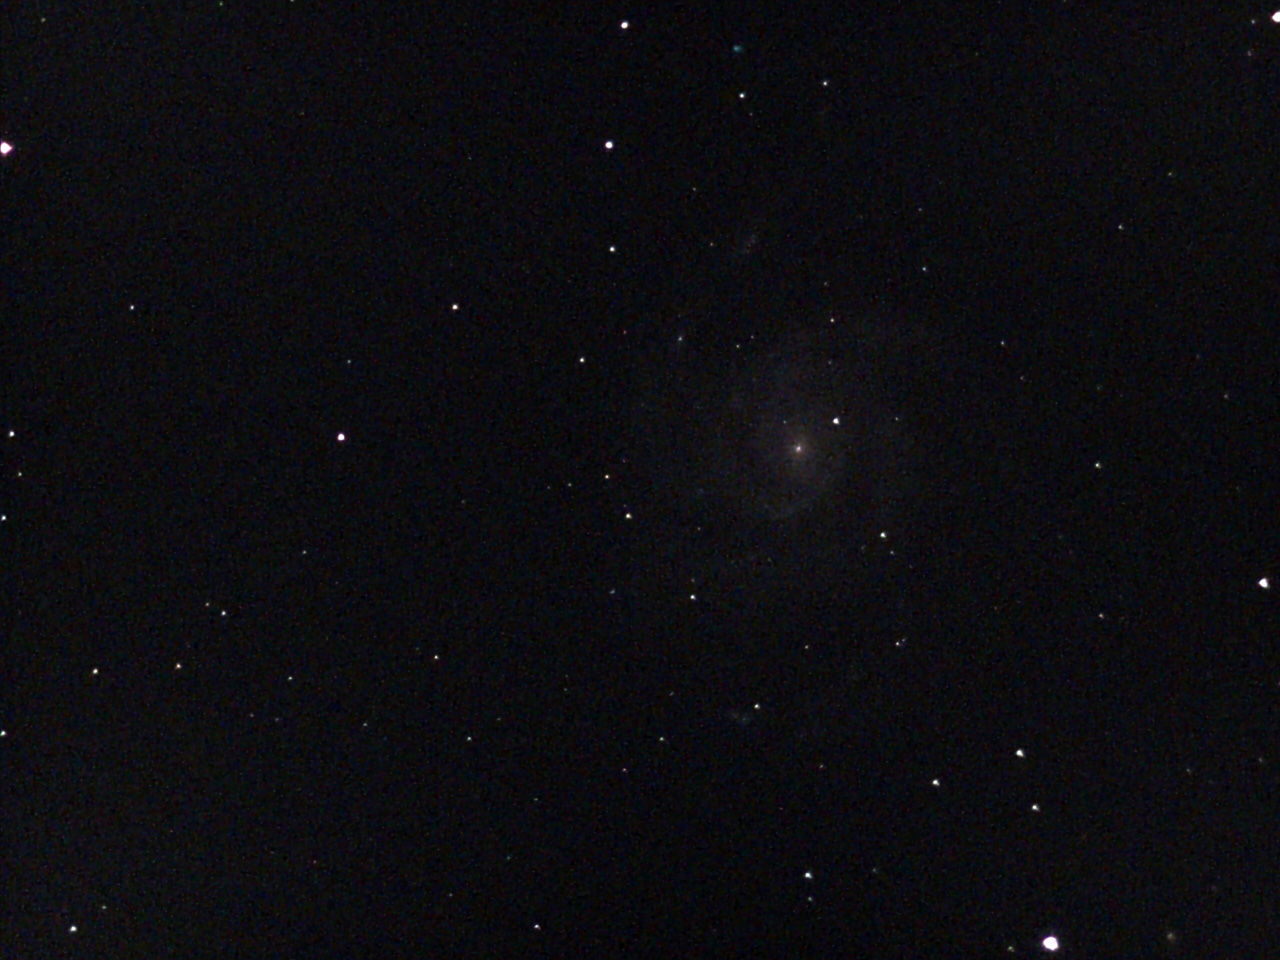
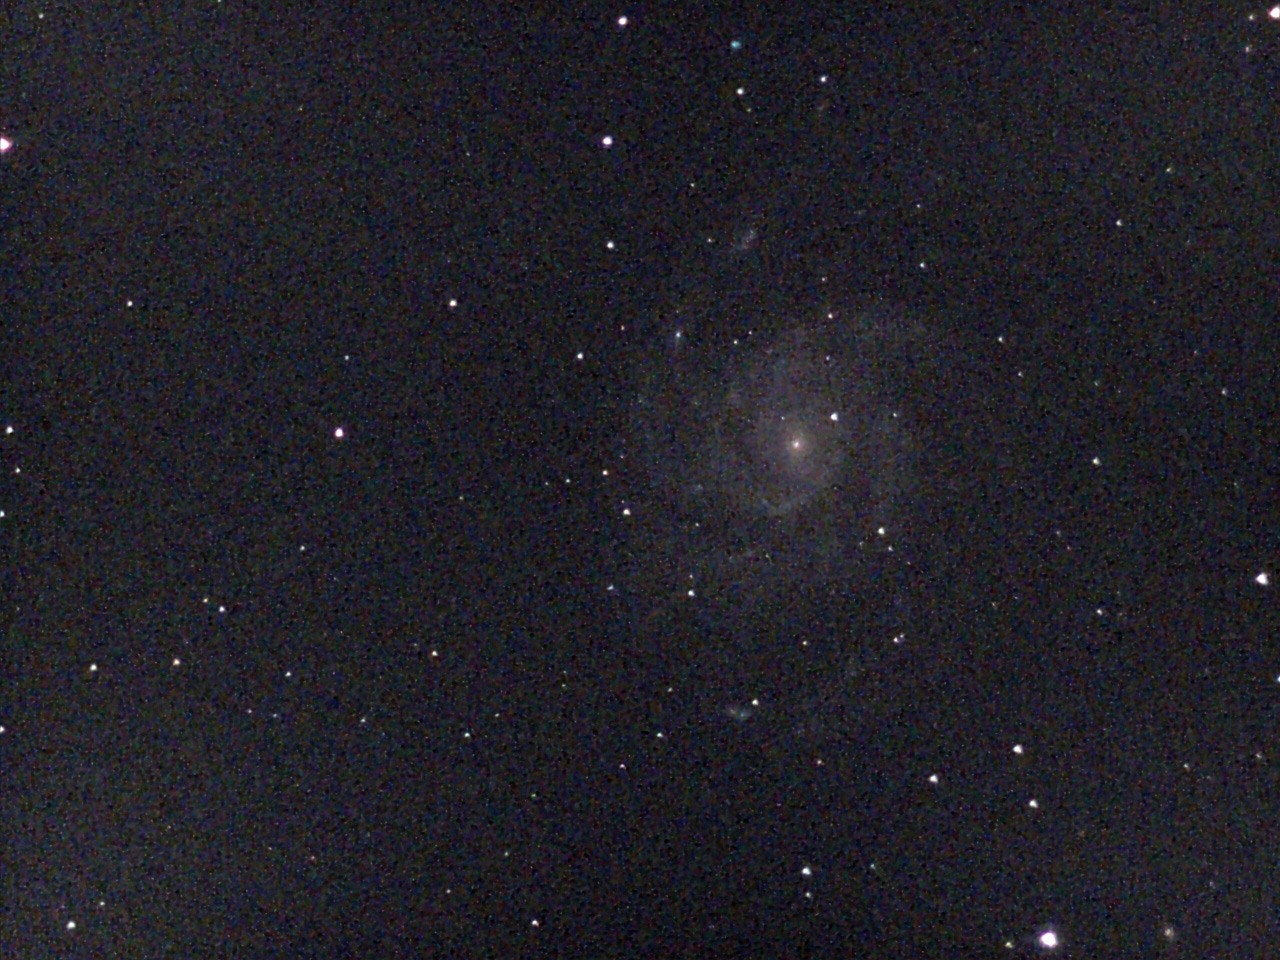
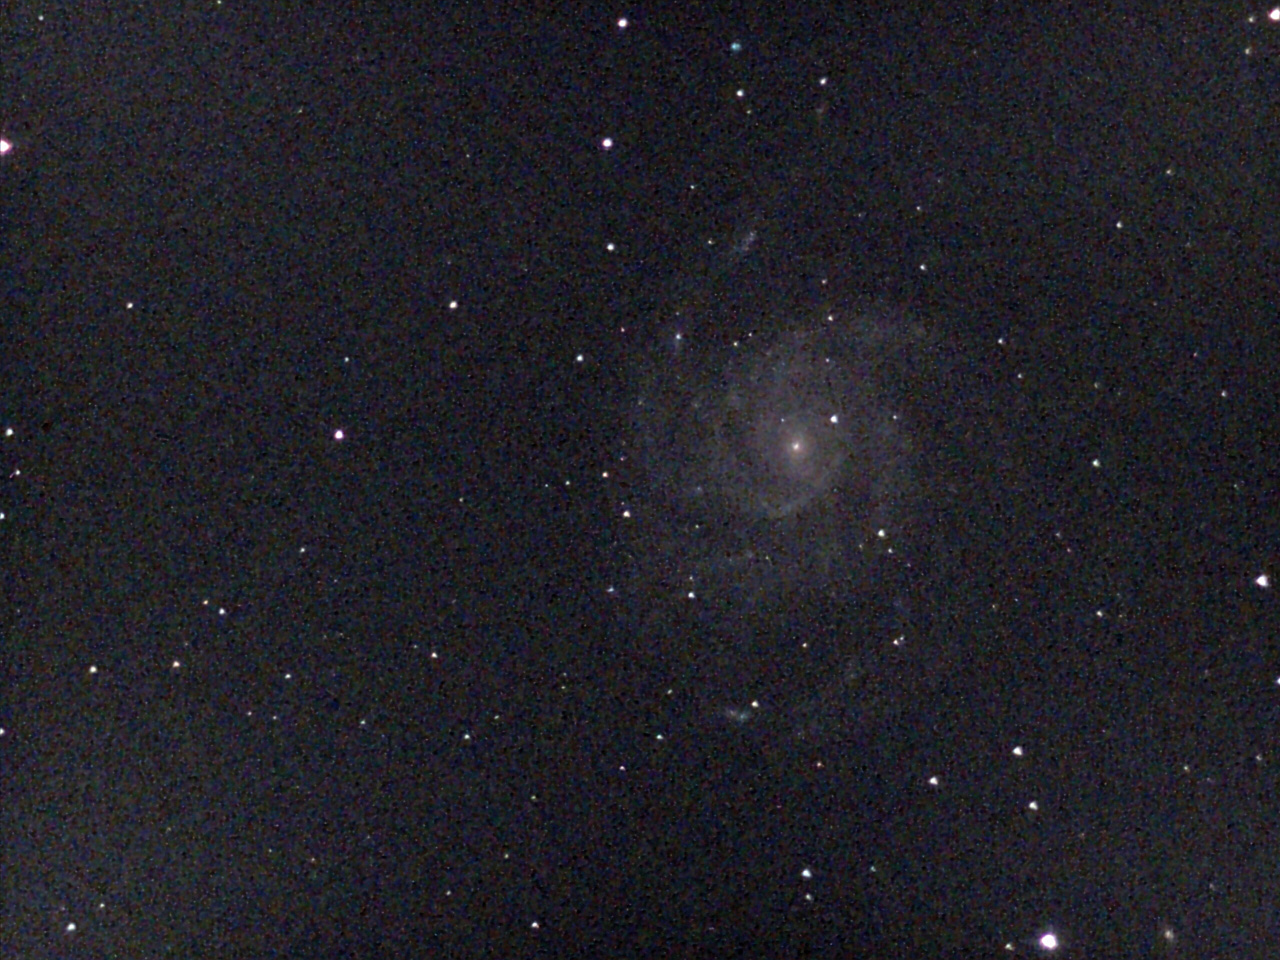
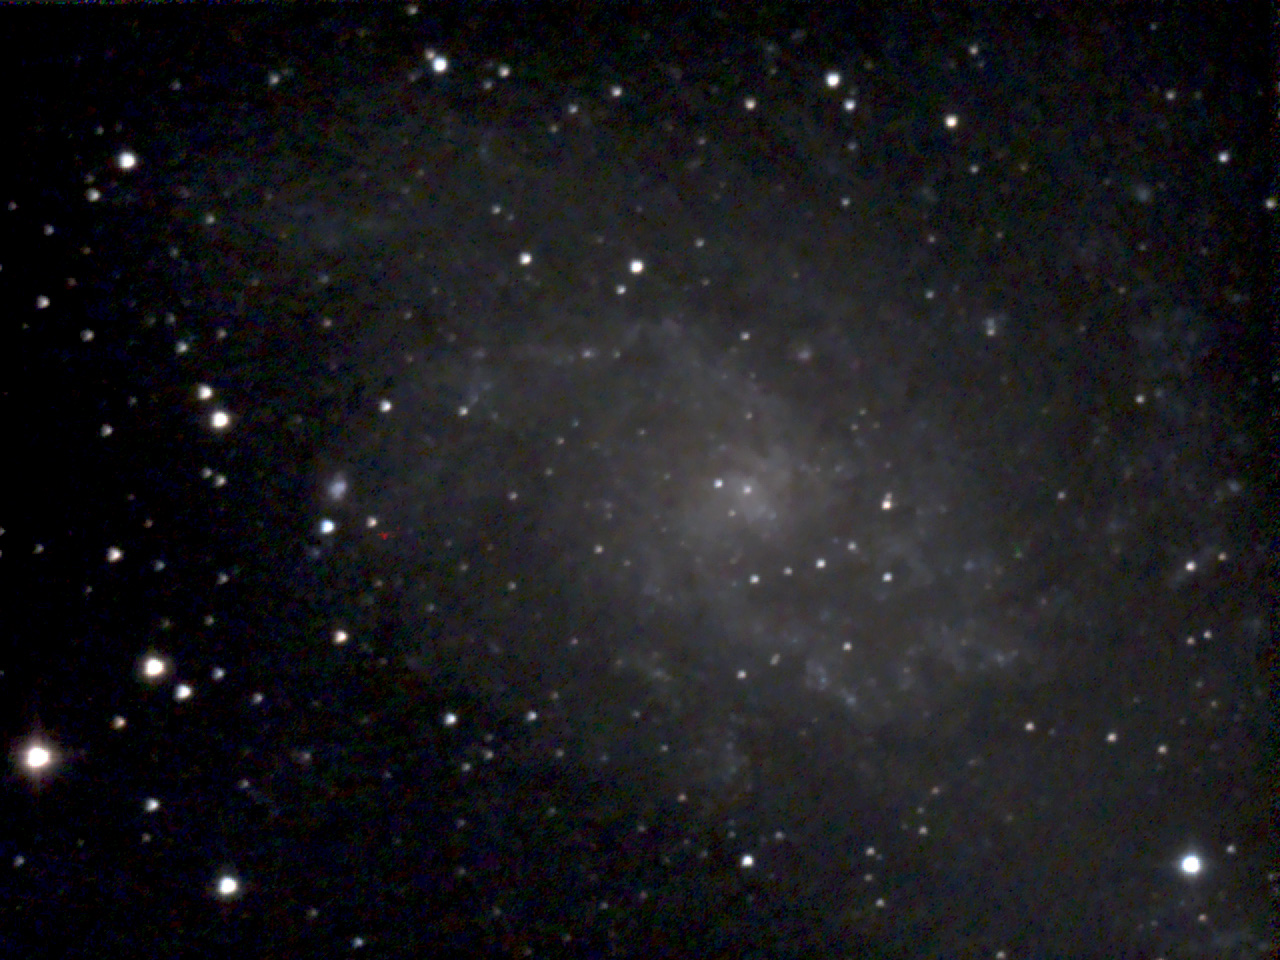
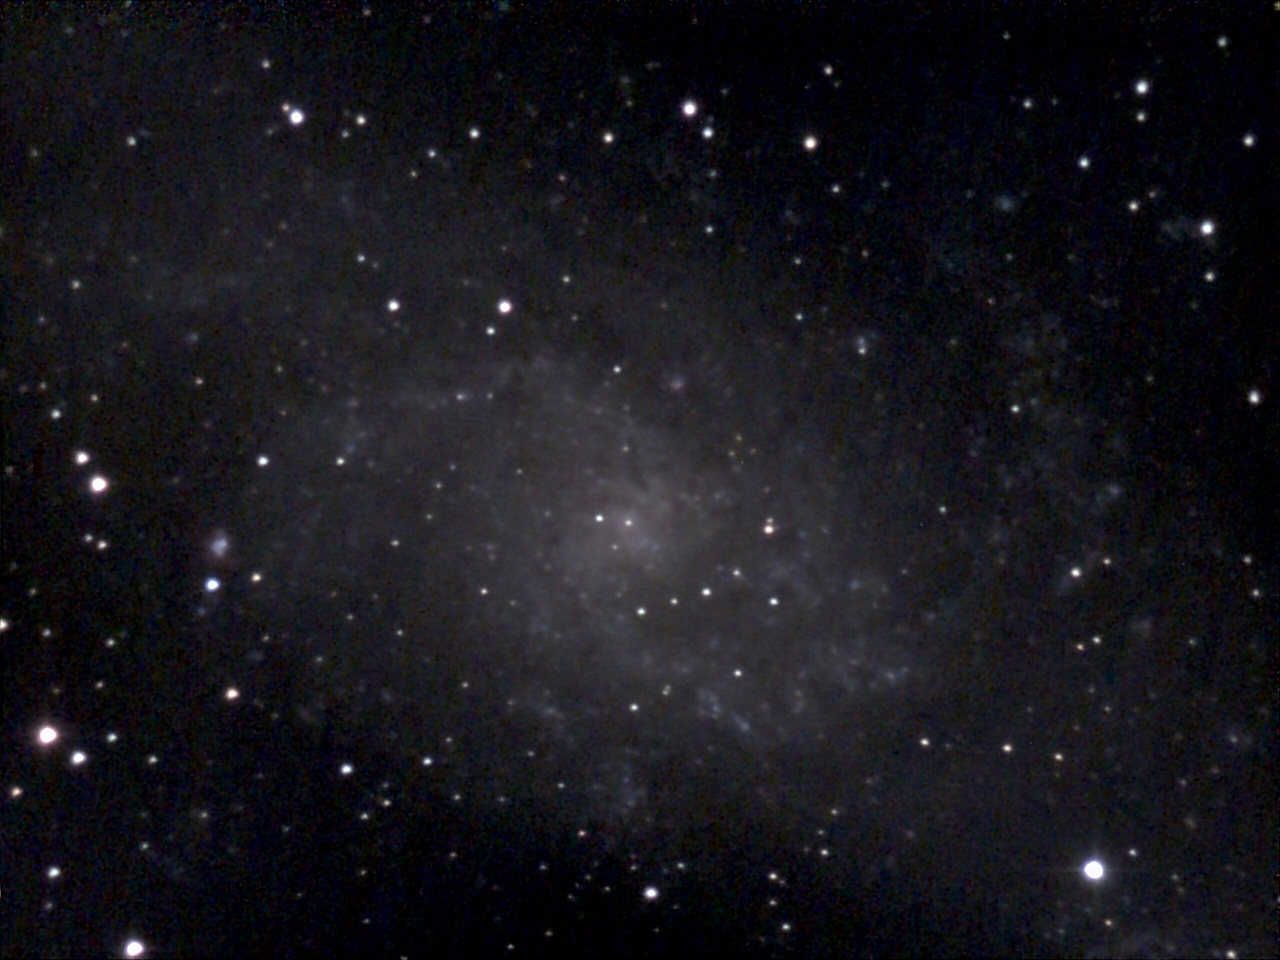
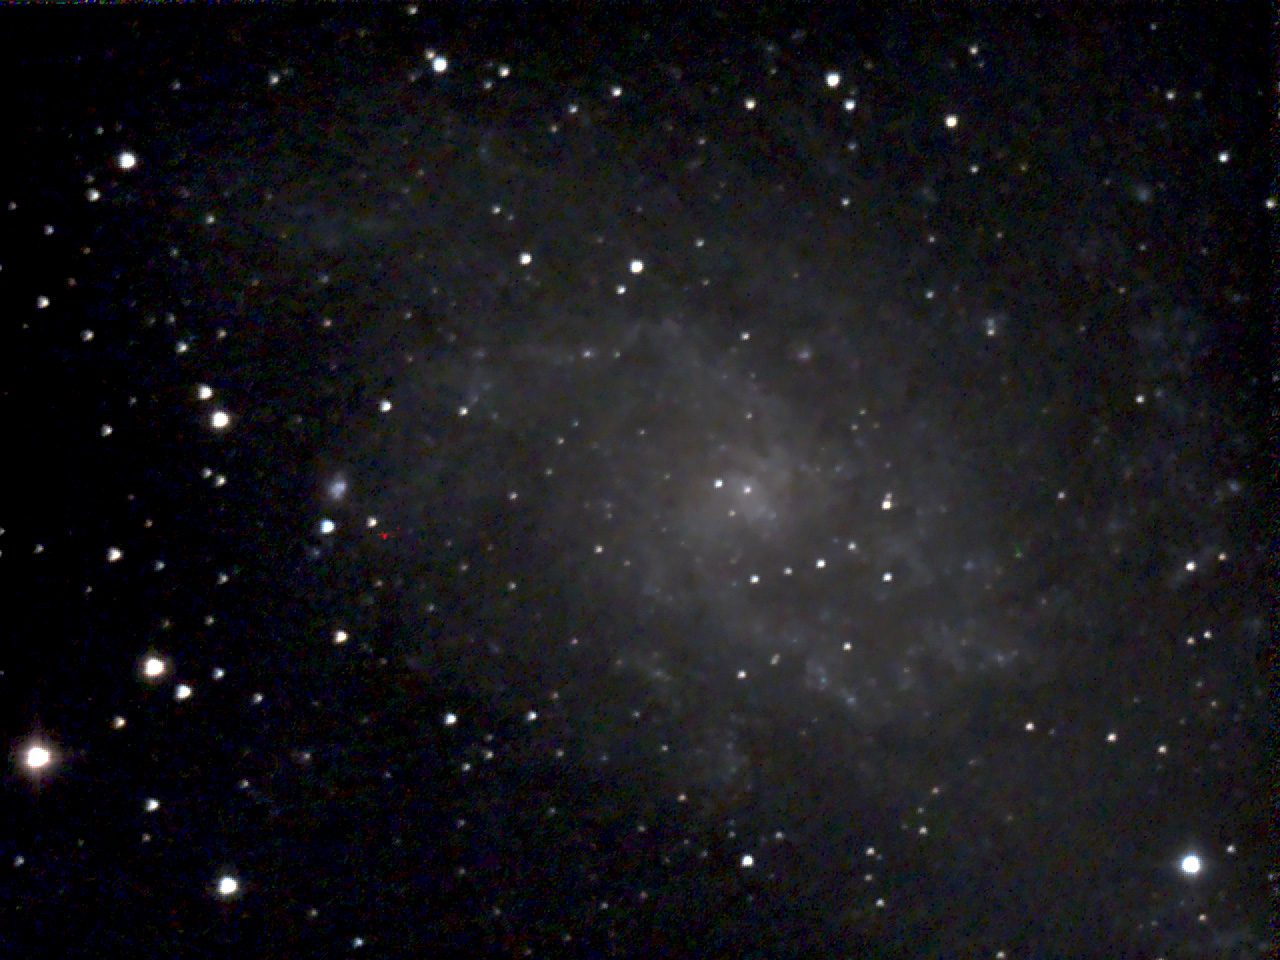
M 33 - Oct 10, 2020, processed |
M 33 - Oct 9, 2021, processed |
|
 |
 |
|
M 71 - Oct 19, 2020, processed |
M 71 - Sep 8, 2021, processed |
|
|
|
|
M 92 - Sep 15, 2020, processed |
M 92 - Jul 18, 2021, processed |
How Close Can I Get to the Results of the New Image Processing?
When I looked at the processed examples with old and new image processing, I wondered: How close can I get to the results of the new image processing with processed photos taken with the old image processing, if I just process them a little more? Surely, this is not the optimal way for best results, but it was the fastest for me....
Here are selected results of my efforts! Mainly, I used a sharpening filter and moved the black point in the histogram, and partly I also increased the color saturation.
Old Processing (< Version 1.3) |
Version 1.3 and Newer |
|
 |
|
|
M 3 - May 15, 2020, processed and further processed |
M 3 - Sep 8, 2021, processed |
|
 |
|
|
M 8 (Lagoon Nebula) - Aug 23, 2020, processed and further processed |
M 8 (Lagoon Nebula) Jul 17, 2021, processed |
|
 |
|
|
M 13 - Sep 15, 2020, processed and further processed |
M 13 - Jul 18, 2021, processed |
|
 |
|
|
M 16 (Eagle Nebula) - Aug 23, 2020, processed and further processed |
M 16 (Eagle Nebula) - Jul 17, 2021, processed |
|
 |
|
|
M 17 (Omega /Swan Nebula) - Aug 23, 2020, processed and further processed |
M 17 (Omega /Swan Nebula) - Jul 17, 2021, processed |
|
 |
|
|
M 27 - Nov 2, 2020, processed and further processed |
M 27 - Oct 16, 2021, processed |
|
 |
|
|
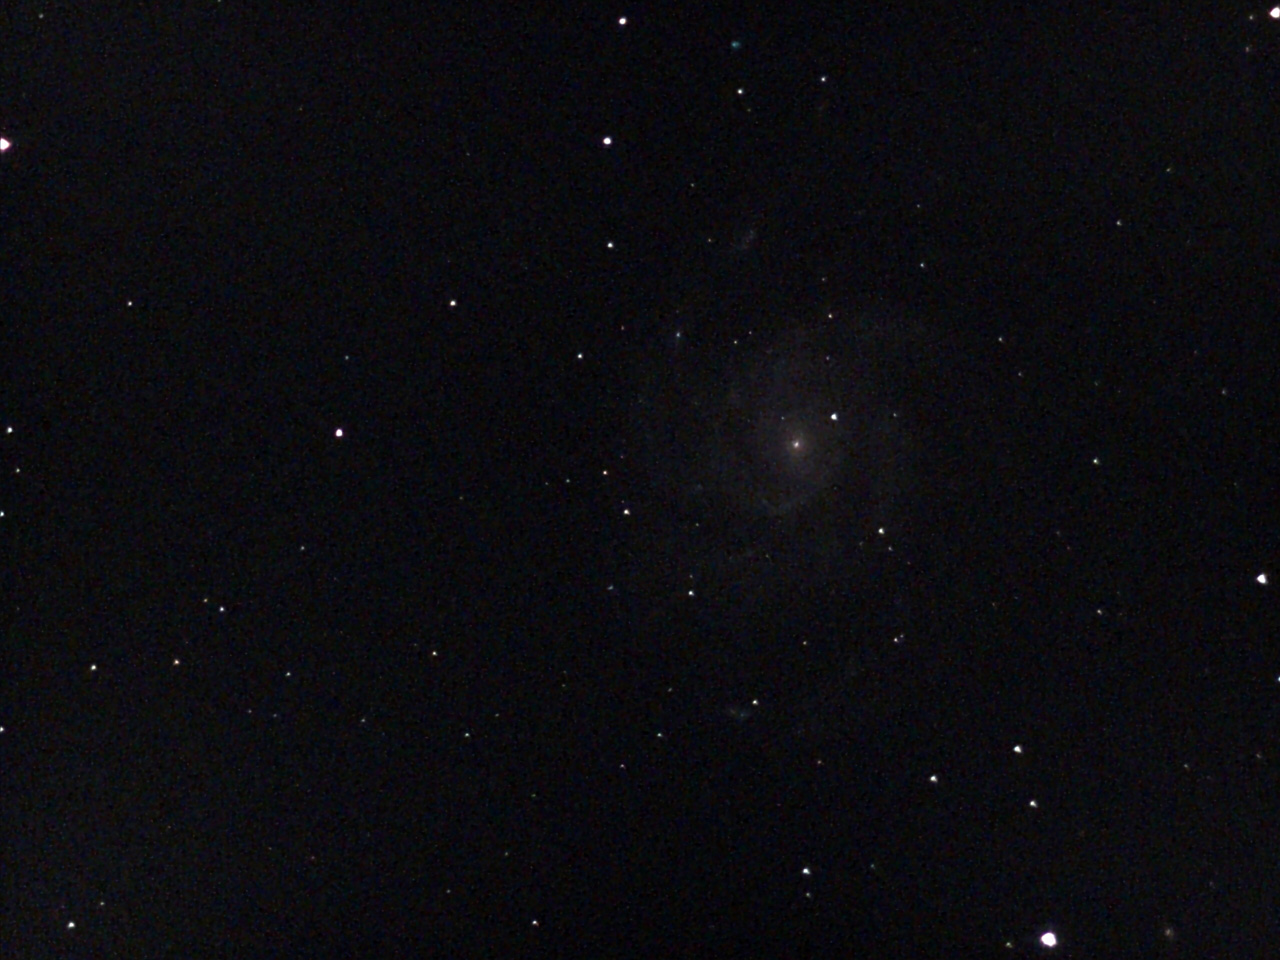
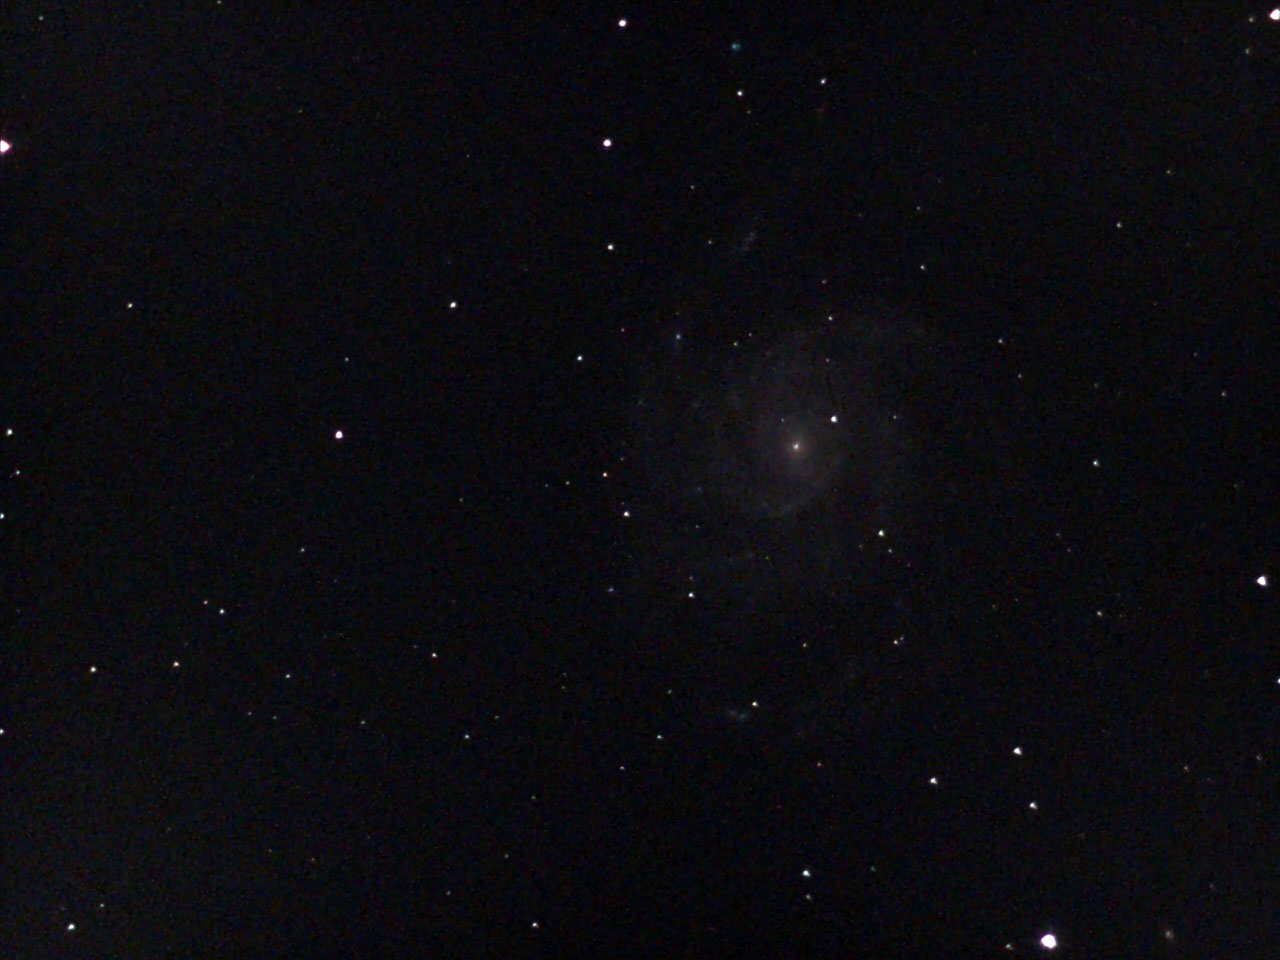
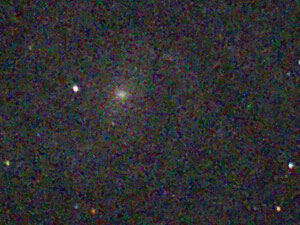
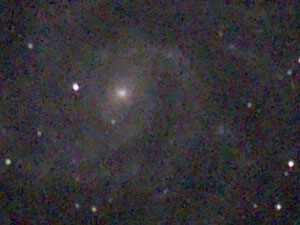
M 33 - Oct 10, 2020, processed and further processed |
M 33 - Oct 9, 2021, processed |
|
 |
|
|
M 71 - Oct 19, 2020, processed and further processed |
M 71 - Sep 8, 2021, processed |
|
 |
|
|
M 92 - Sep 15, 2020, processed and further processed |
M 92 - Jul 18, 2021, processed |
I was not always able to match the results of the new image processing, but by and large, these results show that the new image processing is not "witchcraft". In some cases, however, and for reasons unknown to me, I was not able to achieve the sharpness of detail of the new image processing. On the other hand, especially for globular star clusters with bright cores, I like the revised results of the old image processing better than those of the new one, where the bright cores are washed out beyond repair.
First Conclusions
According to my impression, the new image processing seems to actually have advantages in the presentation of sky objects, such as more details, better sharpness, as well as a darker background. Increased contrast and saturation, however, are a matter of taste and also an ambivalent one. On the other hand, I think that I was able to demonstrate the following: photos taken with the old image processing can be processed in such a way that they come close to those taken with the new image processing - and in some cases, they may even look better. However, I now lack a bit of desire to revise all the older photos...
Addendum (March 2023)
In March 2023, I acquired the noise reduction application Topaz DeNoise AI. Actually I wanted to use it for photos I took (and take...) with the Vaonis Vespera, but for fun I also applied it to eVscope (2) photos. It turned out that DeNoise brings little improvement if the photos were taken with app versions below 1.3; from version 1.3 onwards, however, there are clear improvements, although perhaps not as clear as with the Vespera. Read more on this on the Topaz DeNoise AI page!
Links
- Unistellar Website: unistellaroptics.com
- eVscope Kickstarter campaign: www.kickstarter.com/projects/unistellar/evscope-100-times-more-powerful-than-a-classical-t
- Welcome to 1.3 Unistellar app: www.youtube.com/watch?v=Ke7mIpw6QIs
- eVscope vs DIY - Watch Before You Buy! (Cosmic POV): www.youtube.com/watch?v=v6fD_nQXQw0
- See also my page offering Astronomy Links.
Appendix: Report on App Version 1.3 for Unistellar (Excerpt)
...
I would like to restrain myself to giving feedback on the new image size and processing. When I first read the statement "Four times larger observing record for even more stunning memories of your stargazing", I was not quite sure what this means. But I soon found out that it means upscaling the images from the sensor size of 1280 x 960 to a "whopping" 2560 x 1920 (2 x in linear size).
My first thought was that this is not a good idea, since upscaling does not deliver any new information and makes the image softer, overall. This is similar to the digital zooms of digital cameras (they come in various "spices"...), and typically you should not go beyond a factor of 1.4x there.
A second finding was that the new images are rather grainy, which is new. The graininess is reduced over the observing time, but does never really disappear. It is rather evident if you brighten up the photos for demonstration purposes, and may nearly become invisible if the sky on the photo is dark. I do not know the cause for the graininess. Upscaling may be one reason, a changed image processing the other - probably a mixture of both...
But as always, things are not that easy! I found the following changes:
- The colors seem to have changed somewhat (for example, M 27 turned to more bluish than the greenish before - I do not know which is more correct...). And they also seem to be more saturated (this is also visible at bright stars, which are much more "colorful" at the edges now).
- The contrast seems to be higher, making for darker skies and maybe more brilliant looking photos on the one hand. On the other hand, the bright cores of some globular star clusters are even more washed out than before (and harder to recover...).
- The images show more detail (they look less "painted") and appear much sharper on my iPad now. I will discuss both items below.
iPad: I rarely used my iPad for controlling the eVscope, because I found the images, similar to my laptop, fuzzy and somewhat disappointing, whereas they looked much nicer on my iPhones, because they were a lot smaller on these.
Recently, I used my iPad again (because it has more "stamina"...) and was pleasantly surprised by the sharpness of the photos shown on the screen!
I no longer have access to older app versions, but in the Photos app, I still had some photos taken with older app versions of objects that I also had recently photographed. Well, that really is a difference and a huge improvement, which I had not expected!
I considered that upscaling for the old versions and downscaling for the new versions might cause the difference. But that is not the case! I transferred some downscaled photos (1280x960) taken with the new app version to my iPad, and they looked nearly identical to the large versions. So, it is the new image processing that makes the images look sharper. So, this was an interesting experience!
More Detail: I always disliked the "painted" look of the eVscope images, that is, the processing "brushed away" the details. This was especially apparent on photos of large nebulae, such as M 42, M 16, or M 17. This is also apparent, when I compare eVscope photos with my photos taken with the ASI224, which uses the same sensor (albeit in a different mode...). On a first brief look, the images now seem to look more similar, but I still have to check that thoroughly...
I had always planned to send you an e-mail and ask for less painting. This has never happened, but you seem to have guessed my wish - the new image processing "paints" definitely less and reveals more detail. Not every eVscope user may recognize this, but for me, it is evident. I found this already for M 16 and M 17 (and some more nebulae...), but will have to wait until winter for M 42...
So, this is also a nice surprise for me, which comes somewhat unexpected because of my preconception regarding the upscaling of images. Anyway, I scale my images down and back to 1280 x 960 for archiving purposes (and presenting them on my Website)...
So all I would wish is that the graininess of the photos (and the amp glow) can be reduced...
...
|
made by |
| 30.03.2023 |