Unistellar eVscope - First Conclusions
Introduction | Bumpy and Nerve-Straining Start - After a Long Wait | The First, Preliminary Version of the Unistellar App and Version 1.0 | iPhone, iPad, ... | Finish of Telescope, Tripod and Backpack | Automatic Alignment (Autonomous Field Detection), Tracking, GoTo | Focusing | Collimation | eVscope and Sky Quality | Where Are the eVscope Photos Quality-Wise? | What Can I Do with the eVscope? | What Does the "eVscope Experience" Mean to Me? | Final Words | Wish List | Links
Archive
On this page, I consolidate my first conclusions (May 5, 2020; app version 1.0 and lower) on my electronic 4,5" Newton telescope Unistellar eVscope (I took part in a Kickstarter campaign in mid-November 2017; it arrived on January 27, 2020). At the beginning of July 2022, app version 2.0 was published, which is completely different from its predecessor.
Notes:
- It is, of course, far too early even for first conclusions (May 5, 2020). Nonetheless, I would like to report on some first experiences and present some first thoughts here.
- There is already a page with Second Conclusions after about 9 months (app version 1.1), another one with Third Conclusions (March 2021), and one with the (Final) Conclusions (January 2023).
- See page Overview of the Unistellar Pages for just that!
| Note: At the beginning of December 2021, I received an eVscope 2 ordered in October (I had ordered it, because I was convinced by the better image quality and the slightly larger field of view). I therefore sold my eVscope in mid-March 2022. For this reason, I will not report any further experiences with this telescope here. |
Introduction
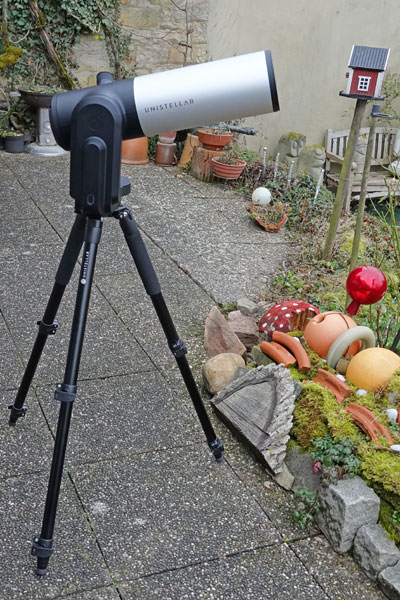
In November 2017, when reading the "Abenteuer Astronomie (Adventure Astronomy)" newsletter, I learned about the Unistellar eVscope for the first time. For a few weeks already, a Kickstarter campaign was running on this new kind of telescope , which can be assigned to "electronically augmented astronomy" (EAA), and I also supported this project (it ended up with more than 2100 supporters and more than $ 2 million in cash by November 24, 2017). Regrettably, I was already far too late to get hold of one of the two cheap offers. My eVscope arrived at my home at the end of January 2020.
 |
 |
 |
 |
Photos: My eVscope (End of January 2020)
Bumpy and Nerve-Straining Start - After a Long Wait
After a about two years of waiting, I received a message in early December 2019 saying that my eVscope was on its way to me. The estimated date of arrival was 18 December, as I was notified. But the delivery was delayed for various reasons (including strikes in France) until January 27, 2020. Before that, the Unistellar app had been released (December 16, 2019), which meant that I also had to buy an iPhone, because the app could not be installed on my WiFi iPad (because GPS is missing). More on this below!
When the eVscope arrived at my place, my joy was of course great. Unfortunately, it was dampened very quickly, because my eVscope could not be switched on reliably. The very friendly and dedicated Unistellar support told me that I was one of the "lucky ones" who had a defective microSD card installed. I was quickly sent a new card, but so quickly that they even forgot to install the software on the card. I also had to order a set of special keys from the USA to be able to open the eVscope. Card and key arrived on the same day, but I soon found out that the new card was empty. So I tried the old card again for a few days. But since it did not work reliably, I eventually ordered a new one, which arrived soon (mid February 2020). Since then, the eVscope starts reliably! Regrettably, I soon noticed that the photos were now full of hot pixels. I asked the Unistellar support and was told that a dark frame image had to be taken to remove the hot pixels. This was, however, only possible with the new version of the app, which would be released soon. The "soon" lasted to nearly mid-March, so I was eagerly waiting for the new version of the app, which was also announced to fix some bugs and introduce new features! More on this below! As nice as everything is, when the eVscope is working properly, this rough start did cost me a quite a few nerves!
Details about all this can be found on the pages: Unistellar eVscope - Information - Unistellar eVscope - First Experiences - Unistellar eVscope - First Observation Sessions
The First, Preliminary Version of the Unistellar App and Version 1.0
Preliminary Version
Unistellar had already announced in advance that the first version of the app, which was delivered with the eVscope, would still be very buggy. And so it was! The eVscope had to be credited, though, with the fact that it seemed to remain largely unaffected by this and that after a restart of the app I was simply able to continue in most cases. In this respect, the app's flaws were not as annoying in practice as one would assume. Whenever the app behaves strangely or seems to hang, you should also look through the eyepiece from time to time. I experienced that everything was displayed correctly there, while the app was still "stuck" to previous targets.
The initial version of the app (0.9.3 (94)) offered 4800 targets, but I missed some DSO that I consider important (e.g. NGC 762, NGC 654, NGC 2264...); information was offered for 120 objects in this version. I also found out (and Unistellar published this later as well) how I can access DSO that are not in the catalog. It would be useful if one would be able to store objects that are accessed via coordinates as user-defined objects.
Version 1.0
Version 1.0 was published on March 12, 2020 and these are the most important improvements:
- Possibility for taking a dark frame (to remove hot pixels)
- Parking function for the telescope
- Focusing aid for the eyepiece (eyepiece focus helper)
Further minor updates quickly followed (versions 1.0.1, 1.0.2, and 1.0.3 up to end of April). The first two updates did not show noticeable differences for me, but definitely some bugs were fixed. Version 1.0.3 allows users to save photos in the rectangular format of the sensor, in which case the overlay with the captions is omitted. This is the option that I had hoped for from the beginning. The enlarged area makes positioning easier (the round section with overlay might cut off parts of the object, what you may not recognize on the smartphone screen) and also has the advantage that you can get several objects better into the field of view. However, it would be possible to enlarge the area downwards, as it was already done in version 1.0, and to place a label at the bottom, without hampering the sensor image. This way, the recording data does not get lost (otherwise you have to take notes...).
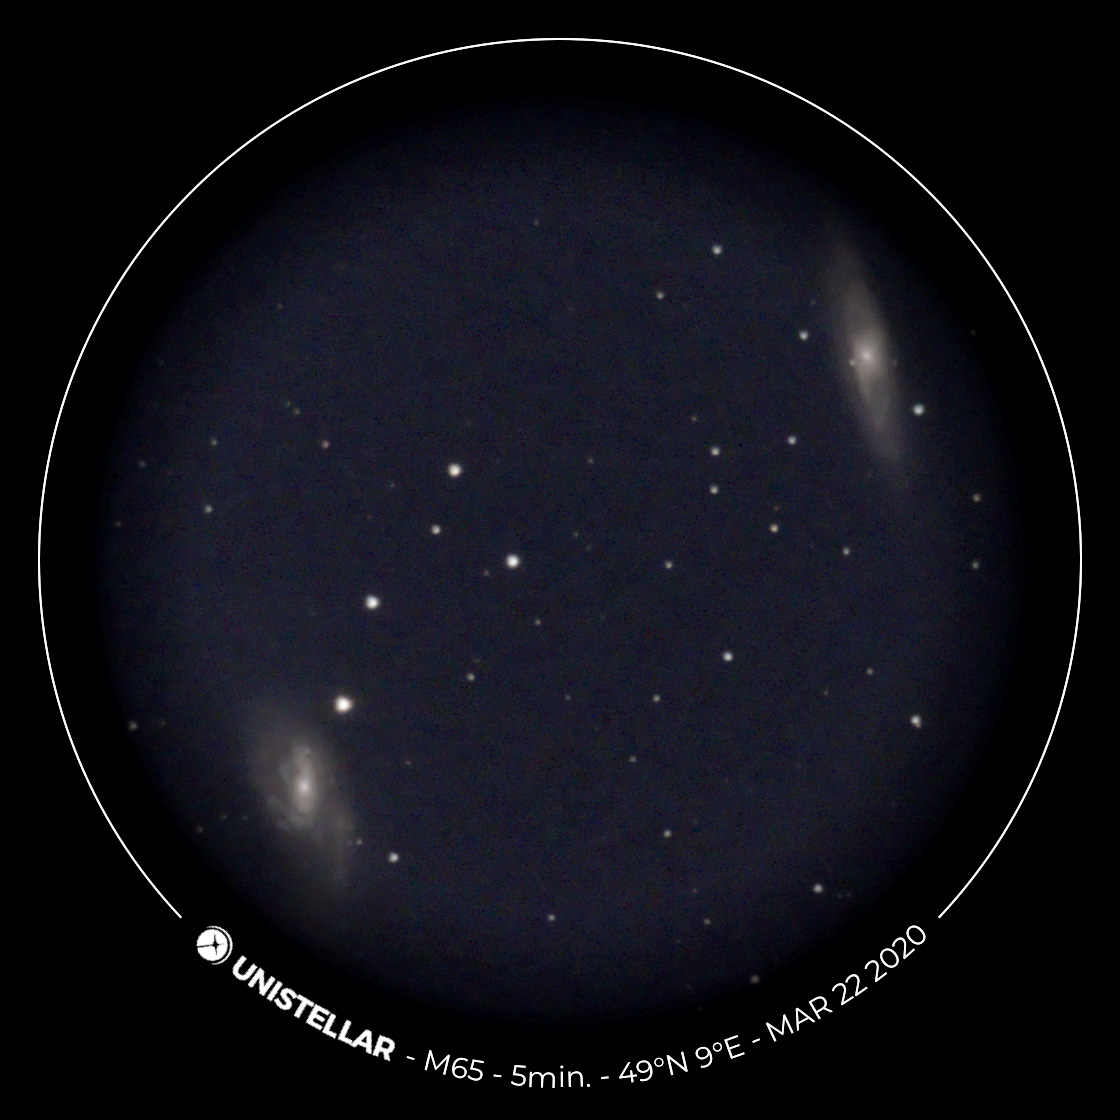
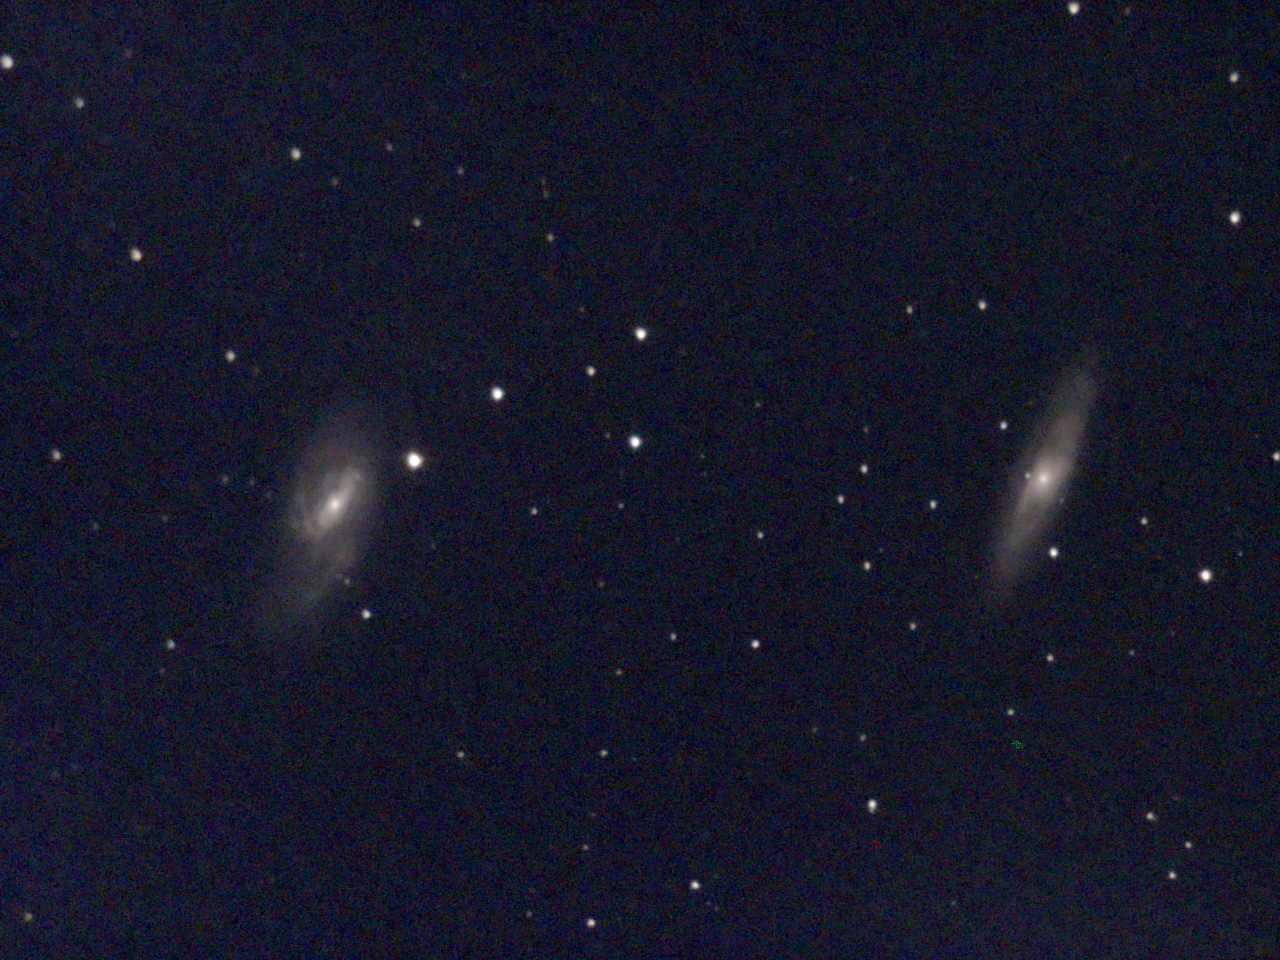
Example: For M 65/66 the overlay makes it quite tight, without overlay both fit well into the image:
 |
 |
|
M 65 & M 66 - March 22, 2020, processed |
M 65 & M 66 - April 23, 2020, processed |
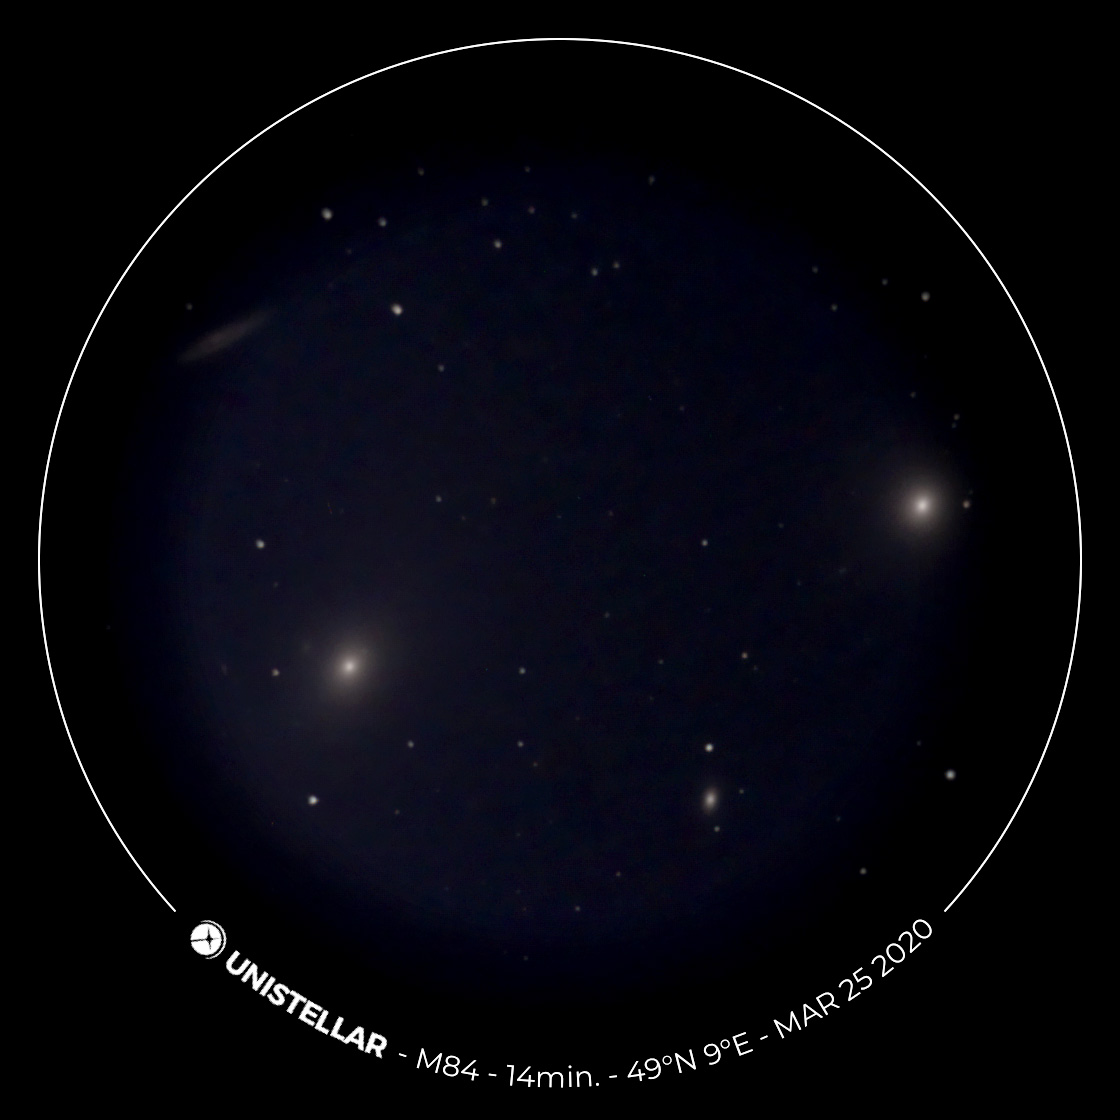
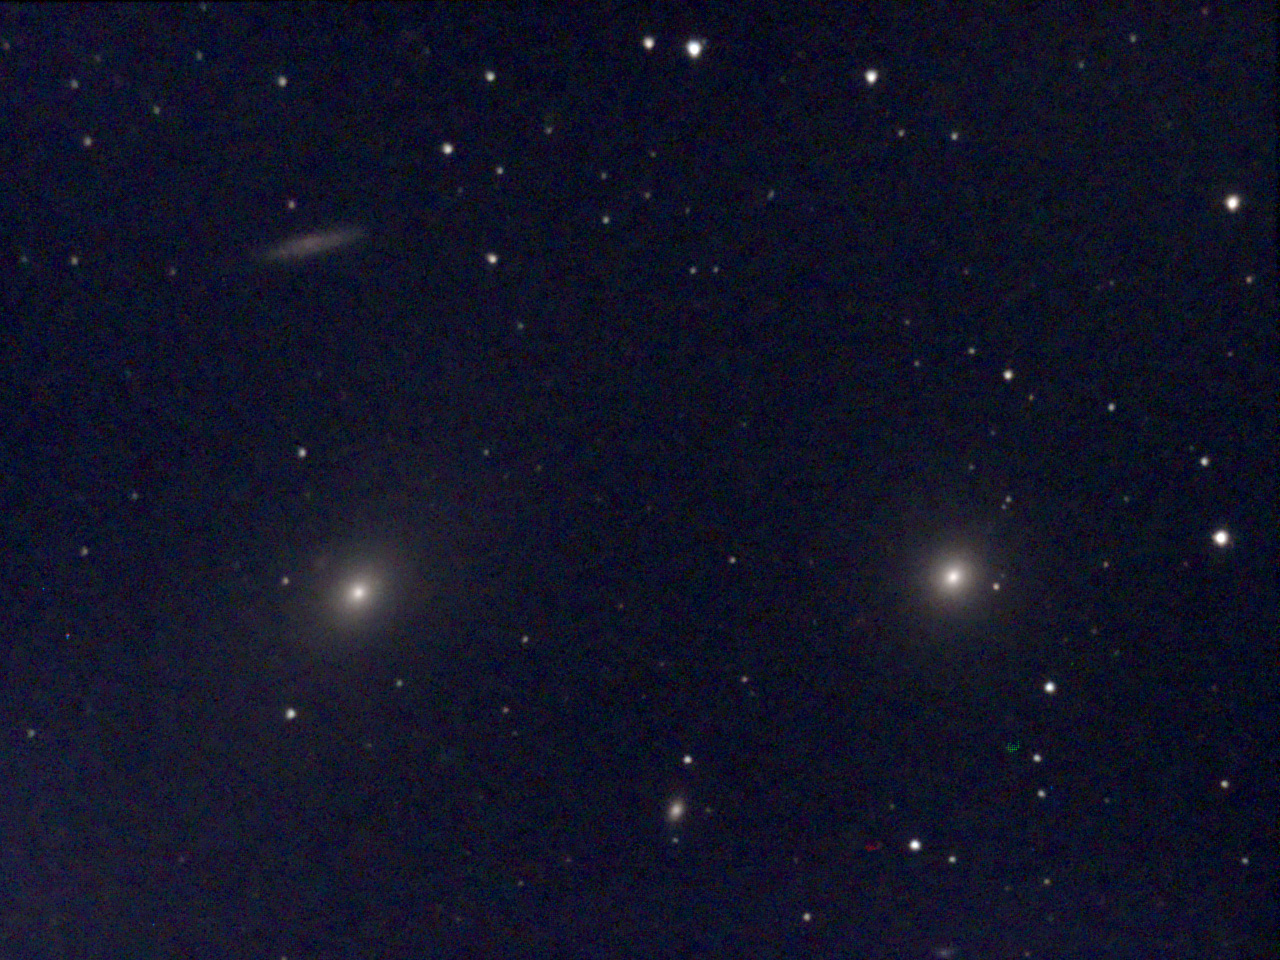
Example: With M 84/86, there is now more room for a third galaxy (NGC 4402):
 |
 |
|
M 86 and M 84 (right; top left NGC 4402) - March 25, 2020, processed |
M 86 and M 84 (right; top left NGC 4402) - April 22, 2020, processed |
With version 1.0.3, the number of objects in the object catalog has also been extended. I later found a respective remark in the version history in the Apple app store. Now, I found NGC 752 and NGC 2264 (Christmas tree heaps) in the catalog, and surely these are not the only additions to the object list. I also read in the version history that the whole Caldwell catalog was added.
Update: On June 20, 2020, the "final" version 1.0.6 in the 1.0 series appeared.
Conclusions
All in all, I think the app is easy to use, but I would like to defer a final judgment to the date when everything in working without crashes.
Of course, there are many things that I would like to see in the app, and many eVscope owners have already expressed their wishes. I already made three suggestions to Unistellar. My "wish list" for Unistellar can be found further down!
iPhone, iPad
To operate the Unistellar app and thus the eVscope, you need a smartphone or tablet computer that can receive GPS data. Since my iPad is only WiFi-capable, the installation of the app is blocked. I therefore had to buy a smartphone and purchased a 16 GB iPhone 6s (at that time I still assumed that my eVscope would arrive soon...).
When I asked Unistellar with respect to the blocked installation, I got the information that the app should be able to receive the location coordinates automatically via GPS because it should be easy to use. In my eyes, this is a completely unnecessary limitation, though, because you can also manually enter the location data in the app. Moreover, the app can be used in "operator" and "observer" mode. For the latter, location data are also not necessary.
Unfortunately, I did not know at the time of purchase that my iPhone must have at least 32 GB of memory, because the eVscope data already needs about 12 GB if it is to be transferred to the SETI institute. And so I bought a used iPhone 6s with only 16 GB of memory and for the moment cannot transfer any data. But this is no problem for me, because the eVscope still takes photos even with full memory (100%) and stores them on the iPhone. Unistellar told me that there will be a solution for the memory problem in the future.
Update: Since App version 1.0.5 (June 15, 2020), the app can also be used on the iPad (even in the WiFi version). Regrettably, I had bought already iPhones at that time, or had to buy them in order to be able to use the eVscope...
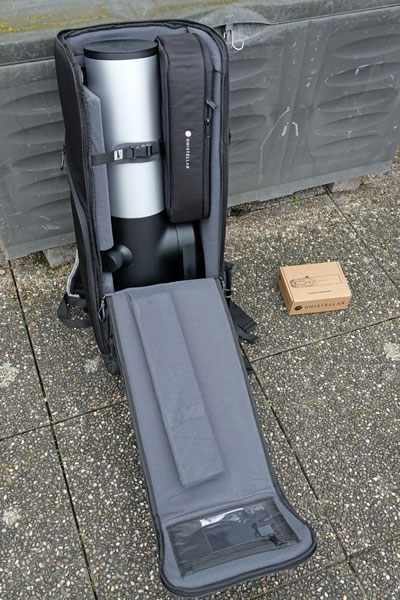
Finish of Telescope, Tripod, and Backpack
The eVscope tube makes a well built and solid impression on me, even though a lot of plastic and aluminum is used. Even when I had to open the telescope to exchange the microSD card, the "inner workings" of the eVscope looked very solid to me. What I would still wish for at the eVscope would be a carrying handle at the bottom of the tube, similar to the one the Celestron C8 has. Then I would be better able to carry it to the tripod and install it there.
The tripod is made of aluminum, but robust enough to carry the eVscope without trembling in all conditions (except in strong winds). Only the "threading" of the telescope into the tripod always gives me some trouble and I am in danger to touch the focus wheel and misadjust the focus. Therefore, it makes sense to start an observation session routinely with checking (and setting) the focus by using the Bahtinov mask.
The backpack was designed and manufactured by a specialist backpack manufacturer, and you can see that, because it makes a very well thought-out impression on me. On the one hand, it seems to be very big, bigger than expected, but on the other hand, some things are a little tight, so that sometimes the zipper gets stuck when I close the backpack. But in total, I am glad to have ordered the backpack.
Automatic Alignment (Autonomous Field Detection), Tracking, GoTo
I have worked with GoTo controls in the past, but I have often struggled with their accuracy, especially with the alignment, which was often poor. I therefore purchased a Celestron StarSense module which, like the eVscope, aligns the telescope automatically (after an initial adjustment of the module to the telescope). However, the longer I used this module, the less successful I was with it. So I stopped using it for the moment and preferred to access DSO manually. How does the eVscope fare in this respect?
First of all: If it is still too bright, the Autonomous Field Detection (AFD) fails. The only way for me to find out when it is sufficiently dark, is to try this out. I may also try to find a darker sky section when AFD fails.
However, if it is dark enough, the AFD works wonderfully and fast. In 10-15 seconds it is often ready; the actual duration probably depends on how many stars are in the sky section and how they are positions relative to each other. On the other hand, when I see how long the StarSense module takes to orientate itself, if it finds anything at all, then the eVscope plays in a different league!
After the eVscope has oriented itself in the sky, it starts tracking (I assume); then you are ready for selecting and approaching objects. Objects can be selected from a catalog, which was extended in app version 1.0.3 and will probably be extended further. Objects that are not in the catalog can be approached by entering the coordinates (see Tips and Tricks).
The eVscope does not always hit objects equally well, but this can only be recognized in Enhanced Vision mode. Since you cannot move the telescope tube in this mode, you have to switch back to the Tracking mode and correct the position, preferably by briefly tapping the directional buttons (which I set to "inverted"). Most of the time you cannot see the object anymore in this mode. So I try to orientate myself using stars to change the position. Sometimes there are also "jumps" in position when I switch between modes, so that the exact positioning is sometimes a little challenging.
Among other things, I change the position when I want to have several objects in the field of view (for example, M 65/M66 or M 84/86), because I have to select one of the objects for the GoTo, and "ideally" this object is at the center thereafter, whereas the others are in unfavorable positions at the edges (see Tips and Tricks for more information).
Focusing
After purchasing the Atik Infinity camera to "pre-experience" the eVscope experience, I quickly realized that besides a reliable GoTo, focusing is very important. When using the Atik Infinity camera, I had some problems with the focusing because I did not have a focus mask. And when I finally had one, I had stopped using the camera...
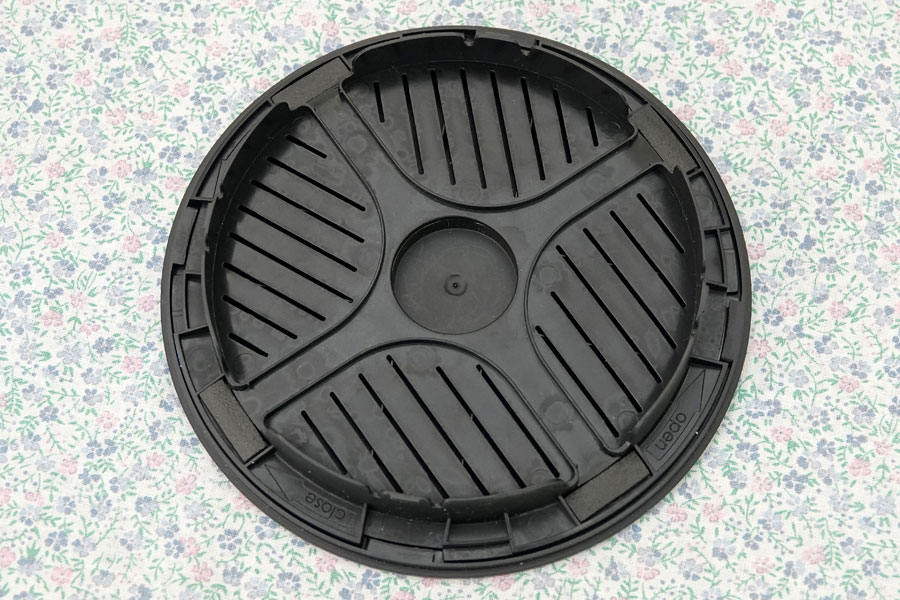
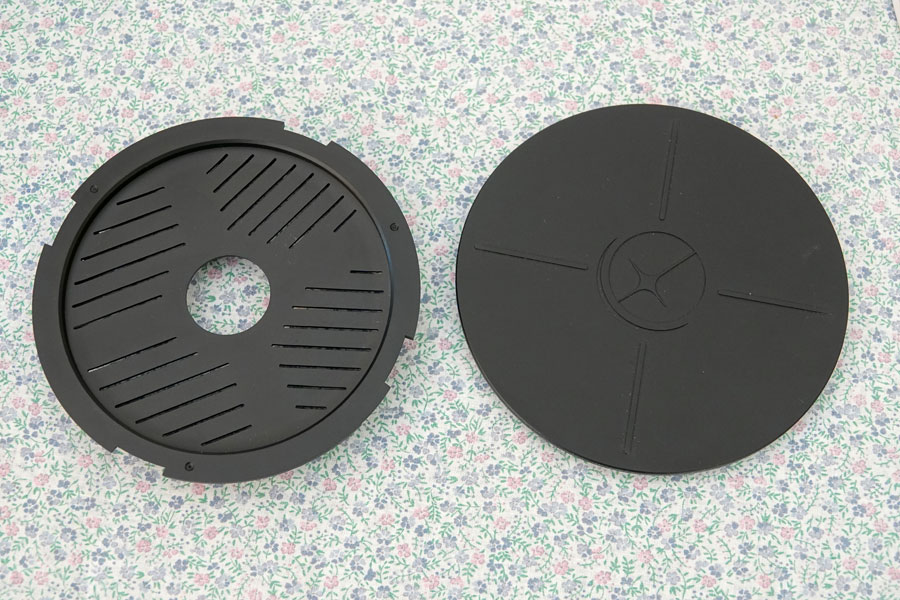
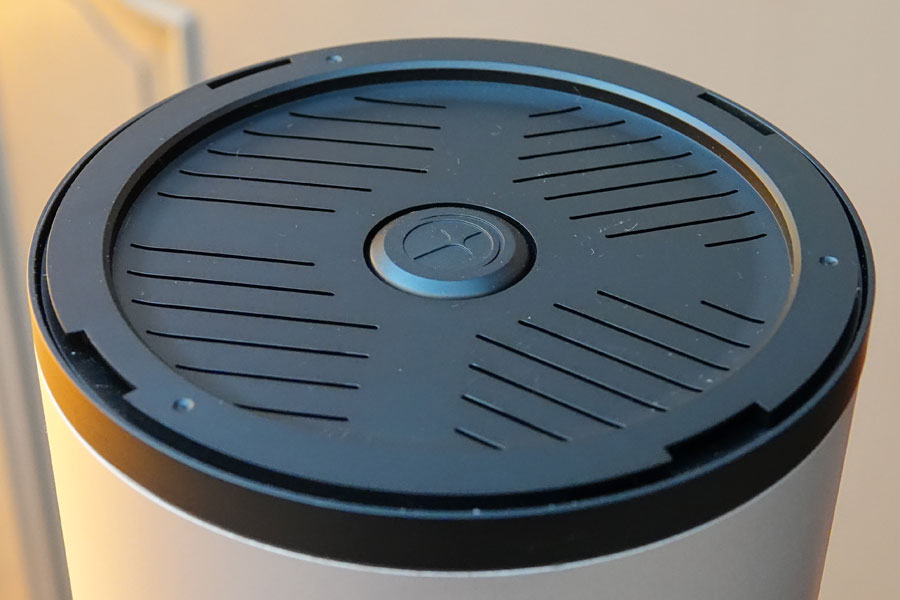
For the eVscope, the same applies in principle with respect to focusing! Fortunately, Unistellar has integrated a Bahtinov mask into the lid of the telescope. And with it, focusing works very well according to my experience. Instructions can be found in the UnistellarHelp Center (How to use the Bahtinov mask?), so I will not write anything else about it here.
 |
 |
 |
||
Bahtinov mask inserted in the telescope lid |
Bahtinov mask next to the telescope lid |
Bahtinov mask put on the eVscope tube |
It looks as if Unistellar were working on another solution (there was a questionnaire about this...), but from my point of view this would not be necessary. I was also able to focus in live-view mode, but this does not work as reliably as with the Bahtinov mask (the results were acceptable, though...).
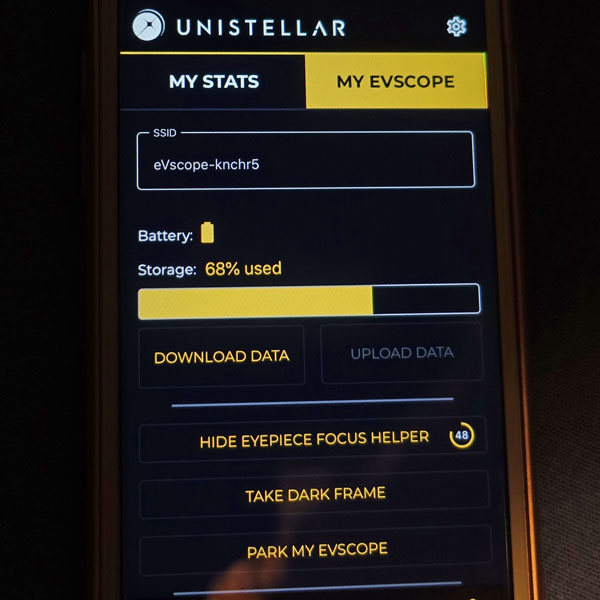
Unistellar also introduced an eyepiece focusing aid (called eyepiece focus helper) with App version 1.0, which is helpful, but certainly not "essential":
 |
 |
|
| The eyepiece focus helper: a pattern is displayed in the eyepiece that can be used for focusing |
The timer for the eyepiece focus helper (to the right of the button text) |
Collimation
When I sent the first eVscope photos to my astronomy dealer, he wrote me back that my eVscope had to be collimated. I did not like to do this, because I usually make things worse during such actions. And this was indeed the case after my first collimation attempt. After the second attempt it was, however, much better, and I will leave the telescope in this state for the time being. I would not call the star images completely round, but I do not know if this can really be achieved. On photos of other eVscope owners all of the the stars are never completely round.
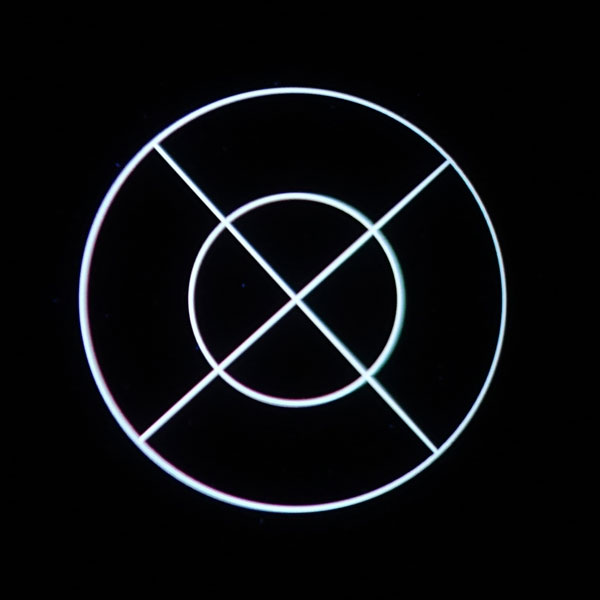
How to collimate the eVscope is described in the Unistellar Help Center; I also briefly cover this on page Tips and Tricks. I would like to give away a helpful trick here: I found out that one should rotate the smartphone by 90° when collimating to check whether the cross pattern used for evaluation is indeed centered (for this purpose, screen rotation must be locked).
eVscope and Sky Quality
Unistellar emphasizes that the eVscope is also suitable for observations under a "light-polluted" urban sky, and many owners have already confirmed this. On the other hand, Unistellar writes in its Quick Start Guide: "For better results, avoid a full moon". Now what is correct about that? Both, of course! Actually, you can observe with the eVscope under "urban lighting conditions" (a hobby astronomer who did astrophotography confirmed to me that this is generally valid for astrophotography), but if you strive for optimal results (i.e. photos), nothing beats a dark sky, preferably in the period around the new moon. I can confirm this from my own experience, and corresponding example photos can be found on my tips and tricks page.
Where Are the eVscope Photos Quality-Wise?
The photos that I took with the eVscope have a look for me that lies between what you can see in a visual telescope and what "real" astrophotos show. Therefore, they are better suited to a comparison with the visual impression than "real" photos, and this is what I want to use them for. But no matter how you judge their quality, the eVscope photos form a "memory" that you can bring back later - and on which you can discover things you did not see at first or during visual observations. More on this below!
eVscope versus Atik Infinity
With my photo of M 42/43, I got for the first time the impression that I can not only keep up with the eVscope with my Atik Infinity and Explorer 150PDS, but also be a bit better... And my first tests with the eVscope confirm that the Atik Infinity delivers better results than the eVscope - with a much higher effort than needed when using the eVscope. And it was also about the lower effort for me!
See also page Atik Infinity Colour Camera versus eVscope - Photo Comparison.
eVscope versus "Normal" Astronomy Photography
"Normal" astronomy photography requires a much higher effort for acquisition and post-processing than photos taken with the eVscope or the Atik Infinity camera. While the differences to the Atik Infinity camera, which uses a similar technique as the eVscope, are not very pronounced, they are indeed very evident in comparison to normal astrophotography, especially when the photos were taken at higher resolutions. However, there is no point in being jealous of such photos as an eVscope owner. You have to keep in mind the different technical and time requirements when holding the photos next to each other. And compared with Hubble photos, even the most beautiful amateur photos look modest! Rather you have to realize what you can achieve with eVscope photos, which I will discuss below. And they are in color, too, which (almost) no visual amateur telescope offers!
Eyepiece or Photo (Smartphone)?
The developers of the eVscope repeatedly emphasize that the eVscope is primarily intended for observation through the eyepiece and not for the purpose of taking photos. I am afraid they are rather alone in this view. Perhaps this view is based on the visual observation they have been disappointed with and that they want to make more satisfying with the eVscope. Or maybe they just want to dampen expectations of the quality of the photos...
Anyway, in April, I received an online survey from Unistellar, asking questions about the eyepiece and even suggesting an eVscope without an eyepiece. This means for me that many eVscope owners or people interested in an eVscope have questioned the eyepiece.
From the beginning, I myself was primarily interested in the photos with which I want to document my observations (see below). That is why it is important to me to get the highest possible image quality and the largest possible field of view, which is now available with version 1.0.3 of the app. Nevertheless, I decided in the questionnaire to opt for the version with an eyepiece, because my wife likes to use it. Contrary to the hype about the eyepiece display spread by Unistellar, I find the image quality on the iPhone much better.
As long as the photos only showed the image section that the eyepiece shows, it could happen again and again that objects, which were clearly visible on the smartphone, were cut off on the photo. Only a look through the eyepiece showed me what would really come on the photo. The problem can be solved now by using the new rectangular format in sensor size. Unfortunately, you do no longer get the recording data... In addition, you can now also see errors caused by field derotation when using the Enhanced Vision mode for longer dwell times; when using the eyepiece format, they are usually cut off... Such errors are probably unavoidable and also occur with my Atik Infinity camera.
Conclusions
No matter how you judge their quality, the eVscope photos create a memory that you can bring back later and use for different purposes - and on which you can discover things that you did not see at first or even during visual observations. I describe this further below.
What Can I Do with the eVscope?
Observe and Rejoice!
First of all, with the eVscope, I can simply look at the sky, have DSO shown to me, photograph them and be happy about all this. But I want to achieve a little bit more! In the following, I will therefore discuss a number of use cases for the eVscope that came to my mind.
DSO Library
I document my DSO observations on my Website, which is a lot of work. Beside all the work, another shortcoming was that I describe DSO only in words in the end I usually forgot about their appearance very soon. I do not want to take photos from the Internet or other sources, especially since they rarely correspond to my visual impression.
With the eVscope I now have the possibility to take photos of observed DSO and thus to capture a memory in the form of a photo that can be revived and passed on again and again.
With the photos I intend to create sort of a "eVscope photo library" of DSO. This is basically, on the one hand, my eVscope photo gallery (with different sections) containing my best photos, on the other hand I will present the photos on the pages dedicated to the DSO that I observed.
Support for Visual Observation
As already written, I usually forget quickly what I have seen when observing visually. On the one hand, this sometimes causes identification problems, on the other hand there is often no or only a faint memory of the object left.
Only when I find striking patterns that I can remember, I can later look for them on photographs (or on images in astronomy programs) and hope to find them again and identify the object in case that I am unsure about its identity. But rarely do these photos correspond to the visual impression (which is why I also have books with drawings that come closer to the observations).
Since eVscope photos are closer to the visual impression than photos in books or on the Internet, it is obvious to use my DSO "photo library" for comparisons with the visual impression and also for identification. If this is done afterwards, the problem of recollection is again present. But because the eVscope photo is more similar to the visual impression than normal photos are, the comparison should be easier.
On the other hand, I might also use the eVscope and a visual telescope in parallel and check with the iPhone in my hand whether I have found the right object in the visual telescope - and how it looks there in comparison. Whether I will really do this, will of course only become apparent in practice...
Expect the Unexpected!
A somewhat surprising experience for me with the eVscope was that it is always good for a surprise. By this I mean that you can find objects on the photos that you had not expected and that you usually did not even know before. These can be, for example, other small galaxies, or structures within objects such as HII regions (for example in M 33).
With an angle of view of about 30', the field of view of the eVscope is comparatively small (size of the moon or sun. Nevertheless, especially since it is possible to use the entire sensor area, in some cases several objects can be observed simultaneously in the field of view, for example the galaxies M 65 and M 66 or the galaxies M 84 and M 86. It is not possible, however, to observe several objects that are located within a field of view between about 0.5° and about 4°, which can be done using rich-field telescopes.
But here I am concerned with something else, namely objects which are located within the field of view of 0.5° and which one had not expected at all - at least when one discovers them for the first time. I am amazed at how many other objects I have already discovered on photographs when I visited and photographed a certain DSO. Apparently, this is especially the case when you look for galaxies with other, smaller galaxies in their vicinity. I am curious what I will discover when the constellation Virgo will be better visible from my home village Mühlhausen. The eVscope has made me a true "galaxy hunter", whereas before I was more focused on star clusters, because I was seldom able to find galaxies in my visual telescopes.
eVscope for "Fast Observing"?
Admittedly, I do not like the German term "Schnellspechteln" at all, but I must also admit that with the eVscope you can be ready for observation in a few minutes (5-10 minutes, I never measured this...). This is not only an advantage over many other visual telescopes (except for my little table-top Dobsonians that I once owned...), but of course, especially over other astrophotography solutions. Clouds are sometimes even faster than you can set up the eVscope, but all in all, I can hardly imagine a faster solution - and it is one that you can quickly activate in between cloudy periods.
It should be noted, however, that Unistellar recommends a cool-down time of about 15 minutes for the eVscope. In this respect, it makes sense to put the eVscope outside a little earlier than one would like to start observing. Perhaps, the waiting time can be used for a routine check of the sharpness with the Bahtinov mask. It is easy for me to touch the focus wheel on the tube when I insert the tube into the mount and thereby misadjust the focus.
I also noticed that the automatic alignment (autonomous field detection) fails when the sky is still too bright. So you cannot start observing too early!
If you want to observe spontaneously, the problem of what to observe arises immediately, of course, because you did not prepare yourself. So you are danger of just visiting "old friends" once again. You can also quickly start an astronomy application and have a look at what DSO are visible at the moment (books are also possible...). Perhaps, the list of recommended DSO provided by the eVscope might prove useful here! But I have not used it yet, because I knew what I wanted to observe...
Flexibility of the eVscope
The eVscope represents an integrated complete solution, whereas with the Atik Infinity camera, which I also own (and any other camera...) many parts (telescope, tripod, accessories, camera, laptop, power supply) are needed and have to be assembled. Accordingly, it is not as flexible as such a solution, in fact it is not at all flexible. The eVscope has only a fixed magnification (plus electronic magnification) and a fixed field of view of 0.5° (corresponding to the size of moon/sun). Cameras, on the other hand, can be operated on different telescopes, plus focal length extenders and reducers. Even more flexible is a visual telescope with different eyepieces and other accessories. And almost every hobby astronomer has more than one telescope...
So you can only trust that the Unistellar developers have found a good compromise with the eVscope - and I think they have! But of course, the eVscope does not allow you to observe large nebulae and star clusters, nor planets or other very small objects. Planetary nebulae are possible, but still quite small...
Part of the "flexibility" issue is transportability. Unistellar points out that the eVscope is light enough to be transported. In addition, the integrated solution (few parts) makes transport easier! For me, however, it is true that the eVscope is transportable, but only by car (12 kg)... I will not follow Arnaud Malvache and carry the eVscope on my back up a mountain (in our case, the Heiligenstein)...
What Does the eVscope Experience Mean to Me?
Before I learned about the eVscope, I observed visually, but only since 2016 have I also observed DSO systematically. These observations were often nice for me on the one hand, but on the other hand many were also very disappointing, because I often was not able to find the objects or they made a disappointing impression on me. The eVscope now looked like a unique chance to experience more success in observing, and so I took part in Unistellar's Kickstarter campaign.
The eVscope replaces the eyepiece (and the secondary mirror) with a sensor and thus, works like a digital camera (this is called EAA = electronic augmented astronomy). Because a sensor, unlike the eye, can store light, it is possible to detect weaker DSO and see colors. The eVscope's eyepiece can be compared to an EVF in digital cameras. The image is also transferred to a smartphone, which controls the eVscope via an app.
For die-hard visual observers, however, this form of observation is no longer "real" observation, and they therefore reject it. And indeed, the eVscope turns many things that are familiar from visual observation "upside down":
- A dark adaptation, which can take 20-30 minutes, is not necessary.
- No need for prolonged observation and telescopic vision to see details (but the longer you stay in Enhanced Vision mode, the better...)
- Cold, dew etc. also play a role, but at least the observer can retreat with the smartphone into the living room or into the kitchen and control and observe the eVscope from there.
- DSO can be observed without alignment (GoTo) or manual search thanks to Auto Alignment (Automatic Field Detection) and GoTo. Other solutions that I own (Celestron StarSense, SkyWatcher Synscan) are more difficult to use, less accurate, and take more time (in case of doubt, I prefer to observe manually because it is faster for me)...
- Seeing (transient)/drawing (a lot of work, for afterwards) versus digital image (while observing/transient)/photo (for afterwards) - see below for details!
Other things remain the same:
- The darker the sky, the better
- The longer you observe/stay in Enhanced Vision mode, the better
- The telescope should cool down before observation (1/4 hour)
- When it is cold, technology gives up... But this should have been improved!
- The eVscope helps to plan the observation by storing an object list and making suggestions for the observation. This is no different from other GoTo systems, but is very easy to use. Nevertheless, as with manual observation, I like to compile object lists (or even images of the sky with targets marked) using astronomy programs. Then I have a better overview.
This list can certainly be extended, and if I can think of anything in this regard, I will do so.
Seeing (transient)/Drawing (much work, for afterwards) versus Digital Image (while observing, transient)/Photo (for afterwards)
When you observe visually, you have the immediate impression, but it is transient. If you want to capture it, all that you can do is drawing, which requires a lot of work, skill, and practice.
On the other hand, if you take astrophotographs, there is no possibility to observe; instead, you have a lot of work afterwards, but a result that remains and is presentable.
The eVscope lies somewhere in between: You can observe a digital image through an eyepiece or a smartphone. But for me personally, this eyepiece image has little to do with the impression in a visual eyepiece (I prefer the smartphone anyway...). On the other hand, you can take "snapshots" of the current image and thus get a result that stays and can be used in many different ways. I described this in some detail above.
Is the eVscope a Toy, Can It Become Boring?
The eVscope is often referred to as a "toy", especially when compared to "real" astrophotography. This usually refers to its limited possibilities (image quality, flexibility). But also the easy access to DSO might turn the eVscope into a toy, because in a relatively short period of time one sees the most beautiful DSO, and observing becomes boring afterwards, since the quality of the photos can hardly be increased. And I soon experienced for myself that collecting DSO can be fast with the eVscope! I have never found so many DSO in such a short time with any of my telescopes! Only bad weather can slow you down!
First of all, I cannot exclude that the eVscope might quickly become boring for at least some of its owners, especially if you observe without much preparation and, except maybe sharing the photos via smartphone, do nothing else, for example, do not document your observations (which I try to do, but it takes a lot of work...).
Above, I have describe what I plan to do with the eVscope, and I believe that I will keep my busy for the next few years. However, I cannot rule out a certain "wear and tear" effect for me either. And here the visual telescope has perhaps even an advantage over the eVscope: Because I forget the image impressions with time, the DSO may appear to me as new again (or almost, depending on the object...) when I observe them again. So I have an inexhaustible resource of DSO "thanks" to my forgetting. Thus, the advantage of the eVscope to produce lasting results might also turn into a disadvantage, because repeated observations are so similar. These are all thoughts that I have at the beginning of a hopefully long friendship with the eVscope...
Final Words
I am glad to have taken part in the Kickstarter campaign for the eVscope, to have it already delivered and, despite a rough start, to be able to use it quite a lot. I will not give it away anymore - and hope that this opinion will hold for quite a number of years (and the eVscope as well). Thank you Unistellar for this great telescope!
Wish List
- Make the labeling ring (including vignetting) optionally available for photos instead of mandatory (in the settings) >> realized with version 1.0.3
- Offer a rectangular format corresponding to the iPhone image optionally available for photos (as an alternative to the square format) (in the settings) >> realized with version 1.0.3
- Offer further well-known NGC objects in the object list (NGC 752, NGC 2264 (Christmas Tree Cluster), ...) >> realized with version 1.0.3
- Offer the possibility to store "user objects" so that users can expand the DSO catalog of the app.
- Timer for duration of Enhanced Vision Mode (top left above image) >> realized with version 1.1.0
Conclusion/Update: Except for the user-defined objects, my wish list has been processed by Unistellar until app version 1.1.0! Thank you!
Links
- Unistellar Website: unistellaroptics.com
- eVscope Kickstarter campaign: www.kickstarter.com/projects/unistellar/evscope-100-times-more-powerful-than-a-classical-t/
- See also my page offering Astronomy Links.
|
made by |
| 17.01.2023 |