Telrad Finder
What is the Telrad Finder? | Photos: The Telrad Finder | Photos: Additions | Photos: The Telrad Finder at the GSO GSD 680 Telescope | Photos: The Telrad Finder at the GSO GSD 680 Telescope (Alternative) | Photos: View Through the Finder | Deep Sky Reiseatlas and Deep Sky Reiseführer | Links
Archive
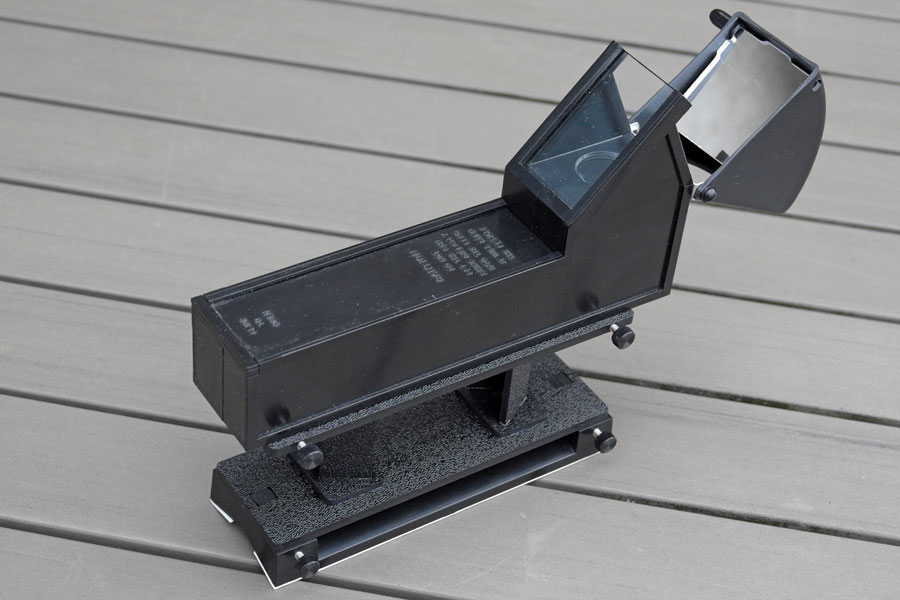
On this page, I report my (first) experiences with my new Telrad finder, which I acquired for my GSD 680 Dobson telescope. In February 2017, I extended it with a 5 cm riser base and a dew cap with integrated 90° mirror.
| Note: In April 2017, I parted with my GSO GSD680 8" Dobsonian telescope, because it was too heavy for me, and I acquired a 6" Newton tube. Unfortunately, the Telrad finder is too large for this telescope tube, so parted with it and its accessories as well. Therefore, I am regrettably unable to report any further experiences with the Telrad finder on this site. |
What is the Telrad Finder?
Developed by Steve Kufeld, the Telrad Finder is a kind of bright-line frame viewfinder, which, unlike the finder scope, is a zero-magnification finder. This has the disadvantage that only those objects are visible in the viewfinder that can be seen with the naked eye (so you still need a finder scope that magnifies for finding faint objects). On the other hand, it provides the advantage that the image in the viewfinder fits into the overall view of the sky instead of showing only a portion of the sky. Therefore, a coarse alignment of the telescope with the Telrad finder should be very intuitive. (After Wikipedia, adapted)
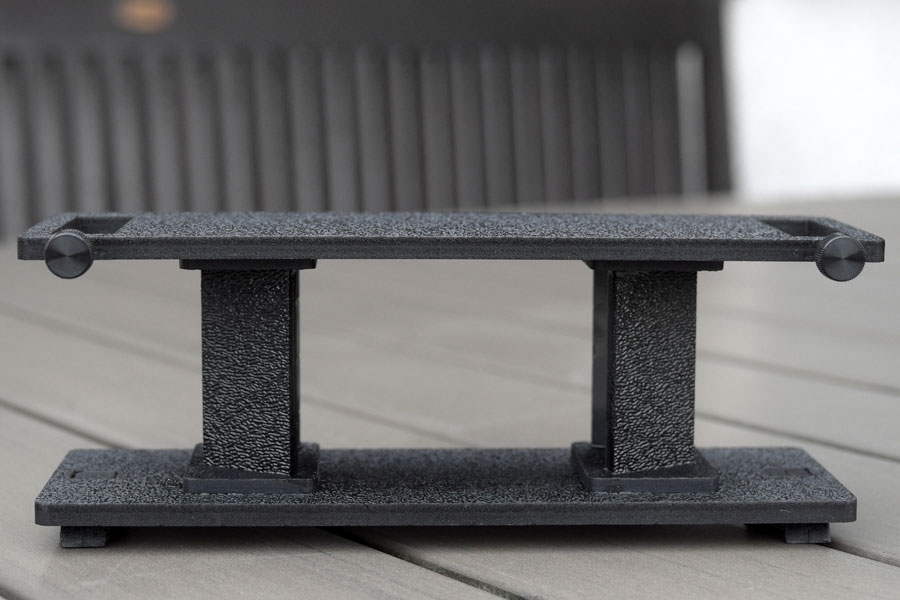
The device consists of a base, which is attached to the telescope tubus with double-sided tape, and the actual viewfinder. The base remains at the telescope; the viewfinder can be easily removed thanks to two knurled screws. If you own several telescopes, you can acquire a base for each of them and simply exchange the viewfinder between the telescopes. There are also riser bases (5 cm, 10 cm) available, so that you get some distance from the telescope tubus when looking through the viewfinder, which can make looking through the viewfinder more comfortable.
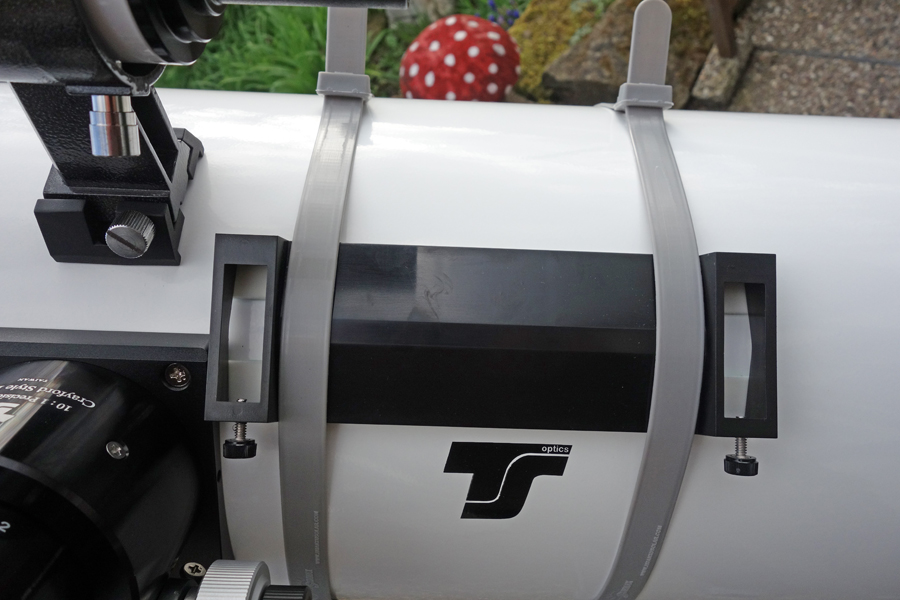
It is recommended to fix the Telrad base provisionally to the telescopic tube before final gluing (the tapes hold extremely tight!) to find the optimum position for the viewfinder. I provisionally secured the base with plastic bands (see photos below) - perhaps this will remain just so... I am still not convinced that the current position is good. I have nearly to crawl on the floor, when I want to look through the viewfinder for objects higher at the sky. I am just trying out an alternative mounting, where I mount the Telrad viewfinder more behind the finder scope base, but in the end, it is very similar to the previous position.
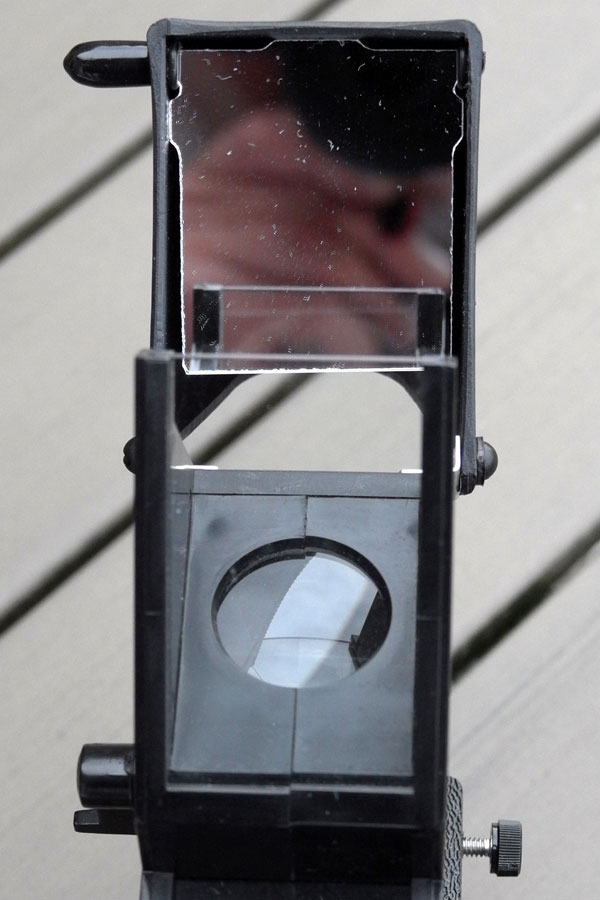
With the Telrad viewfinder you look through a mirror at the sky. The device projects three red rings (corresponding to a visual angle of 0.5 °, 2 ° and 4 °) onto the mirror. At night, you more or less see only the rings - as if they were projected onto the star background. You move the telescope and, using the rings, try to position it so that the target region lies within the inner ring - and hopefully, if the finder is in good adjustment, you will this also when looking through the eyepiece. The adjustment of the rings is done with three thumbscrews on the back of the unit. According to my first impressions, this seems to work well.
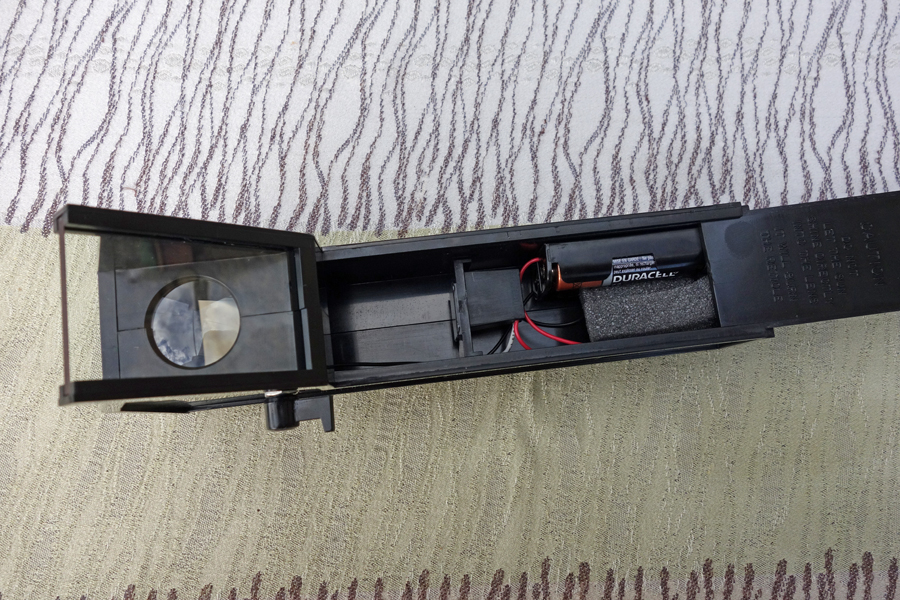
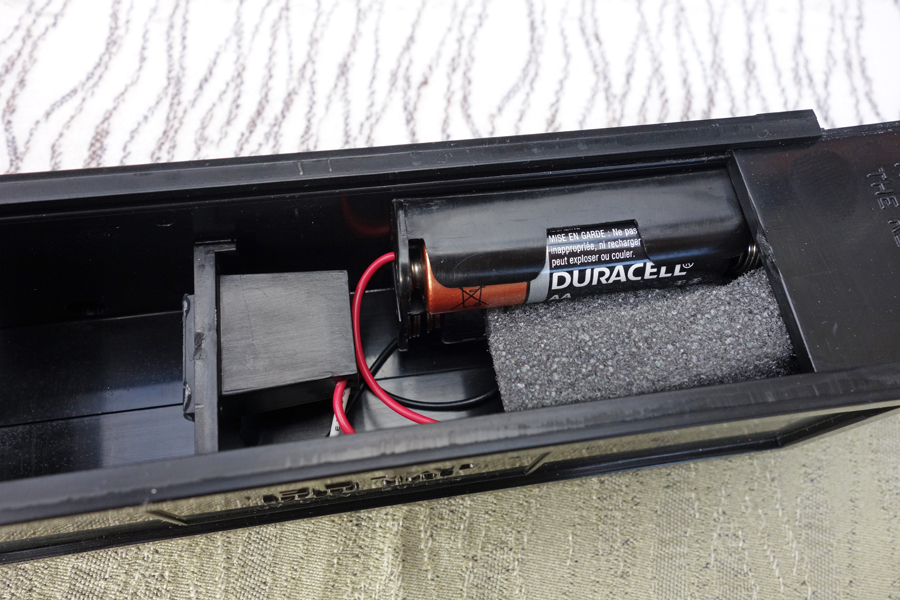
On one side, the device has a switch with rotary knob to turn on the inbuilt LED and regulate its brightness. The red LED of the Telrad finder is powered by two AA cells. Overall, the device appears fairly large and rough to me. But since it is made of plastic, it is relatively low-weight, causing the telescope's center of gravity hardly to move (optionally, you can offset the center of gravity with magnetic weights...).
In addition, you can use sky maps (for example, the Deep Sky Atlas, which I purchased with the Telrad Finder) to find the exact position of an object under observation. These list and describe interesting sky objects (galaxies, star clusters, nebulae), and may also show Telrad rings for selected celestial objects (as the Deep Sky Atlas does). With the latter, you will know what to expect... (After Wikipedia, adapted)
Below I show pictures of the Telrad finder, of its installation on my GSD 680 telescope, and of the rings at night.
Photos: The Telrad Finder
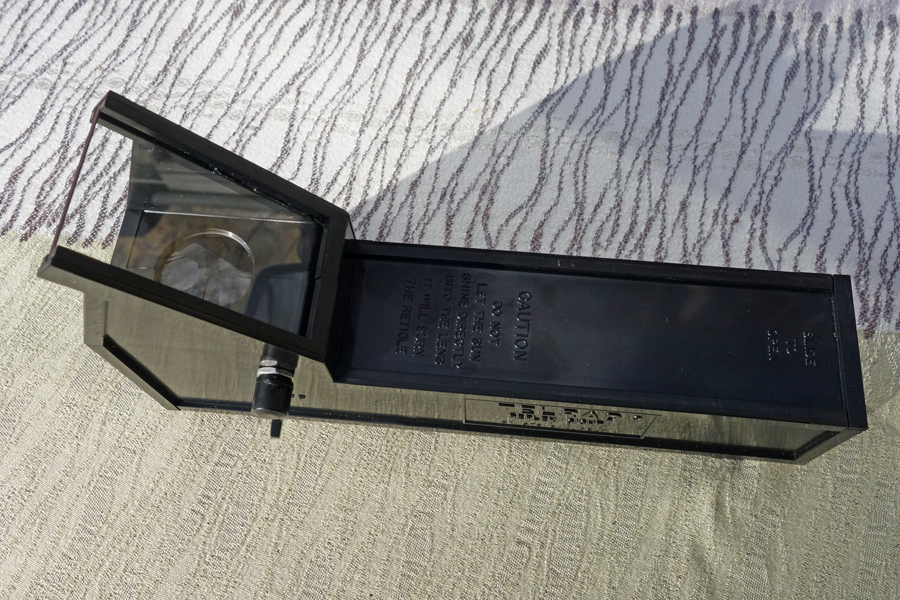
Base from above and already mounted on the telescope tubus. Regrettably, I forgot to take photos of the base alone (particularly, the double-sided tape) and the finder with base... |
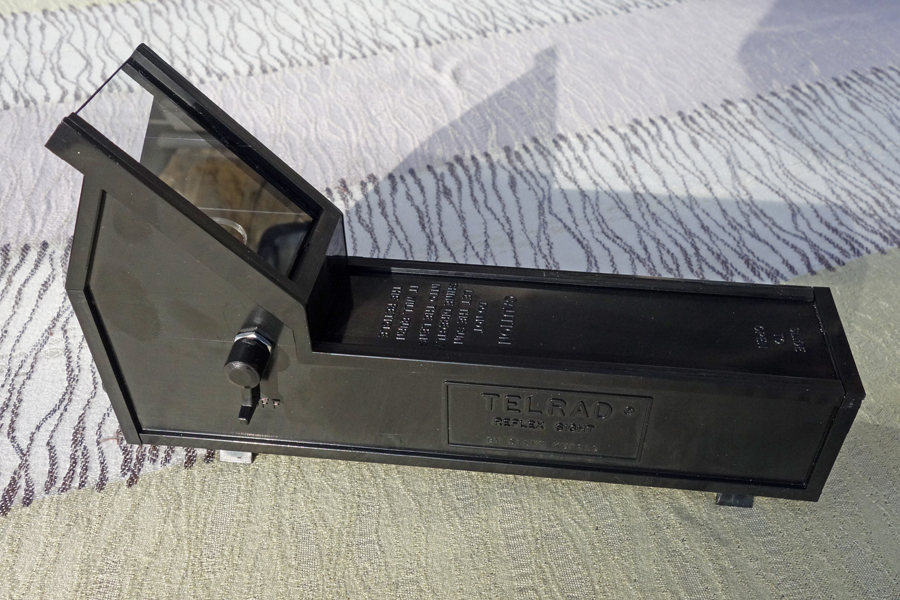
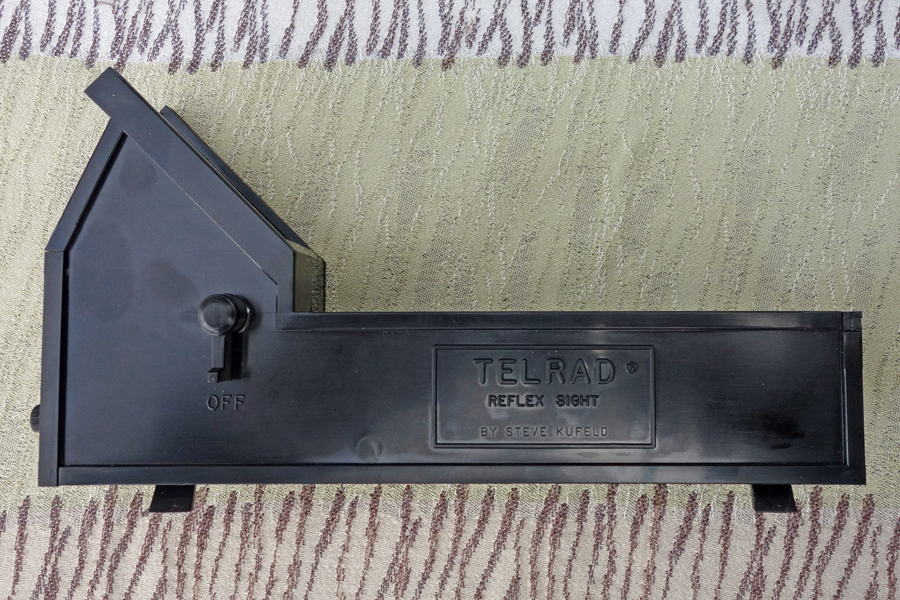
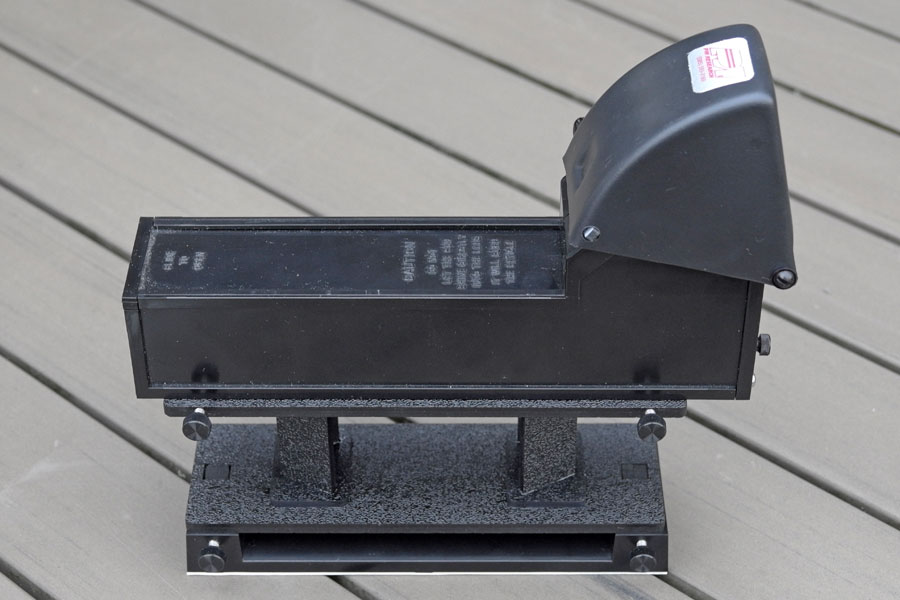
Finder (without base) from the side. You can see the little feet for mounting the finder to the base as well as the main switch (left). |
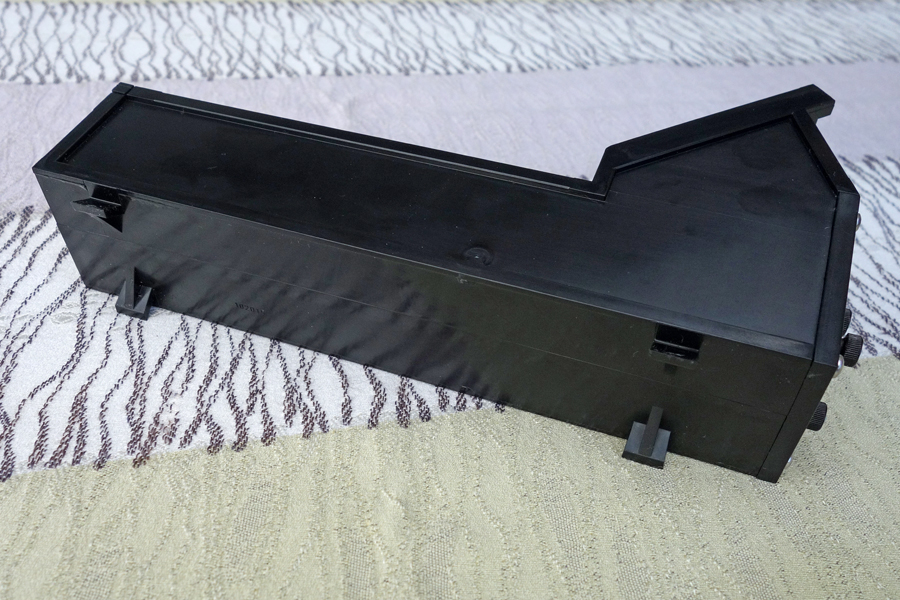
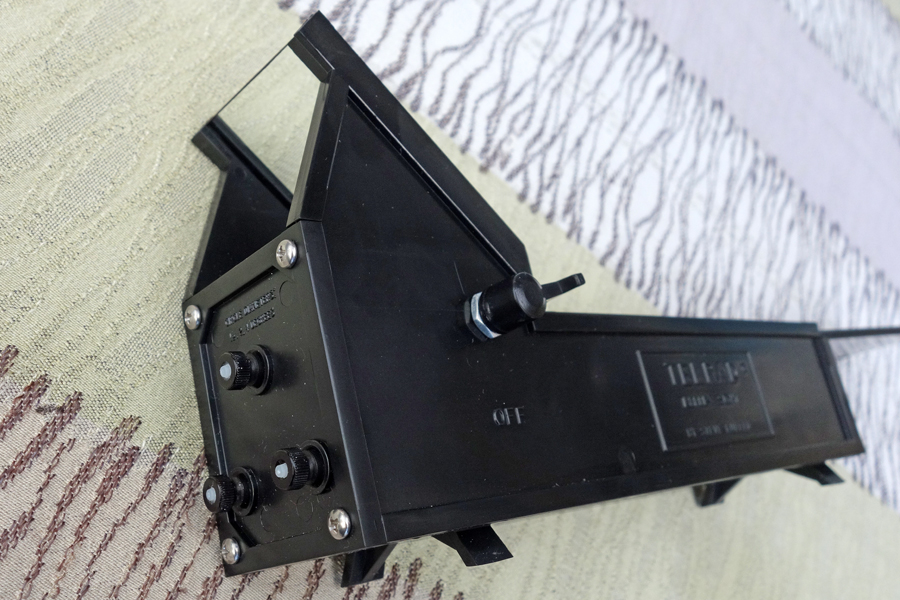
Bottom view of the finder |
Finder from the other side |
 |
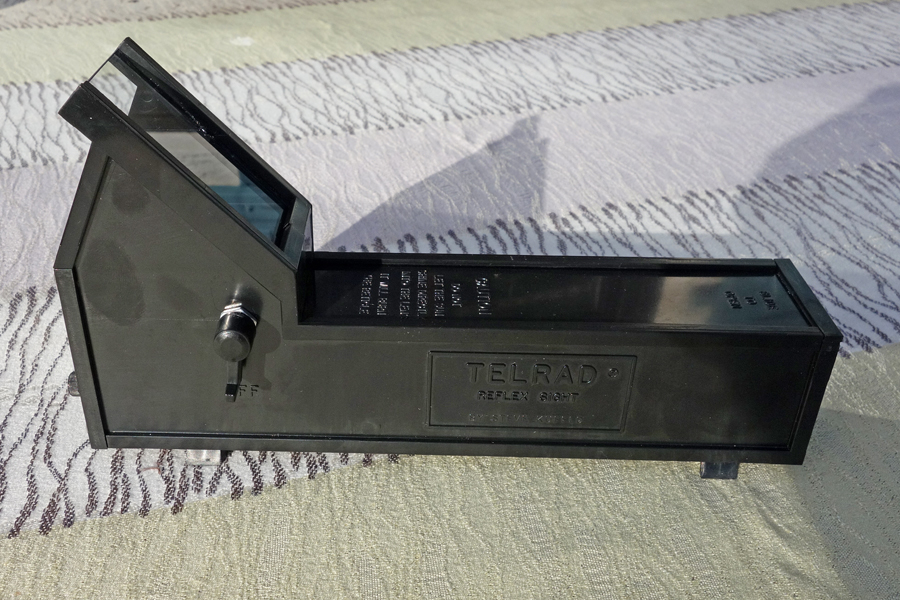 |
Finder from above |
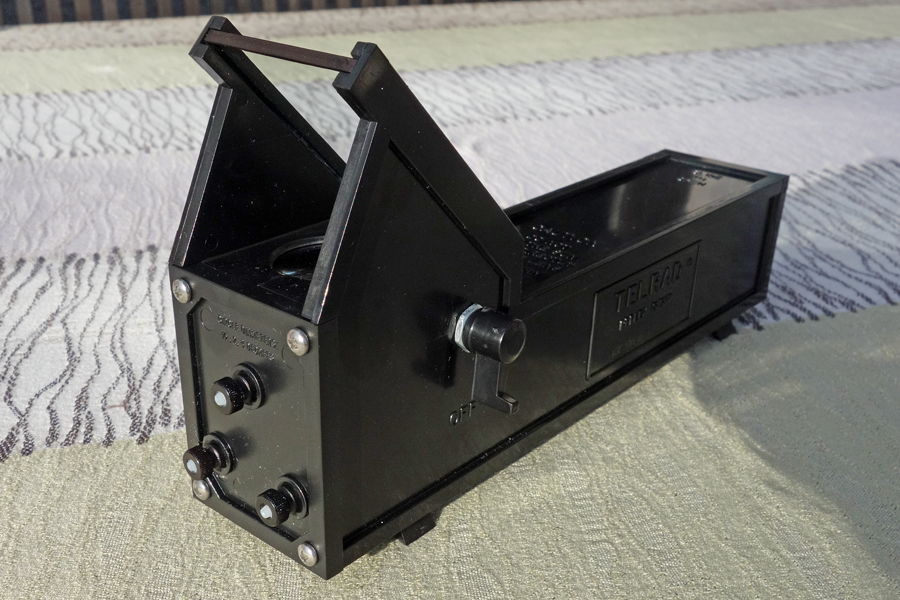
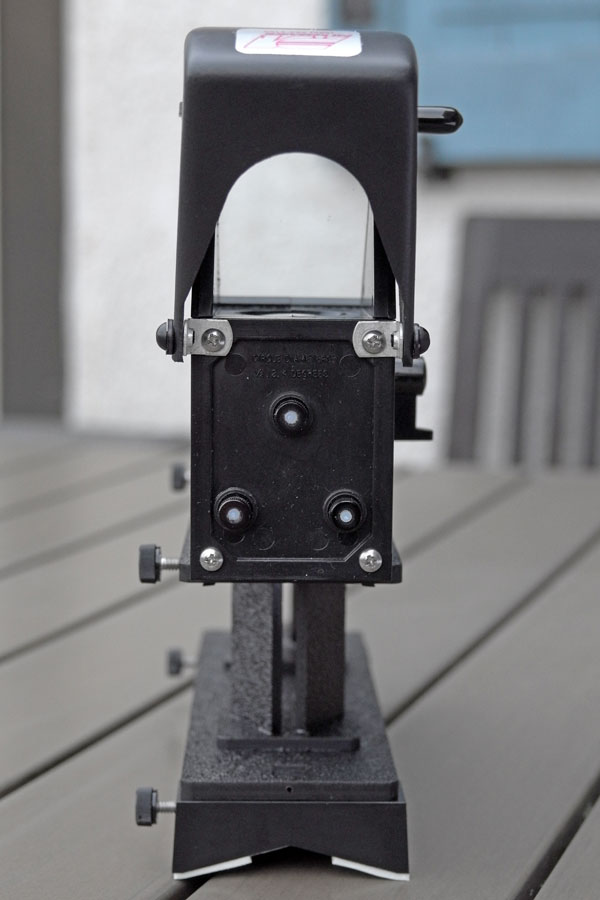
Rear view of the finder; you can see the three collimation screws at the back and the main switch on the side (also regulates brightness of the LED/rings) |
Rear view of the finder; you can see the three collimation screws at the back and the main switch on the side (also regulates brightness of the LED/rings) |
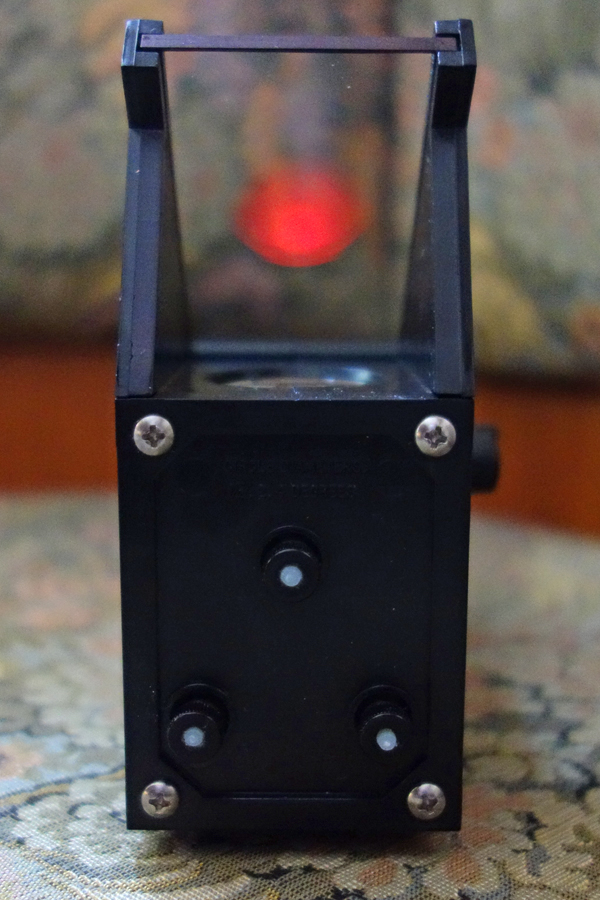
Telrad finder with LED switched on; regrettably, the rings on the mirror are blurred (but see here). |
Telrad finder opened; battery holder on the right (2 AA cells) |
Battery holder larger (2 AA cells) |


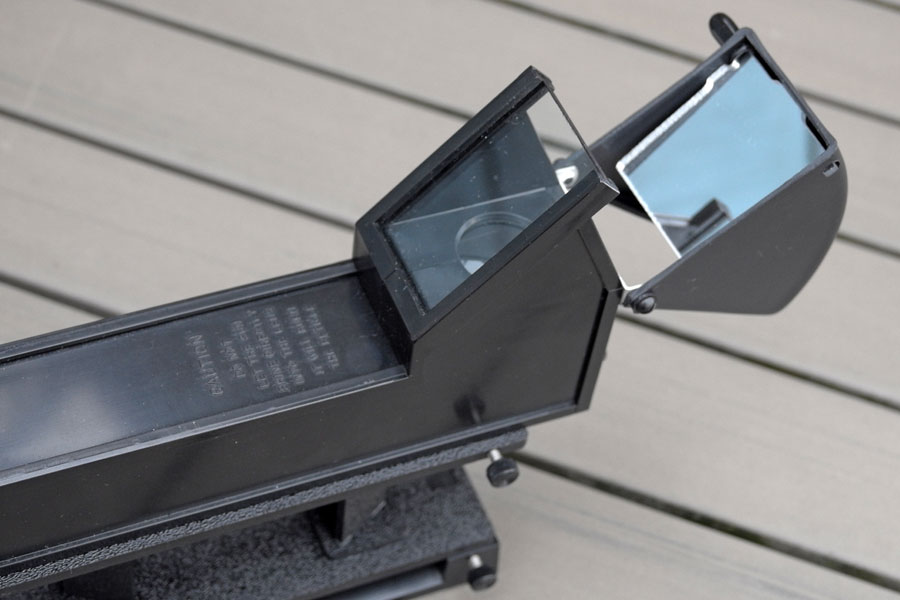
Photos: Additions
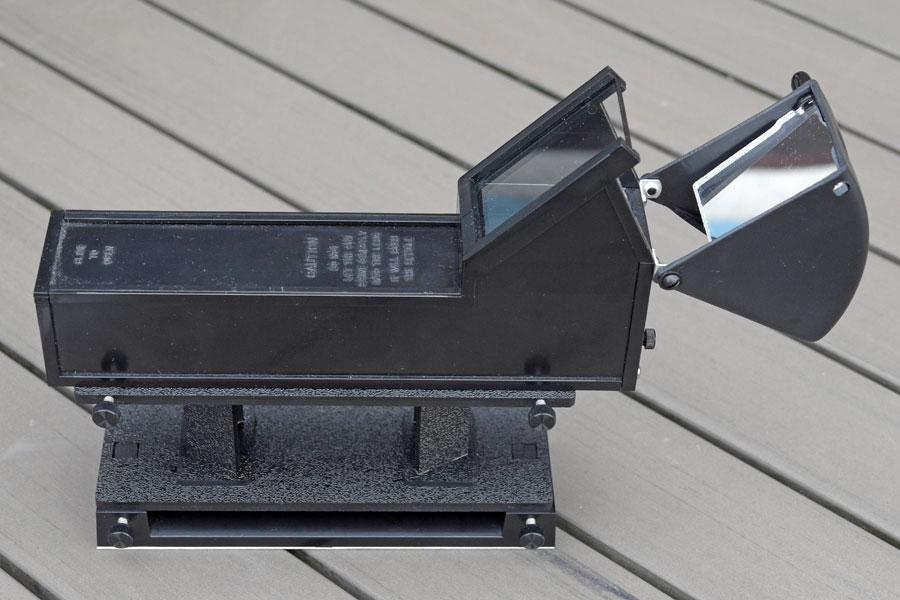
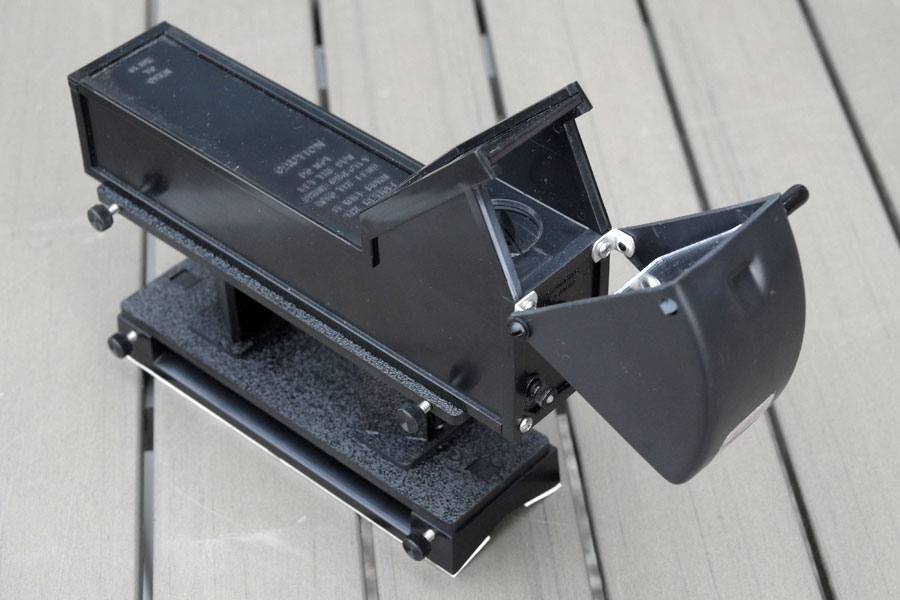
As additions for the Telrad finder I bought a 5 cm riser base and a dew cap+ with integrated 90° mirror.
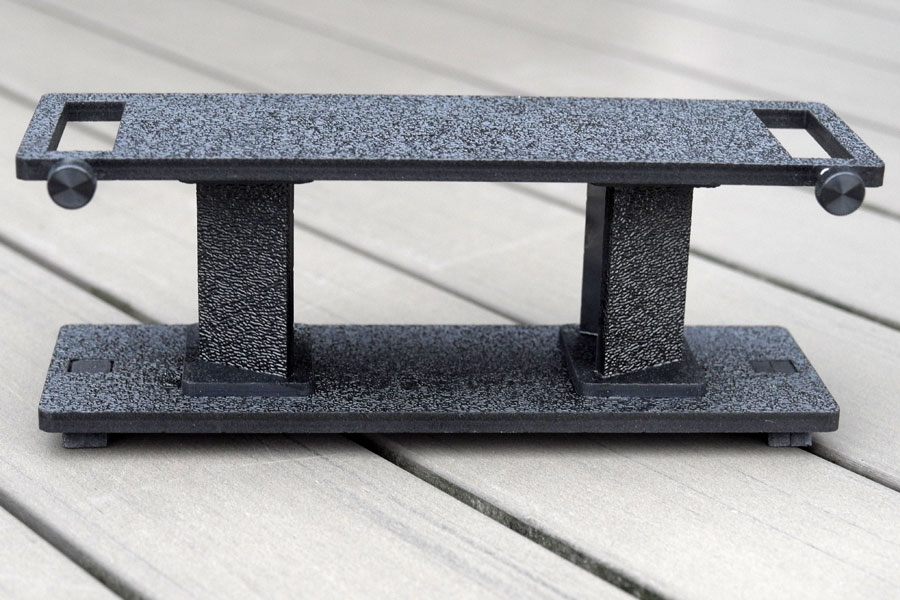
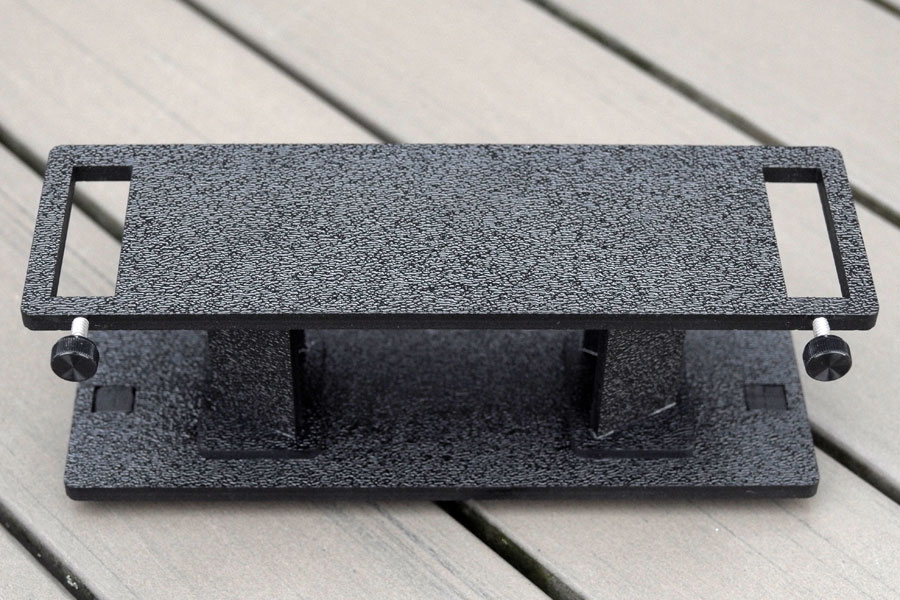
Riser base (5 cm) |
Riser base (5 cm) |
Riser base (5 cm) |
Telrad with riser base and dew cap+ |
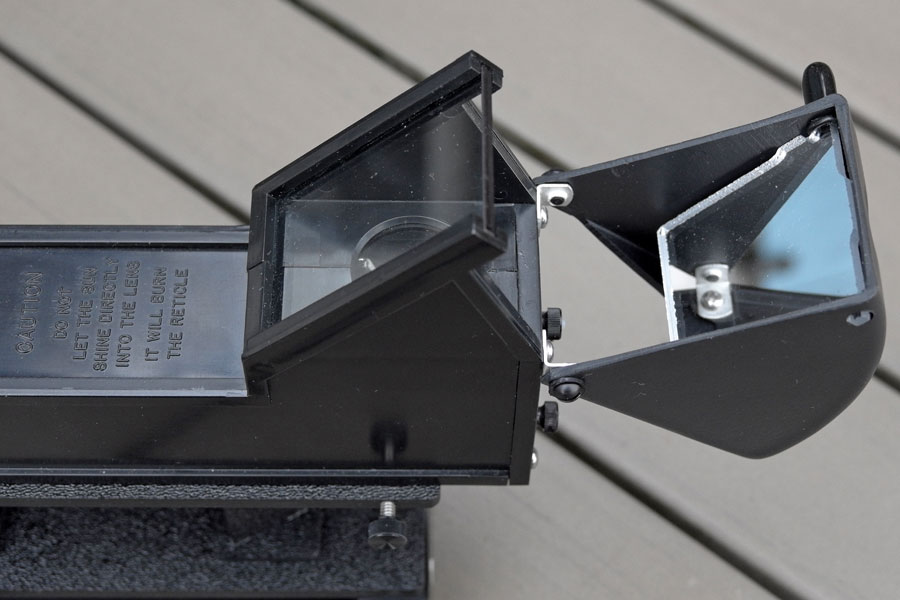
Dew cap opened so that you can look straight through the finder |
Dew cap moved further, mirror lifted up |
About the position for using the mirror |
Ditto |
Ditto |
Ditto |
Direct look with dew cap |
Using the mirror |
Look at the mirror |
|

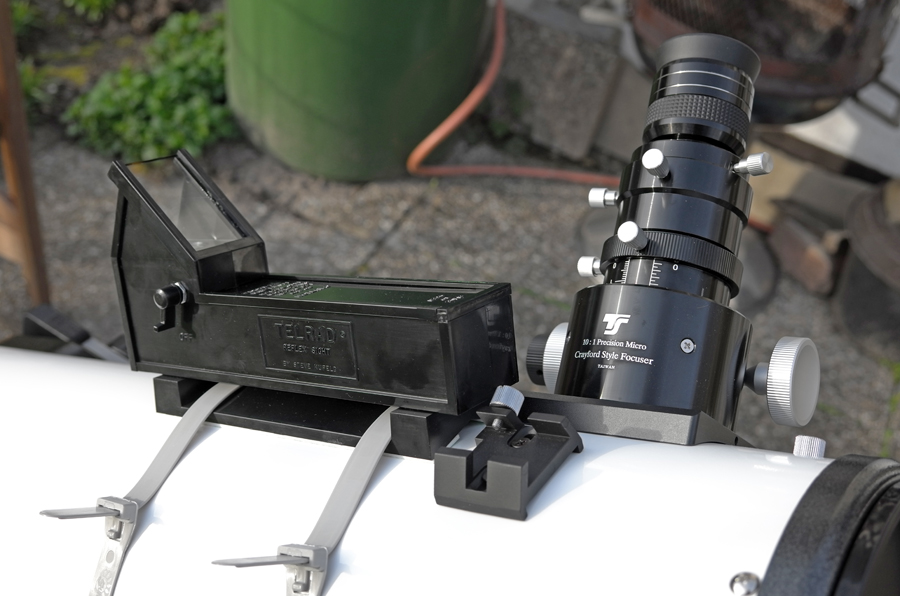
Photos: The Telrad Finder at the GSO GSD 680 Telescope
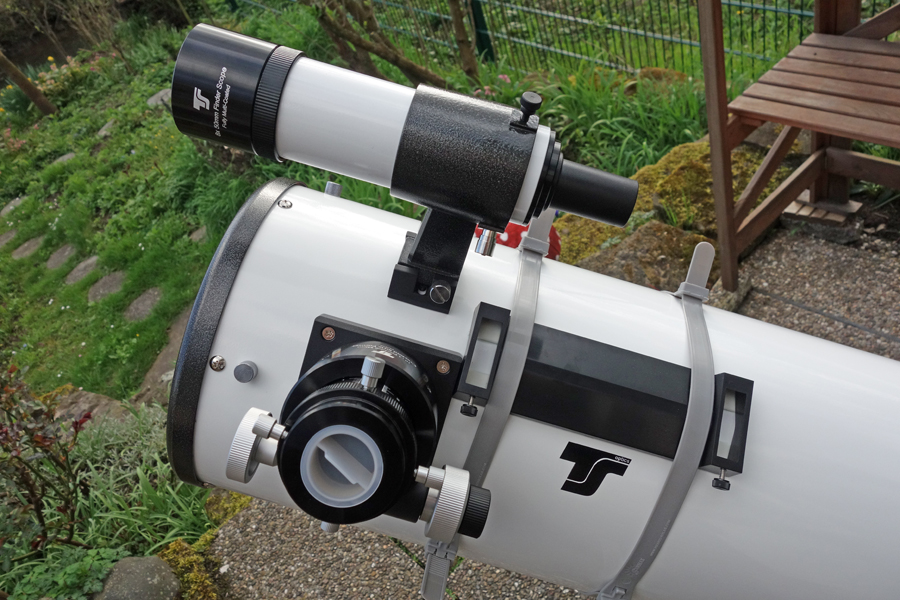
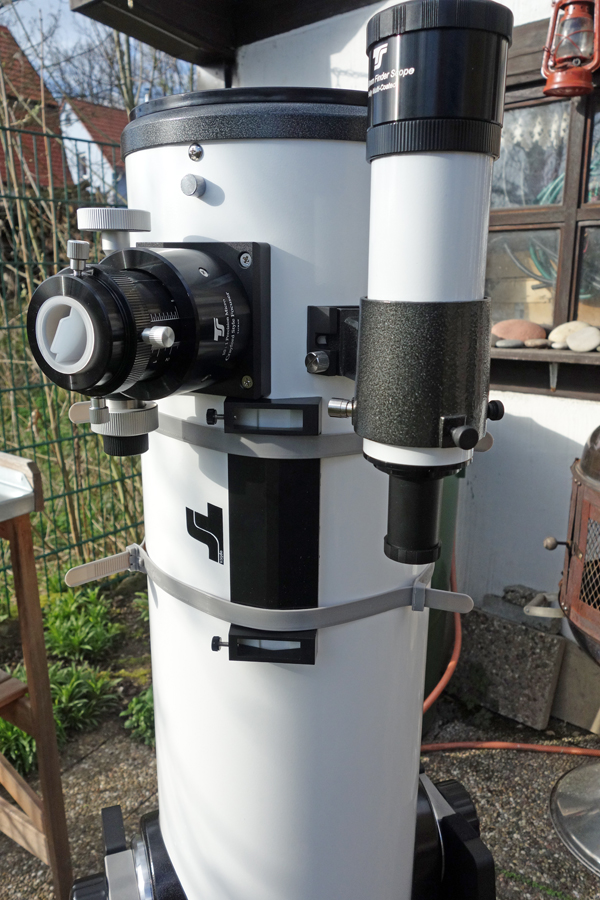
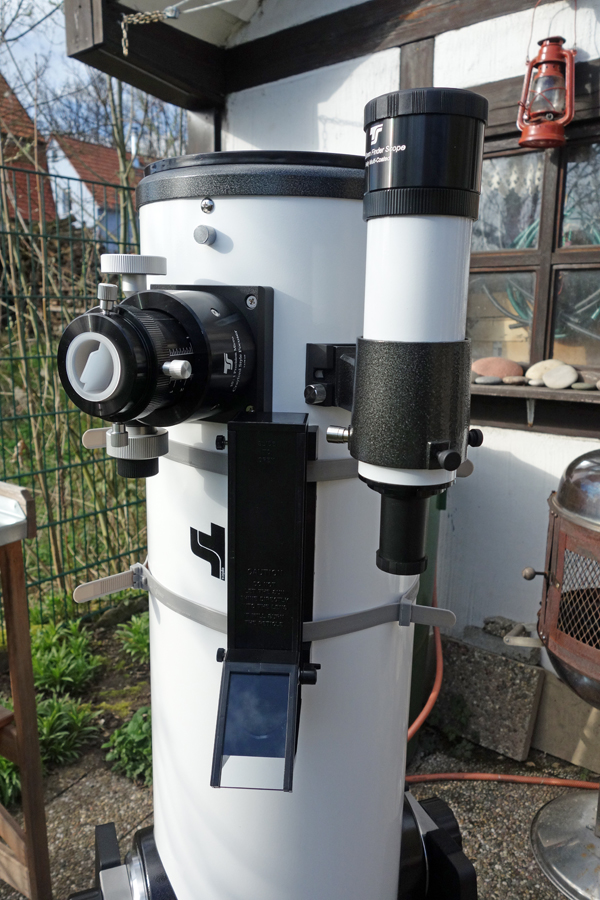
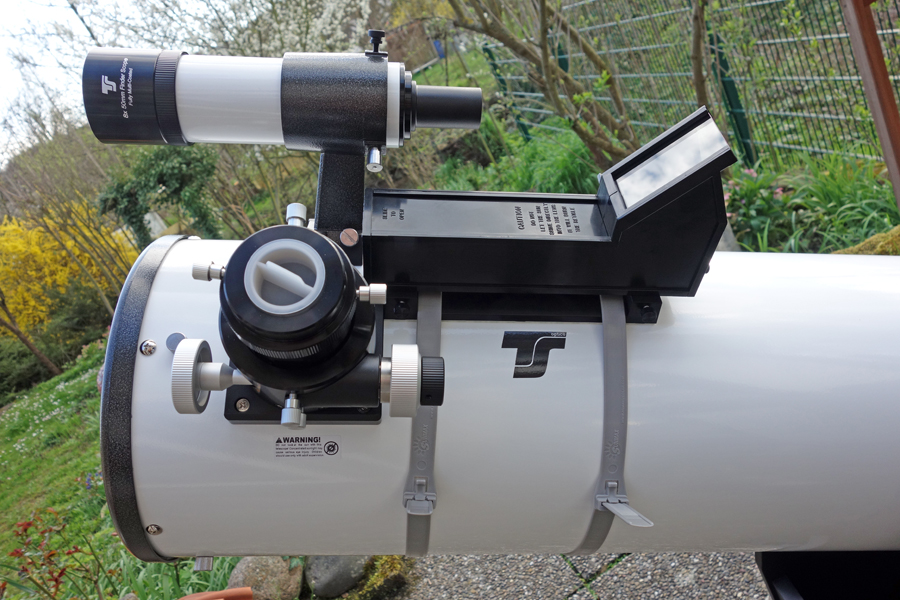
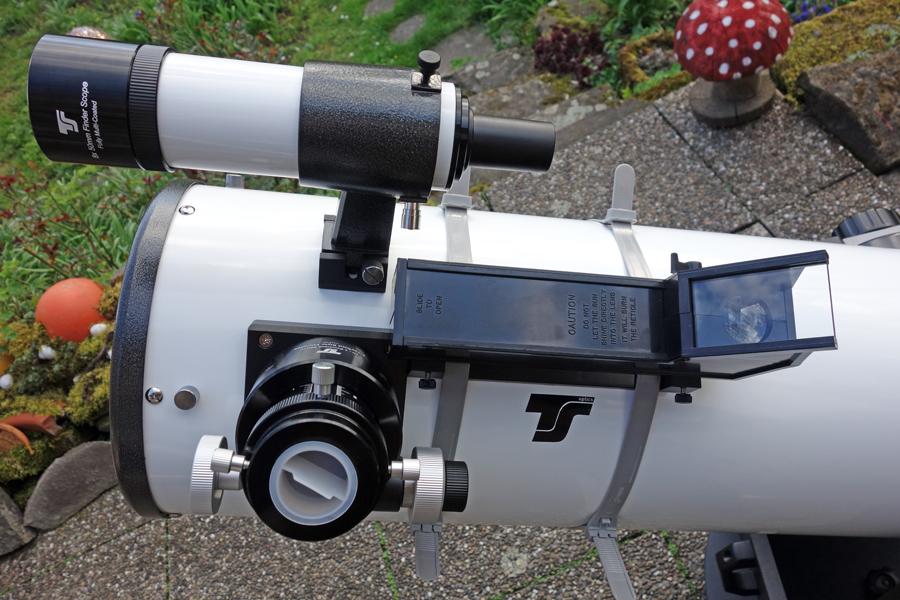
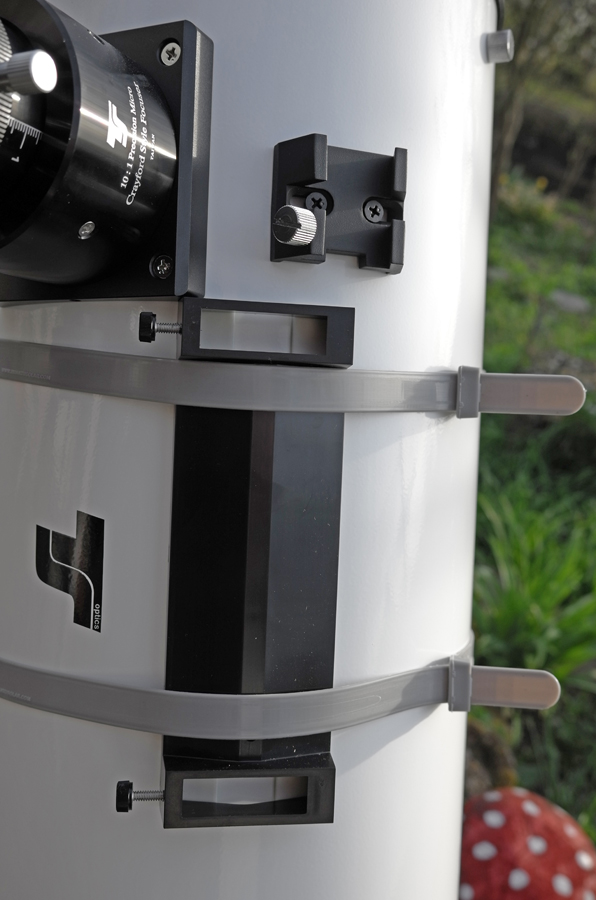
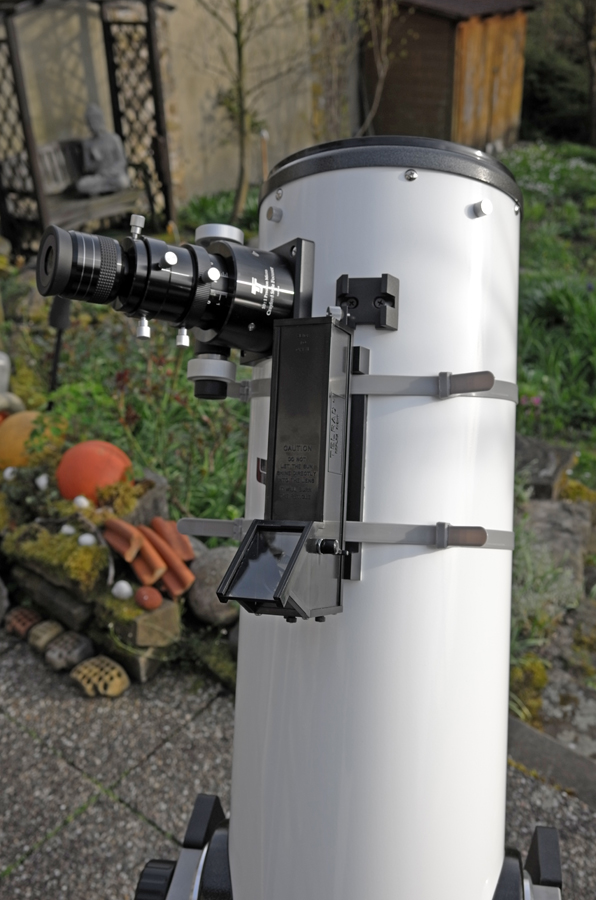
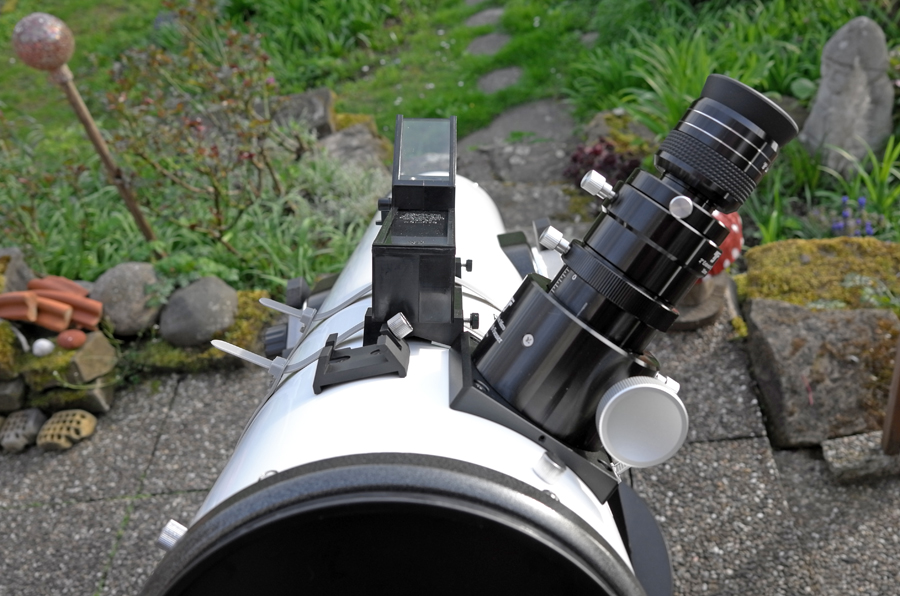
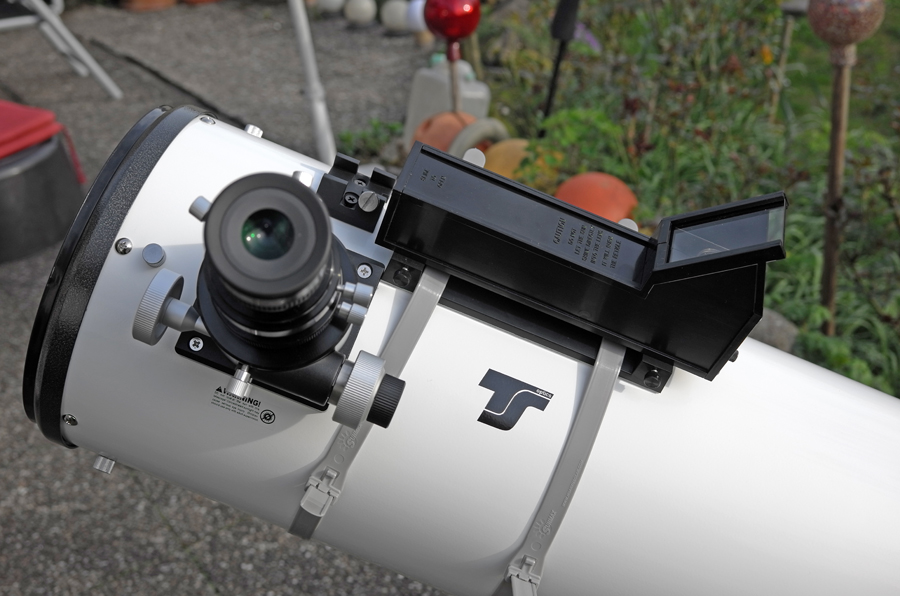
I mounted the Telrad finder between focuser and finderscope so that viewing is reasonably comfortable. Unfortunately, with my 8" telescope there is not enough space to mount the viewfinder between the two - I had to move it slightly backwards. I fixed the base at the telescopic tube with two rings made from three flat plastic bands (from solar lights...) (inspired by a Swiss astro dealer). The bands can be tightened a little bit.
At the moment, the Telrad finder is a bit in the way when using the finderscope. But since I rarely use both viewfinders simultaneously, this is not a big problem - the Telrad finder can be removed easily thanks to two thumb screws.
I mounted the Telrad finder between focuser and finderscope
so that the insight is reasonably comfortable. Note the plastic bands
for securing the base to the tube. |
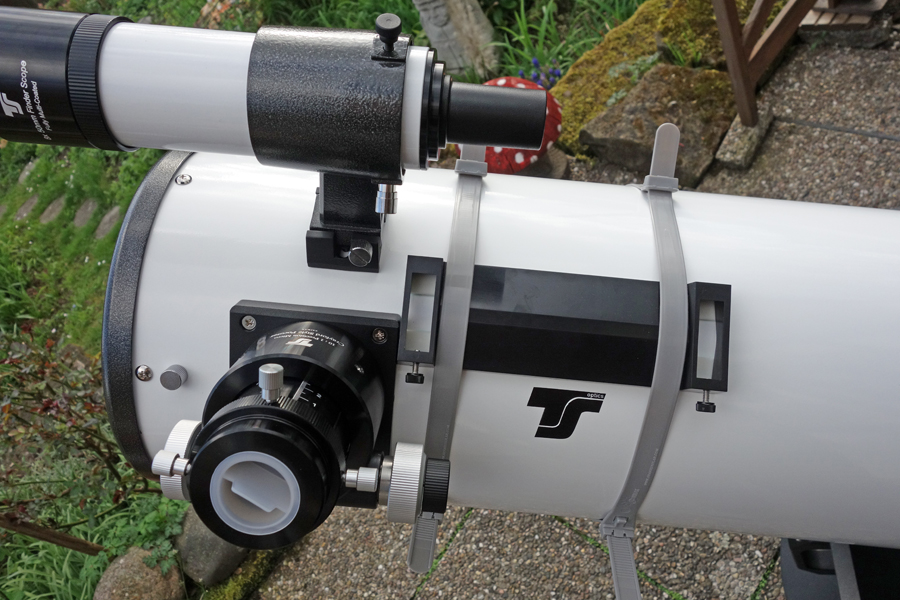
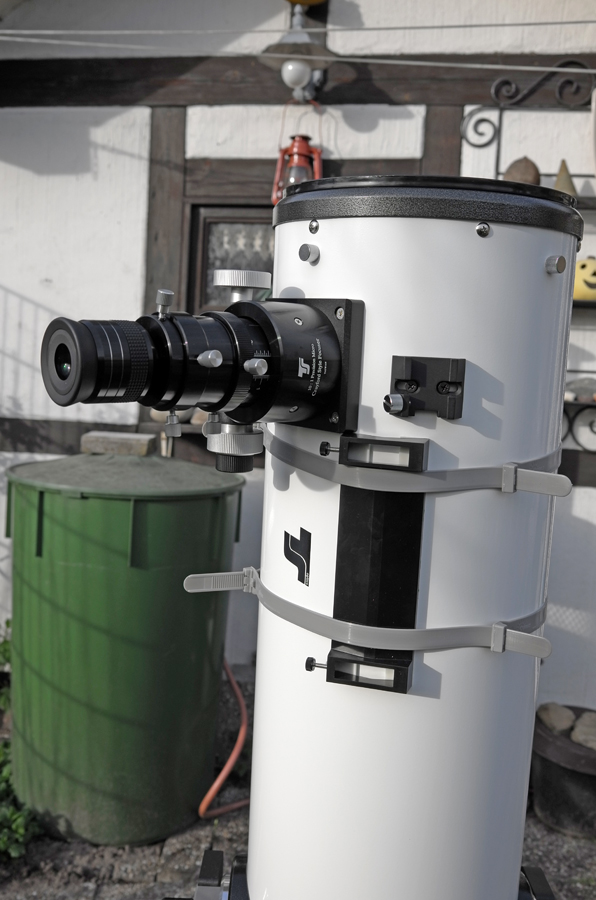
Base without the finder; it touches the focuser base so that it has a fixed starting point. |
Base without the finder; it touches the focuser base so that it has a defined starting point. |
Base enlarged |
Base without finder |
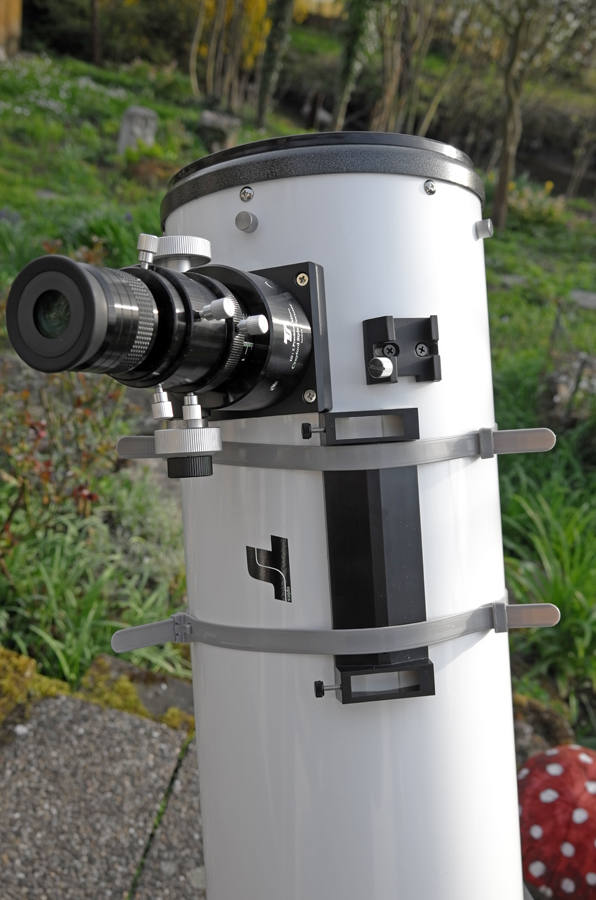
Finder mounted to base |
Complete Telrad finder side view. The finder Telrad finder is a bit in the way when using the finderscope. But since I rarely use both viewfinders simultaneously, this is not a big problem - the Telrad finder can be easily removed thanks to two thumb screws. |
Ditto |
View from above; the base touches the focuser base to have a defined starting point. |
Rear view (from where you look through the finder); there are three collimation screws at the back of the finder. |

Photos: The Telrad Finder at the GSO GSD 680 Telescope (Alternative)
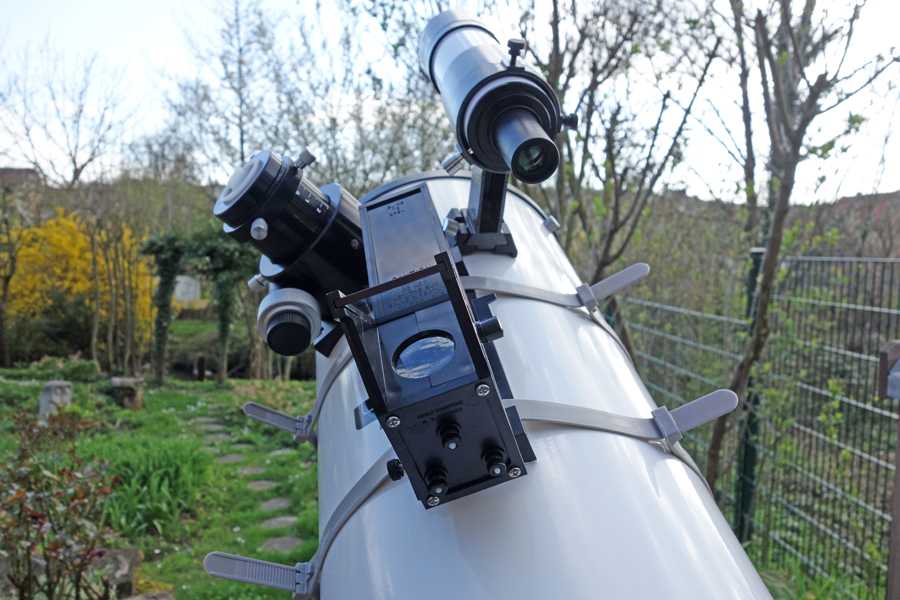
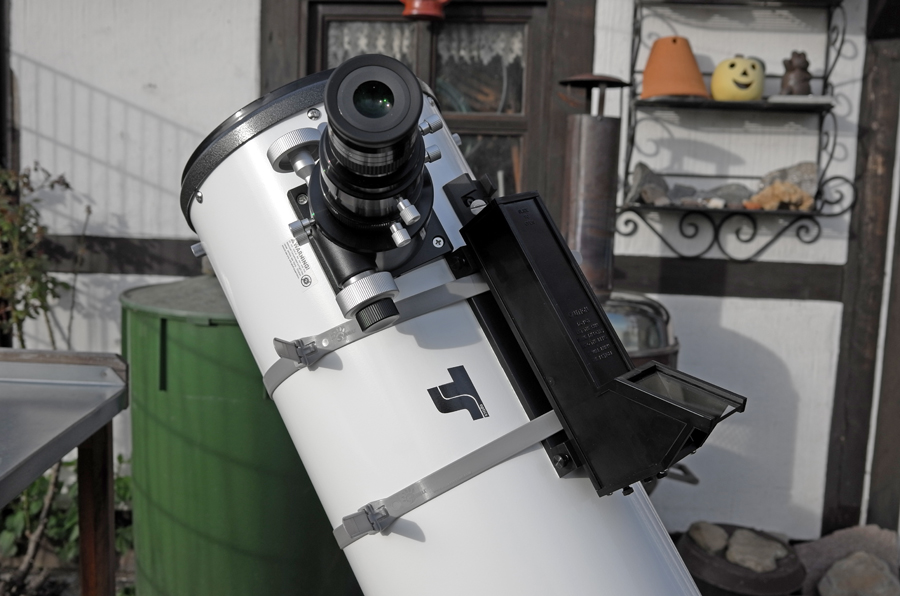
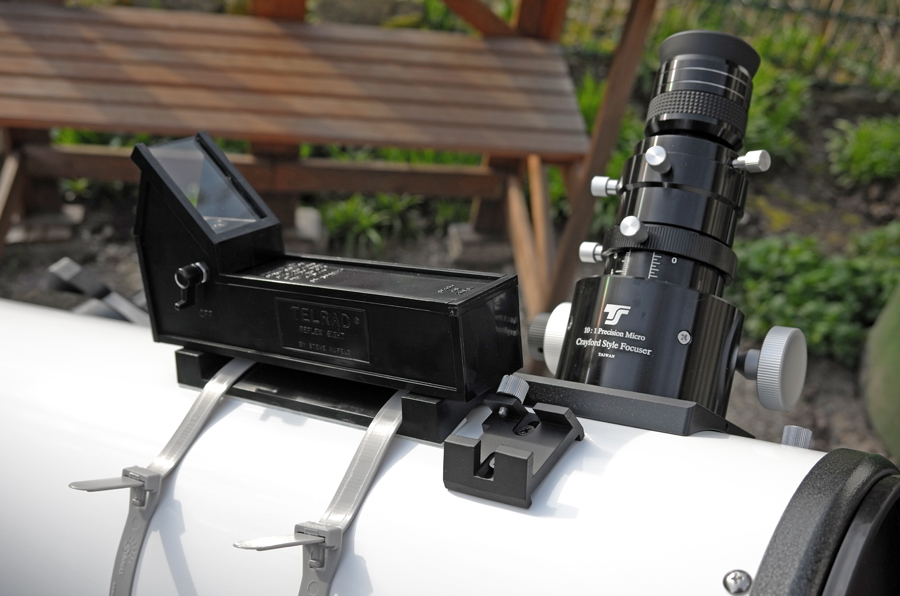
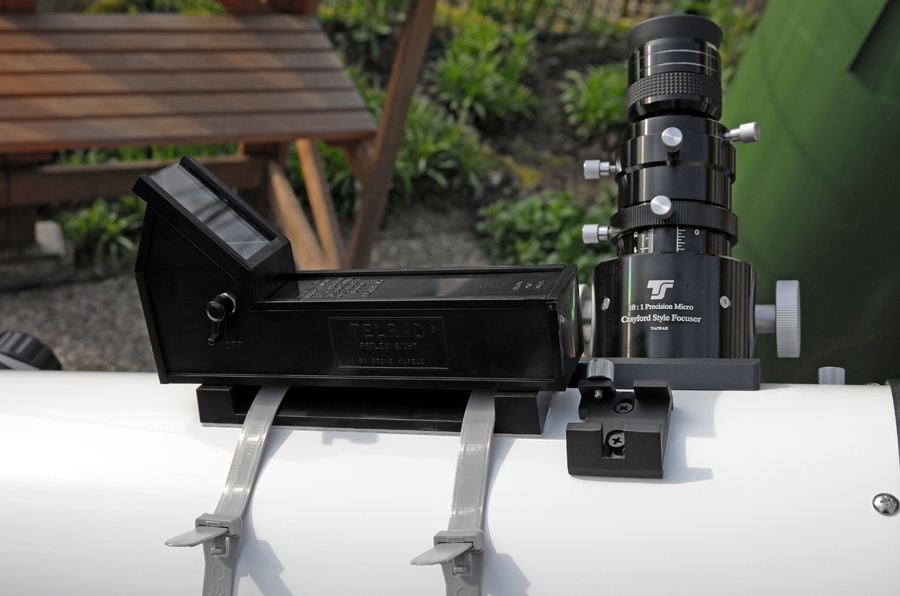
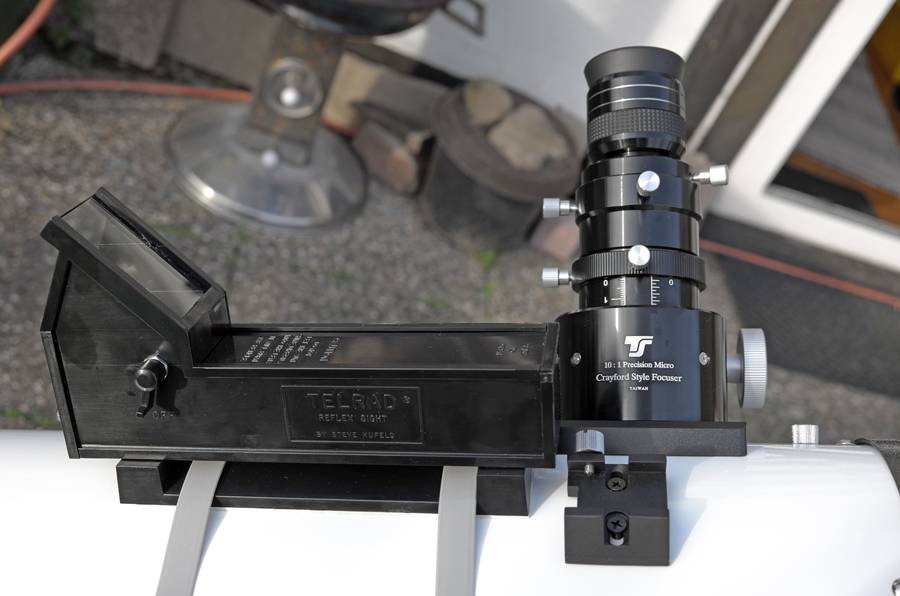
Since I had to crawl almost on the floor when the tubus was standing close to upright, when I wanted to look through the viewfinder, I tried an alternative to the previous mount. Here, however, the finderscope has to be removed. Otherwise, I basically just shifted the base a little bit to the right. I cannot put the base against the holder of the finderscope, because the finder and the holder touch already earlier (I would need to increase the finder's height in order to prevent this). Only experience will show, whether this mount style is more convenient than the previous one.
Mounting the base; basically, just the base was slightly shifted to the right and the finderscope was removed so it does not interfere with using the Telrad finder. |
Ditto |
Detail of mounting the base |
Complete Telrad finder |
Ditto, seen from the other side |
Ditto |
Finder seen from the front |
Finder seen more from above |
Finder seen from the side |
Ditto |
Ditto |
Ditto |

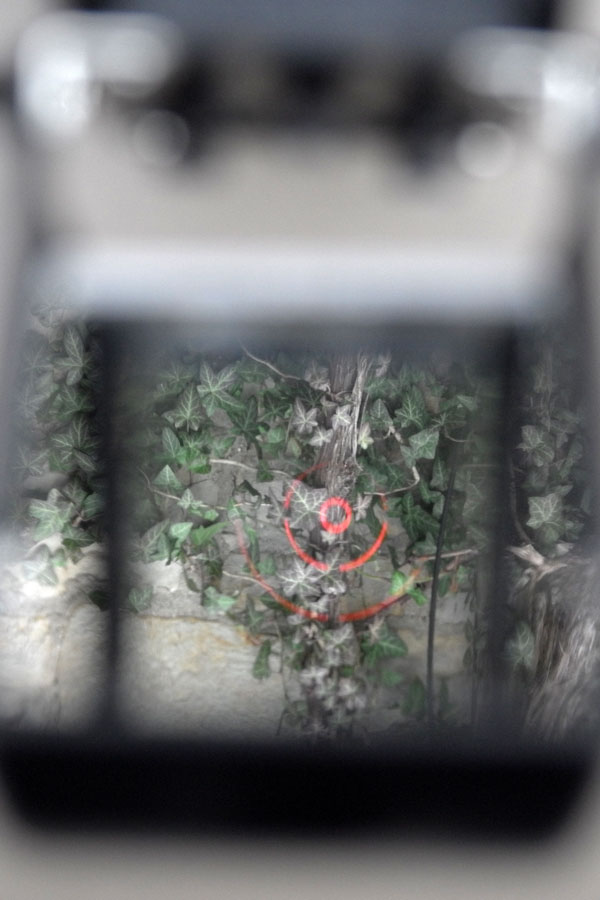
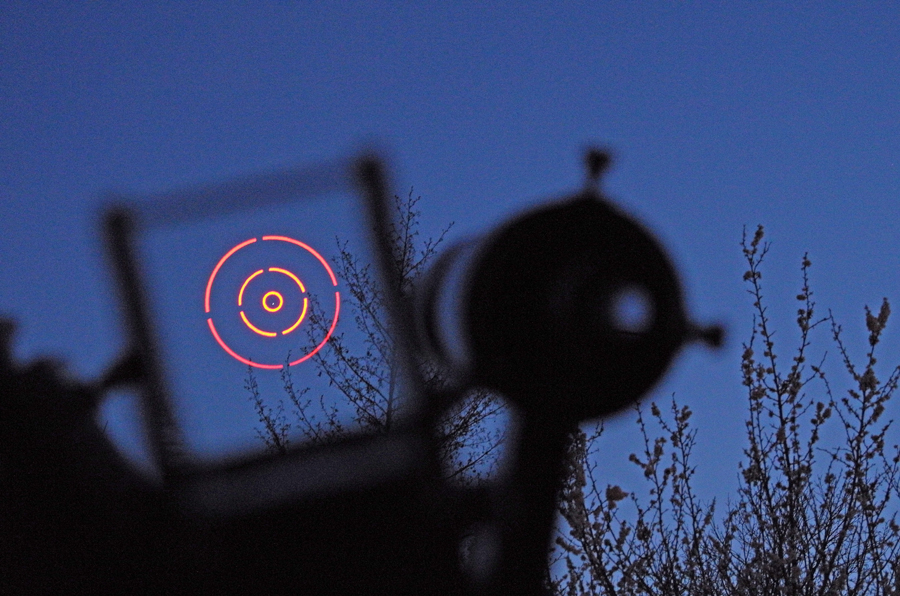
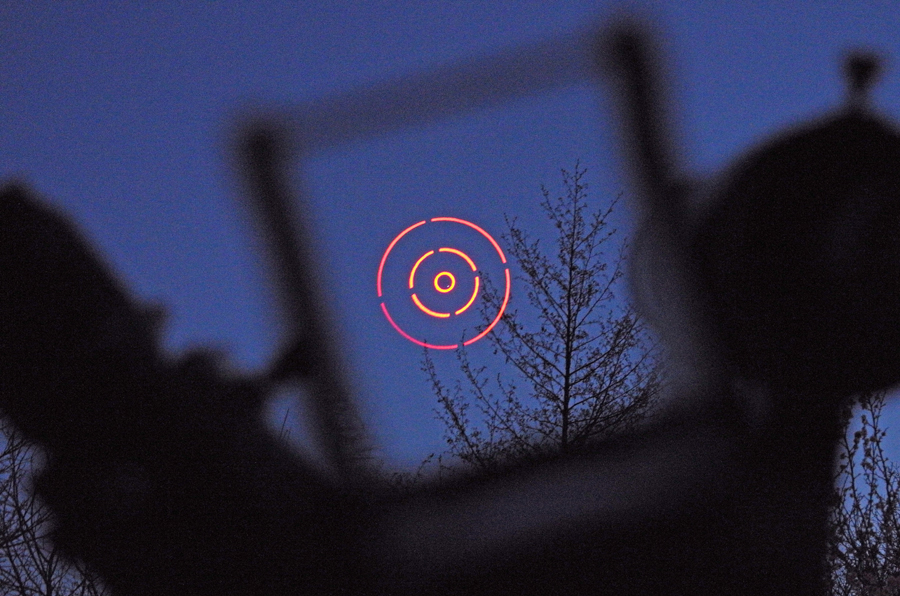
Photos: View Through the Finder
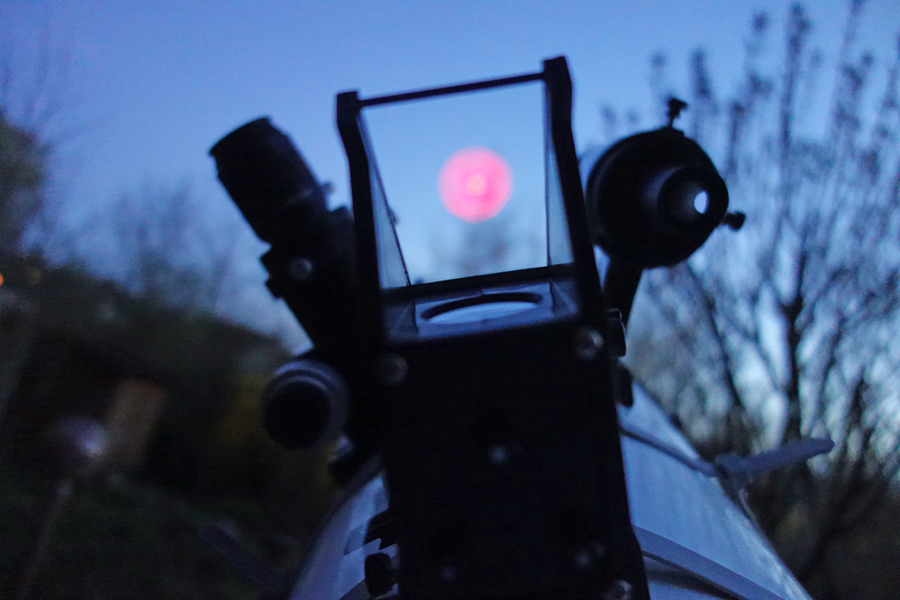
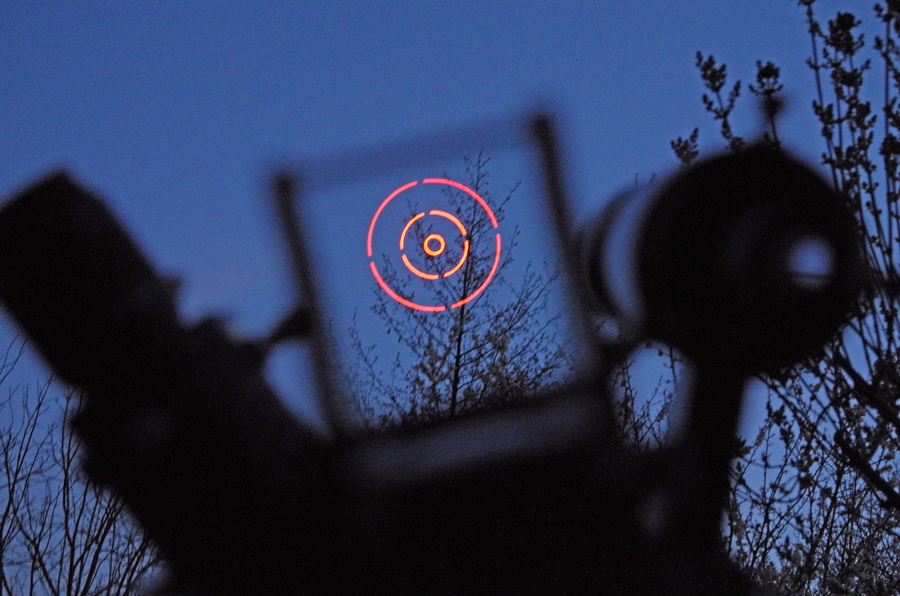
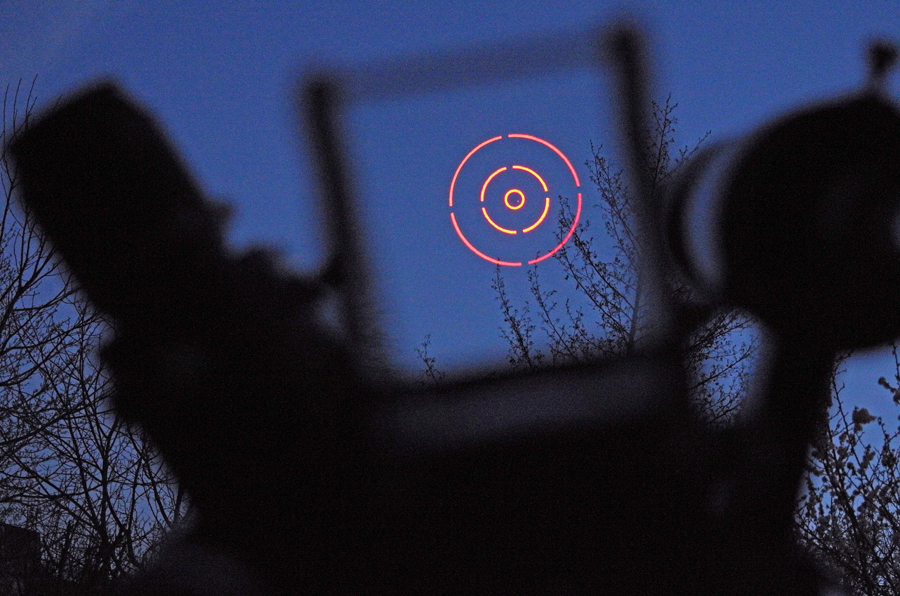
Finally, some photos where you can see the three rings (0.5°, 2° and 4°), which the LED projects on the mirror and which are used for searching target objects. Ideally, the target object is located inside the inner ring. If you look more closely, you can actually see a little star inside the inner ring on some shots.
View through the Telrad finder at the sky. Here you can see the three target rings - but the viewfinder is out of focus (Sony RX100 M1). |
View through the Telrad finder at the sky. Here you can see viewfinder - but the the three target rings are out of focus (Sony RX100 M1). |
View through the Telrad finder at the sky. Here you can see the three target rings - but the viewfinder is out of focus (Leica X Vario). |
Ditto |
View through the Telrad finder at the sky. Inside the inner ring you can see a small star (Leica X Vario). |
View through the Telrad finder at the sky. Inside the inner ring you can see a small star (Leica X Vario). |
View through the Telrad finder at the sky. Inside the inner ring you can see a small star (Leica X Vario). |
View through the Telrad finder at the sky. Inside the inner ring you can see a small star (Leica X Vario). |


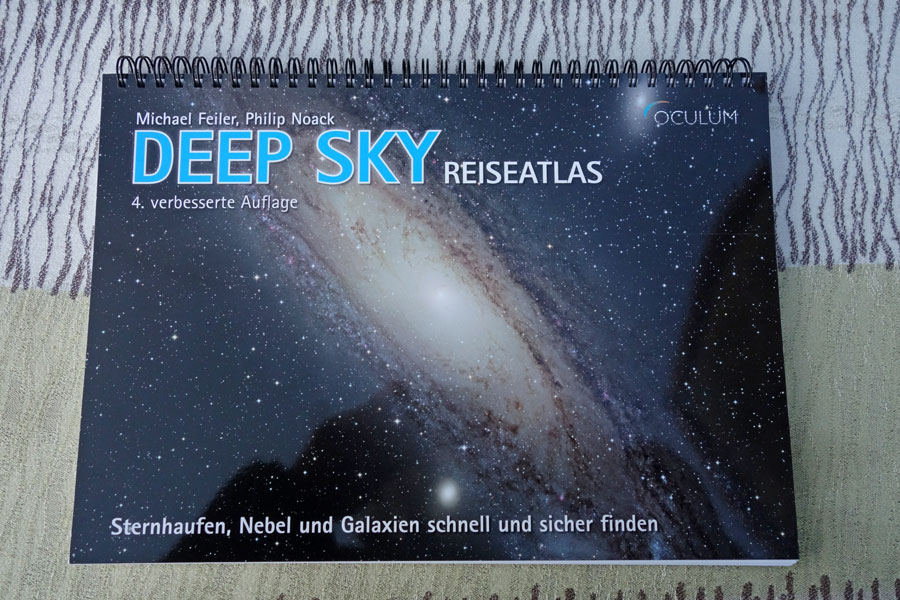
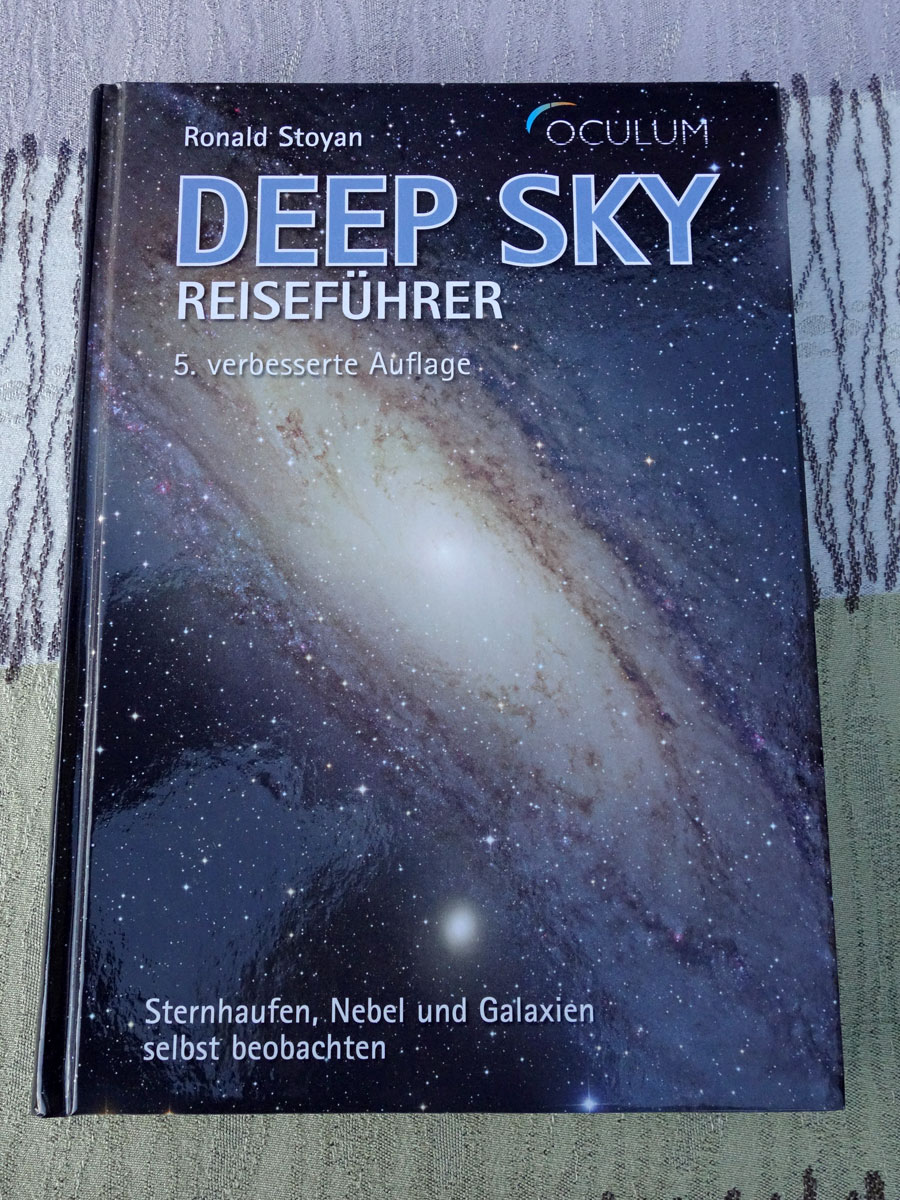
Deep Sky Reiseatlas (Maps) and Deep Sky Reiseführer (Guide)
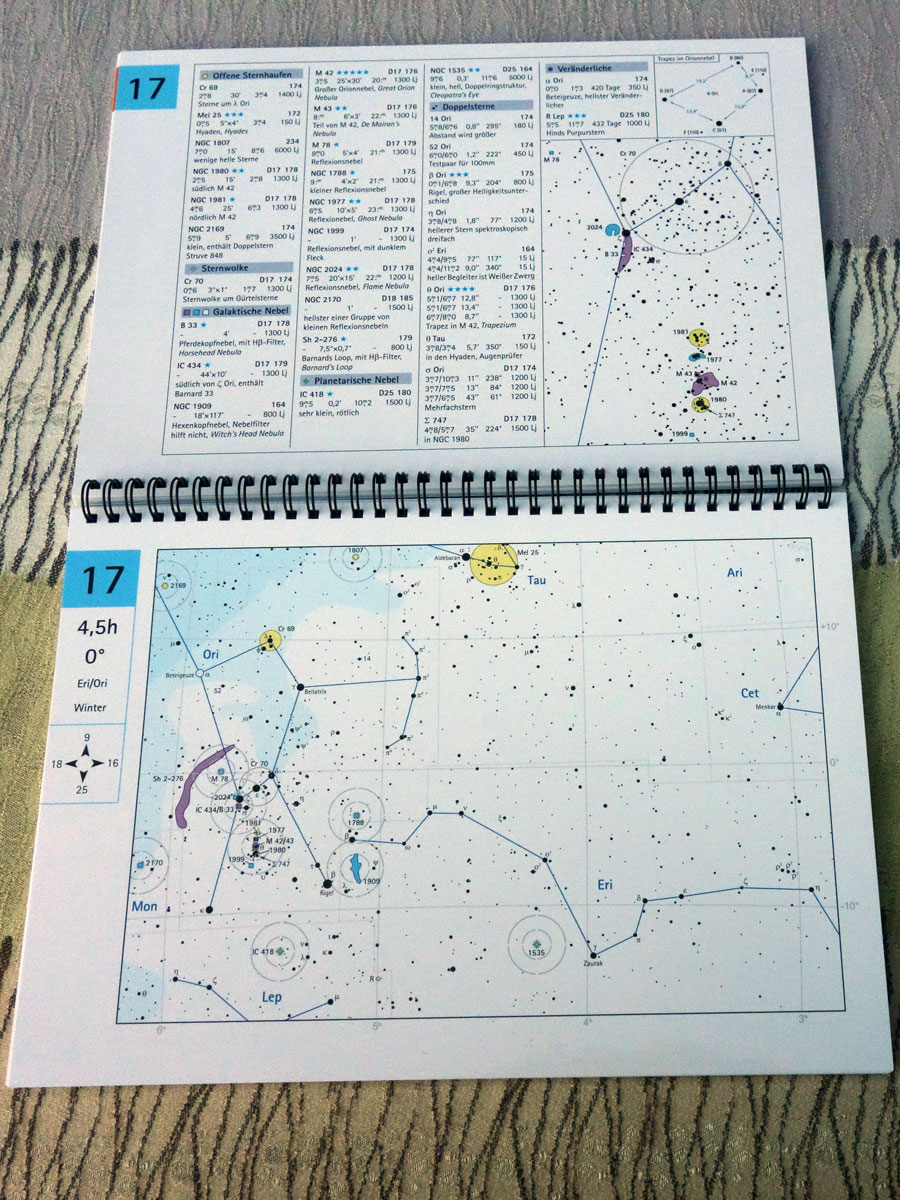
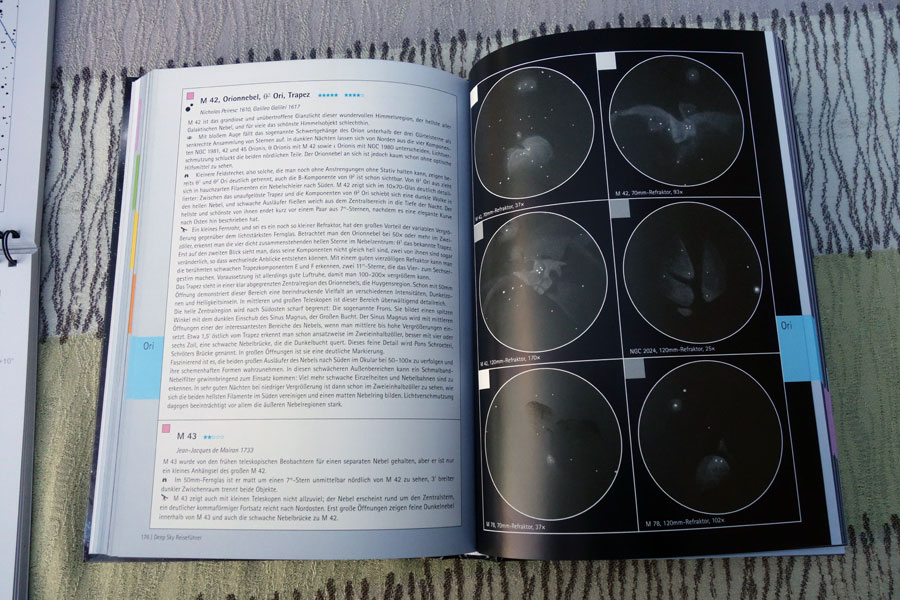
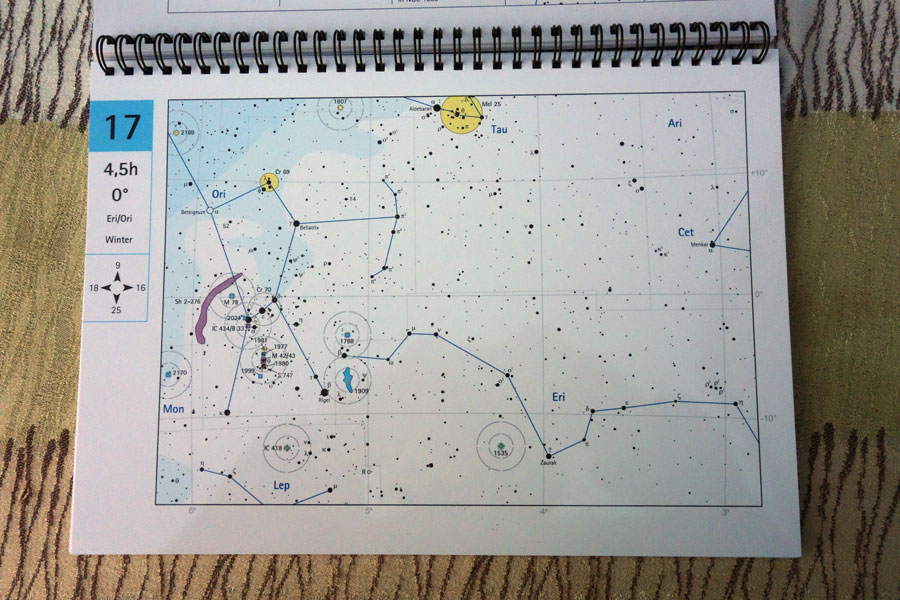
The Deep Sky Reiseatlas (sky map for deep sky objects, in German) is targeted at hobby astronomers who use the Telrad finder. For selected deep sky objects, it shows how the view through the Telrad finder would look like. This sky map also works together with the Deep Sky Reiseführer, a guide that describes selected deep sky objects in more detail (in German) by displaying the page numbers for the descriptions of these objects in the guide.
Deep Sky Reiseatlas and Deep Sky Reiseführer - both books work together... |
Cover of the Deep Sky Reiseatlas (sky map) |
Cover of the Deep Sky Reiseführer (guide) |
Deep Sky Reiseatlas: Double pages present descriptions and a map of a certain section of the sky |
Deep Sky Reiseführer: Description of the Great Orion Nebula M42 (the page number is given in the Reiseatlas), plus paintings of how the object looks in smaller telescops and under different viewing conditions |
Deep Sky Reiseatlas: The upper pages present descriptions of important sky objects and sometimes detail maps |
Deep Sky Reiseatlas: Detail of a lower page with a map (Orion) and Telrad rings for some important deep sky objects |
Deep Sky Reiseatlas: The lower pages present maps of sections of the sky |


Links
- Telrad Finder (Wikipedia, in German): de.wikipedia.org/wiki/Telrad-Sucher
- Telrad Finder: www.teleskop-express.de/shop/product_info.php/info/p308_Telrad-Sucher---die-Alternative-zum-optischen-Sucher---mit-Halte.html (in German) - www.teleskop-express.de/shop/product_info.php/language/en/info/p308_Telrad-Sucher---die-Alternative-zum-optischen-Sucher---mit-Halte.html (in English)
- Michael Feiler & Philip Novak (2014). Deep Sky Reiseatlas, Oculum
Verlag (in
German).
www.oculum-verlag.de/detailview?no=2014 - Ronald Stoyan (2014). Deep Sky Reiseführer, Oculum Verlag (in
German).
www.oculum-verlag.de/detailview?no=2015
|
made by |
| 21.01.2020 |