Digiklemme 1
Introduction | Photos | First Impressions and Experiences | Using Digiklemme 1 | Conclusions | Links
Archive
On this page, I present my experiences with Digiklemme 1 from Teleskop-Express (Teleskop-Service), a solution to connect a camera to an eyepiece.
| Note: I gave away the Digiklemme 1 at the beginning of May 2019 and therefore cannot report any new information here. |
Introduction
I often use the 1:50 method to take photos of the moon, but holding the camera (one with or without a filter thread ...) to the eyepiece is a wobbly affair, and I often have trouble getting a view without vignetting. The Digiklemme 1 from Teleskop-Express announces itself as the solution to this problem: "The Digiklemme offers an easy to use adaptation that works with most compact digital cameras and most eyepieces for telescopes, spotting scopes, microscopes etc. Each compact digital camera has the 1/4" camera thread needed for this adaptation." But already on the Website the Digiklemme 1 looks more like a "handicraft solution." Nevertheless, I ordered one for myself (the price had dropped a little...) to try it out. On this page, I describe my experiences with Digiklemme 1.
Photos
Digiklemme 1 and My Own Supplements
 |
 |
 |
||
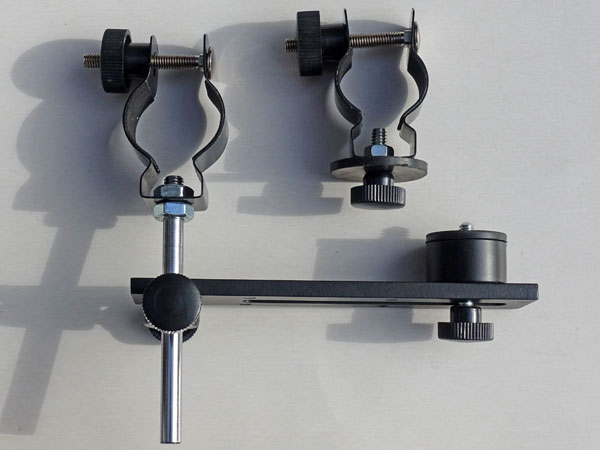
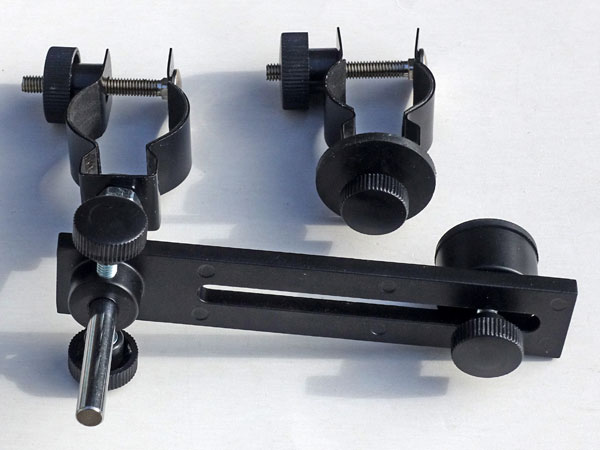
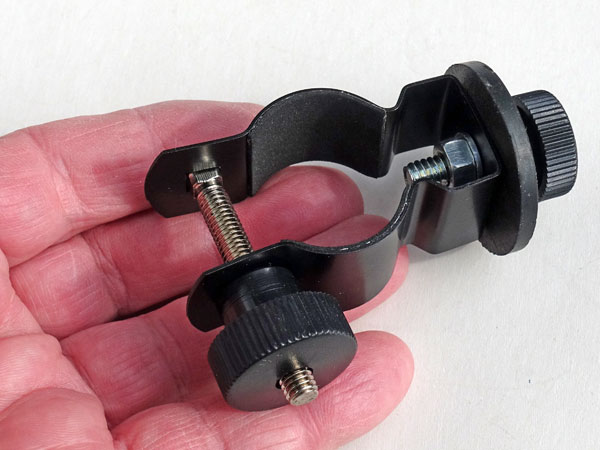
Digiklemme 1, all parts |
Ditto |
Ditto |
||
 |
 |
 |
||
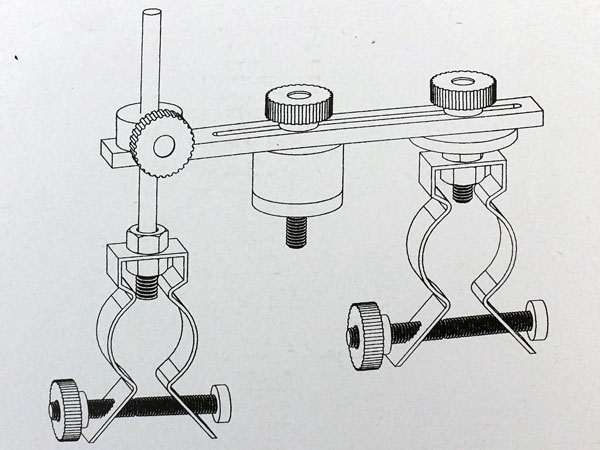
Figure of Digiklemme 1 on its box |
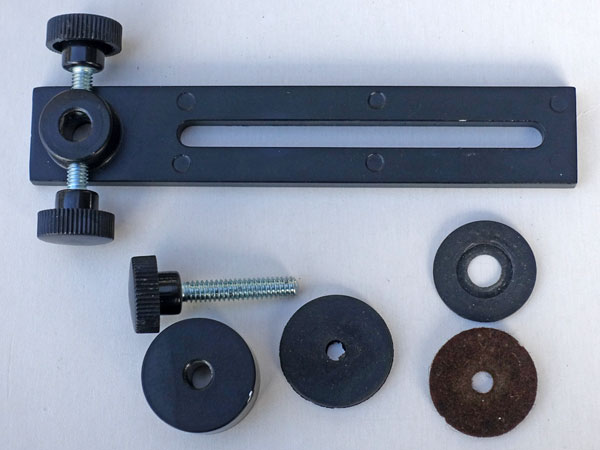
The base (camera adjustment bracket) with additional washers from my surplus... |
This is not used by me... |
Adding the Camera...
 |
 |
 |
||
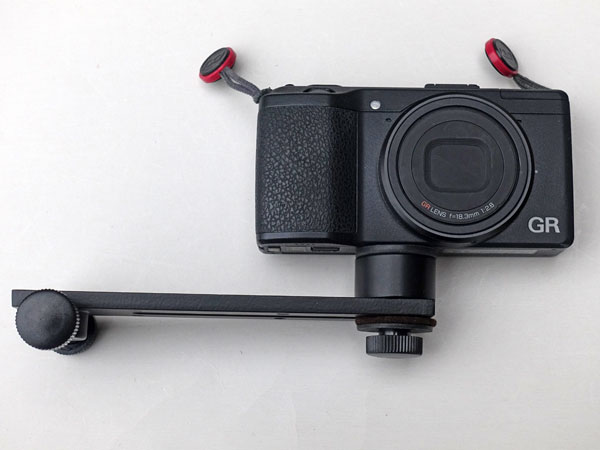
Camera attached to the base |
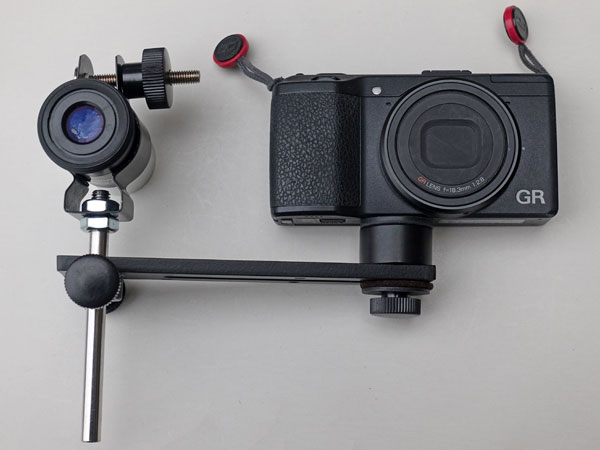
Eyepiece clamp attached |
25 mm eyepiece added |
||
 |
|
|
||
Eyepiece and camera lens aligned, top view |
Ditto, closer view |
Eyepiece and camera lens aligned, side view |
At the Telescope...
 |
 |
 |
||
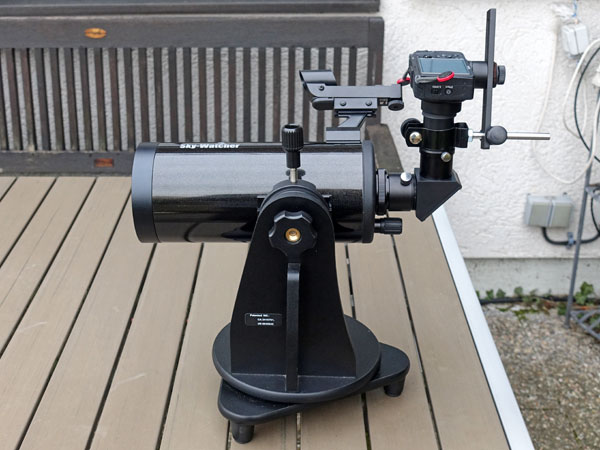
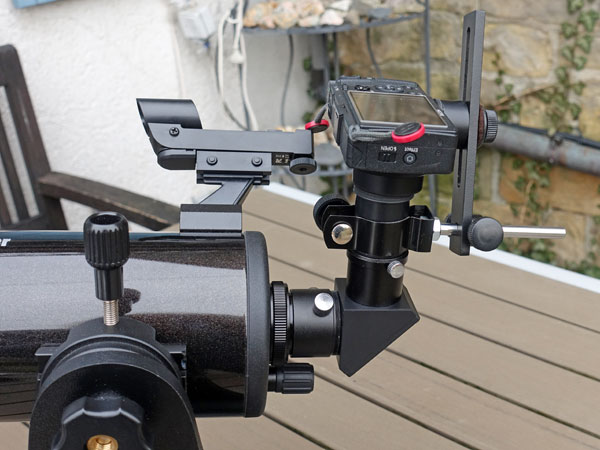
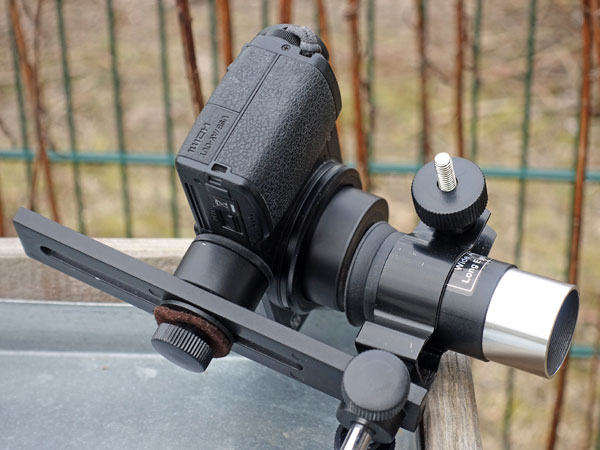
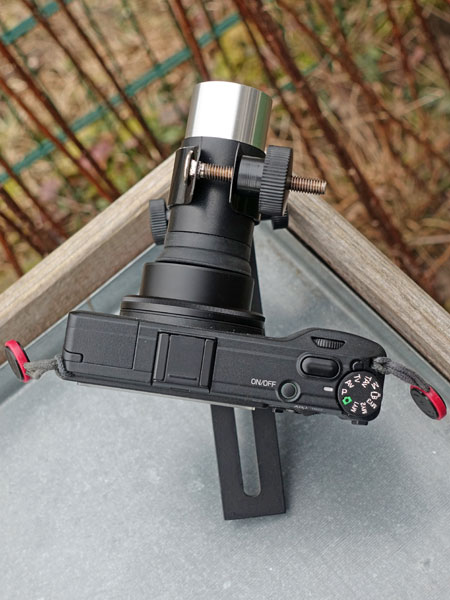
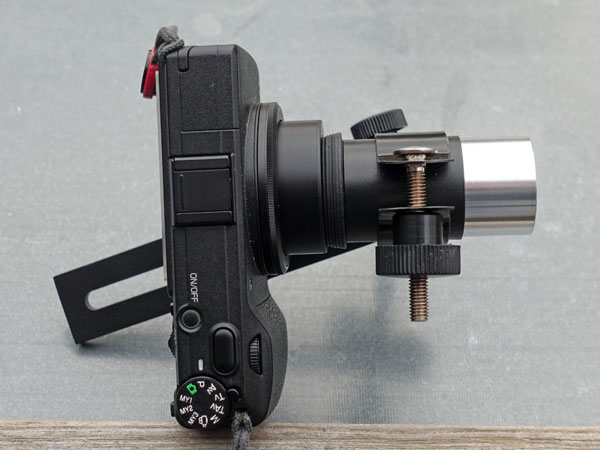
Ricoh GR with Digiklemme 1 at Skymax-102 |
||||
|
|
|
|
|
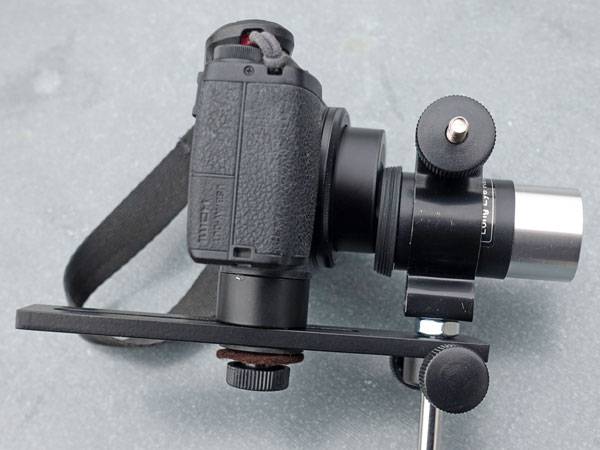
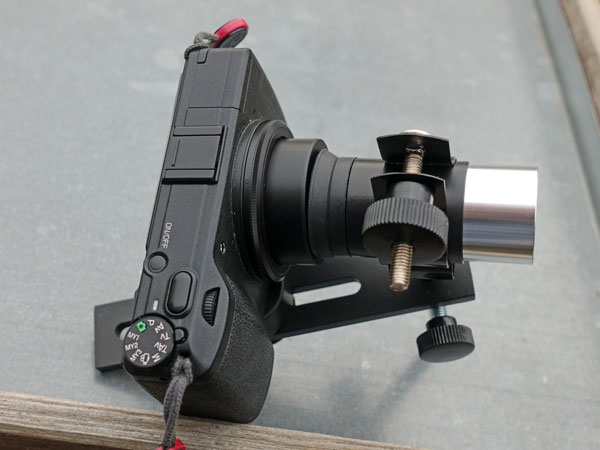
Digiklemme 1 with Ricoh GR camera at Skymax-102 |
||||
|
|
|
|
|
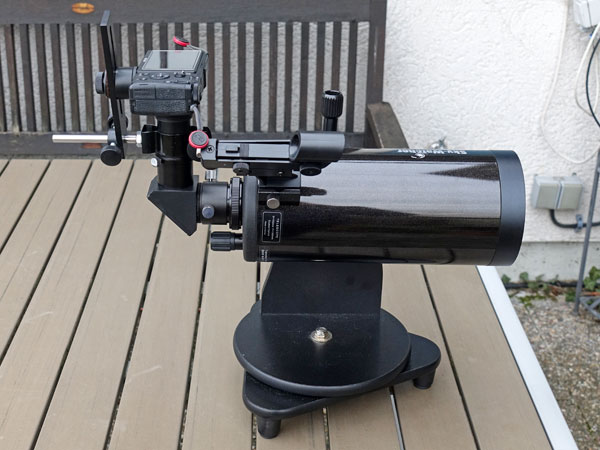
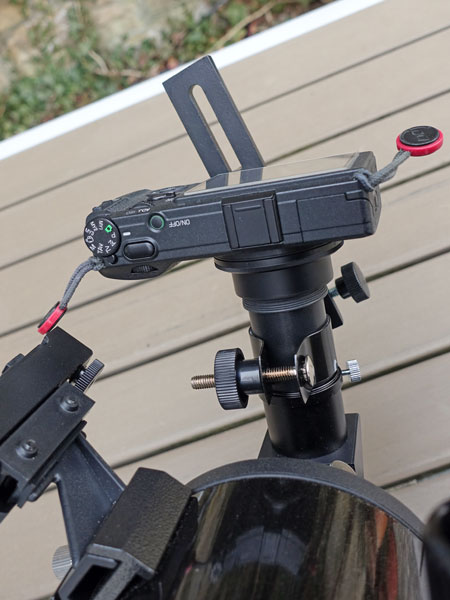
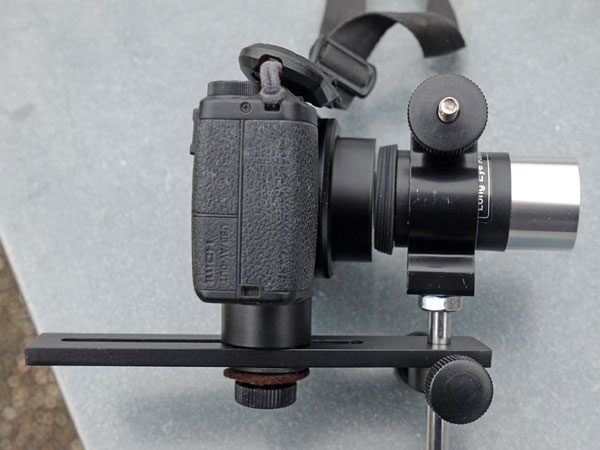
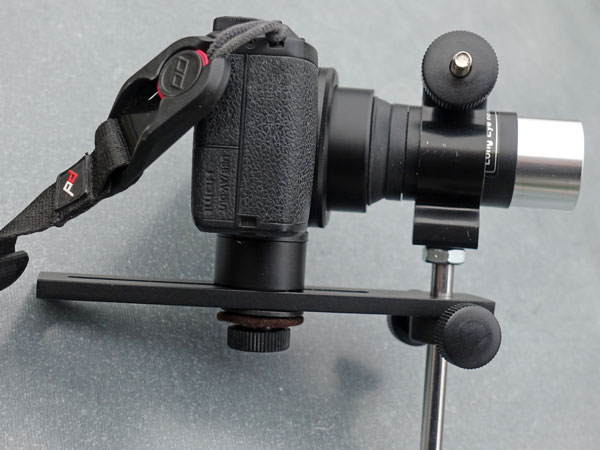
Ditto, side view |
|
Digiklemme 1 at the telescope without a camera |
||


First Impressions and Experiences
Already on the Teleskop-Express Website, the Digiklemme 1 looks a little bit "adventurous", at least for me, and the idea of a "tinkering solution" comes to my mind. After unpacking Digiklemme 1, you may also start tinkering at once. First of all, you have to unscrew and reassemble a few parts to create a Digiklemme suitable for your own camera. Fortunately, a translation of the manual is also included, because regrettably my English is not sufficient for the English manual. Of course, there is also a lot to be observed on the camera side, which the manual thankfully points out...
My first finding was that I cannot use my higher-quality wide-angle eyepieces because the maximum eyepiece diameter that the clamps can handle is 40 mm... Luckily, I kept a 25 mm "Super" eyepiece from Sky-Watcher (not anymore...), whereas I gave most of them away. Having to take photos with a not so great eyepiece was my first disappointment here...
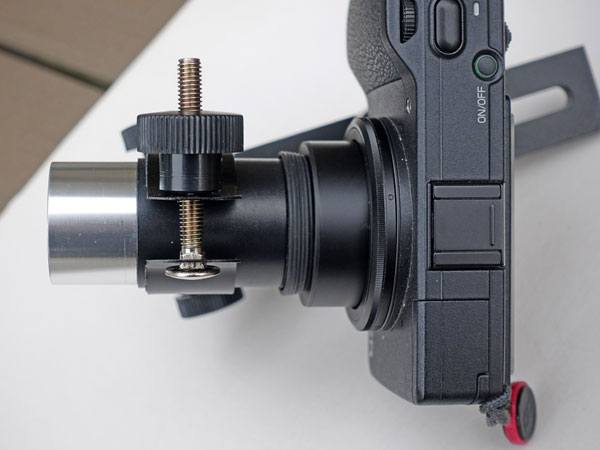
Because my Ricoh GR sits too low to be able to "see" through the eyepiece undisturbedly, it had to be placed on the provided camera attachment spacer. But the supplied screw was too long so that I was not able to tighten it and fix the camera. I therefore put a rubber and a felt disc underneath so that I was able to fix the camera (see the left photo below).
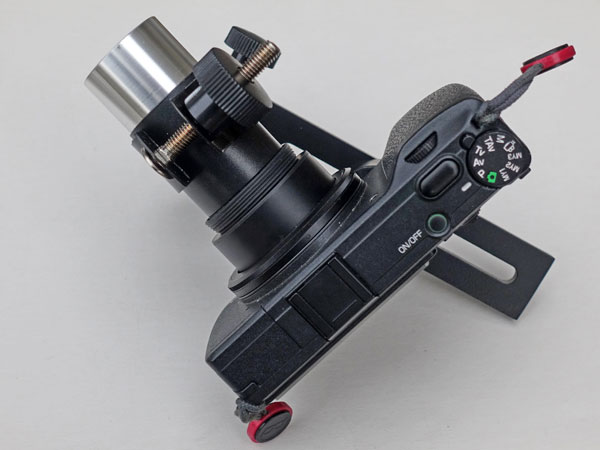
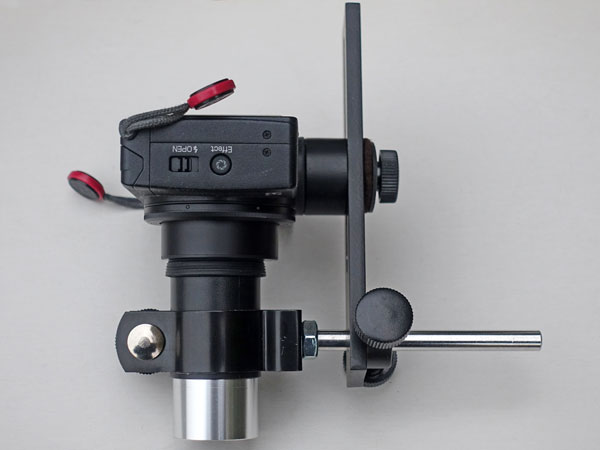
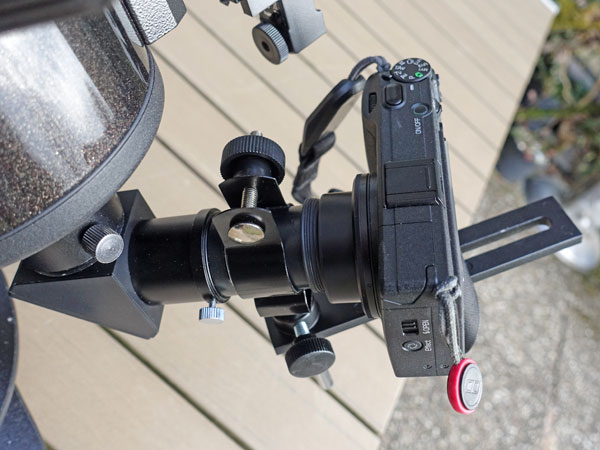
At the beginning I had mounted the distance axis rod upside down, so that the ring with the two clamping screws was on top and thus, reduced the range for adjusting the height of the eyepiece - the lens was even slightly too high, so that I had to remove the rubber ring at the bottom and put it on top. But at night, in a hurry, I mounted the rod, just by chance, correctly - and noticed my mistake. As the photos below demonstrate, there is enough clearance for the height adjustment when the rod is mounted correctly, and I can attach the two discs below.
 |
 |
 |
||
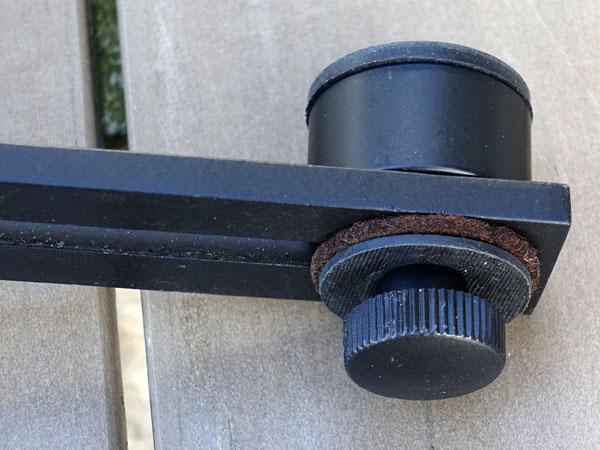
I put a felt and a rubber disc at the bottom to compensate for the long screw |
Eyepiece in lowest position, there is sufficient clearance for adjusting the height of the eyepiece |
Ditto, side view; here you can see the clearance even better |
Practice will show, whether it is better to fold down the eyecup or use it as a light protection means. When the eyecup is folded down, the lens is closer to the eyepiece, and less vignetting occurs (see the photos in the bottom row).
 |
 |
|
Now lens and eyepiece are at about the same height, eyecup folded down |
Alternative with eyecup used as a light protection means - in this case, the lens is farther away from the eyepiece |
|
 |
 |
|
Eyecup folded down: The section is larger because the lens is closer to the eyepiece |
With eyecup, I get a smaller section because the distance between lens and eyepiece is larger |
But then there is another problem: Hardly any point-and-shoot camera has the tripod thread on the optical axis. For this reason, it is not only necessary to adjust the height of the camera (lens) and the eyepiece, but also to align the camera and eyepiece at an angle to produce a continuous light path. This may be possible, but I find the whole thing very "fiddly," because the eyepiece and camera have to be loosened a little bit, so that you can adjust something. And thus, everything gets out of control again and again, and I have to start anew with the alignment.
 Here you can see how far I have to rotate the camera and eyepiece out of the axis to compensate for the fact that the tripod thread is not on the optical axis. |
 |
 |
||
Ditto, side view, eyecup used for light protection |
Ditto, top view, eyecup folded down | |||
 |
 |
|||
| The result of my alignment efforts (for the configuration shown on top) - not quite perfect... | ||||
As the manual nicely states: "Initially, it takes a certain amount of skill to align the camera correctly. With practice, however, the build-up will take place very quickly." In any case, I am still in phase 1 (on the first day...)! Let us see for how long... Actually, for forever, because I gave the Digiklemme 1 away in May 2019...
Using Digiklemme 1
"First Light"
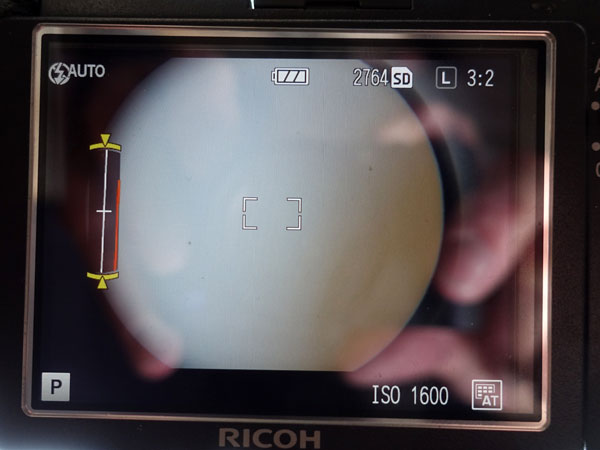
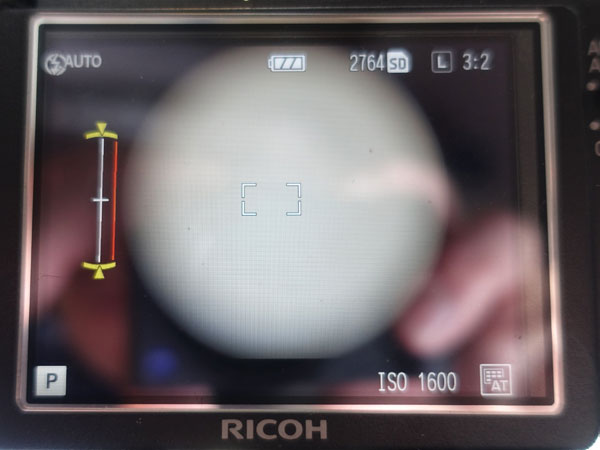
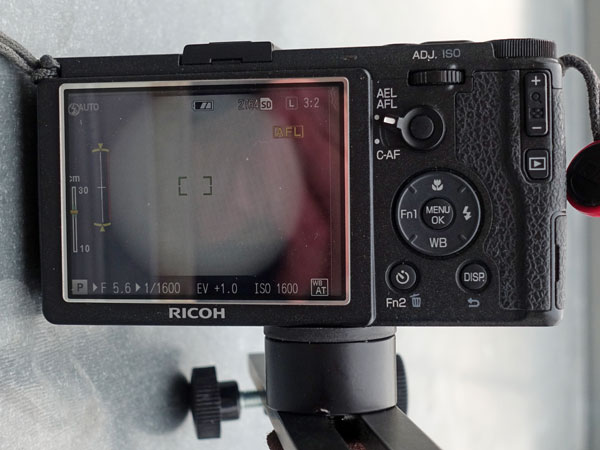
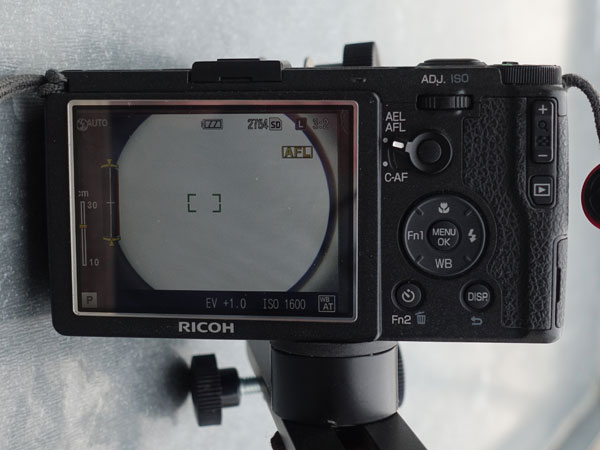
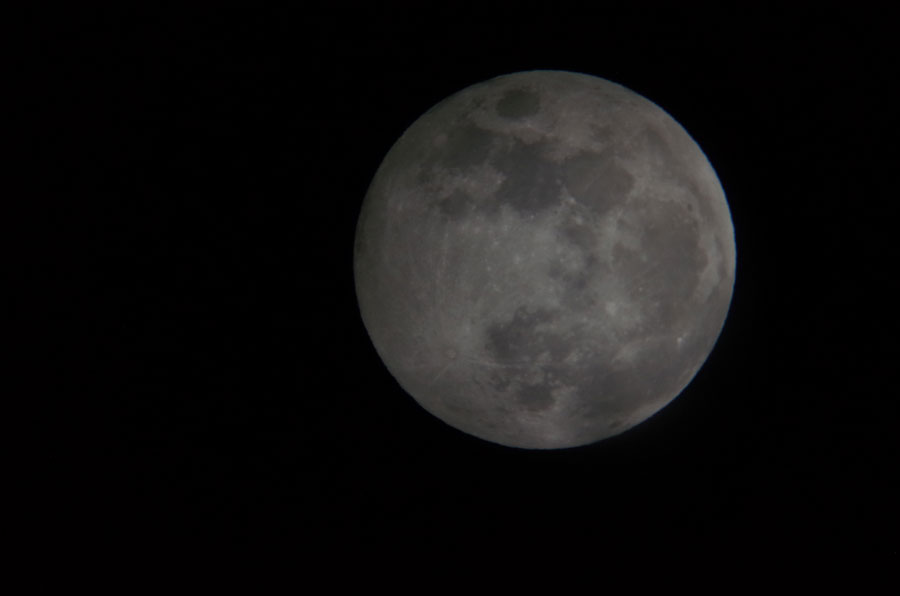
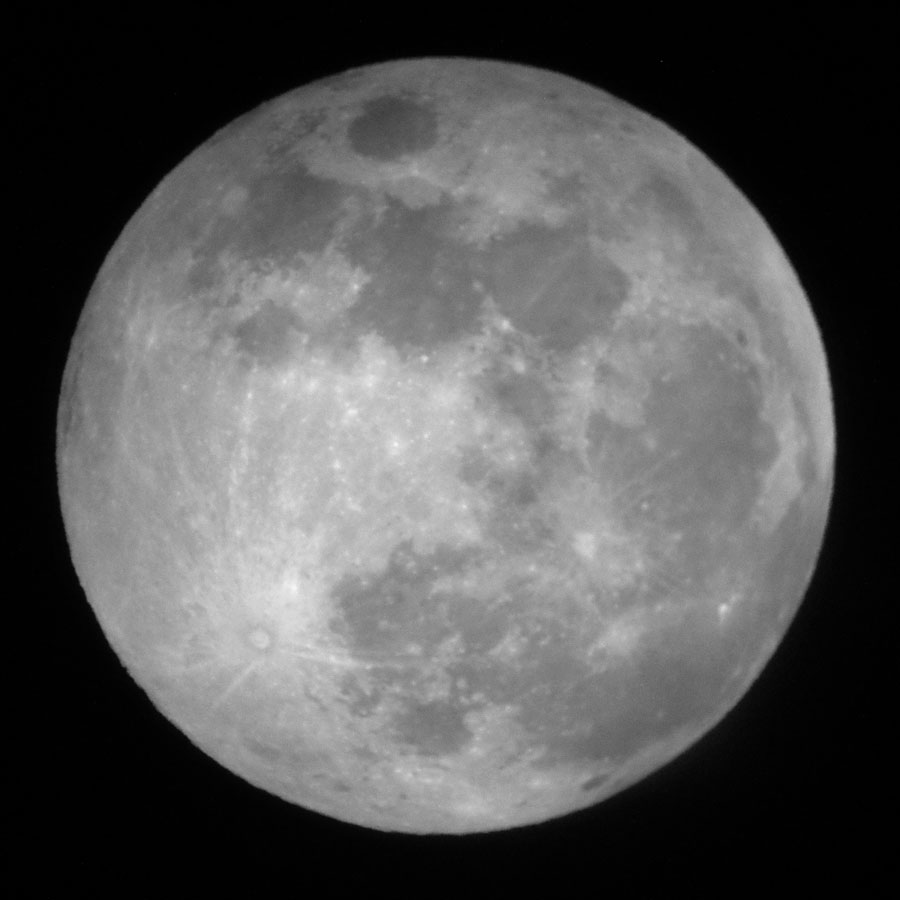
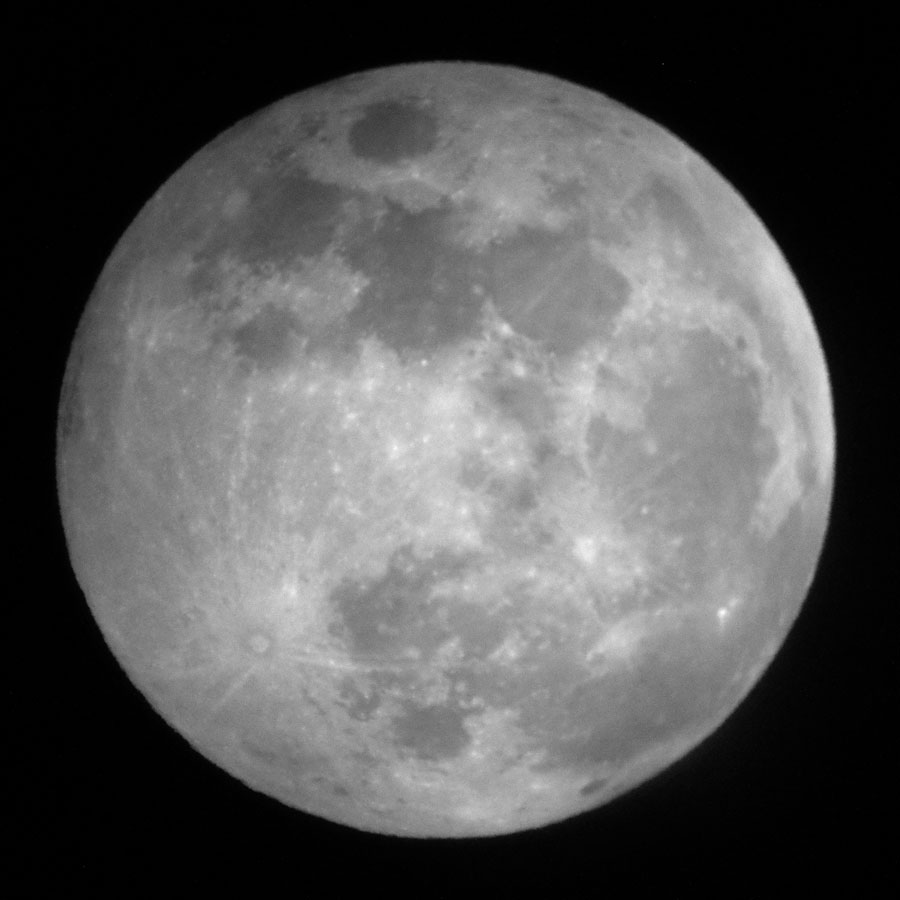
The evening immediately after the arrival of the Digiklemme 1 was certainly not particularly suited to a first test. The moon was hidden behind clouds, and I had removed the camera from the Digiklemme 1 and disassembled it partly. When the moon was suddenly visible again, I hectically assembled and built up my equipment. And, of course, the "view" was not optimal after that. When everything seemed to be OK, and I pressed the shutter release button halfway down, the image suddenly vignetted much more, so that only parts of the moon remained visible. Since the camera measures exposure with working aperture, this means that only a smaller section is available with the aperture eventually used for the photo. Under time pressure, I was not able to adjust the Digiklemme 1 properly. I just "fiddled around" and thus, almost had the condition for my shots, as if I would just hold the camera to the eyepiece... Since I had also forgotten how to activate screen magnification on my Ricoh GR (in the meantime, I have read the manual...), I had to rely on the sharpness at normal screen size, which did not work out well. Besides, we had almost Full Moon, so the moon looked rather blurred anyway.
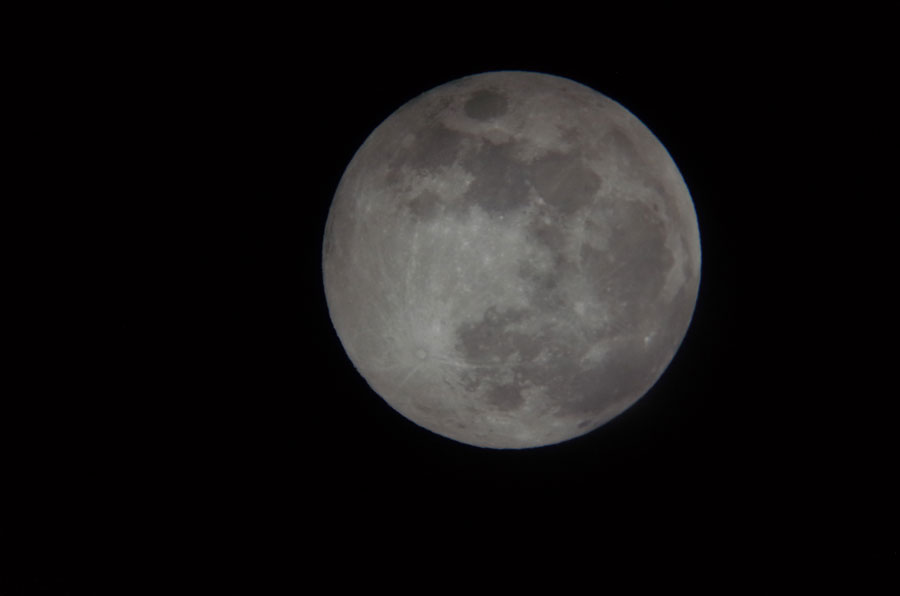
All in all, I learned a few things from this first attempt, but I did not get one useful photo. Nevertheless, here are, as a "proof," three samples that are not really sharp:
 |
 |
 |
||
Original in small, unprocessed |
Ditto |
Ditto |
||
 |
 |
 |
||
Section, post-processed - 2400 Pixel |
Section, post-processed - 2400 Pixel |
Section, post-processed - 2400 Pixel |
Small differences in brightness may be caused by clouds.
Conclusions
After the first day and without practical experience with Digiklemme 1, I wondered whether all this could be done more easily. Not in general, I would assume, but if you have an eyepiece with a T-mount thread, you might wonder if you can connect it to cameras that do not have a filter thread. There are solutions for the Sony RX100, where a filter adapter is glued to the front of the lens, but only the filter and not the whole camera has to be held in place by the glue. And the Baader-DT-rings, which can be used to convert the 37 mm thread of the T-Mount adapter to practically any filter size, do not seem to sold any more (I only own the sizes 40.5 mm and 43 mm). I recently ordered a 52 mm adapter ring on the Internet and it looks and works like a DT ring. In a first test, this worked well for the "bayonet/glue" Lensmate adapter on the Sony RX100 M4, but less so for the "magnetic/glue" MagFilter adapter on the Sony RX100 M1. For the latter, the risk is high that the weight of the camera or hitting it will cause the camera to fall down.
Another question that I had is whether it would be possible to align the camera using another rail mounted to the camera's tripod thread at one end and mounted to the distance axis rod at the other end instead of the camera, so that the optical axis of the camera lies on the center of the distance axis rod. This way, the eyepiece and lens could be aligned with each other more easily. It may be possible that the additional rail would make the whole assembly more unstable, but the alignment should be easier. - I took a closer look at the whole thing and came to the conclusion that this variant is not recommended...
The ultimate question will be, but I can only answer it after enough practical experience with Digiklemme 1, whether I will actually use it or whether the effort involved does not justify the benefit for me, and I will hold the camera with to the eyepiece my hands again. So will find the answer in the following update!
Update
After I had sold my Ricoh GR in March 2019, had not used the Digiklemme 1 until then, and did not have suitable eyepieces any more, I saw no point in still owning the Digiklemme 1 and gave it away in May 2019.
Links
|
made by |
| 23.11.2023 |