Astronomy | GXR · GR · RX100 M1 · RX100 M4 · RX10 M3/4 · TZ202 · X Vario · M240 · General | Photos | Conf. Places | Calendars | Art
Ricoh GR: Taking Close-Up Photos
This page discusses the macro abilities of the Ricoh GR and presents sample photos that demonstrate the close-up facilities. Although the camera has a macro mode (allowing shots between 10 cm and 30 cm), I would not call these photos "macros"...
Notes: See Macro photography with the Ricoh GR V (Roger Packer) for some information on close-up photography with the Ricoh GR (including image examples). See Close-Up Samples for more example photos.
Introduction
Ricoh's small sensor cameras, including the GRs, are extremely good macro shooters. The Ricoh GXR S10 and particularly, P10 camera units demonstrate what is possible. The introduction of an APS-C sensor to the GR line, however, changed this for technical reasons, which may be a disappointment to some - old and new - GR users. The shortest distance is about 10 cm in contrast to 1 cm for many of the small sensor cameras. Ricoh does not disclose the maximum possible magnification for the GR in macro mode, but lists, at least, a minimum object size of 12 cm x 8 cm in the manual.
To verify this, I took a few test shots with both AF and manual focus (both led to about the same result). I found a minimum object width of about 11.2 cm (object height is 7.5 cm for an 3:2 image format). This allows me to calculate the magnification (adopted from dkpeterborough, L-Camera-Forum):
- Sensor width / object width = 23.6 [mm] / object width [mm]
- 23.6 [mm] / 112 [mm] = 0.21 => 1:4.75 or about 1:5 (my experiments)
- 23.6 [mm] / 120 [mm] = 0.2 => 1:5 (Ricoh data)
This result is probably not impressive, but for close-up shots of flowers the close-up abilities of the GR are still useful, as the samples below demonstrate.
Notes:
- According to Imaging Resource, the Ricoh GR captures a fairly large minimum area measuring 4.44 x 2.94 inches (113 x 75 millimeters) in Macro mode. This is very close to what I have found.
- According to dpreview, the Ricoh GR captures a minimum area measuring 103 x 63 millimeters in Macro mode, corresponding to a magnification of 0.23. This is the highest magnification and smallest minimum area that I have found on the Web.
Some Experiences with Close-Ups...
The close-up abilities of the Ricoh GR are a welcome addition, not one of its highlights (as it was for the compact Ricoh cameras...). Nevertheless, being able to take photos of flowers and texts can make a difference when you think about which camera from your collection to pick for a hike or vacation... In the following, I want to share a few observations from my first experiences with taking close-up shots with the Ricoh GR.
A Rule of Thumb...
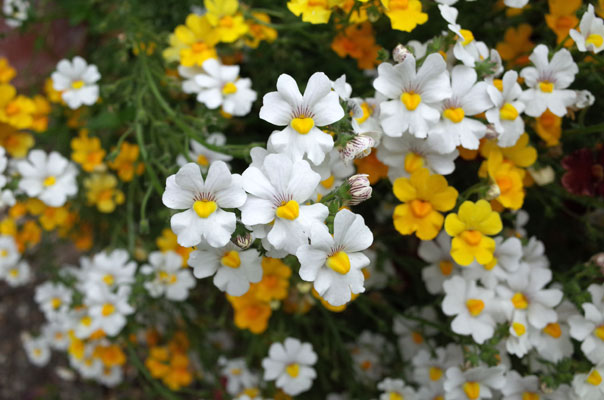
The GR captures an area that is a little bit smaller than a postcard (12 cm x 8 cm). This "rule of thumb" provides an idea of what the GR can do for you with respect to close-up photos. For example, it allows you to take a "full-frame" photo of a rose flower or a small signposts with text (including a postcard...), but not of small daisy blossoms or stamps. See the sample photos below for examples (note that not all of them were taken at the closest possible distance).
An Interplay of MF and AF
When using AF, it is little bit tedious to find the closest possible distance. If you are too close, focus will not be confirmed, and you have to increase the distance and reframe the photo. If you are too far away, the target objects will be smaller than possible - and you may not even notice that you are too far away and how much.
Using manual focus and setting the minimum distance of 10 cm allows you to shoot at the closest distance, but I find it hard to recognize on the LCD screen whether the target object is optimally in focus. Therefore, I sometimes start with MF to get an impression of the minimum distance and then switch to AF to make sure that the target object is indeed in focus. However, you never know, which object detail the camera will actually focus on...
Working with "Ersatz" Targets
I also found that the GR's AF is fairly unreliable in macro mode and often struggles. For example, instead of focusing on a flower, the camera focuses on the ground despite the fact that I use spot or even pinpoint AF (and the focus field is covered by the flower). Generally, with close-ups contrast is often not strong enough for the AF to find focus (which is true for most cameras). Sometimes, it helps when you focus on something close to the target object and then focus again on the actual target. If the camera erroneously focuses on something farther away and not on the target, it often seems to be "trapped" by that wrong focus object - refocusing again and again does not help. Instead, the camera needs help to find correct focus again, and this can be provided by focusing on a different target that is not too far away from the actual target. Having focused on this "ersatz" target, the camera is now able to focus on the actual target. By the way, I found a similar behavior for the Leica X Vario.
From Macro to Infinity...
Macro focusing starts at 10 cm, whereas regular focusing at 30 cm for the Ricoh GR. Correspondingly, for manual focusing, there a scale between 10 and 30 cm and another one from 30 cm to infinity - you switch between both when you continue to turn the up-down wheel. This does, however, not mean that you are restricted to a distance range between 10 cm and 30 cm when you shoot in macro mode. As with most Ricoh cameras, you can focus from the near limit to infinity in macro mode. However, focusing takes a little bit (opinions vary here...) longer than when you are in "normal" focus mode.
While in most shooting modes you need to switch to macro for near objects, in the auto (shooting) mode (mode dial set to green camera symbol) you have an "auto macro" mode that relieves you from the need to switch to macro mode for near-by objects. Only Ricoh knows, why auto macro is not available in other shooting modes - at least, as an option.
Manual Focusing in Macro Mode
Above, I mentioned that when focusing manually, I find it hard to see on the LCD display whether an object is optimal in focus. At the beginning, I could not find any focus help such as screen magnification or focus assist. But now I found them - hidden in the "FA/Move Target" function. This function allows you to move the focus point to a location of your choice, set screen magnification (enlarge part or all, magnification factor) and select a focus assist mode (four modes). The "FA/Move Target" function is assigned to Fn1 by default, but since I need this function button for other purposes, I have to call the function from the "Shooting" menu, which is a little bit tedious.
Even more tedious is for me to set the manual focus by pressing the "Macro" button and then turning the up-down dial - I mentioned this already several times... In my case, I would just want to set the distance to 10 cm for achieving maximum magnification. Thus, the remaining problem is to set the focus where I want it to be using screen magnification and/or focus assist.
Personally, I prefer to do without focus assist at all and use the "Enlarge all" version of screen magnification, because this delivers higher image quality than "Enlarge part". Note that you can also set the magnification factor (1x, 2x, 4x, 8x), 8x seems to be this best for "Enlarge all". Finally, when you half-press the shutter button, the original frame is shown again, allowing you to frame the image to your needs.
As far as I see it at the moment, you can get rid of the "FA/Move Target" functionality by pressing the Cancel (DSP = display) button, when the function has been evoked through the menu. I do not know whether there are other and simpler options for this.
Sample Photos
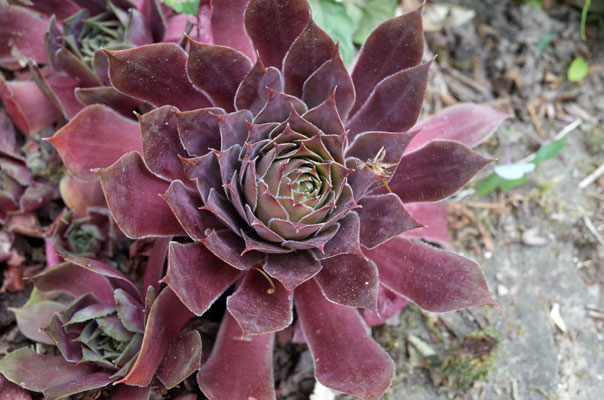
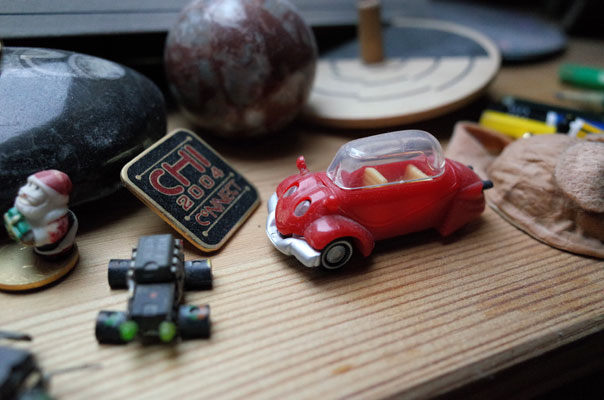
The following examples were taken in June 2014 without to demonstrate the close-up capabilities of the Ricoh GR (except for the last sample). See Close-Up Samples for more example photos.
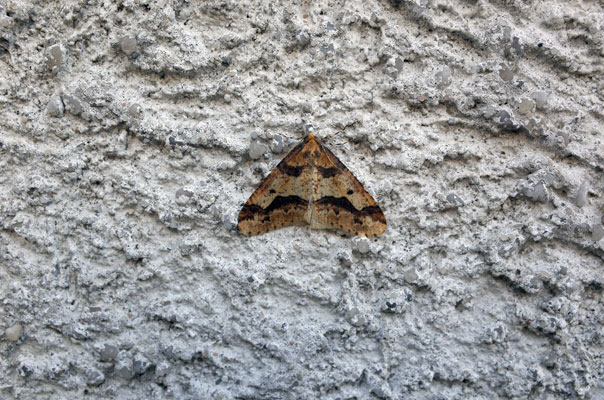
November 2014: Demonstration of what can be achieved with small butterflies...
|
made by |
| 03.04.2019 |