Unistellar eVscope: Observation in Brief (App Version 1)
Introduction - What Kind of Instructions Does Unistellar Offer? | First of All: eVscope Specialties | Plan Your Observation (Objects) | Prepare the eVscope for Observation | Observing with the eVscope, Working Modes | Finishing the Observation | Maintenance | Further Information | Links | Appendix: Instructions in Brief...
Archive
On this page I describe in short form how to conduct an observation session with the Unistellar eVscope. This somewhat competes with the Unistellar's instruction materials, but I wanted to describe this in my own words as well. The appendix contains a summary of the instructions in the text (e.g. for printing).
Note:
- These instructions are also valid for the eVscope eQuinox and can be easily adapted to the eVscope 2. They refer to app version 1!
- In app version 2, the procedure is somewhat different. See page The new Unistellar App is here ! for more information on using the eVscope with the new app version and the video Short Tutorial on the App 2.0. I will not describe the handling with the new app version, because this information should suffice.
Note: See page Overview of the Unistellar Pages for just that!
Introduction - What Kind of Instructions Does Unistellar Offer?
The eVscope comes with a printed version of the Quick Start Guide and Technical Guide in its box, both in English. Unistellar also offers PDF versions of both in English and French that are ready to be printed:
- Quick Start Guide English.pdf (4 MB) - Quick Start Guide Français.pdf (4 MB)
- Tech Guide EN3.pdf (600 KB) - Tech Guide FR3.pdf (10 MB)
There is also a video tutorial in English (French subtitles are available as well, more videos to come (or have already come...)).
If you have problems with the eVscope or just a question, visit the Unistellar Help Center.
First of All: eVscope Specialties
Before describing how an observation session with the eVscope is conducted, I would like to point out some special features of the eVscope that distinguish it from visual telescopes (I will not go into the differences to astrophotography...). Unistellar's primary goal is to offer a more satisfying observation experience and to automate as many things as possible to make them easier for users: input of location coordinates (taken from the smartphone via GPS), automatic alignment, automatic search (Goto), automatic exposure, "automatic" observation proposals...
Automatic Alignment for GoTo
In the past, people had to search for celestial objects "by hand", for example using the star hopping method. At the end of the 20th century, GoTo mounts were introduced, which are aligned with the help of prominent stars; an example of this is my SkyWatcher Star Discovery mount. In 2013, Celestron launched the StarSense module, which can automatically align the telescope after an initial adjustment to the telescope (I also own this module). For this purpose, it has an in-built camera, and its internal computer uses so-called "plate solving" algorithms to determine which position the telescope points to.
The eVscope also offers an automated alignment procedure, called "autonomous field detection" and is based on plate solving algorithms as well. Simply connect your smartphone to the eVscope via WLAN, start Unistellar app on the smartphone and click on the "Autonomous Field Detection" icon. Under good sky conditions (no or few clouds), the automatic alignment takes only 10 to 15 seconds. In my experience, the eVscope requires only a small sky area for the auto-alignment, in contrast to the Celestron StarSense module, which scans large regions of the sky. And the eVscope's GoTo is also very accurate.
Observation Modes: Real-Time versus Combination of Frames (Stacking)
The eVscope has two observation modes or modes of operation, the "Live View & Sky Tracking" mode and the "Enhanced Vision" mode. The "Live View" mode shows an image that is generated in real time. You can see what is happening at the dark sky. When an airplane, shooting star or something else flies through the section of sky you are observing, you will see its track in the eyepiece. "Sky Tracking" means that the eVscope will track a selected object in this mode.
In "Enhanced Vision" mode, the eVscope combines images (frames) that are continuously captured to improve the image quality (e.g. to remove noise). It uses a fast "image stack" or "stacking" algorithm to provide a live user experience ("on-the-go while-it-stacks"). The algorithms also compensate for small movements of the image field and its rotation (which is a annoying characteristic of Alt-AZ GoTo mounts) and correct for the effects of light pollution. Thus, the "stacking" (stacking, superimposing) produces a clean image in the eyepiece. DSO are often only visible in this mode, and only here they show their full beauty.
Observation via Smartphone...
Unistellar has always emphasized observing through the eyepiece of the eVscope, so that the observation experience is close to that of a visual telescope. Since the eVscope is controlled by a smartphone app that displays the image on its screen (in sensor format), many users, myself included, seem to have little need for the eyepiece. Even Unistellar was considering whether they should offer a version of the eVscope without an eyepiece - the eVscope eQuninox was the result... So you can make your observations via smartphone - not only outside where the eVscope stands, but also inside in the kitchen or living room, as long as the WLAN does not break down. I like the smartphone image better than the one in the eyepiece, and it has the sensor format, which can also be saved as a photo since app version 1.0.3.
Finally, it should be noted that observing via eyepiece (electronic viewfinder) or smartphone does not require a dark adaptation, which is mandatory for visual observation of DSO.
Plan Your Observation (Objects)
Typical eVscope owners are certainly not hobby astronomers who will plan their observations in detail beforehand. Nevertheless, nothing can replace a good preparation for an observation session. There are many ways to prepare yourself and to select or have possible objects of observation suggested. My favourite method, which is also valid for some weeks, is to select a section of the sky in SkySafari (or another astronomy program) and mark possible objects of observation in it (I usually print this out with inverted Sky).
The Unistellar app also makes suggestions for possible objects of observation (in the "Explore" tab), but I have not used this feature yet and checked how useful the suggestions are. I assume that they take into account the personal observation window and settings that can be entered in the app. But my observation window is a bit more complicated because I can observe in different directions. So I ignore this at the moment...
Prepare the eVscope for Observation
The steps for preparing the eVscope for an observation are described in the Quick Start Guide. I will therefore only briefly list the most important steps here:
- Set up and level the tripod.
- Insert the eVscope into the tripod and screw it tight (two screws) (15 minutes in advance of observing in order to thermalize the eVscope).
- Switch on the eVscope (the LED on the power switch must turn red).
- Switch on your smartphone and connect via WLAN to the eVscope.
- Launch the Unistellar app on your smartphone.
- Remove the caps from the tube and the eyepiece; focus the eyepiece using the app's Eypiece Focus Helper (in the User tab) or later using sky objects.
- Start automatic alignment (Automatic Field Detection); if it is still too bright outside and the alignment is failing, wait until it gets darker or choose darker section of the sky.
- Focus the tube (I recommend doing this before each observation session): approach a bright star and adjust the focus with the Bahtinov mask*.
Afterwards, the telescope should be in "Live View & Sky Tracking" mode - the observation session can begin!

*) For details see article How to use the Bahtinov mask? in the Unistellar Help Center
Observing with the eVscope, Working Modes
The eVscope has two observation modes or modes of operation, the "Live View & Sky Tracking" mode and the "Enhanced Vision" mode, whereby only the latter performs the frame combination described above.
Select an Object (DSO or Other)
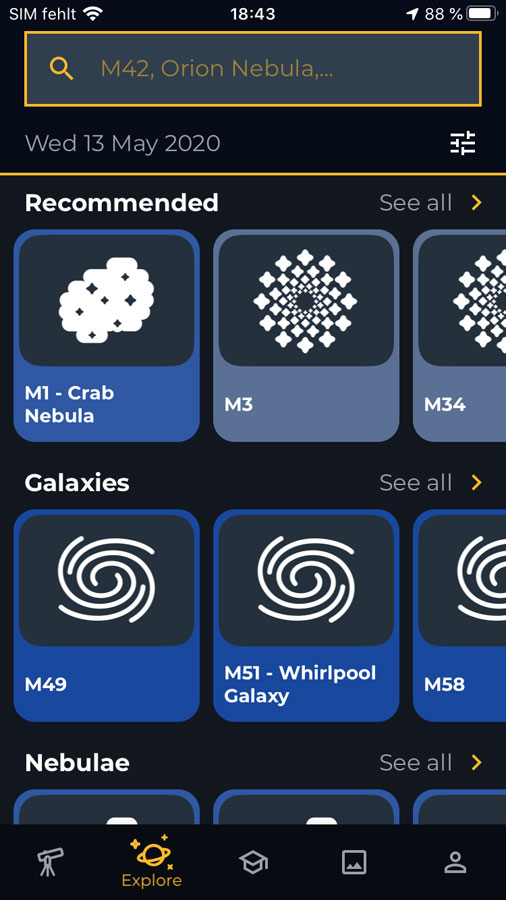
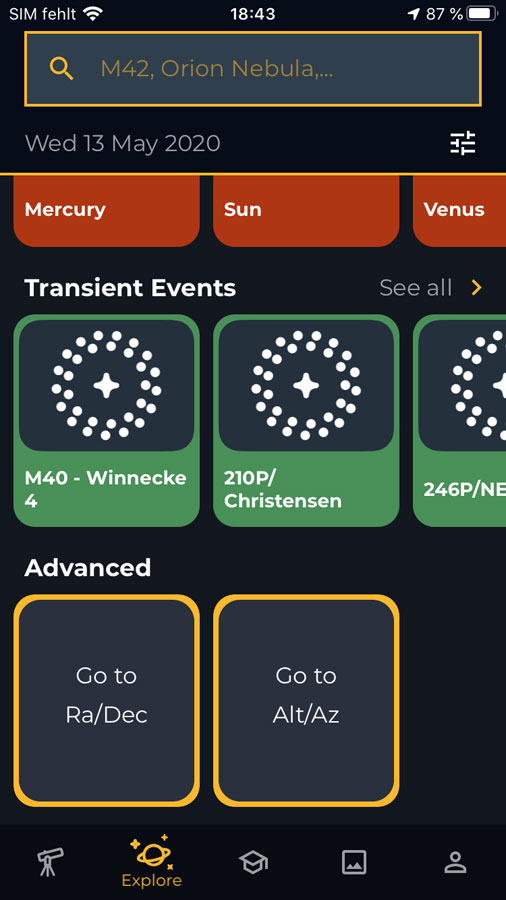
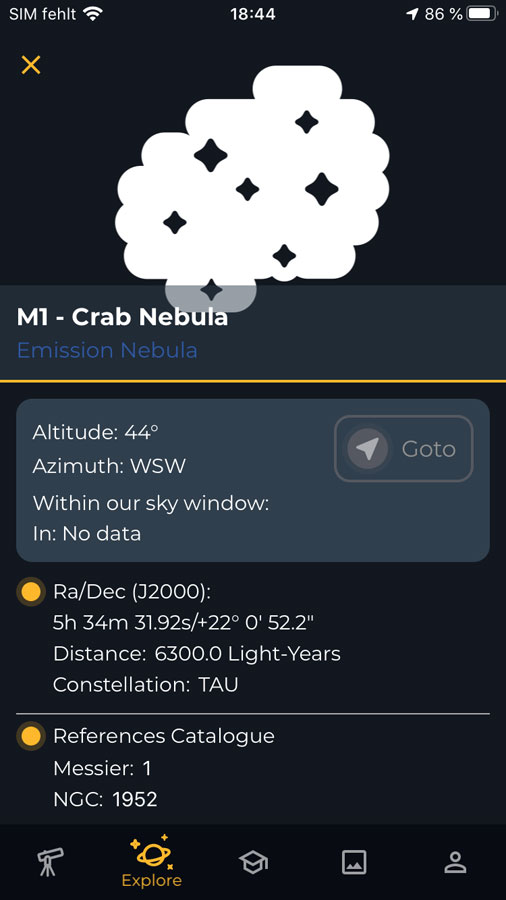
In the "Explore" tab, you first select an object (manual entry of coordinates is possible, but rarely necessary) and move to the eVscope it by pressing the "Goto" button (if it becomes active...). The app switches to the 2eVscope" Tab, displays an information about the object, which can be closed, and reports that it is slewing to the selected object ("Slewing to ..."). After the object has been reached successfully, the message "Goto validated" appears.
 |
 |
 |
Figures: Unistellar app, "Explore" tab selected; here, recommended objects and objects by type are offered, you can also specify the object by name or number; at the bottom of the screen, you can select objects by coordinates and enter coordinates in one of two formats; on the right, an object has been selected, but it cannot be approached for various reasons (the "Goto" button is not active)
 |
 |
|
Figures: Unistellar-App, "eVscope"-Tab selected; on the left, the eVscope approaches M 96 (message "Slewing to M 96"); in the middle, M 96 has been successfully approached (message "Goto validated"); then the message "Live View Mode & Sky Tracking On" appears (here shown with another object...).
"Live View & Sky Tracking" Mode versus "Enhanced Vision" Mode
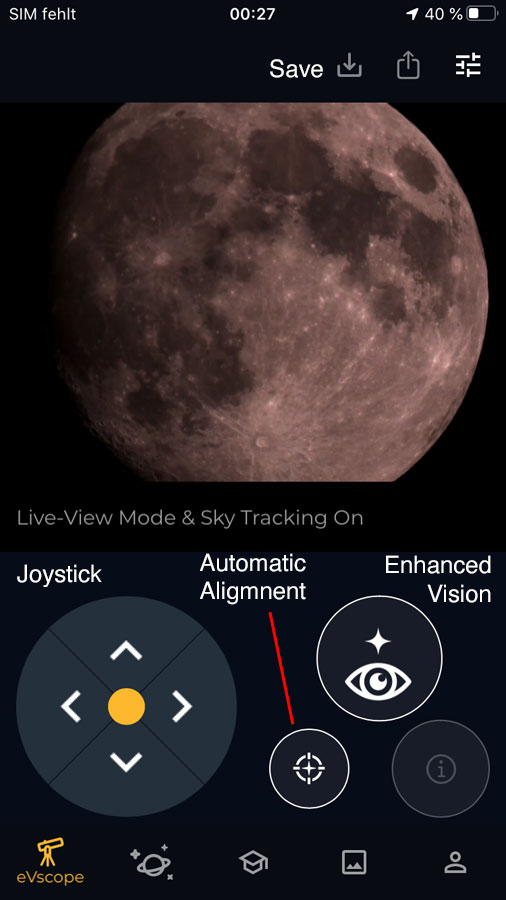
You are now in "Live View & Sky Tracking" mode, one of the two observation modes of the eVscope (as described above). This mode is actually only suitable for planets and the moon, as well as for focusing and collimating, and for moving the tube for fine-tuning or for moving it to into a certain position. Since app version 1.1.0 it is possible to save images in "Live View" mode.
 |
 |
 |
Figure: Left: Unistellar app with the "eVscope" tab selected and in "Live View & Sky Tracking" mode; the joystick and the buttons for automatic alignment, "Enhanced Vision" mode, and for saving photos are marked. Center/Right: Animation after "Enhanced Vision" mode was started (the joystick is deactivated).
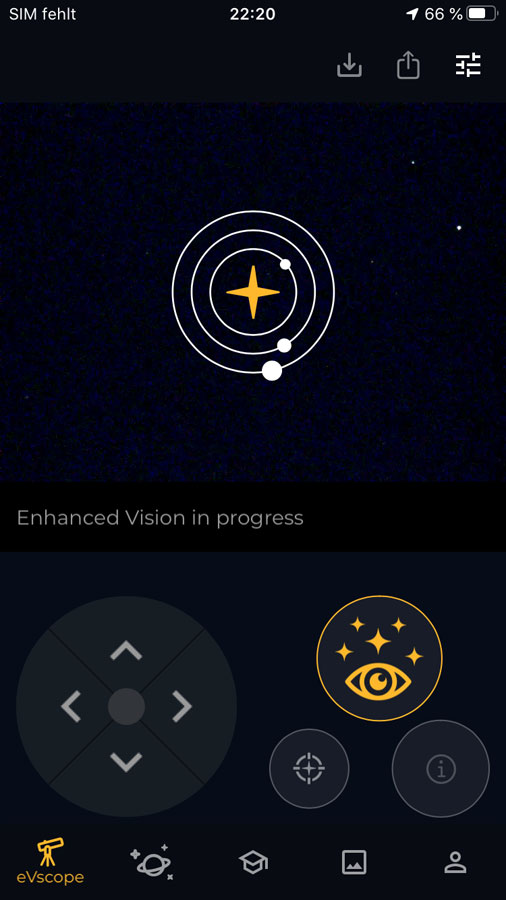
When observing DSO you now switch to the "Enhanced Vision" mode to see, after a certain delay (during which you see an animation with rotating planets), the object in its full beauty. With faint objects, however, the eVscope will repeatedly leave this mode ("Enhanced Vision dropped") - or it will switch back and forth between the two. Sometimes, it helps to restart the GoTo.
 |
 |
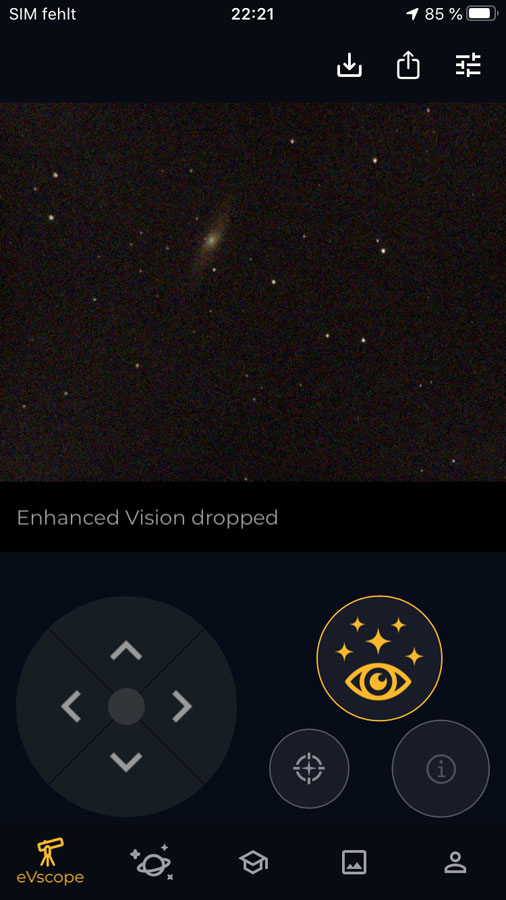 |
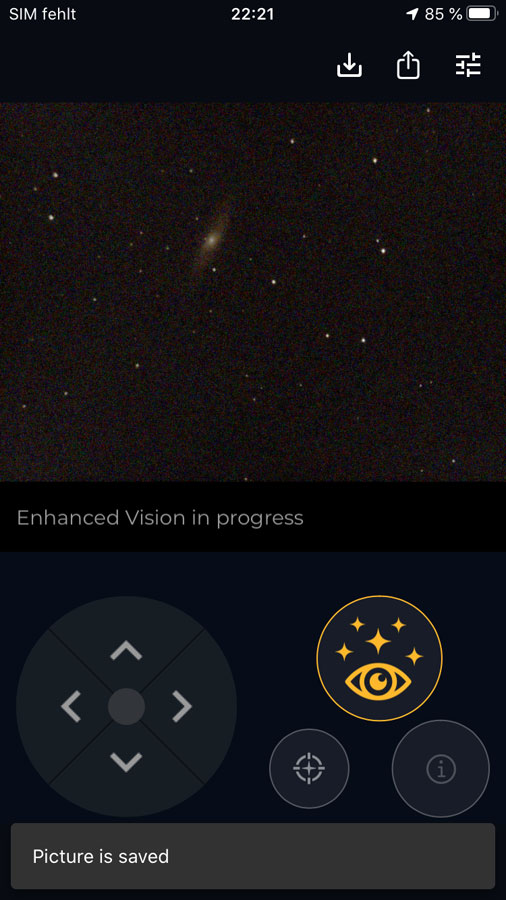
Figure: Links: Unistellar app, "eVscope tab selected and in "Enhanced Vision" mode(the joystick is deactivated). Left: The "Enhanced Vision" mode is just starting and does not show a photo yet; center: instead of "Enhanced Vision on M65", the message "Enhanced Vision in progress" is displayed, maybe the app "forgot" the object name, a message indicates that a photo was taken; right: "Enhanced Vision" mode dropped, the image quality is fairly poor; sometimes the eVscope returns to "Enhanced Vision" mode, sometimes it switches back to "Live View" mode and remains there.
I sometimes switch back to "Live View" mode if an object is not conveniently located in the field of view (especially if I want to observe several objects in the field of view at the same time). This is necessary because in "Live View" mode you usually cannot see where the object you are looking for is located, whereas in "Enhanced Vision" mode the joystick control buttons are not active.
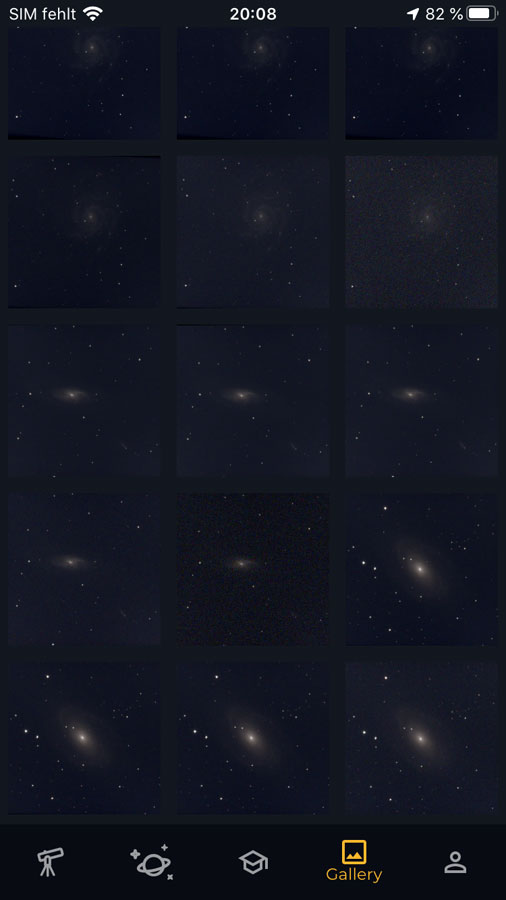
In Enhanced "Vision" mode you can save photos of the observed object (icon on the left above the image); in the photo gallery ("Gallery" tab) you can view the photo in large size to better judge its quality.
 |
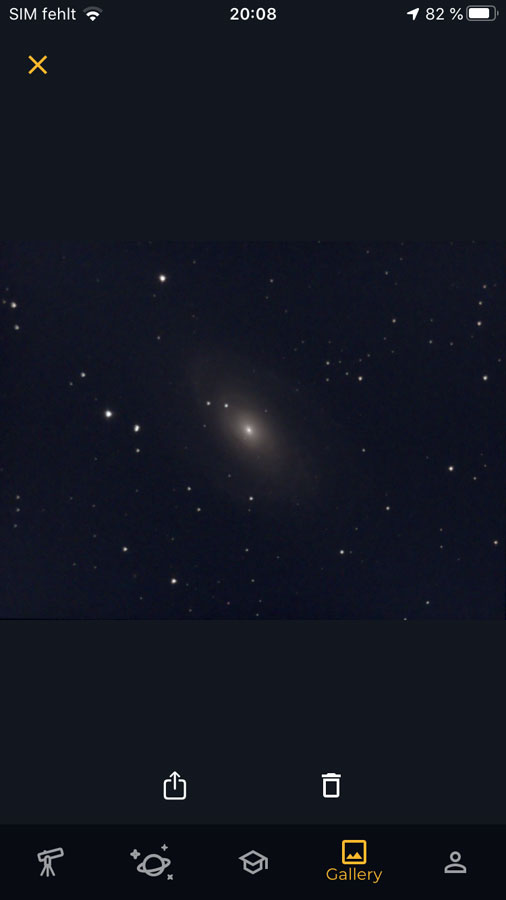 |
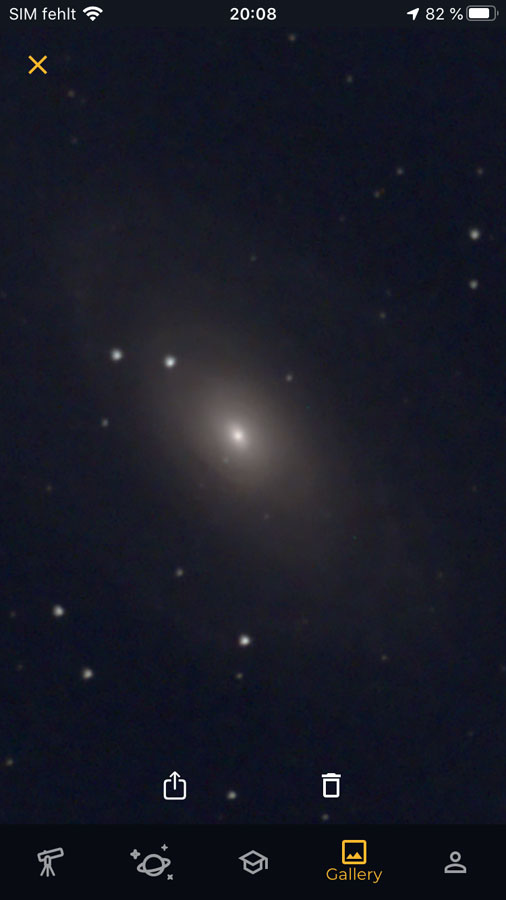 |
Figures: Unistellar app, "Gallery" tab selected; here you can find your photos that you took (left); photo selected (center); photo enlarged (right)
In short:
- Select an object and click the "Goto" button / enter object coordinates and click the "Validate" button (in the "Explore" tab).
- You may want to read the object description, then close it > you will end up in the "eVscope" tab.
- The eVscope approaches the object and reports "Slewing to..."; if the object is found, the message "Goto validated" appears. Now you are in "Live View & Sky Tracking" mode.
- With DSO, you may want to immediately switch to "Enhanced Vision" mode,
which is indicated by "orbiting planets" until the object can be
displayed in sufficient quality.
For faint objects, the eVscope may switch back to "Live View" mode or back and forth between the two modes. Sometimes a new "Goto" helps... - If necessary, return to "Live View & Sky Tracking" mode to correct the position of the object (by touching the joystick buttons); then return to "Enhanced Vision" mode.
- You may save photos of the object ("Picture is saved" message).
- Select next object...
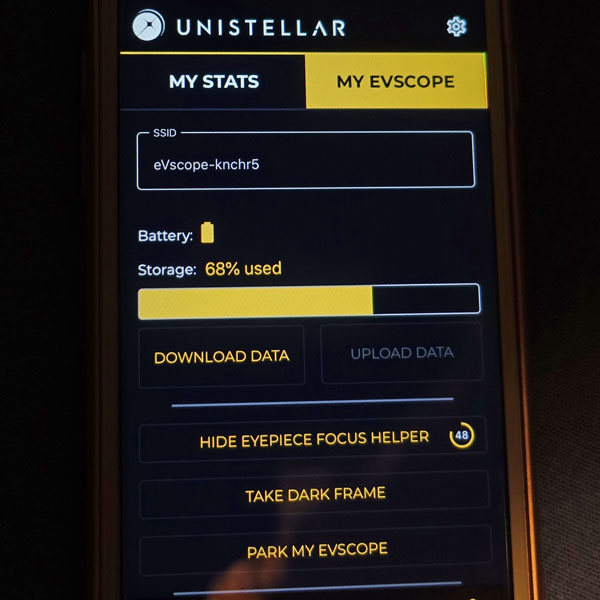
Finishing the Observation
When you have finished your observations, you should use the app to move the eVscope to its park position, where it will automatically shut down (works since app version 1.0).
If you took photos of the observed sky objects, you will need to transfer them from your smartphone to your computer.
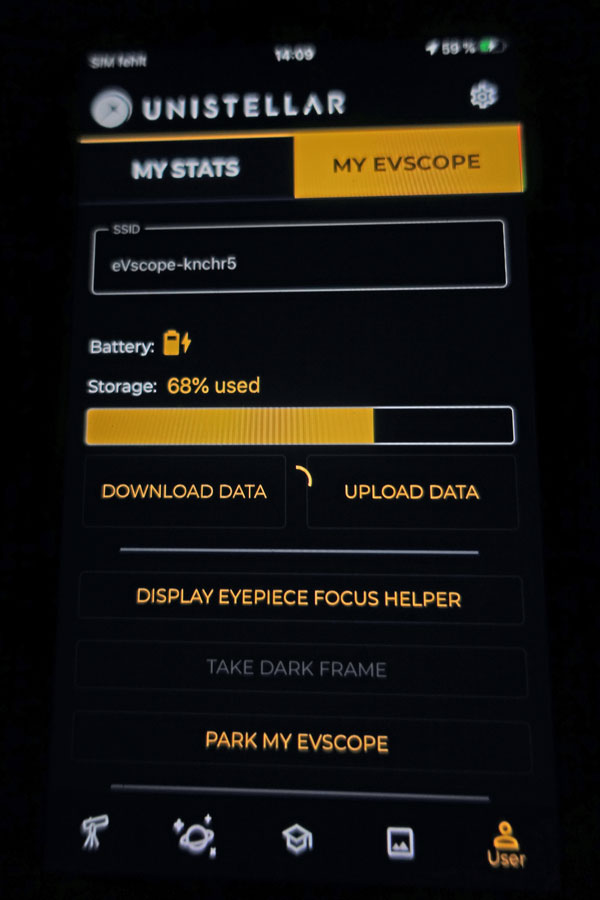
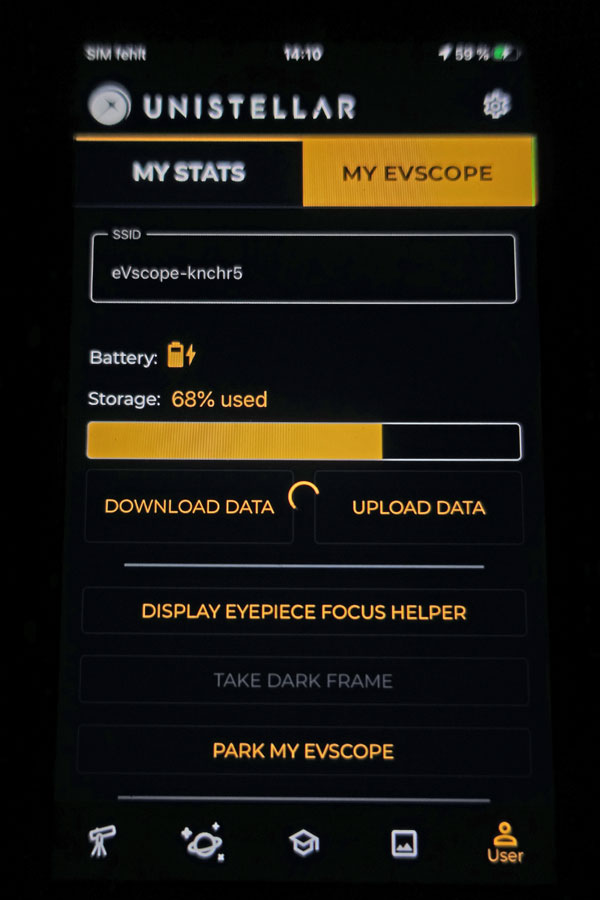
You may also want to download the observation data from the eVscope to the smartphone and then upload it to the Unistellar/SETI server.
Maintenance
Setting the Focus
For the eVscope, Unistellar has integrated a Bahtinov mask into the lid of the telescope. And with it, focusing works very well according to my experience. Instructions can be found in the Unistellar Help Center (How to use the Bahtinov mask?).
 |
 |
|
Bahtinov mask inserted in the telescope lid |
Bahtinov mask next to the telescope lid |
|
 |
 |
|
Ditto, other side |
Bahtinov mask put on the eVscope tube |
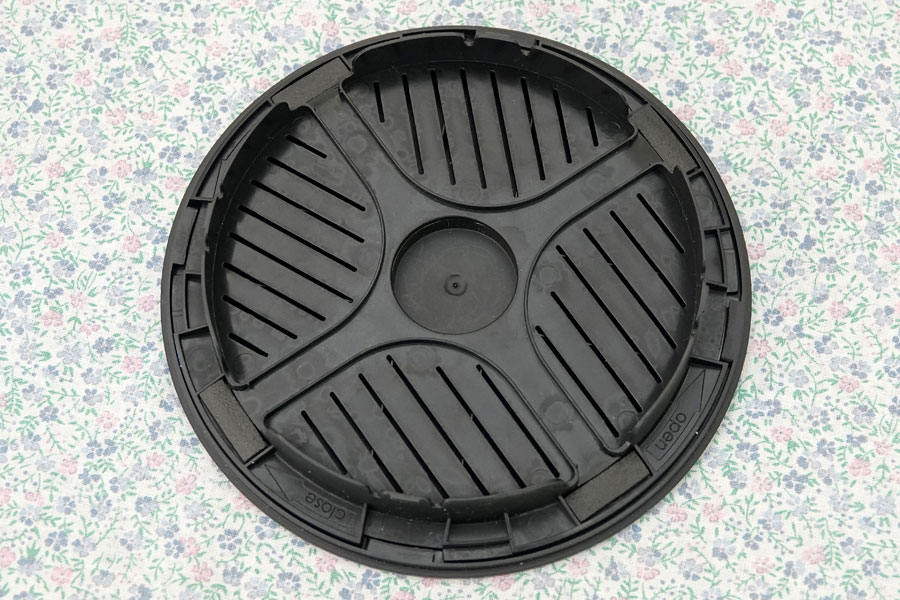
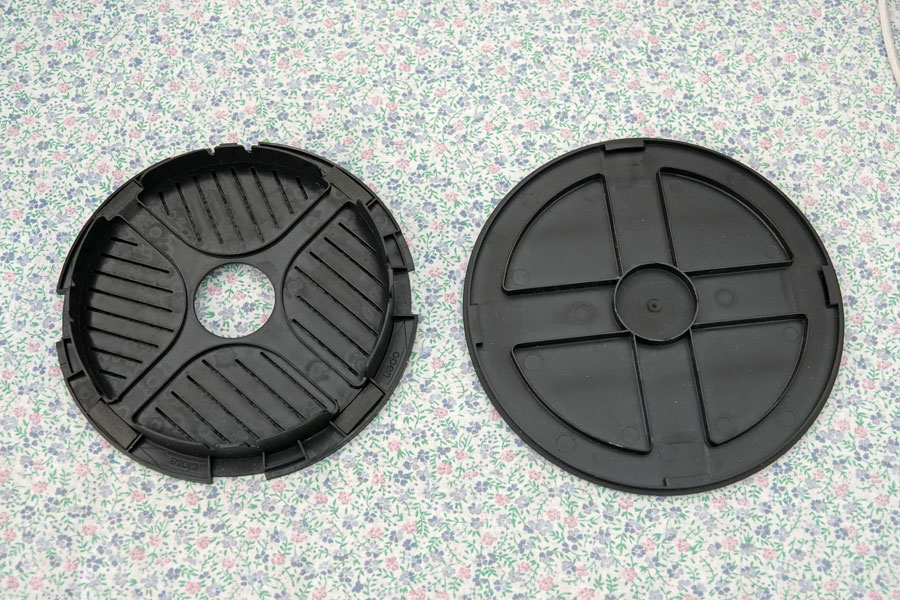
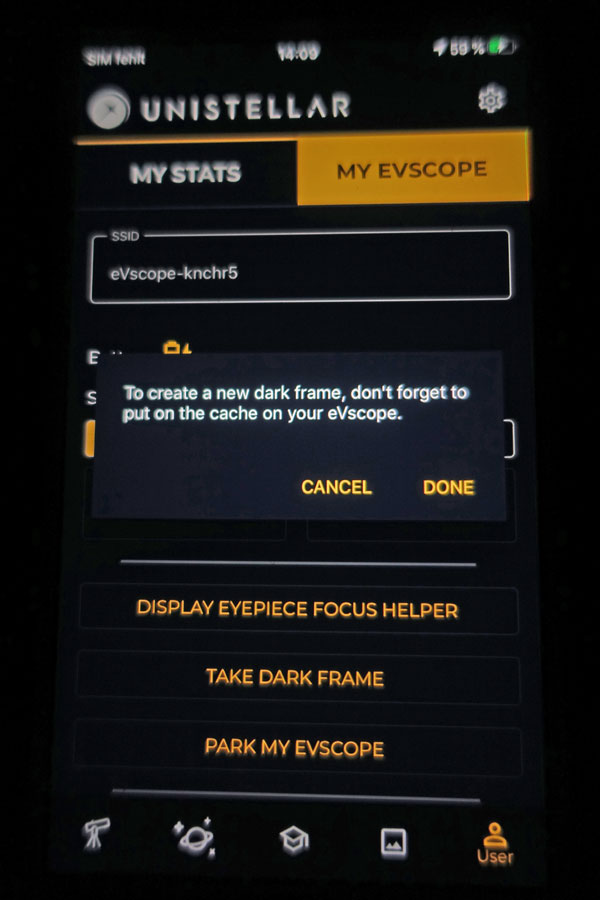
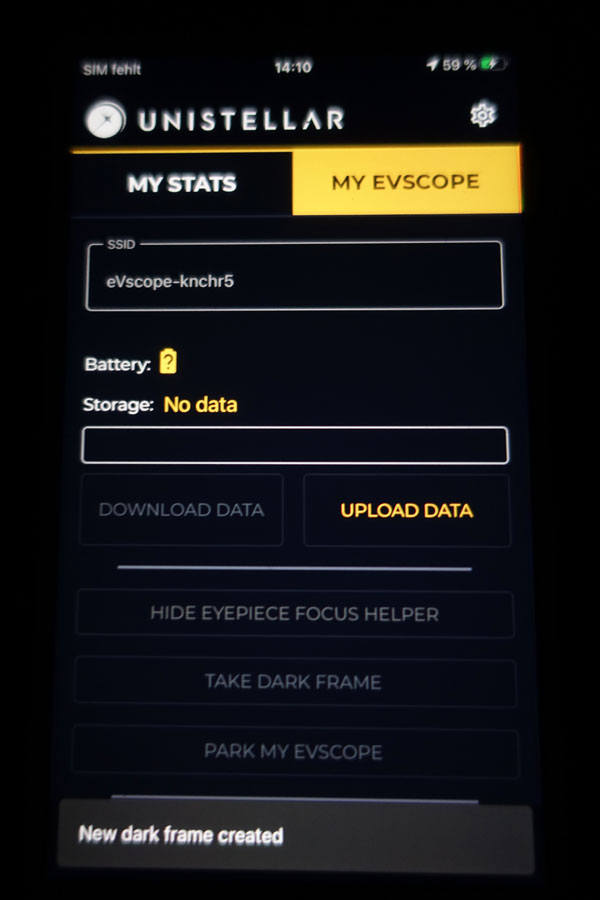
Taking a Dark Frame
Dark frames have to be recorded in order to remove hot pixels (disturbing colored pixels) from the photos. Article How to take a Dark Frame? in the Unistellar Help Center exactly describes what the title of the article says. Here just a few photos:
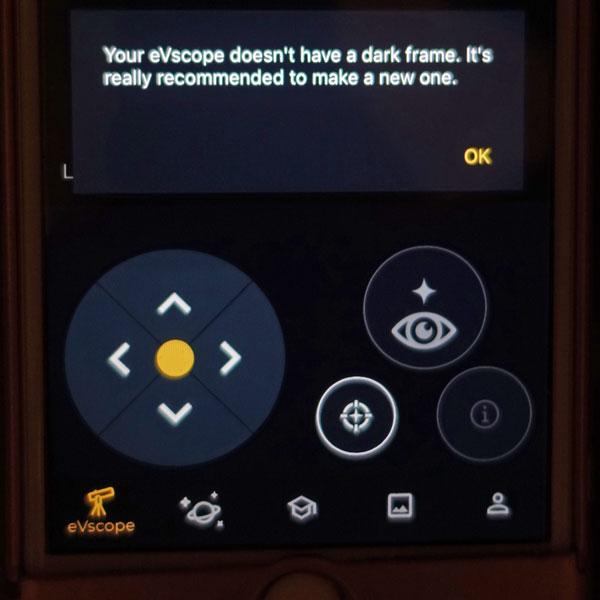
After the update of the Unistellar app to version 1.0, the app "noticed" that there is no dark frame yet and recommended to take one. I then switched to the "User" tab and clicked "Take Dark Frame" (see photo further above). |
 |
 |
||
First, a message appears that reminds you to put the telescope cap on; you should also do all this in a dark room. |
The dark frame is taken... |
|||
 |
 |
 |
||
Ditto |
Ditto, it takes a while... |
Finished! Connection to eVscope interrupted. |
Collimation
Over time, the primary mirror may move from its optimal position, also caused by vibrations, and thus, the image quality suffers (stars are no longer round dots). Therefore, the mirror has to be adjusted from time to time, wich in technical terms is called "collimated". According to Unistellar, collimation proved to be extremely robust on the prototype. Unistellar therefore expects that collimation will be done at the manufacturing plant once and then last for many years to come. However, a key is provided to adjust collimation by acting on two screws, should that happen to be necessary. This is the case, when stars show a coma, that is, are no longer point-like but elongated. The collimation procedure is described in an article in the Unistellar Help Center.
Further Information
Meaning of the LED colors at the On/Off Switch
These are the different colors you can see on your eVscope LED:
- Red: the eVscope is ON and working well.
- Blue and blinking: the eVscope is off and charging. It will blink from 6 times (fully discharged) to 1 time (fully charged).
- Yellow and blinking: the eVscope is being updated.
- Purple: the eVscope embedded software is turning ON or OFF.
- White: an error happened. You should reboot your eVscope.
Recommended Temperature Range for the eVscope
Unistellar recommends the following temperature range (° Celsius) for your eVscope:
- storage: -15°C -> +60°C (recharge your battery regularly if storage > 2 months)
- storage and recharge: 10°C -> +40°C
- observation and recharge: 10°C -> +40°C
- observation: -10°C -> +40°C
While using it in a very cold environment, we recommend covering it to provide relative insulation. The main effect of the cold will be a faster draining of the battery.
Thermalizing the eVscope
The eVscope's performance will be optimized if its mirror reaches thermal balance. If the temperature is below 5°C, Unistellar recommends turning on the eVscope and getting it out at least 15 minutes before one starts observing.
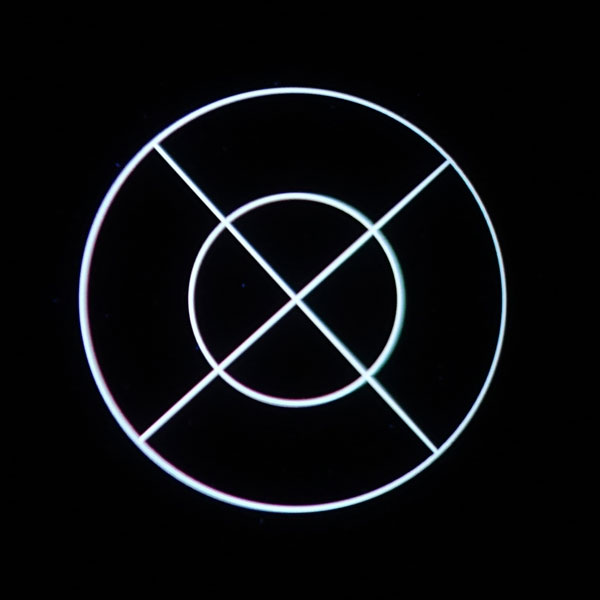
Adapting the Eyepiece to One's Eyes (Focusing the Image in the Eyepiece)
By rotating the eyepiece, the image in the eyepiece can be adapted to one's eyes, i.e. brought into focus. Since app version 1.0, there is also an eypiece focus helper, which displays a pattern in the eypiece to make adapting the focus of the eyepiece easier.
 |
 |
|
The eypiece focus helper: a pattern is displayed in the eyepiece that can be used for focusing |
The timer for the eyepiece focus helper (to the right of the button text) |
Links
- Unistellar Website: unistellaroptics.com
- Unistellar Help Center: unistellaroptics.zendesk.com/hc/en-us
- eVscope Kickstarter campaign: www.kickstarter.com/projects/unistellar/evscope-100-times-more-powerful-than-a-classical-t/
- See also my page offering Astronomy Links.
Appendix: Instructions in Brief...
Preparation
- Set up and level the tripod.
- Insert the eVscope into the tripod and screw it tight (two screws) (15 minutes in advance of observing in order to thermalize the eVscope).
- Switch on the eVscope (the LED on the power switch must turn red)
- Switch on your smartphone and connect via WLAN to the eVscope.
- Launch the Unistellar app on your smartphone.
- Remove the caps from the tube and the eyepiece; focus the eyepiece using the app's Eypiece Focus Helper (in the User tab) or later using sky objects.
- Start automatic alignment (Automatic Field Detection); if it is still too bright outside and the alignment is failing, wait until it gets darker or choose darker section of the sky.
- Focus the tube (I recommend doing this before each observation session): approach a bright star and adjust the focus with the Bahtinov mask.
Observation
- Select an object and click the "Goto" button / enter object coordinates and click the "Validate" button (in the "Explore" tab).
- You may want to read the object description, then close it > you will end up in the "eVscope" tab.
- The eVscope approaches the object and reports "Slewing to..."; if the object is found, the message "Goto validated" appears. Now you are in "Live View & Sky Tracking" mode.
- With DSO, you may want to immediately switch to "Enhanced Vision" mode,
which is indicated by "orbiting planets" until the object can be
displayed in sufficient quality.
For faint objects, the eVscope may switch back to "Live View" mode or back and forth between the two modes. Sometimes a new "Goto" helps... - If necessary, return to "Live View & Sky Tracking" mode to correct the position of the object (by touching the joystick buttons); then return to "Enhanced Vision" mode.
- You may save photos of the object ("Picture is saved" message).
- Select next object...
Finishing and Afterwork...
- Use the app to move the eVscope to its park position (the eVscope will shut down automatically).
- Optional: Transfer photos from your smartphone to your computer.
- Optional: Upload the observation data from the eVscope to the Unistellar/SETI server.
|
made by |
| 17.12.2022 |